Category: Efficiency

  • How Ground Source Geothermal Heating Functions

    How Ground Source Geothermal Heating Functions

    I still remember sitting in my old rental apartment, shivering under three blankets while watching my utility bill climb higher than the temperature inside. It felt like a scam—paying a fortune just to fight a losing battle against the cold. Most people think you need to be a millionaire or live in a high-tech eco-mansion to access serious efficiency, but that’s a lie. People get so lost in the jargon of geothermal heating mechanics that they miss the actual point: it’s about tapping into a constant, free energy source right under your feet to stop flushing money down the drain.

    I’m not here to sell you a lifestyle brand or some over-engineered fantasy that requires a PhD to operate. My goal is to strip away the complexity and show you how these systems actually function in a real-world setting. I’ll break down the practical realities of how heat moves from the earth into your living room, without the fluff or the sales pitch. You’re going to walk away knowing exactly how this tech works and, more importantly, whether it’s a smart investment for your specific home and budget.

    Table of Contents

    Mastering the Geothermal Energy Exchange Process

    Mastering the Geothermal Energy Exchange Process.

    To understand how this actually works in a real home, you have to look at the geothermal energy exchange process as a continuous loop of moving heat rather than creating it. Unlike a furnace that burns fuel to generate warmth, a geothermal system essentially acts as a heat mover. It relies on the fact that even when the air above ground is freezing, the temperature a few feet below the surface stays relatively constant. By tapping into this stable temperature, the system uses a fluid to pull warmth from the earth during the winter and dump excess heat back into the ground during the summer.

    The efficiency of this movement depends heavily on your specific setup, specifically the choice between closed-loop vs open-loop systems. In a closed-loop setup—which is what I see most often in residential audits—a continuous loop of high-density polyethylene pipe circulates a heat-transfer fluid. The success of this entire operation hinges on the thermal conductivity of soil in your backyard; if your soil doesn’t transfer heat well, your system has to work much harder to achieve the same results. It’s all about optimizing that subsurface connection to ensure you aren’t fighting against your own landscape.

    How the Refrigerant Evaporation Cycle Saves You Money

    How the Refrigerant Evaporation Cycle Saves You Money

    To understand why this tech actually pays off, you have to look at the physics of the refrigerant evaporation cycle. Think of it like a high-tech version of how sweat cools your skin. Inside the unit, a specialized fluid absorbs heat from the ground—even when it’s freezing outside—and turns from a liquid into a gas. This phase change is where the magic happens; it’s the moment the system captures that low-grade warmth from the earth and concentrates it into something usable for your living room.

    Because we aren’t burning fuel to create heat, but rather just moving it, the efficiency is insane. Whether you are looking at closed-loop vs open-loop systems, the core principle remains the same: you’re leveraging the constant temperature of the earth to do the heavy lifting. Instead of your furnace fighting an uphill battle against the winter air, the system just pulls from a steady, reliable source. It’s a smarter way to manage your home’s climate without constantly flushing money down the drain every time the temperature drops.

    5 Ways to Get the Most Out of Your Geothermal Setup

    • Don’t ignore your loop integrity; even a tiny pressure drop in your ground loop means your heat pump is working twice as hard to move half the energy, which is basically just throwing money into the dirt.
    • Size your system for your actual footprint, not your “dream home” plans; an oversized heat pump will cycle too frequently, which kills efficiency and puts unnecessary wear on the compressor.
    • Keep your indoor air filters spotless, because if your airflow is restricted, the entire thermal exchange process stalls out, forcing the system to struggle against its own mechanics.
    • Insulate your heat pump’s distribution lines as heavily as you would your exterior walls; there’s no point in extracting heat from the earth if you’re losing it all through the pipes before it even reaches your living room.
    • Monitor your thermostat’s “deadband”—the temperature gap between heating and cooling—to ensure the system isn’t constantly toggling between modes, which is a massive energy drain.

    The Bottom Line on Geothermal Efficiency

    You aren’t actually “creating” heat; you’re just moving it. By leveraging the constant temperature of the earth, you stop fighting the weather and start using physics to do the heavy lifting.

    The real savings happen in the cycle. The way the refrigerant moves heat from the ground into your home is what prevents you from constantly burning through expensive, traditional fuels.

    It’s a long-term play for your wallet. While the tech sounds complex, the goal is simple: stop flushing money down the drain on inefficient heating and start investing in a system that works with nature, not against it.

    ## Efficiency Isn't About Luxury

    “Most people think sustainable heating is a luxury reserved for the wealthy, but geothermal mechanics prove otherwise; it’s just about stoping the cycle of fighting against your environment and instead, finally working with it to keep your money in your pocket.”

    Tobias Nkemdirim

    Making the Switch Count

    Making the Switch Count with geothermal heating.

    At the end of the day, geothermal heating isn’t just some complex physics experiment; it’s a practical way to stop fighting against the seasons and start working with them. By understanding how the ground-source exchange works and how the refrigerant cycle pulls heat from the earth, you can see that this isn’t just about “going green.” It’s about reclaiming control over your monthly expenses. Instead of paying for inefficient combustion or high-voltage electric resistance, you’re leveraging a constant, natural thermal reservoir to keep your space comfortable. It’s a shift from wasting energy to managing it intelligently through smart mechanics.

    I know the upfront costs can feel intimidating—I’ve stood in drafty apartments myself, staring at utility bills that felt like a punishment. But when you look at the long-term data, the math starts to change. Investing in geothermal is one of the most effective ways to decouple your comfort from the volatility of fossil fuel prices. You don’t need to be a millionaire to start thinking this way; you just need to start prioritizing efficiency over convenience. Let’s stop throwing money into the air and start building homes that actually respect both our wallets and the planet.

    Frequently Asked Questions

    Is the upfront cost of installing a geothermal loop actually worth it if I'm on a tight budget?

    Look, I get it. The sticker shock on a geothermal install is real, and when you’re watching every cent, it feels impossible. If you’re looking for immediate relief next month, this isn’t it. But if you’re playing the long game, it’s a different story. Between the massive drop in monthly utility bills and the available tax credits, the system eventually pays for itself. It’s an investment in stopping the slow leak of cash from your bank account.

    How much maintenance should I expect to do compared to a standard gas or electric furnace?

    Honestly, it’s a relief. If you’re coming from a standard gas or electric furnace, you’re going to love this. Since the heavy lifting happens underground in a sealed loop, there’s far less mechanical wear and tear in your living space. You’ll still need to swap filters and check the heat pump regularly, but you aren’t dealing with constant combustion or messy fuel deliveries. It’s much more “set it and forget it” than a gas furnace.

    Will a geothermal system actually work in my specific climate, or is it only efficient in certain regions?

    I get this question a lot when I’m out on audits. The short answer? Yes, it’ll work almost anywhere. Unlike air-source heat pumps that struggle when the temperature drops below freezing, geothermal taps into the earth’s constant temperature. Whether you’re in a humid coastal area or a place where the ground freezes solid, that subterranean warmth stays stable. You aren’t fighting the weather; you’re bypassing it entirely to keep your costs predictable.

  • Implementing Gray Water Recycling for Home Use

    Implementing Gray Water Recycling for Home Use

    I remember standing in my old rental’s tiny bathroom, staring at the drain after a quick shower and feeling a massive sense of guilt. It felt like I was watching money—and perfectly usable water—literally swirl down the pipes for no reason. Most people think gray water recycling requires some high-tech, expensive plumbing overhaul that only a mansion could afford, but that’s just nonsense. You don’t need a massive budget or a degree in civil engineering to stop wasting the resources you’ve already paid for; you just need to stop letting “convenience” dictate your utility bills.

    In this guide, I’m stripping away the complex jargon and the overpriced equipment sales pitches. I’m going to show you the practical, low-cost ways to repurpose your sink and shower water for your garden or toilets without turning your home into a science experiment. My goal is to give you a realistic roadmap for making your home more efficient, one bucket or simple diversion at a time. We’re focusing on smart, small changes that actually work for real people living in real homes.

    Table of Contents

    Gray Water vs Black Water Knowing the Difference

    Gray Water vs Black Water Knowing the Difference

    Before you start setting up any DIY collection buckets, you need to get one thing straight: not all wastewater is created equal. If you mix them up, you’re not just wasting time; you’re creating a massive hygiene hazard. The simplest way to look at gray water vs black water is to follow the source. Gray water comes from your sinks, showers, and washing machines. It’s relatively clean, though it does contain traces of soap or hair. Black water, on the other hand, is the stuff coming from your toilets. It’s full of pathogens and bacteria, making it a total no-go for any home reuse project.

    When I’m auditing a site, I always tell people that the goal is reducing your domestic water footprint without turning your backyard into a biohazard. You can safely use gray water for things like irrigation, but you have to be smart about it. For instance, if you’re looking into safe gray water reuse for plants, you need to ensure you aren’t using heavy chemicals or bleach in your laundry. Keep it simple, keep it clean, and always keep the “black” stuff strictly for the sewer.

    Reducing Domestic Water Footprint on a Budget

    Reducing Domestic Water Footprint on a Budget.

    Look, I get it. When people hear about “residential water reclamation systems,” they immediately picture some high-tech, expensive setup installed by a contractor. But if you’re living in a rental or working with a tight budget, you don’t need a complex overhaul to start reducing domestic water footprint. Most of the impact comes from the low-tech stuff. I always tell my clients to start with the “bucket method” in the shower. While you’re waiting for the water to warm up, catch that initial cold run in a bucket. It’s free, it’s simple, and that water is perfect for your houseplants or flushing the toilet later.

    If you have a small outdoor space, you can also look into safe gray water reuse for plants. Instead of letting your vegetable garden soak up treated tap water, use the leftover water from rinsing veggies or boiling pasta (just let it cool first, obviously). It’s a small shift, but reusing household wastewater this way turns a “waste” product into a resource. You’re essentially bypassing the utility company for your non-potable needs, which is one of the smartest ways to keep your monthly overhead low.

    5 Low-Cost Ways to Start Recycling Gray Water Today

    • Keep it simple with a bucket in the shower. While you’re waiting for the water to warm up, catch that initial cold rinse in a bucket. It’s free, easy water you can use immediately for your houseplants or to flush the toilet.
    • Swap your laundry detergent for something biocompatible. If you’re planning to reuse sink or washing machine water for your garden, you need to ditch the harsh chemicals and phosphates. Stick to plant-safe, biodegradable soaps so you aren’t accidentally poisoning your soil.
    • Set up a basic gravity-fed system for your laundry. You don’t need a high-tech filtration unit; just routing your washing machine’s discharge hose into a large drum can give you a massive reservoir of water for outdoor cleaning or irrigation.
    • Use your kitchen rinse water for the garden. Instead of letting the water from washing vegetables or rinsing grains go straight down the drain, collect it in a basin. It’s nutrient-rich and much better for your plants than treated tap water.
    • Focus on “point-of-use” collection. Don’t try to overhaul your entire plumbing system—that’s expensive and unnecessary. Just focus on the high-volume areas like the bathroom sink or the laundry room to get the biggest bang for your buck without a massive upfront investment.

    The Bottom Line on Gray Water

    You don’t need a complex, expensive plumbing overhaul to start saving; even simple methods like collecting shower water in a bucket can make a dent in your utility bills.

    Always keep a strict line between gray water and black water to ensure you aren’t accidentally introducing bacteria into your garden or home systems.

    Think of water recycling as a long-term efficiency play—it’s about making small, smart shifts in how you use resources so you stop paying for water you’ve already used once.

    Rethinking What We Call "Waste"

    “We’ve been conditioned to think that once water goes down the drain, its job is done—but that’s just leaving money on the table. Gray water isn’t waste; it’s a resource that’s just waiting for a second chance to be useful.”

    Tobias Nkemdirim

    Making Every Drop Count

    Making Every Drop Count with gray water.

    At the end of the day, gray water recycling isn’t about installing a high-tech, expensive filtration system that requires a degree to operate. It’s about understanding the difference between what we actually need to treat and what we can simply repurpose. Whether you’re collecting shower runoff to water your garden or finding ways to divert laundry water for your toilet flush, these small shifts add up. I’ve seen firsthand how these tiny adjustments can significantly lower a monthly utility bill while simultaneously cutting down on the sheer volume of fresh water we pull from the grid. It’s a practical way to stop treating every single drop of water like it’s a precious, one-time-use resource.

    I know it can feel overwhelming to think about changing your entire lifestyle for the sake of the planet, but sustainability doesn’t have to be an all-or-nothing game. You don’t need to live off the grid to make a difference; you just need to be a bit more intentional with what you’re already using. We have to stop accepting waste just because it’s the convenient way to live. By reclaiming your gray water, you’re taking a stand against inefficiency and proving that a sustainable home is accessible to everyone, regardless of their budget. Let’s start treating our resources with the respect they actually deserve.

    Frequently Asked Questions

    Is it actually safe to use gray water on my vegetable garden, or am I risking contamination?

    Look, I get the hesitation. I’ve been there, staring at a bucket of sink water wondering if I’m about to poison my kale. Here’s the data-driven reality: it’s safe if you’re smart about it. Avoid using water with heavy bleach or harsh chemicals. Ideally, use it on the soil around your veggies rather than spraying it directly onto the leaves. As long as you’re mindful of what’s in your soap, you’re good to go.

    How much work is it really to set up a DIY filtration system compared to just using the tap?

    Look, I’ll be straight with you: it’s more work than turning a tap, but it’s not rocket science. If you’re just diverting shower water to water your plants, you can set up a basic gravity-fed bucket system in an afternoon. But if you want something more permanent with actual filtration, you’re looking at a weekend project involving sand, gravel, and some plumbing tweaks. It’s an upfront time investment, but once it’s running, the savings start hitting your bills immediately.

    Are there specific soaps or detergents I need to ditch to make sure my recycled water doesn't ruin my plants?

    This is where most people trip up. If you’re reusing water for your garden, you have to ditch anything with boron, salts, or heavy fragrances. I always tell my clients to check labels for sodium and chlorine; they’ll eventually kill your soil’s microbiome. Stick to biodegradable, plant-safe soaps—the kind that are phosphate-free. It’s a small switch, but it ensures you’re actually nourishing your plants rather than accidentally poisoning them with your laundry runoff.

  • Optimizing Heating Schedules With Smart Thermostats

    Optimizing Heating Schedules With Smart Thermostats

    I still remember sitting in my old rental apartment, shivering under three blankets because I was too terrified to touch the thermostat, fearing the next utility bill would be a knockout blow. It’s a frustrating cycle: you either freeze to save money or burn through your paycheck just to feel human. Most people think they need a massive solar array or a massive budget to fix this, but the truth is usually hiding in your settings. We’ve been sold this idea that smart thermostat programming is some complex, futuristic magic trick, when in reality, most people are just using these devices as glorified, expensive manual switches.

    I’m not here to sell you on some high-tech lifestyle you can’t afford; I’m here to show you how to actually make your gear work for you. I’ve spent countless hours auditing homes and staring at data patterns to figure out where the efficiency actually lives. In this guide, I’m going to give you the straightforward, no-fluff tactics to automate your comfort without draining your bank account. We’re going to stop wasting energy on empty rooms and start treating your home like the efficient ecosystem it should be.

    Table of Contents

    Harness Adaptive Learning Algorithms to Slash Your Monthly Bills

    Harness Adaptive Learning Algorithms to Slash Your Monthly Bills.

    Most people treat their thermostats like a basic dial, but you’re essentially sitting on a piece of high-tech hardware that can think for itself. If you aren’t utilizing adaptive learning algorithms, you’re leaving money on the table. These systems don’t just follow a schedule; they observe your actual behavior. They learn how long it takes your specific space to heat up on a Tuesday morning versus a Saturday afternoon. Instead of you constantly fiddling with the dial, the device builds a thermal profile of your home, ensuring you aren’t burning fuel just to reach a target temperature that you won’t even feel.

    To really maximize your energy efficiency optimization, you need to lean into the automation. I always suggest setting up geofencing temperature settings through your phone. It’s a game-changer. The moment you leave a certain radius around your house, the system knows you’re gone and dials back the intensity. You aren’t heating a vacant living room while you’re stuck in traffic; you’re only ramping things back up when you’re actually on your way home. It’s about working smarter, not harder, to keep your footprint small.

    Geofencing Temperature Settings Comfort Only When Youre Home

    Geofencing Temperature Settings Comfort Only When Youre Home

    If you’ve ever pulled into your driveway after a long day only to realize your house is either a sauna or an icebox, you know the frustration. Most people think they need to manually fiddle with the dial every time they leave the house, but that’s just wasted effort. By utilizing geofencing temperature settings, your thermostat uses your phone’s GPS to create a virtual boundary around your home. The second you cross that line heading to work or the grocery store, the system knows you’re gone and automatically shifts into eco-mode.

    This isn’t about living in discomfort; it’s about energy efficiency optimization that actually works with your lifestyle. Instead of heating or cooling an empty living room for eight hours straight, your system waits until you’re actually approaching the property to start ramping back up. It’s a seamless part of your smart home automation settings that ensures you aren’t burning money on empty air. I’ve seen firsthand how much this reduces the “phantom load” of heating a house that nobody is even using.

    5 Ways to Stop Wasting Money on Empty Air

    • Stop the “set it and forget it” trap; even with a smart device, you need to audit your schedule every few months to make sure your heating isn’t fighting against your actual lifestyle.
    • Use the “Pre-heat” window strategically; don’t let your thermostat crank the heat the second you walk through the door, but program it to start ramping up 30 minutes before you arrive so you aren’t paying for peak-hour surges.
    • Sync your thermostat with your local utility’s “Time-of-Use” rates; if your provider charges more during certain windows, program your home to pre-cool or pre-heat during the cheaper, off-peak hours.
    • Don’t ignore the humidity factor; if you live in a damp climate, use your smart settings to manage humidity levels, because dry air actually feels warmer, meaning you can drop the temp a couple of degrees without feeling the chill.
    • Master the “Away” mode manual override; if you’re heading out for a long weekend, don’t just rely on the sensor—manually trigger a deep energy-saving mode so you aren’t maintaining a “lived-in” temperature for an empty house.

    The Bottom Line: Stop Heating Empty Air

    Stop treating your thermostat like a manual switch; let the adaptive learning do the heavy lifting so you aren’t fighting the settings every single day.

    Use geofencing to create a digital barrier between your comfort and your wallet, ensuring you only pay for climate control when you’re actually walking through the door.

    Treat your programming as a tool for both your bank account and the planet—every degree you don’t waste is money saved and carbon avoided.

    ## Stop Heating Air for Nobody

    A smart thermostat isn’t just a fancy gadget to show off; it’s a tool to stop the bleeding. If you aren’t actively sitting in a room, you shouldn’t be paying to keep it at seventy degrees. Stop treating your HVAC system like an all-day convenience and start treating it like the utility it is.

    Tobias Nkemdirim

    The Bottom Line on Smart Control

    The Bottom Line on Smart Control.

    At the end of the day, programming your thermostat isn’t about mastering complex tech; it’s about reclaiming control over your space and your wallet. By leaning into adaptive learning and setting up geofencing, you’re essentially building a digital barrier against wasted energy. You’ve moved past the era of heating an empty house or letting your money leak through the vents while you’re at work. These aren’t just minor tweaks; they are intentional shifts in how you manage your home. When you automate these decisions, you stop fighting with your heating system and start making it work for you, ensuring that every kilowatt used is actually serving a purpose.

    I know it can feel overwhelming to try and “go green” when the world feels like it’s moving too fast, but sustainability shouldn’t be a luxury reserved for people with massive budgets. It’s found in the small, smart, and sometimes even boring decisions we make every single day. Every degree you shave off during the hours you’re away is a win for your bank account and a win for the planet. Don’t wait for a massive renovation to make an impact. Start with the tech you already have in your hands and stop wasting energy just because it’s convenient. Your future self—and your utility bill—will thank you.

    Frequently Asked Questions

    Will these automated schedules actually save me money, or am I just paying for a fancy gadget that does the same thing my old manual one did?

    Look, I get the skepticism. I’ve seen plenty of “smart” tech end up as expensive paperweights. But here’s the reality: a manual thermostat relies on you being perfect every single day. You’ll forget to turn it down before work, or you’ll leave it high while you’re out running errands. A smart one doesn’t get lazy. It catches those micro-wastes you miss, and over a month, those saved degrees translate into actual cash in your pocket.

    How much of a learning curve is there before the thermostat actually "gets" my routine?

    Honestly, it’s not overnight. Most smart thermostats need about a week or two of consistent data to really “get” you. They’re essentially studying your patterns—when you actually kick off the heat and when you’re likely to be back. Don’t get frustrated if it feels a bit off during the first few days. Just keep your manual adjustments minimal during that learning phase so the algorithm doesn’t get confused by conflicting data.

    If I live in an older rental with bad insulation, will a smart schedule even make a dent in my heating costs?

    Look, I get it. I grew up in a drafty rental where the heat felt like it was fighting a losing battle against the walls. If your insulation is trash, a smart schedule won’t fix the thermal leaks, but it will stop you from throwing money into a void. Instead of heating a freezing box all day while you’re at work, you’re only running the system when it actually matters. It’s about damage control.

  • How Thermal Curtains Affect Indoor Temperature Stability

    How Thermal Curtains Affect Indoor Temperature Stability

    I still remember sitting in my old studio apartment three years ago, shivering under three layers of blankets while my heater groaned in a losing battle against the drafty windows. I’d spent my last bit of savings on a “smart” thermostat, thinking that was the silver bullet, but the truth was much simpler and much cheaper. People love to tell you that you need a full-scale retrofit or expensive double-glazing to fix a cold room, but they completely overlook the immediate thermal curtains impact on your daily comfort. Most of the “energy experts” online will try to sell you a thousand-dollar insulation package, when often, you’re just leaking money through your window frames every single night.

    I’m not here to sell you on some lifestyle aesthetic or overpriced home decor. My goal is to give you the raw, data-driven truth about how much these curtains actually matter for your wallet and your carbon footprint. I’ll show you exactly how to spot the heat leaks in your own space and how to pick the right fabrics so you can stop overpaying for utilities without needing a massive renovation budget.

    Table of Contents

    How Thermal Insulation Fabric Technology Slashes Your Monthly Bills

    How Thermal Insulation Fabric Technology Slashes Your Monthly Bills

    When I’m auditing a room, I don’t just look at the thermostat; I look at the windows. Most people think a curtain is just a piece of fabric to hide a messy room, but if you’re using high-quality thermal insulation fabric technology, that fabric becomes a functional barrier. These specialized textiles are engineered with dense weaves or even integrated layers that trap air. This creates a buffer zone between your living space and the cold glass, which is essentially a giant heat sink during the winter.

    It’s not just about blocking light—though there is a huge difference between blackout vs thermal curtains when it comes to light control—it’s about active temperature regulation. By installing these, you’re essentially adding a layer of invisible insulation to your walls. This is one of the most underrated methods for reducing heating costs with drapes because it stops the “radiant cooling” effect where your body feels cold just by being near a window. Instead of your heater working overtime to fight a losing battle against the draft, the fabric does the heavy lifting for you.
    Smart Temperature Regulation Home Decor for Every Budget

    Smart Temperature Regulation Home Decor for Every Budget

    The truth is, you don’t need a massive budget to start upgrading your home’s thermal envelope. If you’re renting or living in a space where you can’t touch the windows, you can still leverage temperature regulation home decor to make a dent in your utility bills. I often tell my clients that you don’t have to choose between aesthetics and savings. You can find heavy, textured fabrics that look like high-end linen but actually function as effective energy efficiency window coverings. Even a budget-friendly set of heavy drapes can create a much-needed buffer between your living space and a drafty window pane.

    When you’re shopping, don’t get distracted by marketing fluff; look for density. I usually check the weight of the fabric myself. While many people debate blackout vs thermal curtains, the real goal is finding something with enough mass to act as a barrier. By prioritizing reducing heating costs with drapes that have a tight weave, you’re essentially adding a layer of invisible insulation to your walls. It’s a low-effort, high-reward way to stabilize your indoor climate without a professional retrofit.

    5 Low-Cost Ways to Maximize Your Thermal Curtain Impact

    • Seal the gaps. Even the best thermal curtains won’t work if heat is just whistling around the edges. I always check the sides and the top; if there’s a gap between the fabric and the wall, your expensive warm air is basically walking right out the window.
    • Size matters more than you think. Don’t just buy curtains that barely cover the glass. To actually trap a layer of insulating air, you need them to be wide enough to overlap the window frame significantly and long enough to hit the floor.
    • The “Day vs. Night” strategy. This is a simple one: pull them wide open during sunny hours to let the sun do the heating for free, but the second the sun dips, close them tight to lock that warmth inside.
    • Double up if you’re serious. If you’re dealing with an old, drafty rental like I used to, one layer might not cut it. Pairing thermal curtains with a simple honeycomb blind creates an extra air pocket that acts like a secondary barrier against the cold.
    • Check your hardware. If you’re using a thin, flimsy rod, your heavy thermal fabric might sag, creating massive air leaks at the top. Invest in a sturdy rod that can hold the weight so the curtain stays flush against the window.

    The Bottom Line: Why Thermal Curtains Are a Non-Negotiable

    Stop viewing curtains as just decor; they are a functional barrier that keeps your expensive heat inside the room where you actually need it.

    You don’t need a massive, expensive retrofit to see results—hanging heavy, thermal-lined fabric is one of the fastest ways to lower your utility bills.

    Think of thermal curtains as a passive energy tool that works 24/7, helping you maintain a steady temperature without constantly cranking up the thermostat.

    The Real Cost of a Cold Room

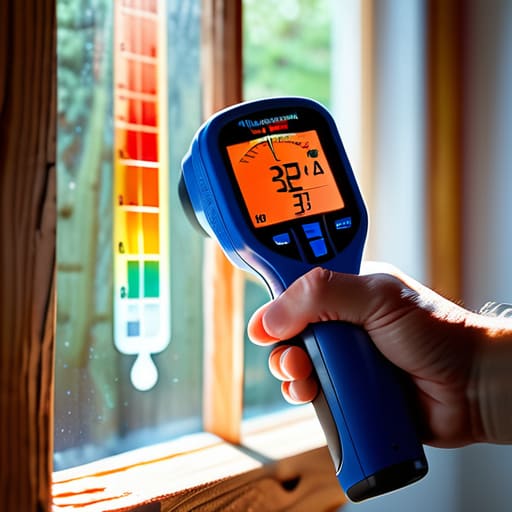
    “I’ve spent enough time pointing an infrared thermometer at drafty window frames to know that a window isn’t just a view—it’s a massive hole in your wallet. Thermal curtains aren’t just a decor choice; they’re a practical barrier that stops you from literally paying to heat the neighborhood.”

    Tobias Nkemdirim

    Making the Switch

    Making the Switch to thermal curtains.

    At the end of the day, thermal curtains aren’t just a design choice; they are a practical tool for reclaiming control over your living space. We’ve looked at how specialized fabric technology acts as a barrier against the elements and how choosing the right decor can help you manage your indoor climate without touching the thermostat. By addressing these small thermal leaks, you aren’t just decorating—you are actively plugging the holes in your wallet. It’s about making sure the energy you pay for actually stays inside the rooms where you need it, rather than bleeding out through your windows.

    I know that when you’re staring at a mounting utility bill, a few yards of heavy fabric might feel like a minor fix, but these small, smart changes are exactly how we build a more sustainable lifestyle. You don’t need a massive solar array or a total home overhaul to start making a difference. It starts with recognizing that efficiency is accessible to everyone, regardless of your budget. Let’s stop letting our hard-earned money escape through the glass and start building homes that work for us, not against us.

    Frequently Asked Questions

    How do I know if my current curtains are actually doing anything, or if I'm just wasting money on decorative fabric?

    The easiest way to tell? Grab your infrared thermometer. I do this during every audit. On a cold night, aim it at the space between your current curtains and the windowpane. If you’re seeing a massive temperature gap—like a 10-degree difference—your curtains are basically just expensive wallpaper. If they feel thin or light, they aren’t trapping any heat. If you can feel a draft hitting your ankles, your fabric isn’t doing its job.

    Will thermal curtains make my room feel too dark or stuffy during the day?

    That’s a fair concern, and honestly, it’s one I hear a lot during my audits. If you go for heavy, blackout-style thermal curtains, yeah, your room might feel a bit cave-like during the day. But you don’t have to sacrifice light for efficiency. I usually recommend layering: use sheer thermal liners that let soft light through while still trapping heat, or just keep them open during sunny hours to let the sun do the heating work for free.

    Are these curtains worth the investment if I'm living in a rental and can't change the windows themselves?

    Absolutely. In fact, I’d argue they’re even more essential for renters. Since you can’t go ripping out old single-pane windows or upgrading to double glazing without losing your security deposit, you have to find workarounds. Thermal curtains are a non-permanent, low-cost hack. I’ve audited plenty of apartments where a simple heavy drape acted as a secondary barrier, stopping drafts and saving the tenant a significant chunk on their heating bill. It’s a win-win.

  • Using Natural Ventilation to Regulate Indoor Temperature

    Using Natural Ventilation to Regulate Indoor Temperature

    I still remember sitting in my old rental apartment three years ago, sweating through my shirt despite the rain hitting the window. The air was so thick and stagnant it felt like I was breathing through a wool blanket, yet the thought of cranking the AC made my stomach knot at the potential electricity bill. Most people will tell you that you need to install expensive, high-tech HVAC systems to fix a stuffy house, but that’s just a way to drain your bank account. The truth is, mastering natural ventilation strategies isn’t about buying more gadgets; it’s about understanding how air actually moves through the space you already live in.

    I’m not here to sell you on some complicated architectural theory or “smart” home tech that breaks in six months. My goal is to give you the actual, low-cost methods I use during my energy audits to keep a home cool without the massive utility spike. We’re going to look at how to use cross-breezes and thermal mass effectively so you can stop throwing money away on cooling. This is about practical, data-driven changes that make your home livable and your bills manageable.

    Table of Contents

    Mastering Wind Driven Ventilation Without Breaking the Bank

    Mastering Wind Driven Ventilation Without Breaking the Bank

    Most people think they need a high-tech HVAC system to manage indoor temperatures, but you can actually leverage the air moving outside your house for free. I’ve seen so many homes where the windows are just shut tight, trapping stale, hot air inside. To get real wind-driven ventilation working for you, you need to understand the pressure difference between the windward and leeward sides of your building. If you open a window on the side the wind is hitting and another on the opposite side, you create a vacuum effect that pulls fresh air through the entire space.

    It’s not just about a breeze, though; it’s about strategic placement. I always tell my clients to look at their window layouts. If you can create a clear path from one side of the house to the other, you’re essentially turning your home into a wind tunnel that flushes out heat. This is one of the most effective passive cooling techniques because it requires zero electricity. You aren’t just cooling the room; you’re actively refreshing the air, which is a massive win for both your wallet and your comfort.

    Simple Building Envelope Design for Cooler Rooms

    Simple Building Envelope Design for Cooler Rooms

    When I’m auditing a home, I usually find that people focus way too much on the gadgets and not enough on the actual shell of the house. You can buy the most expensive smart thermostat on the market, but if your building envelope design is flawed, you’re just fighting a losing battle against physics. I’m talking about the literal skin of your home—the walls, windows, and roof. If your house is absorbing heat like a sponge during the day, no amount of fan-spinning is going to save your electricity bill.

    The goal is to create a barrier that works with the climate rather than against it. This is where passive cooling techniques become your best friend. For example, if you’re looking at window placement, shading them with external shutters or even simple awnings can prevent the sun from turning your living room into a greenhouse. It’s about managing how much heat enters the space in the first place. I always tell my clients: the smartest way to stay cool isn’t to blast the AC; it’s to make sure the heat never gets a chance to settle in your rooms.

    5 Low-Cost Hacks to Get Your Home Moving Air

    • Use the stack effect by opening windows on the ground floor and at the highest point of your house; hot air naturally rises and escapes out the top, pulling cooler air in from below.
    • Time your cross-ventilation with the breeze; I always check the wind direction before opening windows, because opening a window on the leeward side of the house just creates a dead zone of stagnant air.
    • Install inexpensive window films or mesh screens that allow airflow while blocking direct solar heat gain, so you aren’t just inviting the sun to cook your living room.
    • Create a “ventilation path” by aligning your open windows with your furniture; if a heavy bookshelf is blocking the air path between two windows, you’re basically fighting physics for nothing.
    • Use ceiling fans in tandem with open windows; a fan doesn’t cool the air, but it helps circulate the fresh breeze you’re letting in, making the convective cooling feel much more effective.

    The Bottom Line on Natural Ventilation

    You don’t need a high-tech HVAC system to stay comfortable; mastering cross-ventilation and timing your window usage can cut your cooling costs significantly.

    Small architectural tweaks, like strategically placing openings to catch a breeze, offer long-term savings that far outweigh the cost of running an AC all day.

    Efficiency isn’t about spending more; it’s about using the environment you already have more intelligently to stop throwing money out the window.

    ## The Cost of Staying Still

    “We’ve been conditioned to think that comfort requires a constant hum of electricity, but most of the time, your house is just suffocating. Real efficiency isn’t about buying a smarter AC; it’s about learning how to move the air that’s already there for free.”

    Tobias Nkemdirim

    Making It Work for You

    Making It Work for You: natural ventilation.

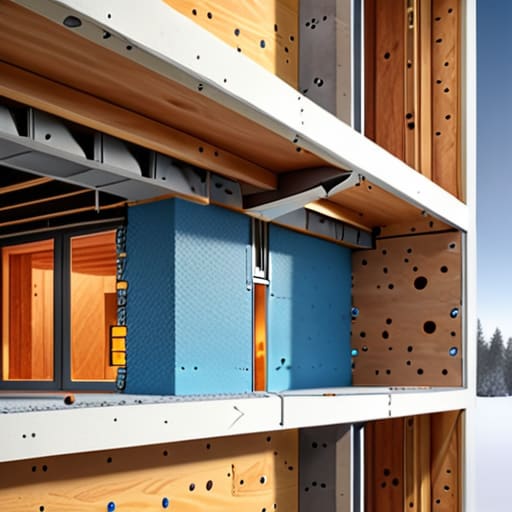
    At the end of the day, natural ventilation isn’t about some complex engineering feat; it’s about understanding how your specific space interacts with the air around it. We’ve looked at how you can leverage wind patterns to flush out heat and how a few smart tweaks to your building envelope can keep the cool air where it belongs. You don’t need to rip out your walls or install a high-tech HVAC system to see a difference. By focusing on strategic airflow and being mindful of how your home breathes, you can significantly cut down on those monthly cooling costs. It’s all about using what you already have more effectively, rather than just throwing more electricity at the problem.

    I know it can feel overwhelming to try and tackle energy efficiency when it feels like everything is getting more expensive. But I promise you, small, intentional changes are where the real impact happens. Every time you choose to open a window instead of cranking the AC, or adjust a shutter to block the midday sun, you’re winning. You’re saving money, reducing your footprint, and taking control of your environment. Living sustainably shouldn’t be a luxury reserved for the wealthy; it’s a practical way of life that starts with just being a bit more observant of the world around you.
    Frequently Asked Questions

    How do I know if I'm actually getting enough airflow, or if I'm just moving hot air around my room?

    The easiest way to tell is by using my infrared thermometer. If I point it at a surface and the temperature stays stagnant despite the fan running, you’re just swirling hot air. You need a temperature differential. Check the air coming in from the window versus the air hitting your skin. If the “inflow” isn’t significantly cooler than the room temp, you aren’t ventilating; you’re just creating a localized heat pocket.

    Will opening my windows for ventilation make my home too humid or bring in too much dust and pollen?

    It’s a fair concern, and honestly, it’s one I hear a lot during audits. Yes, if you leave everything wide open during a pollen spike or a humid afternoon, you’re inviting those issues inside. The trick is timing. Don’t just vent aimlessly; use cross-ventilation for short, intense bursts when the air is actually moving and the outdoor humidity is low. It’s about being strategic with your airflow, not just leaving windows propped open all day.

    Is there a way to use natural ventilation at night without worrying about security or bugs getting in?

    I get it—the thought of leaving windows open while you sleep is enough to keep anyone awake. I’ve been there. The best middle ground is investing in high-quality window screens; they’re cheap, easy to install, and keep the bugs out. For security, look into window restrictors or security bars that allow a gap for airflow but prevent anyone from squeezing through. It’s about finding that balance between a cool room and peace of mind.

  • Understanding Embodied Carbon in Home Building Materials

    Understanding Embodied Carbon in Home Building Materials

    I was standing in a drafty, half-finished renovation last week, clicking my infrared thermometer against a brand-new concrete wall, when it hit me: we are obsessed with the wrong things. Everyone wants to talk about solar panels and smart thermostats to save a few bucks on monthly bills, but they’re completely ignoring the massive carbon debt we rack up before the lights even turn on. We spend all this energy talking about “green living” while ignoring the massive environmental toll of embodied carbon construction. It’s a massive blind spot in the industry, and frankly, it’s a bit of a scam to call a building “sustainable” if the very materials used to build it already wrecked the planet.

    I’m not here to bore you with academic jargon or expensive, high-end architectural theories that only billionaires can afford. I want to show you how we can actually start looking at the real footprint of our buildings. I’m going to break down what this stuff actually means for your wallet and the environment, offering practical, data-driven ways to choose materials that don’t cost the earth. My goal is to give you the no-nonsense truth about building smarter, not just more expensive.

    Table of Contents

    Stop Ignoring the Gap Between Embodied vs Operational Carbon

    Stop Ignoring the Gap Between Embodied vs Operational Carbon.

    Most people I talk to are obsessed with their monthly utility bills—and honestly, I get it. I spent years shivering in a rental because the heating was inefficient, so I naturally focus on how a house performs once people move in. But here’s the problem: we’re so focused on how much energy a building uses daily that we completely ignore the massive carbon debt it carries before the keys are even handed over. This is the fundamental tension between embodied vs operational carbon. You can install the most high-tech, solar-powered smart home on the planet, but if the concrete and steel used to build it required a massive amount of fossil fuels, you’ve already lost the battle.

    We need to stop treating these as two separate issues. If we only optimize for the “operational” side—the lights, the heat, the appliances—we’re just putting a band-aid on a much deeper wound. To truly succeed in decarbonizing the built environment, we have to look at the entire lifecycle of a structure. It’s not enough to just run a house efficiently; we have to stop building homes that are “carbon-heavy” from day one.

    Smart Choices Finding Low Carbon Building Materials Without Breaking the Ba

    Smart Choices Finding Low Carbon Building Materials Without Breaking the Ba

    The problem is that most people think “green” means “expensive,” and honestly, that’s a barrier that keeps sustainability out of reach for most of us. But you don’t need a massive budget to start decarbonizing the built environment. Instead of chasing high-end, boutique eco-products, look at what’s already available locally. Reclaimed wood or even repurposed brick might not come with a fancy certificate, but they carry almost zero new carbon footprint. It’s about shifting our mindset toward a circular economy in construction, where we treat existing materials as resources rather than waste.

    If you are looking at new materials, focus on things that actually work with nature. For example, I’m a huge advocate for timber because of its ability to facilitate carbon sequestration in timber—basically locking carbon away inside the structure itself. Just make sure you’re looking at the whole picture. Don’t just grab the first “eco” label you see; do a quick mental check of where it came from and how it was processed. Making smart, intentional choices doesn’t require a PhD, just a bit of practical scrutiny.

    5 Ways to Cut Carbon Before the First Brick is Laid

    • Stop obsessed with the “shiny and new.” The most sustainable material is often the one that already exists. Before you order a shipment of new timber or steel, look into reclaimed materials or salvaged components. It’s cheaper, looks unique, and skips the massive carbon hit of manufacturing and shipping something from scratch.
    • Prioritize “Low-Embodied” over “High-Tech.” We often get distracted by fancy, smart-home gadgets that promise efficiency, but if those gadgets are made of carbon-intensive materials, you’re just trading one problem for another. Focus on the basics first: stone, earth, or sustainably sourced wood.
    • Think about the lifecycle, not just the purchase price. I see people choosing cheap, synthetic insulation because it saves them money today, but that stuff is often a carbon nightmare to produce and a disaster to dispose of later. Invest in materials that can actually be repurposed or composted when the building’s life is over.
    • Size down to scale up your efficiency. Every extra square foot you build requires more concrete, more steel, and more energy to maintain. If you can achieve your lifestyle goals in a smaller, more intentional footprint, you’re automatically slashing the embodied carbon of the entire project.
    • Demand transparency from your suppliers. Don’t just take a “green” label at face value. Ask for the Environmental Product Declarations (EPDs). If a supplier can’t give you the actual data on how much carbon went into making that product, they’re probably just greenwashing, and you shouldn’t be paying for it.

    The Bottom Line on Embodied Carbon

    Don’t get so obsessed with your monthly energy bills that you forget the massive carbon debt you’re taking on the moment you pick your building materials.

    Real sustainability isn’t just about how much power a house uses; it’s about choosing materials that don’t wreck the planet before you even turn the lights on.

    You don’t need a massive budget to make better choices—start by looking at the lifecycle of what you’re buying rather than just picking whatever is easiest or cheapest at the shop.

    ## The Hidden Debt of Your Home

    We spend so much time obsessing over the monthly electricity bill that we completely ignore the massive carbon debt we’ve already racked up before we even turn the lights on. If the materials used to build your walls are destroying the planet, it doesn’t matter how many LED bulbs you swap in—you’re still starting in the red.

    Tobias Nkemdirim

    The Bottom Line on Building Better

    The Bottom Line on Building Better.

    At the end of the day, we can’t keep treating embodied carbon like it’s some invisible problem that doesn’t matter. If we focus entirely on making a house energy-efficient to run while ignoring the massive carbon debt created by the steel, concrete, and insulation used to build it, we’re just moving the goalposts. We’ve talked about why the gap between embodied and operational carbon is so dangerous, and how we can hunt for smarter, more affordable materials that don’t wreck the planet before the keys are even handed over. It’s about looking at the entire lifecycle of a building, not just the monthly utility bill.

    I know that for most of us, the idea of changing how we build feels massive and expensive, but it doesn’t have to be. Real sustainability isn’t about luxury eco-mansions; it’s about making the intentional choice to value what goes into our walls as much as what comes out of our sockets. Every time we push for better materials or reuse what we already have, we’re chipping away at a system that prioritizes convenience over the climate. Let’s stop building for the sake of it and start building for the long haul.

    Frequently Asked Questions

    If I'm on a tight budget, is it actually worth paying the premium for low-carbon materials, or should I just focus on making my insulation better?

    Look, if your wallet is tight, prioritize the insulation. Period. You can use the most eco-friendly timber in the world, but if your thermal envelope is leaky, you’re just wasting low-carbon materials by heating the outdoors. Focus on the “low-hanging fruit” first—seal those drafts and get high-quality insulation in. Once your operational energy is dialed in and your bills are low, you’ll actually have the breathing room to invest in premium, low-carbon materials later.

    How do I know if a "green" material is actually helping, or if it's just clever marketing to charge me more?

    Don’t just take their word for it; look for the data. If a company says a material is “eco-friendly” but won’t provide an Environmental Product Declaration (EPD), they’re likely just greenwashing. I always check the lifecycle assessment. You want to see the actual numbers on carbon sequestration and manufacturing impact. If they can’t prove the math, they’re just selling you a premium price tag wrapped in a green leaf logo.

    Can I still make my home energy efficient if I'm stuck living in an older building that was built with high-carbon materials?

    Absolutely. You don’t need to tear down the walls to make a difference. I’ve audited plenty of old rentals where the bones are high-carbon, but the energy leaks are even worse. Focus on the “low-hanging fruit” first: draft excluders, heavy curtains, and sealing window gaps. It’s about managing the energy you do use. You can’t change the bricks, but you can definitely stop the heat from escaping through them.

  • Integrating Energy Storage Systems Into Your Home

    Integrating Energy Storage Systems Into Your Home

    I remember sitting in my old rental apartment three years ago, shivering under three layers of blankets because the heating bill was suddenly astronomical. I spent that entire winter staring at my meter, watching the numbers spin like a slot machine, feeling like I was being robbed by my own walls. Most people think you need a massive solar farm or a massive bank account to gain control over your power, but the truth is that energy storage systems have become way too gatekept by hype and ridiculous price tags. You don’t need a futuristic, high-tech mansion to stop being a slave to the grid; you just need a strategy that actually works for your wallet.

    I’m not here to sell you on some overpriced, shiny gadget that looks good in a brochure but fails when the lights actually go out. My goal is to strip away the marketing fluff and give you the straight-up data on what these setups actually do for your monthly costs. I’ll be walking you through the practical side of choosing a system that fits a real budget, focusing on efficiency rather than just empty promises. We’re going to find a way to keep your home powered and your carbon footprint small without breaking the bank.

    Table of Contents

    Solar Energy Storage Solutions That Actually Pay for Themselves

    Solar Energy Storage Solutions That Actually Pay for Themselves

    When I first started auditing homes, I noticed a pattern: people were installing solar panels but still getting hammered by peak-rate electricity prices in the evening. This is where solar energy storage solutions actually move from being a “nice-to-have” gadget to a serious financial tool. Instead of dumping excess power back into the grid for pennies, you store it to run your heavy appliances when rates are highest. It’s about shifting your usage to match your production, which is the smartest way to ensure your setup isn’t just a vanity project.

    To figure out if a specific setup makes sense for your wallet, you really need to run a quick cost-benefit analysis of battery storage against your local utility rates. It’s not just about the upfront hardware cost; it’s about calculating how much you save over five to ten years by avoiding those expensive peak windows. I’ve seen setups where the battery pays for itself in under six years simply by optimizing when you pull from the grid versus when you use your own stored juice. It’s practical, data-backed math that turns a sustainable choice into a smart financial move.

    A Real Cost Benefit Analysis of Battery Storage for Your Home

    A Real Cost Benefit Analysis of Battery Storage for Your Home

    When I’m out on a site audit, I always see the same hesitation: “Is a battery actually worth the upfront hit to my wallet?” To be blunt, a simple cost-benefit analysis of battery storage shows it’s not just about the sticker price; it’s about how much you’re currently bleeding through peak-hour rates. If your utility company spikes prices when everyone turns their AC on at 6 PM, a battery lets you bypass those predatory rates by using your own stored juice. You aren’t just buying hardware; you’re buying independence from the grid’s pricing whims.

    However, you have to look at the math over a five-to-ten-year horizon. While the initial investment in battery energy storage systems technology can feel steep, the real value lies in the integration with your existing setup. When you pair a battery with smart energy management systems efficiency, you’re automating the process of saving money. You stop being a passive consumer and start actively managing your load. It’s about moving away from the “set it and forget it” mentality that keeps our bills unnecessarily high.

    5 Ways to Make Energy Storage Work for Your Wallet (Not Just Your Ego)

    • Don’t buy for “what if”—buy for what you actually use. Most people overspend on massive battery banks they’ll never fully cycle. Check your smart meter data for a week first; if your peak usage is low, a smaller, more efficient system will give you a much faster return on investment.
    • Prioritize “Time-of-Use” arbitrage. If your utility provider charges more during evening peaks, your battery shouldn’t just be a backup for outages; it should be a tool to soak up cheap midday solar and dump it back into your home when rates spike. That’s where the real savings live.
    • Watch the depth of discharge (DoD). It’s tempting to drain every last percent to save a few cents, but pulling a battery to zero too often kills its lifespan. Aim for a cycle strategy that preserves the chemistry; a battery that lasts ten years is infinitely cheaper than one you have to replace in four.
    • Check your inverter efficiency, not just the battery capacity. I’ve seen plenty of setups where the battery is top-tier, but the inverter loses a huge chunk of energy as heat during the conversion process. If you’re losing 15% of your power just moving it from DC to AC, you’re basically burning cash.
    • Start with modular systems. Instead of dropping five grand on a massive, fixed installation, look for systems that let you add extra modules later. It keeps your upfront costs low and lets you scale your storage as your budget—or your solar array—grows.

    The Bottom Line on Energy Storage

    Don’t buy a system just because it’s trendy; focus on a setup that offsets your peak usage hours to see a real dent in your monthly bills.

    The best ROI comes from combining storage with solar, turning your roof into a personal power plant that keeps you running when grid prices spike.

    Small, scalable battery setups are often better than massive, expensive ones—start with what you can afford and expand as your efficiency improves.

    ## The Reality of Modern Energy

    “A battery isn’t just a piece of hardware you bolt onto a wall; it’s your way of reclaiming control from the utility companies and making sure you aren’t paying a premium just to keep the lights on when the sun goes down.”

    Tobias Nkemdirim

    The Bottom Line on Battery Storage

    The Bottom Line on Battery Storage.

    At the end of the day, choosing an energy storage system isn’t about chasing the latest tech gadget; it’s about taking control of your own utility bills and your home’s resilience. We’ve looked at how solar-integrated batteries can pay for themselves over time and why a realistic cost-benefit analysis is the only way to avoid expensive mistakes. Whether you’re looking at small-scale lithium setups or more robust home backup systems, the goal remains the same: stop letting expensive, grid-dependent energy dictate your monthly budget. It comes down to investing in efficiency rather than just paying for waste.

    I know that the upfront costs can feel daunting, especially when you’re already juggling rent or a mortgage. But I’ve seen firsthand how these small, smart shifts in how we manage power can change the entire math of a household. You don’t need to overhaul your entire life overnight to make a difference. Start where you can, do the math, and focus on the upgrades that actually move the needle for your wallet and the planet. We don’t have to choose between being sustainable and being financially stable; smart energy management allows us to do both.

    Frequently Asked Questions

    How long will these batteries actually last before I have to spend money replacing them?

    It really depends on the chemistry you’re looking at. Most modern lithium-ion setups—the kind I usually recommend for home efficiency—will give you anywhere from 10 to 15 years of solid service. If you’re looking at Lithium Iron Phosphate (LiFePO4), you might even see closer to 20 years. Just keep an eye on your cycle count; how often you drain them deeply matters more than just the calendar years.

    Can I integrate a battery system into my current setup without having to overhaul my entire electrical panel?

    The short answer is yes, but it depends on what you’re currently running. Most modern “plug-and-play” or AC-coupled battery systems are designed to sit alongside your existing setup without a total panel overhaul. I usually check the breaker capacity first with my thermometer and a multimeter to see if there’s enough headroom. You might need a small sub-panel or a smart gateway, but you definitely don’t need to rewire your entire life.

    Is it worth the upfront cost to get a larger capacity, or should I just start small and scale up later?

    Look, I’ve seen both sides of this. If you have the budget now, go larger. It’s much cheaper to buy one big unit than to buy two small ones later because of the “entry cost” of installation and hardware. However, if money is tight, don’t let “perfect” be the enemy of “good.” Start small to stabilize your base load, then scale up as your savings from lower bills start to add up.

  • The Role of Green Roofs in Home Temperature Regulation

    The Role of Green Roofs in Home Temperature Regulation

    I remember standing on the roof of a client’s small bungalow last summer, watching the heat shimmer off the black shingles. I pulled out my infrared thermometer, and the reading was staggering—the surface was practically cooking. Most people think a green roof installation is some high-end, architectural flex reserved for luxury eco-mansions or massive corporate headquarters. They see the price tags on glossy brochures and assume it’s a pipe dream for the average homeowner. But honestly? That’s just marketing noise designed to make sustainability feel exclusive, when it should actually be accessible.

    I’m not here to sell you on a lifestyle aesthetic or some overpriced garden kit that’ll die in two months. My goal is to strip away the fluff and give you the actual, data-driven reality of how this works for real homes. I’ll walk you through the practical steps of green roof installation, from the structural math you can’t ignore to the specific plant types that won’t break your bank. We’re going to focus on actual energy savings and long-term durability, ensuring you get a cooler house and lower bills without needing a massive inheritance to do it.

    Table of Contents

    Extensive vs Intensive Green Roofs Choosing Your Path

    Extensive vs Intensive Green Roofs Choosing Your Path

    When you’re looking at your options, the first thing you need to nail down is whether you want a low-maintenance layer of insulation or a full-blown ecosystem. This is the core of the extensive vs intensive green roofs debate. Extensive roofs are the “set it and forget it” option; they use shallow soil and hardy plants like sedum to provide solid thermal protection without much fuss. They’re perfect if you just want to improve your home’s efficiency and help with urban heat island effect mitigation without spending every weekend weeding.

    On the other hand, if you’re dreaming of a lush rooftop sanctuary with shrubs or even small trees, you’re looking at an intensive system. These are basically elevated parks, but they come with a catch: you have to account for significant rooftop garden structural requirements. Because the soil layers are much deeper, the weight can be immense. I always tell my clients to check their load-bearing capacity before getting too excited. Intensive setups offer incredible stormwater management benefits, but they require a much higher level of commitment and a sturdier foundation.

    Mitigating the Urban Heat Island Effect Without Breaking the Bank

    Mitigating the Urban Heat Island Effect Without Breaking the Bank.

    When I’m out doing audits, I notice how much concrete and asphalt trap heat, turning city streets into literal ovens by mid-afternoon. This is the core of the urban heat island effect mitigation struggle; our cities are designed to soak up sun and radiate it right back at us. By adding vegetation to your roof, you aren’t just decorating; you’re creating a natural cooling layer that prevents that heat from sinking into your living space. It’s one of the most effective ways to stop your AC from working overtime just to fight the building next door.

    The best part is that you don’t need a massive landscape architecture budget to make an impact. While the choice between extensive vs intensive green roofs usually dictates your cost, even a low-maintenance, lightweight system can significantly lower local temperatures. You’re essentially building a thermal buffer. It’s about making smart, tactical moves to reclaim your comfort and lower your cooling costs without needing to overhaul your entire building’s structure.

    5 Practical Steps to Get Your Green Roof Right

    • Check your roof’s load capacity before you buy a single plant. I’ve seen too many people underestimate the weight of wet soil, and the last thing you want is a structural nightmare on your hands.
    • Go for native plants to keep maintenance low. If you pick species that actually belong in your local climate, they’ll handle the heat and rain without you needing to babysit them or waste water.
    • Don’t skimp on the drainage layer. A green roof isn’t just about the plants; it’s about managing water flow so you don’t end up with a swamp that rots your roof membrane.
    • Think about your budget by starting small with an extensive system. You don’t need a massive, expensive intensive garden to see a drop in your cooling costs; even a thin layer of succulents makes a difference.
    • Plan for a smart irrigation setup. Even “low maintenance” roofs need a little help during a heatwave, so setting up a simple, efficient watering system now will save you a lot of headache (and dead plants) later.

    The Bottom Line: Is a Green Roof Worth It?

    Don’t let the upfront cost scare you; view a green roof as a long-term investment that pays for itself by slashing your cooling bills and extending your roof’s lifespan.

    Match your roof type to your actual lifestyle—if you aren’t planning to spend hours gardening up there, stick to an extensive system to save money and maintenance headaches.

    Think beyond your own wallet; by installing a green roof, you’re actively helping cool down your entire neighborhood and reducing the energy strain on the local grid.

    The Real Value of Going Green

    “A green roof isn’t just some aesthetic luxury for high-end builds; it’s a practical tool for anyone tired of watching their cooling bills spike every single summer.”

    Tobias Nkemdirim

    Making the Move to a Greener Roof

    Making the Move to a Greener Roof.

    At the end of the day, choosing between an extensive or intensive green roof comes down to your specific goals, your budget, and how much maintenance you’re actually willing to handle. Whether you’re looking for a lightweight, low-maintenance layer to help with insulation or you want to build a full-scale rooftop garden, the core objective remains the same: reducing the thermal load on your building. By tackling the urban heat island effect head-on, you aren’t just making a stylistic choice; you are making a calculated investment in your home’s long-term efficiency. It’s about moving away from the “set it and forget it” mentality and toward a system that actively works to lower your utility bills every single month.

    I know that looking at installation costs can feel overwhelming, especially when you’re trying to balance a tight monthly budget. But I want you to remember that sustainability shouldn’t be a luxury reserved for the elite. Every square meter of greenery we add to our rooftops is a step toward a more resilient, cooler, and more affordable way of living. Don’t let the complexity of the process stop you from starting small. Even a modest installation can drastically reduce your carbon footprint and prove that you don’t need a massive fortune to make a real impact on the planet.

    Frequently Asked Questions

    How much extra weight can my current roof actually handle before I need to worry about structural damage?

    Look, I can’t give you a magic number because every roof is different, and guessing here is how you end up with a structural nightmare. Before you even think about soil or plants, you need a structural engineer to run the math. They’ll calculate your roof’s “dead load” versus the “live load” of a saturated green roof. Don’t skip this step—an overloaded roof isn’t just expensive to fix; it’s dangerous.

    Is the upfront cost of a green roof actually going to pay itself back through lower energy bills in a reasonable timeframe?

    Look, I’ll give it to you straight: if you’re looking for a quick ROI in twelve months, a green roof isn’t it. The upfront cost is higher than standard roofing, and that’s a reality. However, when I run the numbers on cooling costs—especially during those brutal summer heatwaves—the savings start to stack up. Between lower AC bills and the roof lasting much longer because it’s protected from UV damage, it pays for itself.

    What kind of maintenance am I looking at—am I basically turning my roof into a full-time gardening job?

    Look, I get the hesitation. If you go intensive with deep soil and shrubs, yeah, you’re basically starting a rooftop garden. That requires weeding and regular watering. But if you stick to an extensive setup—think sedums and hardy succulents—the maintenance is minimal. It’s more about checking the drainage and making sure things haven’t dried out during a heatwave. It shouldn’t be a second job; it should just be a smart, low-effort upgrade.

  • Efficiency of Radiant Floor Heating Systems

    Efficiency of Radiant Floor Heating Systems

    I still remember standing in my old rental apartment, shivering in thick wool socks while staring at a utility bill that made absolutely no sense. I’d spent a small fortune trying to keep the place habitable, only to realize I was basically throwing cash into a thermal void. Most people think that if their underfloor heating isn’t working, they need to rip everything out and install a high-end, smart-integrated system that costs a mortgage payment. That’s a lie. Improving your floor heating efficiency isn’t about buying your way into a “smart home”; it’s about identifying where the heat is actually escaping and stopping that expensive leakage before it happens.

    I’m not here to sell you on overpriced gadgets or complex architectural overhauls. My goal is to give you the same practical, data-driven tactics I use during my professional audits to make sure every watt actually counts. We’re going to look at the small, smart tweaks—from floor coverings to thermostat calibration—that will keep your toes warm without draining your bank account. I promise to keep this straightforward: no hype, just real ways to make your heating work for you, not against your wallet.

    Table of Contents

    Comparing Hydronic vs Electric Floor Heating Efficiency Without Breaking Th

    Comparing Hydronic vs Electric Floor Heating Efficiency Without Breaking Th

    When you’re looking at the numbers, the debate between hydronic and electric systems usually comes down to your upfront budget versus your long-term utility bills. Electric mats are incredibly easy to install—you can practically DIY them—but the energy consumption of electric floor heating tends to climb quickly if you’re running them constantly. On the flip side, hydronic systems use water circulated through pipes, which is much more efficient at moving heat, but the initial setup cost can feel like a gut punch if you’re on a tight budget.

    If you’re trying to decide which route to take, I always tell my clients to look at the total lifecycle cost. For a small space or a quick renovation, electric might be your best bet for a cost-effective floor heating solution in the short term. However, if you’re looking at a larger area, investing in a hydronic setup pays for itself through much lower monthly running costs. To make either system work harder for you, don’t skip the basics: ensure you have high-quality insulation benefits for underfloor systems to prevent that expensive heat from simply bleeding into the ground below.

    The Insulation Benefits for Underfloor Systems You Cant Ignore

    The Insulation Benefits for Underfloor Systems You Cant Ignore

    If you’re looking at underfloor systems, you can’t just focus on the heating element itself; you have to look at what’s happening underneath it. I’ve seen too many people install expensive radiant systems only to realize they’re essentially heating the ground beneath their house. This is where the insulation benefits for underfloor systems become the real game-changer. By placing a high-quality thermal break beneath your heating loops or electric mats, you force that heat upward into your living space rather than letting it bleed into the subfloor or concrete slab.

    It’s a simple concept, but the math is hard to argue with. When I’m auditing a home, a lack of proper subfloor insulation is usually the biggest culprit behind high bills. Investing in decent insulation is one of the most cost-effective floor heating solutions available because it drastically lowers the workload on your system. Instead of your heater running constantly to compensate for heat loss, a well-insulated floor holds onto that warmth, making your entire setup much more efficient without needing a massive upgrade to your hardware.

    5 Quick Wins to Stop Wasting Heat Under Your Feet

    • Stop the thermal bleed by using a programmable thermostat; there’s no point heating up your floor at 3 AM when you’re fast asleep and the house is empty.
    • Don’t let heavy rugs act as insulators; if you place a thick, dense rug directly over your heating elements, you’re essentially trapping the heat under the carpet instead of letting it radiate into the room.
    • Keep your furniture light and airy; shoving a heavy, solid-back sofa directly against a heated floor section creates a dead zone where heat gets trapped and wasted.
    • Check your seals regularly; I always grab my infrared thermometer to check if cold air is creeping in from the baseboards, because even the best floor heating can’t compete with a drafty room.
    • Time your heating cycles to match the thermal mass of your floor; instead of constant low-level heating, try pulsing the system so the floor stays warm without running the heater 24/7.

    The Bottom Line on Floor Heating Efficiency

    Stop treating floor heating as a standalone system; if you don’t invest in high-quality underfloor insulation first, you’re basically just heating the ground beneath your house instead of the room you’re standing in.

    Choose your heating type based on your long-term budget—electric is easier to install for a quick fix, but hydronic systems are the real winner for keeping monthly utility bills from spiraling out of control.

    Small, data-backed adjustments like precise thermostat scheduling and sealing thermal leaks can make a massive difference in how much energy your system actually uses to maintain comfort.

    The Real Cost of Hidden Leaks

    “Most people think they have a heating problem, but when I pull out my infrared thermometer, I usually find they just have a leakage problem. If you aren’t investing in the insulation underneath your floor heating, you’re essentially just trying to heat the ground beneath your house instead of the room you’re standing in.”

    Tobias Nkemdirim

    Making the Most of Your Warm Floors

    Making the Most of Your Warm Floors

    At the end of the day, optimizing your floor heating isn’t about buying the most expensive smart system on the market; it’s about understanding how heat actually moves through your space. We’ve looked at how choosing between hydronic and electric systems can shift your long-term costs, and why skipping out on proper underfloor insulation is basically like trying to fill a bucket with holes in it. Whether you are upgrading a whole room or just fine-tuning your current setup, the goal is the same: stop letting your hard-earned money escape through the floorboards. When you combine the right heating method with a solid thermal barrier, you aren’t just staying warm—you are drastically cutting down on wasted energy.

    I know it can feel overwhelming to tackle home efficiency, especially when it feels like every “green” solution comes with a massive price tag. But I’ve seen firsthand through my audits that the most impactful changes often come from the smallest, most intentional decisions. You don’t need to overhaul your entire house overnight to make a difference. Start with what you can manage, focus on the leaks, and keep your eyes on the data. Living sustainably shouldn’t be a luxury reserved for the wealthy; it should be a practical standard for everyone. Let’s stop paying for heat we aren’t even feeling.

    Frequently Asked Questions

    Is it actually worth the upfront cost to upgrade my insulation if I'm just planning to rent this place for a couple of years?

    Look, I get it. If you’re on a two-year lease, you don’t want to sink cash into a place you don’t own. But here’s the thing: if you can’t change the insulation, focus on the “quick wins” that actually move the needle. Grab some heavy thermal curtains or draft stoppers. It’s not a permanent fix, but it stops your money from leaking out the window while you’re still living there.

    How much of a difference does a smart thermostat actually make when I'm trying to manage an electric floor heating system?

    It makes a massive difference. If you’re running electric floor heating, you’re essentially paying for heat that’s warming an empty room. I’ve seen too many people leave their mats on all day just because it’s “easier.” A smart thermostat stops that waste by learning your schedule and cutting power when you’re out. It turns a constant drain into a targeted tool, saving you serious cash without you having to manually fiddle with the dial.

    If I have an older hydronic system, are there ways to boost its efficiency without having to rip up my entire floor?

    Honestly, you don’t need a full renovation to see a difference. If your hydronic pipes are already there, stop letting the heat escape into the subfloor. I usually recommend checking your pump efficiency first—an old, power-hungry pump is a silent budget killer. Also, look into smart thermostatic radiator valves (TRVs) or zone controllers. It’s about precision: only heating the rooms you’re actually using, rather than blasting the whole house.

  • How to Identify and Fix Thermal Bridging

    How to Identify and Fix Thermal Bridging

    I still remember sitting in my old rental apartment three years ago, wrapped in two blankets and watching my breath mist in the living room, even though the heater was cranked to the max. I’d pull out my infrared thermometer, and the reading would tell the whole story: these massive, invisible cold spots bleeding heat straight through the wall studs. Most people think you need to gut your entire house or spend a fortune on high-end construction to fix this, but that’s a total myth. You don’t need a massive renovation budget to tackle thermal bridging solutions; you just need to understand where the heat is actually escaping.

    In this guide, I’m cutting through the architectural jargon to give you the real-world tactics I use during my energy audits. I’m not here to sell you on expensive, unnecessary upgrades that only contractors love. Instead, I’ll show you how to identify these thermal leaks and apply practical, low-cost thermal bridging solutions that actually work. My goal is to help you stop paying for heat that just vanishes into thin air, ensuring your home stays efficient and affordable without breaking the bank.

    Table of Contents

    Smart Continuous Insulation Methods to Lower Your Monthly Bills

    Smart Continuous Insulation Methods to Lower Your Monthly Bills

    When I’m out on an audit, the biggest culprit I see isn’t usually a lack of insulation, but rather the gaps where it stops. If your insulation is just tucked into the cavities of your walls, you’re still losing heat through the studs themselves. This is where continuous insulation methods become a game-changer. By adding a layer of rigid foam or mineral wool boards directly to the exterior of your sheathing, you essentially wrap the house in a thermal blanket. This breaks the path that heat tries to take through the structural members, which is one of the most effective thermal bridge mitigation techniques available for anyone serious about their energy bills.

    It’s not just about the warmth, though; it’s about the physics of moisture. When a structural element stays significantly colder than the air inside your home, you run a high risk of preventing condensation through thermal bridges by ensuring those cold spots don’t exist in the first place. If you can stabilize the temperature of your building envelope, you stop the cycle of dampness and mold that often follows a drafty winter. It’s a smarter way to approach energy efficient building design without needing to tear your house down to the studs.

    Protecting Building Envelope Integrity Without Breaking the Bank

    Protecting Building Envelope Integrity Without Breaking the Bank

    When I’m out on an audit, I often see people focus so much on thick insulation that they completely overlook the gaps where the real damage happens. Maintaining your building envelope integrity isn’t just about adding more material; it’s about ensuring there are no “weak links” in your home’s defense. If your exterior walls are solid but your window frames or floor joists are acting like heat highways, you’re essentially trying to fill a bucket with a hole in the bottom.

    One of the biggest headaches I encounter is moisture. If you don’t address these temperature gaps, you’re looking at a serious risk of preventing condensation through thermal bridges becomes an uphill battle. When warm, moist indoor air hits a freezing cold spot on a structural element, you get mold. It’s a messy, expensive problem that most people don’t realize is caused by a simple lack of continuity. You can protect your home by focusing on these junctions—sealing the gaps around penetrations and ensuring your insulation layers actually meet—without needing to tear down your walls.

    5 Quick Wins to Cut Down on Heat Leaks

    • Seal your electrical outlets. Most people forget that the gaps around your socket plates are literal highways for cold air to travel from your walls into your living space. I always carry my thermometer to find these; a simple foam gasket behind the plate makes a massive difference.
    • Don’t ignore the window frames. Even if you have double glazing, the point where the frame meets the wall is a prime spot for thermal bridging. Using a high-quality, flexible sealant around those edges can stop that annoying draft without needing to replace the whole window.
    • Mind the floor-to-wall junction. This is where a lot of heat just vanishes. If you’re on a budget, adding a thick, insulated rug over areas where the floor meets the exterior wall can act as a decent temporary buffer to keep the warmth from escaping through the structure.
    • Address your balcony connections. If you have a concrete balcony attached to your building, it’s basically acting like a giant radiator in reverse, pulling heat out of your room. While a full structural fix is expensive, ensuring your interior walls near the balcony are well-insulated can help mitigate the chill.
    • Check your door sweeps. A door that doesn’t sit flush against the threshold is a major thermal bridge. Installing a heavy-duty sweep or even a simple weighted draft excluder is a low-cost, high-impact way to keep the conditioned air inside where it belongs.

    The Bottom Line: Small Fixes, Big Savings

    You don’t need a massive renovation budget to fight thermal bridging; focus on sealing the gaps in your building envelope first to see the fastest return on your investment.

    Prioritize continuous insulation over just adding more bulk; it’s about creating an unbroken barrier that prevents heat from finding a shortcut through your walls.

    Think of energy efficiency as a long game—addressing these small leaks now stops the slow drain on your bank account and reduces your carbon footprint every single month.

    ## The Hidden Leak in Your Wallet

    “Thermal bridging is basically like leaving a window cracked open in the middle of winter; you can crank up the heat all you want, but you’re just paying to heat the neighborhood through those invisible gaps in your walls.”

    Tobias Nkemdirim

    Cutting the Leaks for Good

    Cutting the Leaks for Good via insulation.

    At the end of the day, fixing thermal bridges isn’t about performing a complete structural overhaul or buying the most expensive insulation on the market. It’s about being observant. Whether you’re focusing on continuous insulation to smooth out those temperature gaps or simply taking steps to protect your building envelope from the elements, the goal is the same: stop the bleed. By targeting those specific points where heat escapes, you aren’t just making your home more comfortable; you are actively plugging the holes in your wallet. Every small tweak to your home’s thermal integrity pays dividends in lower utility bills and a much more stable indoor climate.

    I know that looking at a list of energy inefficiencies can feel overwhelming, especially when you’re working with a tight budget. But remember, sustainability shouldn’t be a luxury reserved for people with massive renovation funds. You don’t have to fix everything overnight to see a difference. Start with the low-hanging fruit, use the data to guide your next move, and keep an eye on those heat leaks. If we all take these small, intentional steps to stop wasting energy just because it’s convenient, we can collectively build homes that are both affordable and planet-friendly. Let’s get to work.

    Frequently Asked Questions

    I'm renting an apartment and can't tear into the walls; are there any ways to mitigate thermal bridging without making permanent structural changes?

    I get it—as a renter, you’re stuck with the walls you’ve got. Since you can’t rip into the drywall, focus on “surface-level” fixes. I always suggest heavy, thermal-lined curtains to block drafts from window frames, or even temporary foam insulation boards tucked behind furniture against cold exterior walls. It’s not a permanent structural fix, but it breaks that direct heat path and stops your money from literally leaking through the masonry.

    How much of an actual impact will fixing these bridges have on my monthly utility bills compared to just upgrading my thermostat?

    Look, a smart thermostat is a great tool for managing when you use energy, but it can’t stop energy from escaping. If you have thermal bridges, you’re basically heating the outdoors. It’s like trying to cool a room with the window cracked open—no matter how high-tech your thermostat is, the heat is still leaking out. Fixing those bridges provides a permanent reduction in heat loss, which usually yields much bigger, more consistent savings.

    If I'm looking at DIY insulation, how do I identify where the most critical thermal bridges are located in my specific home layout?

    Grab your infrared thermometer—it’s the best tool for this. On a cold day, run it along your walls, especially where the ceiling meets the wall or around window frames. You’re looking for “cold spots” where the temperature drops sharply; those are your bridges. Don’t forget to check corners, floor joists, and where plumbing penetrates walls. If a spot feels significantly colder than the rest of the surface, that’s where your money is leaking out.