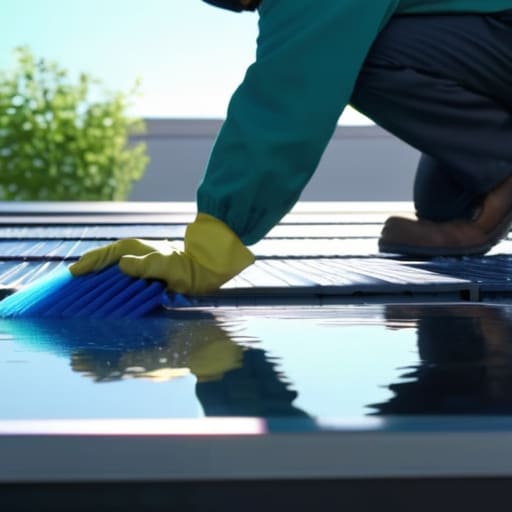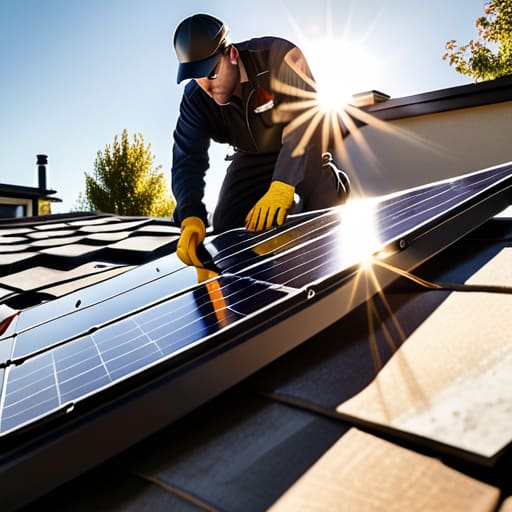
Category: Solar

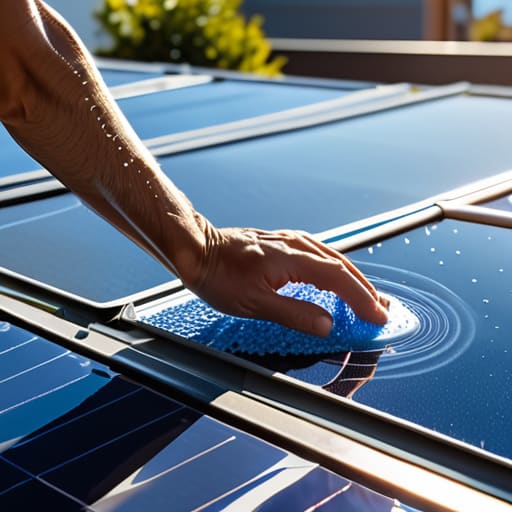
  • Effective Sprays for Solar Panel Maintenance

    Effective Sprays for Solar Panel Maintenance

    I was standing on a client’s roof last Tuesday, clicking my infrared thermometer against a set of panels that looked perfectly fine to the naked eye, only to see the efficiency numbers tanking. It’s the same frustration I had growing up in that drafty rental; you think you’re doing everything right, but you’re literally leaking money through things you can’t see. Most people think they need a professional crew or some heavy-duty industrial chemical wash to fix this, but honestly, a lot of that high-end marketing is just noise. You don’t need a massive budget to fix a layer of grime; often, the right solar panel cleaning spray is the difference between a system that actually pays for itself and one that’s just an expensive piece of glass sitting on your roof.

    I’m not here to sell you on some miracle product that costs a fortune. My goal is to cut through the marketing fluff and show you how to maintain your setup without breaking the bank. I’ll be sharing my no-nonsense breakdown of which sprays actually work, how to apply them without damaging your cells, and how to ensure you’re getting every single watt of free energy possible.

    Table of Contents

    Preventing Solar Panel Grime to Keep Bills Low

    Preventing Solar Panel Grime to Keep Bills Low

    The thing about solar panels is that they’re basically giant magnets for whatever is floating in your local air. If you live near a busy road or in an area with high pollen, that thin layer of film builds up faster than you think. I’ve seen it happen during my audits—people think their system is failing because the output is dropping, but really, they’re just looking at a layer of grit. Preventing solar panel grime isn’t just about aesthetics; it’s about ensuring those photons actually reach the cells instead of getting bounced away by a dusty surface.

    To keep things running smoothly, you need to be strategic about how you clean. I always tell people to steer clear of harsh chemicals or stiff brushes that can scratch the glass. Instead, look into non-abrasive solar cleaners that lift the dirt without compromising the surface. If you want to get really proactive, some newer solar panel coating technology can actually help water bead off more effectively, making the self-cleaning process a bit more efficient during rainstorms. It’s all about those small, consistent habits that keep your energy output from dipping.

    Maximize Solar Efficiency Without Breaking the Bank

    Maximize Solar Efficiency Without Breaking the Bank

    When I’m out doing audits, I often see homeowners who think they’ve hit a plateau with their energy savings, only to realize their hardware is just struggling to breathe through a layer of grit. To truly maximize solar efficiency, you have to look beyond just the occasional rinse. It’s about a consistent rhythm of care. I always tell my clients that photovoltaic cell maintenance shouldn’t be a massive, expensive quarterly project; it’s more about small, manageable habits that ensure your investment actually performs the way the manufacturer promised.

    If you’re looking to level up, I’d suggest looking into non-abrasive solar cleaners rather than reaching for whatever harsh chemical is sitting under your sink. Using something too aggressive can actually damage the protective layers on your panels, which is the last thing you want when you’re trying to lower long-term costs. I’ve found that staying on top of the grime is the most cost-effective way of improving energy output without needing to buy more hardware. It’s simple math: cleaner panels mean more juice, which means a faster return on what you’ve already spent.

    5 Ways to Keep Your Panels Working Harder

    • Skip the harsh detergents; most household soaps leave a film that actually traps more dirt, so stick to a dedicated solar spray that rinses clean.
    • Timing is everything—don’t spray your panels in the heat of the midday sun or you’ll deal with water spots that act like tiny magnifying glasses for heat damage.
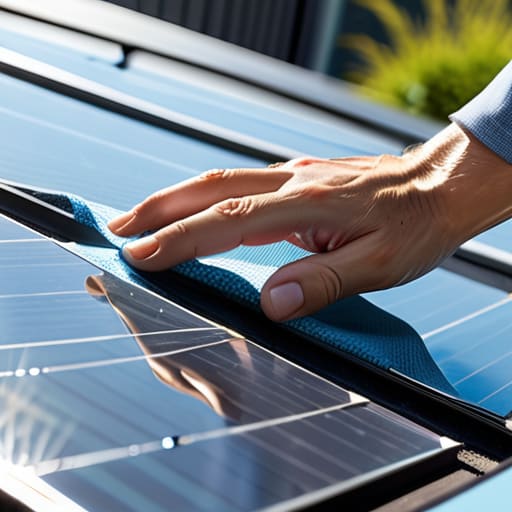
    • Use a soft-bristled brush or a microfiber cloth with your spray to avoid micro-scratches that can permanently drop your energy output.
    • Check your local water quality first; if you have hard water, use a deionized spray to prevent calcium buildup from blocking the light.
    • Don’t wait for a massive buildup to act; a quick, light spray once a month is way more effective (and cheaper) than a heavy-duty scrub once a year.

    The Bottom Line on Keeping Your Panels Productive

    Don’t let a thin layer of dust or bird droppings act like a tax on your electricity; regular cleaning with a proper spray ensures you’re actually capturing the sunlight you’re paying for.

    Skip the harsh chemicals that can damage the glass; stick to a dedicated solar cleaner to protect your investment and keep your efficiency numbers where they should be.

    Think of cleaning as a maintenance task, not a chore—a quick spray every few months is a small effort that prevents massive energy waste and keeps your utility bills from creeping up.

    ## Don't Let Dirt Tax Your Energy

    “I’ve seen too many people treat solar panels like ‘set and forget’ appliances, but if you let a layer of grime build up, you’re essentially paying a hidden tax on every kilowatt you fail to capture. A decent cleaning spray isn’t a luxury; it’s a tool to make sure the hardware you already invested in actually does its job.”

    Tobias Nkemdirim

    Keeping the Momentum Going

    Keeping the Momentum Going with solar maintenance.

    At the end of the day, maintaining your solar setup doesn’t need to be a massive, expensive undertaking. We’ve looked at how a bit of regular maintenance—specifically using the right cleaning spray—can prevent grime from choking your output and eating into your monthly savings. It’s about moving away from the “set it and forget it” mindset that leads to wasted energy. By choosing a cleaner that actually protects your panels rather than leaving behind harsh residues, you’re ensuring that your investment works as hard as it possibly can. It’s a small, data-backed habit that pays off every time your meter stops spinning quite so fast.

    I know it can feel like one small task won’t change much in the grand scheme of the climate crisis, but that’s where we get it wrong. Sustainability isn’t just about the big, flashy tech; it’s about the smart, intentional ways we manage what we already have. Every bit of sunlight you capture instead of letting it bounce off a layer of dust is a win for your wallet and a win for the planet. Don’t let your hard-earned energy go to waste just because of a little bit of dirt. Keep your panels clean, keep your bills low, and let’s make living sustainably a standard, not a luxury.

    Frequently Asked Questions

    Is it actually worth buying a specialized spray, or can I just use a garden hose and some mild soap?

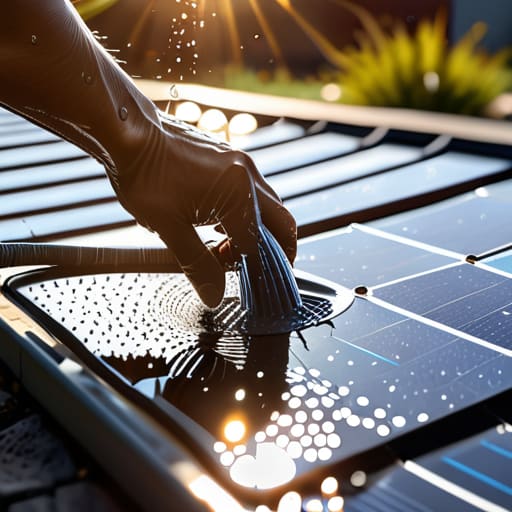
    Look, I get the temptation to just grab the garden hose and some dish soap—it’s easier and cheaper. But here’s the reality: standard soaps can leave a thin film that actually attracts more dust over time, creating a cycle of grime. If you’re on a tight budget, a soft cloth and plain water are fine, but a dedicated spray is worth it for the long game. It breaks down the buildup without leaving that sticky residue.

    How often do I really need to clean them to see a noticeable difference in my energy savings?

    Honestly, it depends on your environment, but I usually tell people to check them every few months. If you’ve got heavy pollen, dust, or bird droppings building up, you’ll see a drop in efficiency almost immediately. I always say: don’t wait for a massive bill to notice. If you see a visible film of grime, clean them. It’s better to spend twenty minutes cleaning now than losing 10-15% of your power output all month.

    Will using a harsh cleaning chemical actually damage the anti-reflective coating on my panels?

    Short answer: Yes, absolutely. Don’t do it. Most solar panels have a specialized anti-reflective coating designed to catch as much light as possible, and harsh chemicals—especially anything with abrasives or high acidity—can eat right through that layer. Once that coating is compromised, your efficiency takes a massive hit, and you’re basically paying for hardware that’s underperforming. Stick to a soft brush and plain water; it’s safer for your wallet and your panels.

  • What to Use When Cleaning Solar Panels

    What to Use When Cleaning Solar Panels

    I was out on a client’s roof last Tuesday, clicking my infrared thermometer against a panel that looked perfectly fine to the naked eye, only to see the efficiency numbers tanking. The culprit wasn’t a broken inverter; it was a stubborn, crusty layer of grime that the homeowner had tried to scrub off with some harsh, industrial-grade degreaser they found in the garage. People think they need these expensive, specialized solar panel cleaning chemicals to get peak performance, but honestly, most of the high-priced stuff marketed online is just expensive water wrapped in fancy branding. You don’t need a chemistry degree or a massive budget to keep your array running; you just need to stop making mistakes that actually damage the glass.

    I’m not here to sell you on some “miracle solution” that costs more than your monthly power bill. My goal is to give you the straight truth about which solar panel cleaning chemicals actually work and, more importantly, which ones you should never touch if you want your panels to last. I’ll show you how to maintain your system using practical, data-backed methods that protect your investment and keep your energy output high without wasting a single cent.

    Table of Contents

    Avoiding Solar Panel Efficiency Loss Without Spending a Fortune

    Avoiding Solar Panel Efficiency Loss Without Spending a Fortune

    Look, I get it. When you see your energy output dipping, the instinct is to grab whatever heavy-duty degreaser is under the sink. Please, don’t do that. Using harsh, acidic, or highly alkaline products is a fast track to permanent damage. The biggest danger lies in abrasive cleaner risks; if you use a scrub that’s too rough, you’ll create microscopic scratches on the glass. Those tiny grooves trap even more dirt and degrade the surface, leading to a permanent solar panel efficiency loss that no amount of cleaning can fix.

    If you’re on a tight budget, you don’t need fancy, branded kits to see results. For most of the homes I audit, the goal is simply preventing mineral buildup from hard water. If you have access to it, deionized water cleaning is the gold standard because it leaves zero residue behind. If that’s too expensive, just stick to a soft microfiber cloth and a gentle, pH balanced solar cleaner or even just plain water. It’s about being smart and consistent, not spending a fortune on chemicals that might actually do more harm than good.

    Why Ph Balanced Solar Cleaners Are Your Best Budget Friend

    Why Ph Balanced Solar Cleaners Are Your Best Budget Friend

    When I’m out on a site audit, I see people trying to save a few bucks by grabbing whatever heavy-duty degreaser or harsh soap is sitting under their sink. That’s a massive mistake. Most household cleaners are far too aggressive, and the abrasive cleaner risks are real—you can actually create microscopic scratches on the glass surface. Once that protective coating is compromised, you aren’t just losing efficiency; you’re inviting permanent damage that’s expensive to fix.

    This is why I always advocate for ph balanced solar cleaners. These solutions are specifically formulated to lift grime and bird droppings without eating away at the panel’s sealant or glass. It’s about long-term stability rather than a quick, aggressive scrub. By using something gentle, you’re effectively preventing mineral buildup and ensuring that your photovoltaic panel maintenance doesn’t accidentally become a costly repair job. It’s a small upfront cost that protects your entire investment, keeping your energy output steady without the headache of degrading your hardware.

    5 Ways to Clean Without Costing the Earth (or Your Wallet)

    • Skip the harsh household detergents; things like dish soap or degreasers often leave a film that actually attracts more dust, forcing you to clean even more often.
    • Stick to distilled water if you have hard water at home, because mineral buildup from tap water can create a crust on the glass that’s a nightmare to scrub off later.
    • Test your cleaner on a tiny corner first; I always use my infrared thermometer to check if a new solution is causing any weird thermal issues or residue buildup.
    • Avoid anything with abrasive chemicals or grit; you don’t want to create micro-scratches on the surface that trap dirt and kill your energy yield over time.
    • Use a soft microfiber cloth or a specialized solar brush rather than a sponge, which can trap grit and scratch the panels, making them less efficient in the long run.

    The Bottom Line on Keeping Your Panels Clean

    The Bottom Line on Keeping Your Panels Clean

    Skip the harsh household chemicals; they might seem cheap, but they’ll strip the anti-reflective coating off your panels and cost you way more in lost efficiency long-term.

    Stick to pH-balanced cleaners or even just plain water to protect your investment and ensure you’re actually capturing every bit of sunlight you’re paying for.

    Regular, gentle maintenance is better than a heavy-duty deep clean once a year—consistency is what keeps your energy bills low and your carbon footprint small.

    ## The Real Cost of Cheap Cleaners

    “I’ve seen too many people try to save a few bucks with harsh detergents, only to end up with micro-scratches that kill their panel’s efficiency for years. At the end of the day, if you’re using the wrong chemicals, you aren’t just cleaning your panels—you’re actively sabotaging your return on investment.”

    Tobias Nkemdirim

    The Bottom Line on Keeping Your Panels Clean

    At the end of the day, maintaining your solar setup doesn’t require a massive budget or a professional cleaning crew. It’s really about being smart with what you use. We’ve looked at why skipping the harsh, abrasive chemicals is non-negotiable and how sticking to a pH-balanced cleaner protects your investment from long-term degradation. Remember, the goal isn’t just to make the panels look shiny; it’s about ensuring that every photon hitting those cells actually turns into usable power. If you use the wrong stuff, you aren’t just risking the glass—you’re directly sabotaging your own energy savings and your return on investment.

    I know that managing a sustainable home can sometimes feel like a constant battle of small details, but these are the details that matter. Every time you choose a gentle, effective cleaning method over a cheap, damaging shortcut, you are making a choice that favors both your wallet and the planet. We don’t need to be wealthy to live efficiently; we just need to be intentional with our maintenance. Keep your panels clean, keep your data in check, and stop letting wasted sunlight slip through your fingers. It’s a small habit that pays off in every single monthly utility statement.

    Frequently Asked Questions

    Can I just use a garden hose and some dish soap, or will that actually damage the coating on my panels over time?

    I get why you’d think that—it’s easy and cheap. But honestly? I wouldn’t recommend it for the long haul. Most dish soaps are actually pretty harsh; they contain degreasers and salts that can strip away the anti-reflective coating on your cells. Once that coating is gone, your efficiency takes a permanent hit. If you’re on a budget, stick to plain water or a dedicated pH-neutral cleaner to protect your investment.
    How often do I realistically need to clean them to see a difference in my monthly energy savings?

    Honestly, it depends on your local environment, but I usually tell my clients to aim for once every three months. If you live somewhere with heavy pollen, dust, or bird activity, you might see a noticeable spike in your bills if you skip it. I always check my data: if I see a dip in output during a clear week, it’s time to grab the bucket. Don’t wait for the grime to become a crust.

    Are there specific chemicals I should absolutely avoid if I want to prevent permanent buildup or "clouding" on the glass?

    Look, if you want to avoid permanent “clouding,” stay far away from harsh abrasives or high-alkaline cleaners like heavy-duty degreasers and bleach. I’ve seen cases where people use industrial cleaners to scrub off bird droppings, only to realize they’ve actually etched the glass surface. Once that microscopic pitting happens, your efficiency is shot for good. Stick to mild, pH-neutral soaps; it’s better to spend ten extra minutes cleaning than to replace an entire panel.

  • Safety Precautions for Cleaning Solar Panels

    Safety Precautions for Cleaning Solar Panels

    I was standing on a ladder last Tuesday, my handheld infrared thermometer tucked into my pocket, watching a client attempt to scrub his array with a high-pressure washer and a prayer. It’s one of those moments where my stomach just sinks. People think they’re being “proactive” about their energy savings, but they’re actually gambling with their lives just to shave a few cents off their monthly bill. There is a massive, dangerous gap between “keeping things clean” and actually understanding solar panel cleaning safety, and honestly, the DIY community is doing a terrible job of explaining that distinction.

    I’m not here to sell you a fancy, overpriced cleaning kit or tell you to hire a specialized firm every time a bird leaves a mess. My goal is to give you the straightforward, data-driven reality of what you can actually handle yourself without ending up in the ER. I’ll walk you through the specific risks—from electrical hazards to structural stability—so you can keep your system running at peak efficiency without risking your life or your home’s integrity. Let’s get into the practical stuff.

    Table of Contents

    Preventing Falls From Roofs Without Breaking the Bank

    Preventing Falls From Roofs Without Breaking the Bank

    Look, I get it. When you’re trying to squeeze every bit of efficiency out of your system, the last thing you want to do is drop a hundred bucks on professional-grade scaffolding. But after growing up in drafty rentals, I’ve learned that cutting corners to save money usually ends up costing you way more in the long run—especially if you’re dealing with gravity. If you aren’t comfortable on a ladder, don’t pretend you are. Preventing falls from roofs starts with being honest about your own limits. If your roof pitch is steep or your ladder feels sketchy, it’s cheaper to hire a pro than to pay a deductible.

    If you do decide to DIY, please don’t just wing it. Invest in a decent harness or at least some high-traction footwear; your grip is your only lifeline up there. I always tell my clients that proper working at heights protocols aren’t just for industrial sites—they’re for anyone standing on a slope. You don’t need a massive budget, but you do need a solid plan and the right gear to make sure you actually make it back down to the ground in one piece.

    Smart Solar Panel Cleaning Equipment Safety for Homeowners

    If you aren’t climbing up there yourself, you’re already winning. The smartest way to approach solar panel cleaning equipment safety is to invest in tools that keep your feet firmly on the ground. I’m a big fan of telescopic water-fed poles. They allow you to reach the center of your array from the safety of a ladder or even the driveway. It’s much better to spend a little extra on a high-quality, lightweight pole than to deal with the consequences of a slip.

    When you are choosing your gear, keep in mind that you aren’t just dealing with dirt; you’re dealing with a live system. Even though the panels are sealed, you need to be mindful of handling photovoltaic electrical components correctly. Never use metal brushes or abrasive tools that could scratch the glass or compromise the protective coating. I always check my gear for any signs of wear before I start. Using soft, non-conductive materials is a simple way to ensure you aren’t accidentally creating a path for a surge or a short while you’re trying to boost your efficiency.

    5 Ways to Keep Your Skin (and Your Roof) Intact While You Clean

    5 Ways to Keep Your Skin (and Your Roof) Intact While You Clean
    • Watch out for the “silent” danger of electrical shock; even if your panels look fine, never use a metal-bodied brush or any conductive tools near the mounting hardware, especially if the surface is wet.
    • Check the weather forecast like a hawk—if there’s even a slight chance of rain or high winds, scrap the plan for today because a slippery roof combined with a sudden gust is a recipe for a disaster I don’t want to see.
    • Don’t go it alone; if you’re planning on getting more than a few feet up, grab a friend to act as a spotter or at least someone to keep an eye on you from the ground—it’s much better to have an extra set of eyes than to be stuck in a bad spot by yourself.
    • Test your ladder before you commit to a climb; I always check for cracks or loose rungs first, because a ladder that feels “mostly fine” is usually the one that fails right when you’re mid-ascent.
    • Keep an eye on your physical limits and don’t push through the heat; cleaning panels is surprisingly draining work, and if you start feeling dizzy or overheated, get down immediately—no amount of efficiency gains is worth a heatstroke.

    The Bottom Line: Clean Panels, Zero Accidents

    Prioritize your physical safety over a slightly higher energy yield; no amount of extra sunlight is worth a fall from a roof.

    Invest in the right tools—like telescopic poles or long-reach brushes—so you can clean from the ground and keep your feet on solid footing.

    Treat solar maintenance like any other home project: do your research, check the weather, and never cut corners on safety gear just to save a few minutes.

    The Real Cost of a Shortcut

    “I’ve seen people try to save twenty bucks by skipping a proper ladder or a safety harness, but no amount of energy savings is worth a trip to the ER. In this game, the smartest way to manage your solar investment is making sure you’re actually around to see the ROI.”

    Tobias Nkemdirim

    Bottom Line: Safety First, Savings Second

    Bottom Line: Safety First, Savings Second.

    At the end of the day, keeping your solar panels clean is one of the smartest moves you can make to keep your energy bills from spiking, but it shouldn’t come at the cost of your physical well-being. We’ve covered how to avoid those dangerous rooftop climbs by using the right extension poles, why you need to double-check your gear, and how to avoid the temptation of “quick and dirty” methods that end in a trip to the ER. Remember, the goal is a high-performing system, not a high-risk afternoon. Always prioritize your stability over a slightly faster cleaning time, and make sure you have the right tools for the job before you even step near a ladder.

    I know the drive to be more sustainable can feel overwhelming, especially when you’re trying to balance a tight budget with the desire to do right by the planet. But true sustainability isn’t just about carbon footprints; it’s about creating a lifestyle that is manageable and safe for the long haul. You don’t need a professional crew to make a difference, but you do need to be smart about how you maintain your setup. Take it slow, use the data from your monitoring apps to see if cleaning is actually necessary, and protect your most valuable asset: yourself. Keep those panels shining, but keep your feet firmly on the ground.

    Frequently Asked Questions

    Is it actually worth the risk of climbing up there myself, or should I just hire a pro and call it a day?

    Look, I get the urge to DIY to save a few bucks—I’ve been there. But honestly? If your roof is steep, high, or if you’re uncomfortable with heights, just hire a pro. The cost of a professional cleaning is a lot less than an ER visit or a broken ladder. If you’re just doing a quick, low-stakes rinse on a single-story flat roof with the right gear, go for it. Otherwise, let the experts handle the climb.

    How do I know if my roof is too steep or slippery to handle cleaning without a professional harness?

    Look, if you have to ask, you’re probably already playing with fire. Grab your infrared thermometer—or better yet, just look up. If your roof pitch is over 4:12 (about 18 degrees) or if you see even a hint of moss, lichen, or loose slate, stop right there. If you can’t walk comfortably on a flat surface without feeling like you’re on ice, it’s too slippery. Don’t gamble your safety; call a pro.

    Can I just use my garden hose and a soft brush, or am I going to accidentally damage the panels or cause an electrical issue?

    You can use a garden hose, but don’t just blast them with high pressure—you’ll end up with micro-cracks in the cells that are a nightmare to fix. A soft brush is fine, but avoid anything abrasive that could scratch the anti-reflective coating. Most importantly, never clean them while they’re hot from the sun; the thermal shock from cold water can actually crack the glass. Stick to early morning or late evening to play it safe.

  • A Guide to Cleaning Solar Panels Safely

    A Guide to Cleaning Solar Panels Safely

    I was standing on my client’s driveway last Tuesday, pointing my infrared thermometer at a rooftop array, when I realized just how much money was literally evaporating into thin air. The panels looked fine from the ground, but the thermal readings told a different story: a thick, invisible layer of grime was choking their output. Most people think you need some expensive, high-tech service to maintain their setup, but that’s a myth that keeps your utility bills unnecessarily high. In reality, a solid solar panel cleaning guide shouldn’t cost you a fortune; it just requires a bit of strategy and the right tools to make sure you aren’t throwing money away every time the sun comes out.

    I’m not here to sell you on fancy gadgets or complicated maintenance schedules that eat up your weekend. Instead, I’m going to walk you through a practical, no-nonsense approach to keeping your system running at peak efficiency without breaking the bank. We’ll cover everything from the safest cleaning solutions to the exact timing you need to avoid damaging your cells. My goal is to give you a straightforward roadmap so you can stop wasting energy and start actually seeing the savings you were promised when you went solar.

    Table of Contents

    Guide Overview

    Total Time: 1-2 hours
    Estimated Cost: $20-60
    Difficulty: Beginner

    Tools & Supplies

    • Soft-bristle brush or squeegee for debris removal
    • Garden hose with spray nozzle for rinsing
    • Telescopic pole for reaching rooftop panels
    • Deionized or distilled water (optional for spot prevention)
    • Mild, non-abrasive soap (1 small bottle)
    • Microfiber cloths (2-3 cloths)

    Step-by-Step Instructions

    • 1. First, grab your gear and check the weather. You want to do this on a cool, overcast morning or late in the evening. If you try to clean your panels while the sun is beating down, the water will evaporate almost instantly, leaving behind streaks of mineral deposits that actually block more light.
    • 2. Before you even touch the glass, give them a quick rinse with a garden hose. This isn’t about deep cleaning yet; it’s about loosening the heavy grit, bird droppings, and dried leaves. If you start scrubbing immediately without this step, you’ll likely end up scratching the surface with the very dirt you’re trying to remove.
    • 3. Fill up a bucket with lukewarm water and add a tiny bit of mild, biodegradable soap. Avoid anything harsh like dish detergents with heavy degreasers or abrasive cleaners; these can leave a filmy residue on the panels that actually attracts more dust in the long run.
    • 4. Use a soft-bristled brush or a squeegee designed specifically for solar panels. I always tell my clients to avoid using anything abrasive, like a kitchen sponge, because even micro-scratches can reduce the efficiency of your cells over time. Work in gentle, circular motions to dislodge the stubborn grime.
    • 5. If you’re dealing with particularly nasty spots—like dried bird lime—don’t reach for the chemicals. Instead, let the soapy water sit on the spot for a minute to soften the mess before you gently scrub. It’s much more effective than trying to force it off with sheer pressure.
    • 6. Once you’ve finished scrubbing, do a final rinse with clean water. Make sure you rinse from the top down to ensure all the soap suds are completely gone. You want to see a crystal-clear surface once the water clears, otherwise, you’re just setting yourself up for a new layer of buildup.
    • 7. Finally, take a quick look at your monitoring app or your meter. A clean panel should show an immediate uptick in output. If you don’t see a bump in your production numbers, you might have a deeper issue, or perhaps there’s still a layer of film preventing the light from hitting those cells properly.

    Mastering Solar Panel Efficiency Maintenance Without Breaking the Bank

    Mastering Solar Panel Efficiency Maintenance Without Breaking the Bank

    Look, you don’t need to hire a professional crew every month to keep your setup running well. Most people think they need expensive, specialized gear, but effective solar panel efficiency maintenance is actually quite low-tech if you’re smart about it. The biggest mistake I see is people scrubbing too hard or using abrasive sponges. You have to be careful about preventing micro-cracks during cleaning; those tiny fractures are invisible to the eye but can absolutely wreck your energy output over time. Stick to soft brushes or even just a microfiber cloth to avoid any structural damage.

    Timing is also everything. I always tell my clients that the best time of day to clean solar panels is early morning or late evening when the glass isn’t baking in the sun. If you spray cold water onto a scorching hot panel, you risk thermal shock, which is a nightmare for the cells. Also, if you’re dealing with stubborn spots like removing bird droppings from solar panels, don’t just scrape at them. Let some water soak the mess first to soften it up, then gently rinse it away. It’s about being methodical, not forceful.

    The Best Time of Day to Clean Solar Panels Safely

    The Best Time of Day to Clean Solar Panels Safely

    Timing is everything here, and it’s not just about your schedule—it’s about physics. I always tell my clients to avoid cleaning during the peak heat of the day. If you spray cold water onto glass that’s been baking under the midday sun, you risk thermal shock. This can lead to structural damage, and preventing micro-cracks during cleaning should be at the top of your priority list if you want these panels to last decades.

    The sweet spot is usually early morning or late evening when the panels are cool to the touch. Not only is this safer for the hardware, but it also gives you a better window to work without getting heat exhaustion yourself. When you’re using different solar panel rinse methods, doing it during these cooler hours ensures the water doesn’t evaporate instantly, which helps you avoid those annoying, streaky mineral deposits left behind by hard water. Stick to the twilight hours; your panels (and your wallet) will thank you for the extra care.

    5 Pro-Tips to Keep Your Efficiency High and Your Costs Low

    • Ditch the harsh chemicals; a simple solution of water and a tiny bit of mild soap is all you need to avoid leaving a residue that actually attracts more dust later.
    • Never use a pressure washer unless you want to crack a cell; the force is way too intense for the glass and can cause micro-fractures that kill your output.
    • Watch out for hard water spots; if your tap water is heavy on minerals, use distilled water for the final rinse so you aren’t leaving behind a film that blocks the sun.
    • Use soft-bristled tools like a squeegee or a microfiber cloth to prevent scratching the anti-reflective coating, which is vital for catching every bit of light.
    • Don’t forget the surrounding area; trimming back overgrown branches or clearing debris from near your panels ensures they aren’t sitting in permanent shade.

    The Bottom Line: Keep Your Energy Gains from Slipping Away

    Don’t let a layer of grime or dust act like a tax on your electricity; regular cleaning is the simplest way to ensure your panels actually produce what you paid for.

    Prioritize safety and efficiency by cleaning during the cooler parts of the day to avoid thermal shock to the glass and to keep yourself from overheating.

    You don’t need expensive professional services to see results—staying on top of basic maintenance with a little water and a soft brush is enough to stop wasting money.

    ## Efficiency isn't just about the tech

    “A layer of dust might look harmless, but it’s basically a tax on your sunlight. If you aren’t keeping those panels clean, you’re paying for energy you’ve already harvested but simply aren’t letting into your home.”

    Tobias Nkemdirim

    Don't Let Your Investment Gather Dust

    Don't Let Your Investment Gather Dust.

    At the end of the day, keeping your solar setup running smoothly doesn’t require a massive budget or a professional crew. It really comes down to the basics: timing your cleaning for the cooler parts of the day to avoid thermal shock, using the right gentle tools, and staying consistent with your checks. I’ve seen too many people let a thin layer of grime or bird droppings act like a shroud over their savings, quietly dragging down their energy output day after day. By spending just a little bit of time on regular maintenance, you ensure that every ray of sunlight is actually being converted into power rather than being lost to inefficiency.

    Transitioning to solar is a huge step toward independence, but it isn’t a “set it and forget it” situation. It’s an active part of managing your home’s ecosystem. I truly believe that sustainable living is about stewardship—taking care of the tools we use to power our lives. When you take the time to clean those panels, you aren’t just cleaning glass; you are maximizing your ROI and honoring the commitment you made to the planet. Keep that infrared thermometer handy, stay observant, and remember that small, intentional actions are what ultimately drive real, long-term change.

    Frequently Asked Questions

    Is it actually worth the effort to clean them if I live in an area where it rains frequently?

    I get asked this a lot. It’s tempting to think the rain does the heavy lifting for you, but that’s a bit of a myth. Rain is great for rinsing away loose dust, but it’s terrible at removing bird droppings, pollen, or that stubborn, sticky grime that builds up over time. If those spots sit there, they create “hot spots” that kill your efficiency. A quick manual wipe ensures you aren’t leaving money on the table.

    Can I just use my garden hose, or am I going to risk damaging the cells with too much pressure?

    A garden hose is fine, but you need to be careful with the pressure. I’ve seen enough DIY jobs go wrong to know that a high-pressure nozzle can actually force water into the seals or crack the glass. Stick to a standard spray setting—nothing aggressive. If you can’t clean it with a gentle flow, you’re using too much force. Keep it low-pressure, keep it steady, and you won’t risk damaging the cells.

    How often should I actually be checking my output to know if they're dirty enough to warrant a cleaning?

    I don’t like guessing, so I usually check my monitoring app once a month. If you see a steady, gradual dip in your daily kilowatt-hour production that doesn’t align with the weather, that’s your red flag. Don’t wait for a massive drop; if your output looks sluggish on a clear, sunny day, your panels are likely choking on dust or grime. Catch it early before that efficiency loss starts eating your budget.

  • Managing Shade on Your Solar Panels

    Managing Shade on Your Solar Panels

    I was auditing a small bungalow last month, and the homeowner was genuinely devastated because their electricity bills were creeping up despite having a brand-new solar setup. I pulled out my infrared thermometer, scanned the roof, and there it was: a single, overgrown oak tree casting a shadow right across the center of the array. It’s one of those things people overlook, thinking a little shade won’t matter, but it’s actually a massive energy killer. Most experts will try to sell you on incredibly expensive micro-inverter upgrades or complex rerouting, but honestly, most solar panel shading solutions don’t need to break the bank to actually work.

    I’m not here to pitch you some high-tech, overpriced gadget that promises the moon. My goal is to give you the straightforward truth about how to manage shade without draining your savings. I’ve spent enough time looking at energy data to know which fixes are worth your time and which ones are just marketing fluff. We’re going to look at practical, low-cost ways to reclaim your power production, from simple landscaping tweaks to smarter hardware choices, so you can finally stop wasting energy and start seeing the returns you were promised.

    Table of Contents

    Mitigating Solar Shade Impact Without Breaking the Bank

    Mitigating Solar Shade Impact Without Breaking the Bank

    You don’t need to tear down a whole tree or redesign your entire roof to deal with shadows. If you’re dealing with a bit of partial shade solar panel efficiency loss, the first thing I do during an audit is look at your hardware. Most modern setups use modules with bypass diodes in solar modules, which are essentially tiny internal rerouting systems. When a shadow hits one part of a panel, these diodes allow the electricity to flow around the shaded cell rather than choking the entire string. It’s a built-in safety net, but it’s not a magic fix for heavy shade.

    For a more hands-on approach, I always suggest looking into microinverters or power optimizers. Instead of your whole system performing like the weakest link in a chain, these devices let each panel act independently. It’s a much more effective way of optimizing solar energy yield when you can’t control exactly where the shadows fall. It might cost a bit more upfront than a standard string inverter, but when you calculate the long-term savings on your utility bills, the math usually makes sense.

    Optimizing Solar Energy Yield Even When Trees Grow Tall

    Optimizing solar energy yield even when trees grow tall.

    It’s a common frustration: you install a beautiful system, and two years later, the oak tree in your backyard has grown just enough to cast a shadow right across your array. You don’t necessarily need to go out there with a chainsaw, though. Instead, focus on optimizing solar energy yield through smarter hardware choices. If you’re still in the planning phase or looking to upgrade, look into modules equipped with bypass diodes in solar modules. These little components act like internal circuit breakers; they allow the current to skip over the shaded cells rather than letting the entire string’s performance tank because of one dark spot.

    If you’re dealing with a fixed setup, your best bet is a bit of strategic planning. Sometimes, a slight shift in your solar array layout optimization can make a massive difference. By reconfiguring how your panels are wired—perhaps moving from a single long string to multiple smaller parallel strings—you prevent one shaded panel from dragging down the output of the entire system. It’s about working with the environment you have, rather than fighting a losing battle against nature.

    Quick Wins to Keep the Shade from Killing Your ROI

    • Get a professional trim on those overgrown branches. It’s much cheaper to pay a gardener once a year than to lose 20% of your daily energy yield because a rogue oak limb is creeping over your array.
    • Switch to microinverters or power optimizers if you haven’t already. In a traditional string inverter setup, one shaded panel can drag down the performance of the entire row; these tools isolate the problem so the rest of your system keeps pumping out power.
    • Map your shade patterns throughout the day. Use a simple app or just observe your yard to see exactly when the shadows hit. Knowing your “dead zones” helps you decide if you need to reposition a panel or just accept a temporary dip in production.
    • Install a solar tracker if you have the space and a bit of extra budget. While they’re more complex, they can tilt your panels to follow the sun, helping to mitigate some of the efficiency losses caused by fixed-position shading.
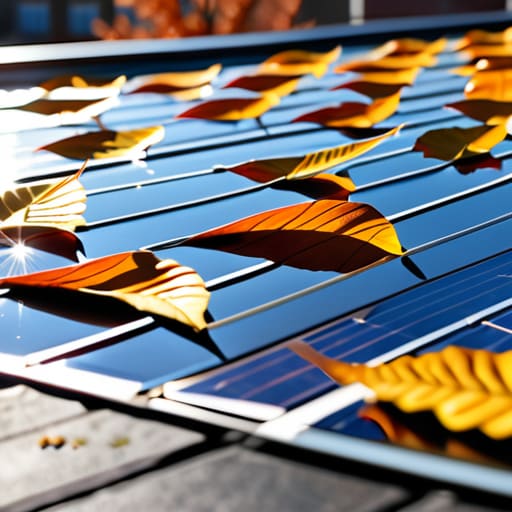
    • Keep your panels clean of debris. Sometimes what looks like shade is actually just a buildup of leaves, twigs, or bird droppings caught in the shadow of a nearby structure. A quick rinse can often restore that lost connection to the sun.

    The Bottom Line on Managing Shade

    You don’t need to tear down every tree in your yard; sometimes a strategic prune is all it takes to stop a shadow from killing your system’s efficiency.

    Prioritize low-cost fixes like micro-inverters or optimizers if your shading is unavoidable, as they prevent one shaded panel from dragging down your entire array.

    Think long-term—always account for how much a nearby tree will grow in five years so you aren’t paying for solar capacity that ends up being uselessly covered in shade.

    ## The Reality of the Shade

    “I’ve spent too many hours looking at thermal maps to ignore the truth: a single shadow from a poorly timed tree branch isn’t just a nuisance, it’s a leak in your wallet. You don’t need a total system overhaul to fix it, though—you just need to stop letting shade dictate your energy independence.”

    Tobias Nkemdirim

    The Bottom Line on Shade

    The Bottom Line on Shade for solar.

    At the end of the day, shade doesn’t have to be a dealbreaker for your solar setup. We’ve looked at how everything from strategic tree pruning to installing micro-inverters can make a massive difference in how much juice you actually pull from the sun. You don’t need to tear down the whole backyard or replace your entire array to see results. It’s about being smart with your placement and using the right tech to bypass those localized drops in efficiency. Whether you’re trimming a rogue branch or upgrading your hardware, the goal is simple: stop letting wasted sunlight turn into wasted money.

    Transitioning to renewable energy can feel overwhelming, especially when you’re trying to balance a budget and a growing family. But remember, sustainability isn’t about perfection; it’s about making the most of what you have. Every watt you save from being blocked by a shadow is a win for both your bank account and the planet. Don’t let a few trees or a poorly placed roofline discourage you from making the switch. If you take these small, calculated steps, you’ll find that living sustainably is actually achievable without needing a massive windfall. Just keep optimizing, keep auditing, and keep pushing for a more efficient home.

    Frequently Asked Questions

    If one panel in my array gets shaded, does it tank the performance of the entire system?

    The short answer? It depends on your setup, but it can definitely tank your numbers. In older “string” systems, the panels are linked like old Christmas lights; if one gets shaded, the whole string’s output drops to match that weakest link. It’s frustratingly inefficient. However, if you have microinverters or power optimizers, the impact is localized. One shaded panel won’t drag the others down, which is why I always check your hardware before suggesting a fix.

    Is it actually worth the cost of hiring a professional to prune my trees, or can I just DIY the trimming myself?

    Look, I’m all for the DIY ethos—I spend half my time tinkering with old tech—but when it comes to trees overhanging your panels, I’d suggest hiring a pro. It’s a balance of risk versus reward. If it’s just a few low branches, grab the shears. But if you’re looking up at heavy limbs near high-voltage lines, the risk of damage (to your roof or your safety) isn’t worth the savings. Do it right once.

    How much of a difference will a small amount of shade actually make on my monthly electricity bill?

    It’s easy to underestimate, but even a little shade can hit your wallet harder than you’d think. Solar panels are like a chain; if one link is weak, the whole system struggles. A single branch casting a shadow during peak sun hours can drop your output by 10% to 30% depending on your setup. That’s not just a minor dip—that’s a direct increase in your monthly utility bill.

  • What to Expect During Solar Installation

    What to Expect During Solar Installation

    I remember sitting in my old rental apartment, shivering under three blankets while staring at a utility bill that felt like a personal attack. Back then, I thought going solar was some elite luxury reserved for people with massive estates and endless budgets. Most people will tell you that the solar panel installation process is this high-tech, intimidating mountain of paperwork and massive upfront costs that you just can’t afford. They make it sound like you need a degree in engineering just to get started, but honestly? That’s just marketing noise designed to keep you paying your grid provider forever.

    I’m not here to sell you on a lifestyle you can’t afford or drown you in technical jargon. Instead, I want to walk you through the actual, boots-on-the-ground reality of how this works. I’ll break down the solar panel installation process into manageable, logical steps so you can see exactly where your money goes and how to avoid the common pitfalls. My goal is to give you the straightforward truth about what to expect, from the initial site audit to the moment you finally flip the switch, without any of the typical industry hype.

    Table of Contents

    Smart Choices Essential Solar Energy System Components

    Smart Choices Essential Solar Energy System Components

    When you’re looking at a quote for a new setup, don’t let the jargon trip you up. At its core, a functional photovoltaic system setup relies on a few heavy hitters working in harmony. First, you have the panels themselves, which obviously catch the light, but the real magic happens with the solar inverter configuration. The inverter is the brain of the operation; it takes that raw DC power from your roof and converts it into the AC electricity your fridge and laptop actually use. If you skimp on the inverter quality, you’re essentially bottlenecking your entire system’s potential.

    Next, let’s talk about the stuff that usually gets ignored until something breaks: the solar mounting hardware. I’ve seen too many cheap installs where the brackets weren’t rated for local wind loads, which is a massive headache waiting to happen. You need hardware that is built to last as long as the panels themselves. Finally, keep an eye on your net metering interconnection setup. This is what allows you to actually get credit for the extra power you send back to the grid, turning your roof into a genuine little revenue stream rather than just a decorative feature.

    The Solar Installer Checklist for Budget Conscious Homes

    The Solar Installer Checklist for Budget Conscious Homes

    When you start vetting companies, don’t just go with the first quote that lands in your inbox. I’ve seen too many people get burned by “low-cost” providers who cut corners on the actual hardware. My personal solar installer checklist always starts with the technical specifics: ask them exactly what kind of solar mounting hardware they use and if it’s rated for your specific roof type and local wind loads. You don’t want to realize six months later that your panels are rattling because they used cheap brackets to save a few bucks.

    Beyond the physical gear, you need to grill them on the logistics of the photovoltaic system setup. A pro should be able to explain how they handle the net metering interconnection with your local utility provider without you having to chase them down for paperwork. If they can’t give you a straight answer about how your excess energy actually turns into credits on your bill, walk away. You aren’t just buying hardware; you’re investing in a long-term financial tool, and you need to make sure the person installing it actually understands the math.

    5 Reality Checks Before You Sign the Contract

    • Don’t just look at the sticker price; calculate your payback period. I always look at how many years it’ll take for the energy savings to actually cover the initial cost of the installation. If it’s longer than a decade, you might want to rethink the math.
    • Get a professional shading analysis done. I’ve seen too many people install panels only to realize a neighbor’s oak tree or a chimney is killing their efficiency. If you don’t account for shade, your ROI is going to tank.
    • Check your roof’s health before the crew arrives. There is zero point in installing a high-tech solar array if your shingles are about to fail in two years. It’s much cheaper to fix the roof now than to pay a crew to tear up your new solar setup later.
    • Prioritize the inverter quality. Everyone obsesses over the panels, but the inverter is the brain of the whole system. A cheap, low-quality inverter is a recipe for a headache and a system that stops working right when you need it most.
    • Verify the permit and interconnection paperwork. It sounds dry, but if your installer isn’t handling the local utility paperwork properly, you could be stuck with a beautiful system that isn’t legally allowed to feed power back into the grid.

    The Bottom Line on Going Solar

    The Bottom Line on Going Solar.

    Don’t let the upfront cost scare you; focus on the long-term math and look for ways to make the system pay for itself through lower monthly bills.

    Quality matters more than a low quote—skimping on components like the inverter or panels will just lead to more expensive repairs and wasted energy later.

    Solar isn’t a “set it and forget it” miracle; you need to vet your installer thoroughly to ensure they aren’t just selling you a shiny product, but a system that actually fits your home’s specific energy needs.

    ## The Real Cost of Cutting Corners

    “People get so caught up in the upfront price tag of solar panels that they forget the real cost is in a bad installation; if you don’t get the setup right from day one, you aren’t investing in energy independence, you’re just paying for a very expensive way to leak power.”

    Tobias Nkemdirim

    The Bottom Line on Going Solar

    At the end of the day, getting solar installed isn’t just about checking off a list of components or finding the cheapest contractor. It’s about understanding how the pieces—from the panels themselves to the inverter and the mounting hardware—work together to stop your money from leaking out of your roof. I know the technical jargon can feel overwhelming, but if you stick to the checklist and focus on quality over the lowest bid, you’ll avoid the expensive mistakes that plague so many first-time adopters. It’s a process that requires some upfront legwork, but once you’ve audited your needs and vetted your installer, you’re essentially future-proofing your home’s finances.

    I still remember those freezing winters in my old rental, feeling like I was throwing cash into a furnace just to stay warm. Switching to solar changed that perspective for me; it turned my home from a passive consumer into an active producer. You don’t need a massive inheritance to make this move, and you definitely don’t need to be an engineer. You just need the willingness to take that first step toward energy independence. Stop letting your utility company dictate your monthly budget and start taking control of your own power. It’s one of the most practical things you can do for both your wallet and the planet.

    Frequently Asked Questions

    How long will it actually take from the day I sign the contract until I see my first drop in my electricity bill?

    Realistically? You’re looking at a gap of anywhere from two to six months. The actual installation usually takes just a couple of days, but the paperwork—permits, utility inspections, and grid connection approvals—is where the lag happens. Even once the panels are live, your utility company might not update your billing cycle immediately. Don’t panic if your first bill looks high; just track your meter closely to see the real-time difference.

    Do I need to upgrade my home's electrical panel before the solar panels can even be hooked up?

    It’s a common question, and honestly, it’s one of those “hidden” costs that catches people off guard. The short answer? Maybe. I usually pull out my thermometer to check for heat leaks, but for this, I look at your load capacity. If your current panel is old or already maxed out by heavy appliances, it won’t handle the extra input from solar. You don’t want to strain your system; an upgrade ensures everything runs safely and efficiently.

    What happens to my solar setup if I decide to rent my home or move to a different place in a few years?

    Look, I get the hesitation. I spent years in rentals where I couldn’t touch the thermostat, so I know the “what if I move?” anxiety is real. If you own the home, the solar system is a massive asset that usually boosts your property value. If you’re renting, you’re stuck—unless you look into portable setups or community solar. Treat your solar investment like a home upgrade, not just a gadget; it stays with the house.

  • How Often Should You Clean Solar Panels

    How Often Should You Clean Solar Panels

    I was auditing a client’s small bungalow last Tuesday when I pulled out my infrared thermometer and realized their output was tanking, not because of a faulty inverter, but because of a thick, stubborn layer of grime. It’s frustrating how many “experts” try to sell you expensive, monthly professional washing services like it’s some mandatory subscription. The truth is, there is no one-size-fits-all answer to solar panel cleaning frequency, and following a rigid, pre-set schedule is often just a way to drain your bank account for no reason.

    I’m not here to sell you a cleaning kit or a service contract; I’m here to help you reclaim your margins. In this guide, I’m stripping away the marketing fluff to give you a practical, data-driven approach to knowing exactly when your panels need attention. You’ll learn how to monitor your own system’s performance and determine the ideal solar panel cleaning frequency based on your specific environment. My goal is to make sure you’re getting every single watt you paid for without wasting a dime on unnecessary maintenance.

    Table of Contents

    The Hidden Cost of Photovoltaic Cell Debris Removal

    The Hidden Cost of Photovoltaic Cell Debris Removal

    When I’m out on a site audit, I often see people treating solar panels like they’re “set it and forget it” appliances. That’s a mistake. The real issue isn’t just the dirt you can see; it’s the cumulative solar panel efficiency loss that happens when you ignore the buildup. If you let a layer of grime settle, you aren’t just looking at a dirty roof—you’re looking at a direct hit to your ROI. Every bit of debris acts like a tiny shroud, preventing photons from actually hitting the cells, which means you’re paying for hardware that isn’t performing at its peak.

    It’s also about the specific types of mess. I’ve seen cases where bird droppings on solar panels caused localized “hot spots.” This isn’t just about a drop in output; it can actually cause physical damage to the cells due to uneven heating. Whether it’s fine silt from a dry summer or pollen in the spring, the impact of dust on solar output is a silent thief. You might not notice a 2% dip in your monthly generation, but over a year, those small losses add up to a significant amount of wasted money.

    How Dust on Solar Output Drains Your Wallet

    How Dust on Solar Output Drains Your Wallet

    I’ve seen this play out during my audits more times than I’d like: a homeowner is frustrated that their system isn’t hitting the promised numbers, only for me to point my infrared thermometer at a layer of grime they didn’t even notice. It’s not just about aesthetics; it’s about the math. When dust accumulates, it creates a physical barrier that prevents photons from reaching the silicon. This solar panel efficiency loss isn’t a sudden drop, but a slow, agonizing leak in your potential savings. Every millimeter of grit acts like a tiny shade, forcing your inverter to work harder for less juice.

    Think of it like trying to breathe through a thick cloth—you’re still getting air, but it’s nowhere near optimal. The impact of dust on solar output can vary wildly depending on your local environment, but the financial drain is constant. If you live in a dry, windy area, that buildup happens fast. If you ignore it, you’re essentially paying a “dirt tax” every single month through higher utility bills and diminished ROI. It’s a simple, preventable drain on your wallet.

    My Practical Checklist for Staying on Top of the Grime

    • Check your output after heavy pollen seasons; if you live near trees, that yellow dust settles like a blanket and can tank your efficiency overnight.
    • Don’t just guess—keep a simple log of your energy production versus the weather, because a sudden dip on a sunny day is a dead giveaway that your panels are dirty.
    • Use my favorite trick and grab a soft squeegee or a microfiber cloth; avoid high-pressure washers at all costs, as they can crack the glass or ruin the seals.
    • Timing is everything; always clean your panels in the early morning or late evening when they are cool to prevent the glass from thermal shock and cracking.
    • Watch out for “bird bomb” zones; if you have a lot of local wildlife, you’ll need to spot-clean those specific acidic spots immediately before they etch into the surface.

    Quick Wins for Your Solar Maintenance

    Don’t wait for a massive drop in power to act; a quick rinse every few weeks can prevent a slow, expensive leak in your energy production.

    Think of cleaning as a direct investment in your utility bills rather than a chore—less grime means more kilowatt-hours for the same amount of sunlight.

    Keep it simple and safe; you don’t need fancy equipment to stop dust from stealing your savings, just a bit of consistency and a bit of water.

    The Real Cost of Neglect

    “I’ve seen too many people treat solar panels like ‘set it and forget it’ tech, but if you’re ignoring the grime buildup, you’re basically paying a monthly tax to the dust sitting on your roof.”

    Tobias Nkemdirim

    Don't Leave Your Savings to Chance

    Don't Leave Your Savings to Chance.

    At the end of the day, keeping your solar panels clean isn’t just about aesthetics; it’s about protecting your investment and ensuring every photon counts. We’ve looked at how dust, bird droppings, and even pollen act like a physical barrier between your panels and the energy they’re meant to harvest. If you wait until the output visibly drops, you’ve likely already lost money. By establishing a consistent cleaning schedule—whether that’s a quick rinse every few months or a deep clean after a particularly dusty season—you prevent that slow, invisible drain on your wallet. It’s a small, proactive step that keeps your efficiency high and your utility costs predictably low.

    I know that managing a home can feel like a constant battle against rising costs and environmental guilt, but this is one area where you actually have total control. You don’t need a massive budget or high-tech equipment to make a difference; you just need to be observant. When we stop treating energy as an infinite, free resource and start treating it as something precious that needs to be captured correctly, everything changes. Let’s stop letting preventable grime dictate our carbon footprint. Take care of your tech, and your tech will take care of you.

    Frequently Asked Questions

    Is it actually worth the effort to clean them if I live in an area where it rains frequently?

    It’s a fair question, and honestly, it’s one I get asked a lot during audits. If you live in a rainy climate, you might think nature is doing the heavy lifting for you, but it’s rarely a perfect rinse. Rain often just moves the grime around, creating a thin, stubborn film of “mud” or pollen that actually traps more dirt. I’d still recommend a quick check every few months. Don’t let a little rain give you a false sense of security.

    Can I just use a garden hose, or am I going to risk cracking the glass or damaging the cells if I do it myself?

    Look, you can use a garden hose, but don’t just blast them blindly. The biggest risk isn’t the water; it’s thermal shock. If you spray ice-cold water on panels that have been baking in the midday sun, you could actually crack the tempered glass. Wait until the morning or evening when they’re cool. Also, skip the high-pressure nozzles—too much force can damage the seals. A gentle rinse and a soft brush are all you need.

    How do I know if the drop in my energy production is actually due to dirt or if my inverter is starting to fail?

    Before you go calling a technician and paying a hefty call-out fee, grab your phone and check your monitoring app. Look for patterns: if your output is dipping across all strings simultaneously, it’s likely just grime or shading. However, if one specific string or panel shows a sudden, sharp drop while others are fine, that’s a red flag for an inverter or wiring issue. I always check for uniform “dirt patterns” first—it’s the cheapest diagnostic tool you have.

  • Recent Developments in Solar Cell Technology

    Recent Developments in Solar Cell Technology

    I remember sitting in my old rental apartment, shivering under three blankets while staring at a utility bill that felt like a personal insult. Back then, whenever I brought up the idea of going green, people would just wave me off, claiming that solar panel technology was some luxury reserved for tech billionaires or massive estates. They made it sound like you needed a PhD and a massive inheritance just to stop bleeding money to the grid. It’s a total myth that sustainability has to be prohibitively expensive, and frankly, it’s a myth that keeps smart, budget-conscious people stuck in a cycle of wasting energy.

    I’m not here to sell you on some futuristic dream or push overpriced, flashy gadgets that won’t actually pay for themselves. Instead, I want to break down how modern solar panel technology actually works for the rest of us—the renters, the small-home owners, and the people who just want to stop overpaying for power. I’ll be sharing the raw, data-driven truth about what’s worth your investment and what’s just marketing fluff, so you can make a move that actually sticks.

    Table of Contents

    Maximizing Every Ray Through Solar Energy Conversion Efficiency

    Maximizing Every Ray Through Solar Energy Conversion Efficiency

    When I’m out on a site audit, I often see people getting caught up in the aesthetics of their setup while ignoring the actual science of what’s happening on their roof. If you want to get the most out of your investment, you need to look closely at solar energy conversion efficiency. It’s not just about how many panels you have, but how effectively those panels turn sunlight into usable electricity. We’re seeing massive leaps in photovoltaic cell advancements lately, moving away from old-school setups toward hardware that captures a much broader spectrum of light.

    I’ve been tracking how much better next-gen materials are performing compared to the tech from even five years ago. A lot of the gains come down to improvements in silicon wafer manufacturing, which allows for thinner, more efficient cells that don’t lose as much power to heat. For someone on a budget, this is the sweet spot: higher efficiency means you need fewer panels to hit your energy goals, which ultimately lowers your upfront hardware costs. It’s about making sure every single photon counts toward shrinking that monthly utility bill.

    The Truth About Next Generation Solar Cells and Your Wallet

    The Truth About Next Generation Solar Cells and Your Wallet

    Look, I get the skepticism. When I see headlines about “miracle” breakthroughs in next-generation solar cells, my first instinct is to check the price tag. Most people think high-tech means high-cost, but the reality is shifting. We’re moving past standard silicon toward things like perovskite layers, which promise much higher energy yields from the same amount of sunlight. For you, this doesn’t just mean better tech; it means getting more kilowatt-hours out of every square inch of your roof, which is the fastest way to see a return on your investment.
    The real win for your wallet, though, lies in solar panel durability and lifespan. It’s easy to get distracted by the cheapest upfront cost, but I always tell my clients to look at the long game. If a cheaper panel loses its efficiency after five years while a premium one keeps humming for twenty, the “budget” option actually becomes a massive drain on your finances. Investing in better hardware means you aren’t just buying power; you’re buying decades of predictable, low-cost energy.

    5 Ways to Get More Bang for Your Buck with Solar

    • Don’t just buy the cheapest panels you find online. Look at the efficiency rating; a panel that converts more sunlight into actual usable power means you need fewer of them to cover your load, which saves you space and installation costs in the long run.
    • Watch your shading like a hawk. Even a small branch or a chimney casting a shadow over one corner of a panel can tank the output of your entire string. I always check the sun’s path throughout the seasons before recommending a layout.
    • Invest in a decent microinverter setup rather than a single central inverter. If one panel gets covered in leaves or shaded by a cloud, the rest of your system keeps pumping out power instead of dragging the whole system down to the lowest common denominator.
    • Keep your hardware clean. It sounds basic, but a layer of dust, pollen, or bird droppings acts like a tiny, dirty blanket over your cells. A quick rinse with water every few months can actually make a measurable difference in your monthly yield.
    • Pair your solar with smart monitoring tools. You can’t fix what you aren’t measuring. Use an app that shows you real-time production so you can spot a drop in efficiency immediately—before it turns into a massive spike in your utility bill.

    The Bottom Line on Going Solar

    Efficiency matters more than raw size; choosing cells that convert more light into actual usable power is how you stop wasting space and money.

    Don’t get blinded by the “next big thing”—focus on the tech that offers the best long-term ROI for your specific energy needs rather than chasing every shiny new prototype.

    Solar isn’t just a luxury for the wealthy if you prioritize smart, data-driven upgrades that actually lower your monthly overhead.

    ## The Real Goal of Solar

    “At the end of the day, I don’t care how fancy the silicon is or how many decimal points we add to the efficiency rating; I care about whether that panel actually keeps your lights on and your bills down without draining your savings account.”

    Tobias Nkemdirim

    Making the Switch Count

    Making the Switch Count with solar energy.

    At the end of the day, moving toward solar isn’t just about chasing the latest gadget or a shiny new tech trend. We’ve looked at how much efficiency actually matters and how the next generation of solar cells can finally make high-performance energy accessible to more than just the wealthy. Whether you’re looking at high-conversion monocrystalline panels or waiting for the price of thin-film tech to drop, the goal remains the same: stop bleeding money through your roof. It’s about choosing hardware that aligns with your specific energy needs and your budget, ensuring that every photon captured actually translates into lower monthly utility bills.

    I know that looking at solar specs can feel overwhelming, especially when you’re just trying to make ends meet. But I promise you, sustainability shouldn’t be a luxury reserved for the elite. Every small step you take toward energy independence is a win for your bank account and a win for the planet. You don’t need to overhaul your entire life overnight; you just need to start making smarter, data-driven choices. Let’s stop letting energy waste be the “convenient” default and start building homes that are actually built to last. The future is efficient, and it’s more affordable than you think.

    Frequently Asked Questions

    Is it actually worth the upfront cost if I live in a place that's mostly cloudy?

    I get this question all the time, and honestly, it’s a valid concern. I’ve audited plenty of homes in gray, overcast areas where people thought solar was a lost cause. Here’s the reality: solar panels don’t need direct, blazing sunlight to work; they just need light. Even on cloudy days, photovoltaic cells still capture energy from diffused light. It might take a bit longer to hit your break-even point, but it’s still a solid investment for long-term savings.

    How much maintenance do these panels really need, or am I going to be constantly fixing them?

    Honestly, you won’t be constantly fixing them, but you can’t just “set it and forget it” either. Most modern systems are pretty low-maintenance, but dust, bird droppings, or even heavy pollen can create shade that kills your efficiency. I usually recommend a quick visual check every few months. If you live in a dusty area, a gentle rinse with water once or twice a year is plenty. Keep them clean, and they’ll do the work.

    Can I actually run my whole house on solar, or am I still going to be tied to the grid for everything?

    The short answer? Yes, you can, but it’s not as simple as just slapping panels on the roof. To truly cut the cord, you need a robust battery backup system to bridge the gap when the sun goes down. Without storage, you’re still at the mercy of the grid’s schedule. If you want total independence, you have to pair your solar setup with smart energy management and a bit of discipline.

  • How Solar Panels Withstand Extreme Weather

    How Solar Panels Withstand Extreme Weather

    I remember standing on a client’s roof last October, clicking my infrared thermometer against a solar array that looked brand new on paper but was already showing massive thermal hotspots. It’s infuriating. Most sales reps will try to sell you on “cutting-edge technology” while glossing over the reality of how these systems actually hold up against hail, heatwaves, and years of grime. They talk about theoretical lifespans, but they rarely talk about the actual solar panel durability you can expect when your hard-earned money is literally sitting on your roof. You aren’t just buying glass and silicon; you’re buying a decade or two of energy independence, and getting it wrong means you’re just subsidizing a manufacturer’s marketing budget instead of lowering your bills.

    I’m not here to give you a glossy brochure or a list of technical specs that don’t mean anything in the real world. My goal is to strip away the hype and show you exactly what to look for so you don’t end up with a system that fails just when you need it most. We’re going to look at the real-world stressors that actually break panels and how you can pick gear that stays tough without breaking your bank account.

    Table of Contents

    How Solar Panel Degradation Rates Impact Your Long Term Savings

    How Solar Panel Degradation Rates Impact Your Long Term Savings

    When I’m auditing a home, I’m not just looking at where the heat escapes; I’m looking at the math behind the investment. Most people assume their panels will pump out the same amount of juice for twenty-five years, but that’s not how physics works. You have to account for solar panel degradation rates, which is basically the slow, inevitable decline in how much electricity your system can actually pull from the sun. If you don’t factor this in, your projected savings are going to look a lot rosier on paper than they actually are in your bank account.
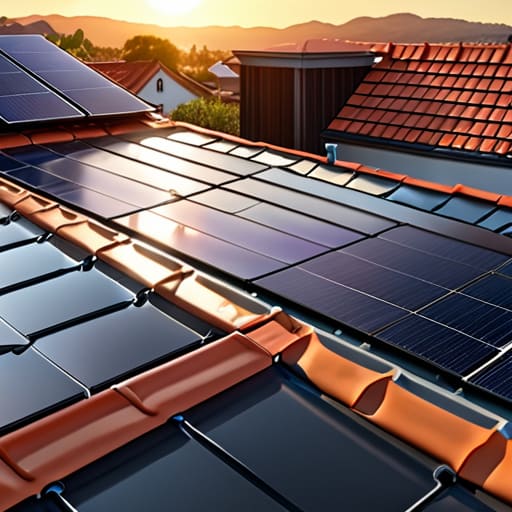
    This isn’t just about old age, though. I’ve seen how the impact of extreme temperatures can accelerate the wear and tear on a system. If you live somewhere with massive temperature swings, your panels are under constant physical stress. It’s why I always tell my clients to look closely at the photovoltaic cell longevity specs. You aren’t just buying hardware; you’re buying a predictable stream of energy. If the degradation is too steep, that “green” investment starts feeling like a drain on your finances rather than a way to save them.

    Why Photovoltaic Cell Longevity Matters for Your Monthly Bills

    Why Photovoltaic Cell Longevity Matters for Your Monthly Bills

    When I’m auditing a home, I’m not just looking at the insulation; I’m looking at the long-term math. If you’re installing solar to cut down your monthly overhead, you have to look at the photovoltaic cell longevity as the foundation of that math. It’s easy to get caught up in the upfront cost of a kit, but if those cells start losing efficiency too quickly, your “savings” are basically an illusion. You aren’t just buying hardware; you’re buying a predictable stream of energy that keeps your utility bills from spiking every summer.

    The reality is that your panels are constantly fighting a losing battle against the elements. I often see how the impact of extreme temperatures can accelerate wear and tear, especially if the modules aren’t built to handle local weather shifts. If the cells degrade faster than the manufacturer promised, you’ll find yourself back in the position of paying the utility company for power you thought you’d already covered. To make this work for your wallet, you need gear that maintains its output throughout its entire solar module lifecycle.

    5 Ways to Make Sure Your Solar Setup Doesn't Become a Paperweight

    • Don’t just chase the lowest price tag; look for panels with a high temperature coefficient. If you live somewhere where the sun actually beats down hard, cheap panels will lose efficiency the second they get hot, effectively wasting the energy you’re paying to capture.
    • Check the warranty, but look deeper than the “product” coverage. You want to see a clear degradation guarantee—meaning the manufacturer promises the panels will still produce a specific percentage of power (usually 80% or more) after 25 years. If they can’t put a number on it, walk away.
    • Keep an eye on your mounting hardware. I’ve seen too many setups where the panels are fine, but the rails and clamps are corroding or loosening. If your mounting system isn’t built for your local wind or snow loads, you’re looking at a massive repair bill down the road.
    • Set up a routine to check for micro-cracks. You don’t need a lab, but a quick visual inspection after a heavy storm or a particularly rough season can catch physical damage early. Once those cells crack, your energy output drops, and you’re essentially throwing money into the wind.
    • Invest in a quality microinverter or optimizer setup. If one panel gets shaded or damaged, a cheap string system can cause the whole array to tank. Using better tech ensures that one bad apple doesn’t ruin the efficiency of your entire investment.

    The Bottom Line on Solar Longevity

    Don’t get blinded by a low upfront price; if the panels degrade too fast, you’ll end up paying more per kilowatt-hour in the long run than if you’d just stuck with the grid.

    Check the manufacturer’s degradation rate—you want gear that stays efficient for decades, not something that starts losing its punch after just five years.

    Think of durability as an insurance policy for your wallet; high-quality, weather-resistant panels are what actually turn a sustainable choice into a genuine financial win.

    ## The Real Cost of Cheap Hardware

    “I’ve seen too many people get excited about a low upfront price tag, only to realize two years later that their ‘affordable’ system is already losing its edge. If your panels can’t survive a decade of heavy weather without their efficiency tanking, you aren’t saving money—you’re just subsidizing a waste of energy.”

    Tobias Nkemdirim

    Making the Call on Longevity

    Making the Call on Longevity with solar.

    At the end of the day, choosing solar isn’t just about the upfront cost or how sleek the panels look on your roof. It’s about the math. We’ve looked at how degradation rates can quietly eat away at your savings and why the physical longevity of your cells is the only way to ensure your monthly utility bills actually stay low. If you invest in gear that can’t handle the weather or loses efficiency too fast, you aren’t just wasting sunlight; you’re wasting your hard-earned money. You need to prioritize quality over quick wins to make sure your system is still working hard for you a decade from now.

    I know that transitioning to renewable energy can feel like a massive, intimidating leap, especially when you’re trying to balance a budget. But remember, sustainability shouldn’t be a luxury reserved for the wealthy. By focusing on durability and smart, long-term planning, you’re doing more than just cutting a bill; you’re building a home that is resilient and efficient. Don’t settle for the cheapest option just because it’s convenient. Invest in something that lasts, because true energy independence is built on the foundation of equipment that refuses to quit.

    Frequently Asked Questions

    How can I tell if my panels are actually degrading just by looking at them, or do I need professional gear to spot the drop in efficiency?

    Look, you can spot some obvious red flags with your own eyes—like visible cracks in the glass, discoloration (that weird brownish tint), or even bird droppings caked on. But honestly? You can’t “see” efficiency dropping. A panel can look perfectly fine while quietly underperforming. If your bills are creeping up despite sunny days, that’s when you need a pro with a multimeter or thermal camera to see what’s actually happening under the hood.

    Is it worth paying the extra upfront for high-end panels, or will the cheaper ones eventually pay for themselves through better durability?

    Look, I get the temptation to go cheap, but I’ve seen too many people get burned by “budget” setups that die right when they start paying off. If you buy low-tier panels, you’re essentially betting that they’ll outlast your mortgage. I usually tell my clients: pay the premium for high-efficiency, durable gear. It’s not about being fancy; it’s about ensuring those panels actually keep delivering power ten years from now instead of becoming expensive roof scrap.

    What kind of weather or environmental stuff in my specific area is actually going to kill my panels faster?

    It really depends on where you’re living, but I always look for the “silent killers.” If you’re in a coastal area, salt spray is a nightmare—it eats away at the frame and connections. In high-heat zones, extreme temperature swings cause thermal expansion that cracks cells over time. Also, don’t overlook heavy hail or even intense wind; if your mounting isn’t solid, the environment will find a way to shake your investment loose.

  • Understanding Solar Panel Warranty Terms

    Understanding Solar Panel Warranty Terms

    I was auditing a client’s small cottage last month when I saw it: a beautiful, high-end solar array that was effectively dead in the water because of a single cracked cell. When they called the manufacturer, they were met with a mountain of fine print that basically turned their solar panel warranty into a useless piece of paper. It’s infuriating. We’re told that going solar is this ultimate path to energy independence, but too many companies hide behind predatory legal jargon that leaves you footing the bill for their faulty hardware.

    I’m not here to sell you on the “dream” of endless free energy; I’m here to make sure you don’t get ripped off while trying to build it. In this guide, I’m stripping away the marketing fluff to show you exactly what a real, functional warranty looks like. We’ll look at the math behind the coverage and identify the red flags that mean a company is just protecting their bottom line instead of yours. My goal is simple: to help you choose gear that actually keeps your bills low for the long haul.

    Table of Contents

    Decoding the Fine Print Product vs Performance Warranty Explained

    Decoding the Fine Print Product vs Performance Warranty Explained

    Here is where most people get tripped up. When you’re looking at a quote, you’ll see two very different numbers, and if you don’t distinguish between them, you might end up with a system that technically “works” but performs like a relic. First, you have the product warranty, which is basically your safety net against manufacturing defects. If a panel arrives with a cracked cell or a faulty internal connection, this is what covers the cost of the hardware itself. It’s about the physical integrity of the unit.

    The second part is the performance warranty, which is arguably more important for your long-term wallet. This isn’t about whether the panel is broken; it’s about how much juice it actually produces over time. All panels experience solar panel degradation rates—they naturally lose a tiny bit of efficiency every year. A good performance guarantee ensures that even after twenty years, your system is still pumping out a significant percentage of its original capacity. Understanding solar warranty fine print means realizing that a high product warranty is useless if the performance guarantee allows your energy output to tank after just a decade.

    Stopping the Leak Why Solar Installation Workmanship Warranty Matters

    Stopping the Leak Why Solar Installation Workmanship Warranty Matters

    Most people get so caught up in the specs of the panels themselves that they completely overlook the actual humans doing the mounting. You can buy the highest-rated hardware on the market, but if the installer leaves a gap in your flashing or fails to secure a mounting bracket properly, that expensive gear becomes a liability. A solar installation workmanship warranty is your only safety net against human error. It’s the difference between a system that sits tight for twenty years and one that starts leaking water into your attic after the first heavy storm.

    I’ve seen too many homeowners realize this only after they’re staring at a water stain on their ceiling. While you’re busy understanding solar warranty fine print regarding how much power the cells will produce, don’t forget to check who is on the hook if the roof penetrations fail. A solid workmanship guarantee ensures that if the installation itself is flawed, the contractor—not your bank account—is responsible for the fix. It’s about protecting the integrity of your home, not just the efficiency of your energy production.

    Don't Get Burned: 5 Ways to Make Sure Your Warranty Actually Works

    • Check the “pro-rata” clause. Some companies promise a 25-year warranty, but that doesn’t mean you get a brand-new panel if yours dies in year 10; it often means they only pay you a tiny fraction of the original cost.
    • Look for a “labor warranty” that isn’t just a footnote. A panel warranty covers the hardware, but if a faulty connection causes a leak or a roof issue, you don’t want to be stuck paying a contractor hundreds just to swap the part out.
    • Verify the manufacturer’s reputation, not just the installer’s. If your local installer goes out of business in three years, you need to know that the panel manufacturer still stands behind their tech so you aren’t left with expensive glass bricks on your roof.
    • Read the “void” conditions like they’re a contract for your life. Some warranties are incredibly picky—if you have a specific type of mounting system or if a certain amount of hail hits, they might try to claim the warranty is void. Know those triggers before you sign.
    • Keep a digital folder of every single document. I’ve seen people lose thousands because they couldn’t find the specific serial number or the original installation date when they filed a claim. Don’t rely on the installer to keep your records safe.

    The Bottom Line: Don't Get Burned by the Fine Print

    Separate the gear from the work; a great panel warranty won’t save you if the installer’s workmanship warranty is non-existent.

    Look past the “25-year” headline and check the actual performance math to ensure your savings don’t evaporate as the panels age.

    Treat your warranty like an insurance policy—read the exclusion clauses now so you aren’t left footing the bill for a repair later.

    ## Don't Let the Fine Print Burn Your Budget

    “A solar warranty isn’t just a piece of paper to tuck away in a drawer; it’s your financial safety net. I’ve seen too many people get excited about low upfront costs, only to realize years later that their ‘guarantee’ doesn’t actually cover the one thing they need most: consistent, reliable power that keeps their bills down.”

    Tobias Nkemdirim

    Don't Leave Your Savings to Chance

    Don't Leave Your Savings to Chance.

    At the end of the day, getting solar isn’t just about the upfront excitement of going green; it’s a long-term financial commitment. I’ve seen too many people overlook the details, only to realize years later that their “savings” are being eaten up by repair costs that aren’t covered. Remember, you need to distinguish between the hardware itself and the person who actually installed it. A high-quality product warranty is useless if the workmanship warranty doesn’t protect you from a leaky roof or faulty wiring. Make sure you understand the difference between a panel that simply exists and a panel that actually performs at the level you were promised.
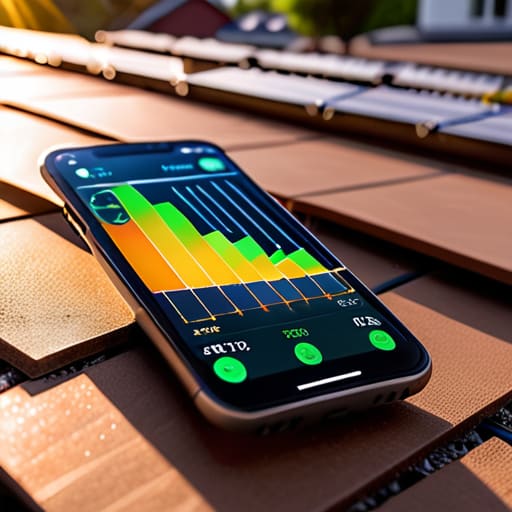
    Transitioning to renewable energy shouldn’t feel like a gamble. I know it can feel overwhelming to navigate all this technical jargon, but taking an extra hour now to scrutinize those warranty terms is what separates a smart investment from a massive headache. You are doing this to gain independence and lower your bills, not to become a full-time maintenance technician. Protect your wallet and your peace of mind by being a bit of a skeptic during the sales process. If you do the homework now, you can finally sit back, enjoy the lower utility bills, and know that your sustainable future is actually built on a solid foundation.

    Frequently Asked Questions

    If a panel stops producing as much power as promised, how do I actually prove it and trigger the warranty?

    You can’t just point at a bill and say, “It feels lower.” You need data. Start by checking your inverter’s monitoring app—most modern systems log daily kilowatt-hour production. If you see a sudden, unexplained dip that doesn’t align with cloudy weather, grab your records. I always recommend keeping a simple log of your monthly yields. Once you have that digital paper trail, you can present it to your installer to prove the performance drop and trigger that claim.

    Does the warranty cover the cost of me having to hire a technician to come out and fix it, or am I stuck paying for the labor?

    This is where most people get blindsided. In my experience auditing systems, I’ve seen plenty of “comprehensive” warranties that cover the hardware but leave you holding the bill for the guy with the ladder. Usually, the manufacturer covers the replacement panel, but the labor and the technician’s call-out fee are on you. Always check if your installer offers a separate workmanship warranty that includes labor; otherwise, a “free” part might still cost you hundreds.

    What happens to my coverage if I decide to move house or sell my place before the 25-year mark?

    This is a common concern, especially for renters or people who don’t plan on staying in one spot forever. Usually, the hardware warranty stays with the panels themselves, meaning it transfers to the new homeowner. However, the workmanship warranty is a different story—that often stays tied to the original installer and the person who signed the contract. Always check the fine print to see if the coverage is “transferable” so you don’t accidentally strip value from your home.