Category: Solar

  • Types of Solar Panel Mounting

    Types of Solar Panel Mounting

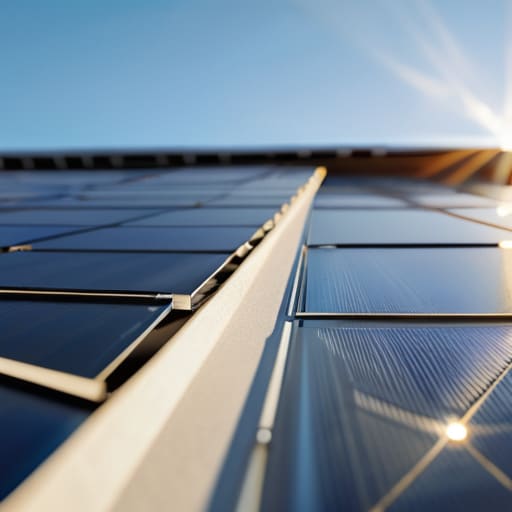
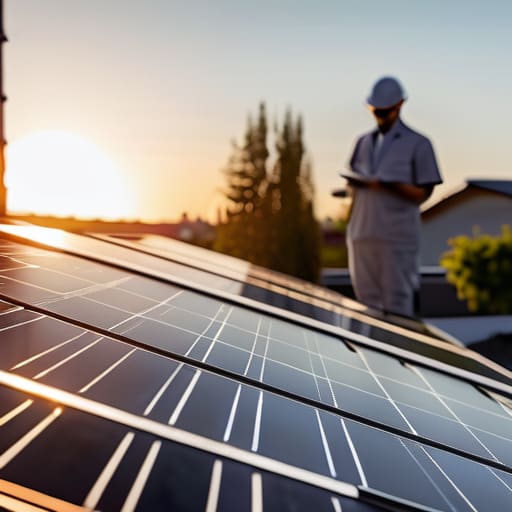
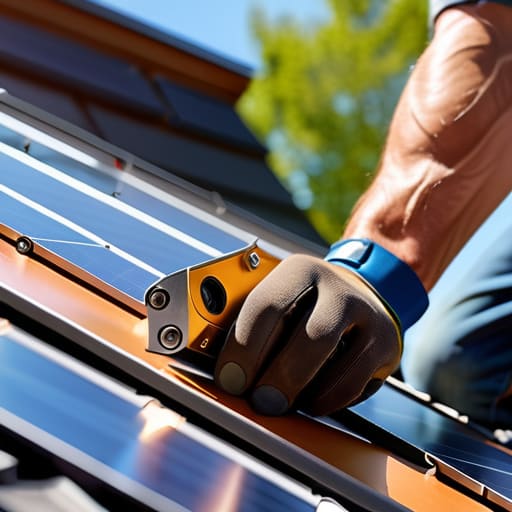
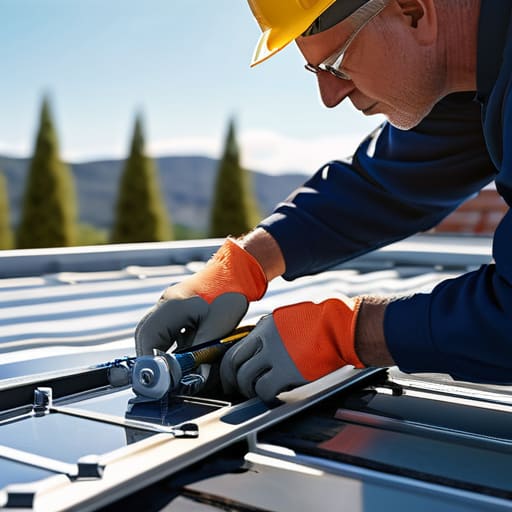
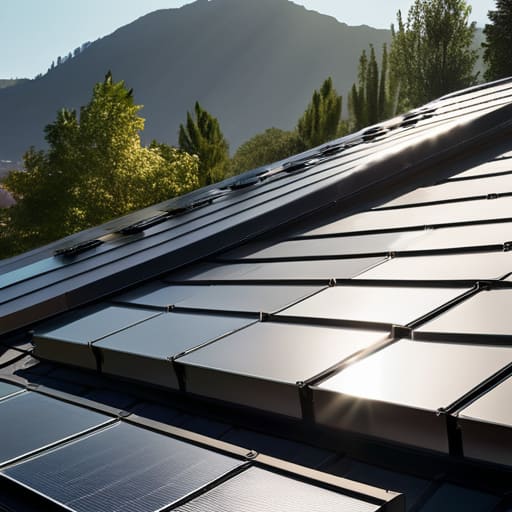
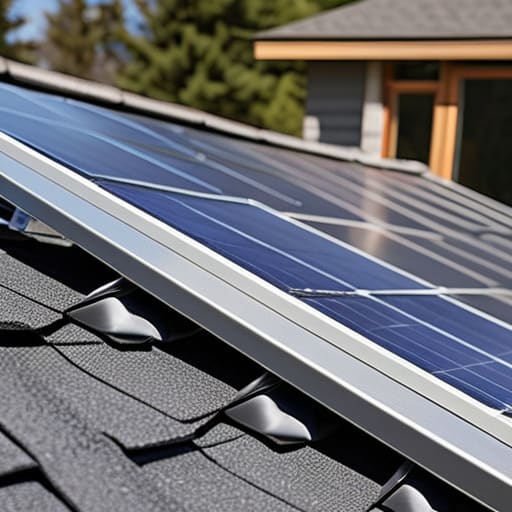
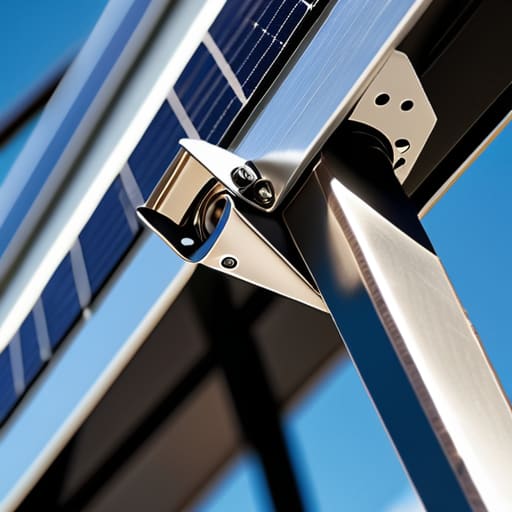
    I remember standing on a client’s roof last November, clicking my infrared thermometer against a poorly installed array, and feeling that familiar surge of frustration. The homeowner had spent a fortune on a high-end system, but because they skimped on the solar panel mounting setup, the wind was literally peeling the panels away from the structure. It’s the same old story: people get so caught up in the shiny tech and the “green” hype that they completely ignore the unsexy, structural stuff that actually keeps the system running for twenty years.

    I’m not here to sell you on some overpriced, proprietary mounting kit that promises the moon. My goal is to cut through the marketing noise and show you how to choose a setup that is actually durable without draining your savings. I’ll walk you through the real-world mechanics of different mounting styles, the common mistakes that lead to energy leaks, and how to ensure your investment stays put through every storm. Let’s get your setup right the first time so you can actually start seeing those lower utility bills.

    Table of Contents

    Mastering Roof Attachment Methods Without Breaking the Bank

    Mastering Roof Attachment Methods Without Breaking the Bank

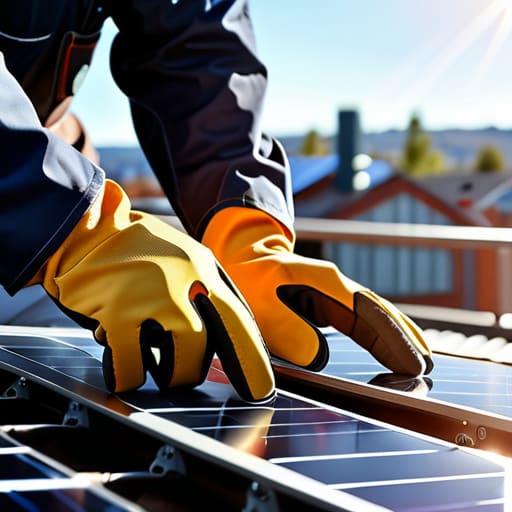
    When I’m auditing a home, I often see people getting overwhelmed by the sheer variety of roof attachment methods available. They think they need a custom-engineered, high-end setup to make it work, but that’s usually where the budget goes to die. If you’re working with standard asphalt shingles, you really just need a reliable rail system that secures firmly to your rafters. The goal is to find a balance between structural integrity and cost. You want something that handles the local solar panel wind load requirements without requiring a specialized crew that charges triple for a weekend job.

    I always tell my clients to prioritize the quality of the small stuff. It’s easy to get distracted by the panels themselves, but if you skimp on the hardware, you’re just asking for trouble down the line. Investing a little extra in corrosion resistant mounting hardware is a non-negotiable for me. It’s much cheaper to buy decent stainless steel bolts now than it is to replace a whole array because of rust streaks or hardware failure in five years. Keep it simple, keep it sturdy, and don’t overcomplicate the physics.

    Choosing Corrosion Resistant Mounting Hardware for Longevity

    Choosing Corrosion Resistant Mounting Hardware for Longevity

    If you’re anything like me, you hate the idea of buying something once only to have it fail three years later because of poor quality. When it comes to your setup, the hardware is the unsung hero. I’ve seen too many DIY installs where the brackets start pitting and rusting within a couple of seasons, which is a massive waste of both money and effort. To avoid this, you need to prioritize corrosion resistant mounting hardware, specifically looking for Grade 304 or 316 stainless steel. Anything less is just asking for trouble, especially if you live in a coastal area or a place with high humidity.

    It isn’t just about the metal itself, though; it’s about how those components interact with your specific photovoltaic mounting systems. If you’re using a ground mount, the soil chemistry can be even more aggressive toward your gear. I always tell my clients to check the spec sheets for salt spray resistance ratings. Investing a little more upfront in high-quality fasteners ensures your system stays structurally sound for decades, rather than becoming a high-maintenance headache that costs more to repair than it ever saved you in energy.

    5 Practical Ways to Get Your Mounting Right the First Time

    • Don’t just eyeball the angle; use a clinometer or a simple level to ensure your mounting system is pitched correctly for your specific latitude, or you’re just leaving free energy on the table.
    • Check your roof’s structural integrity before you even buy a single bracket; there’s no point in a high-efficiency setup if your rafters can’t handle the extra load during a heavy storm.
    • Prioritize tilt-adjustability in your mounting hardware so you can tweak the angle as the seasons change, maximizing your harvest without needing a whole new system.
    • Keep an eye on the “gap”—ensure there’s enough space between your panels and the roof surface to allow for airflow, which prevents overheating and keeps your efficiency levels from dipping.
    • Avoid the temptation of the cheapest generic clamps; invest in high-quality, rated mounting rails that won’t warp or loosen, because fixing a failed mount is way more expensive than buying the right one upfront.

    Quick Wins for Your Solar Setup

    Don’t skimp on the hardware; spending a little extra on corrosion-resistant mounts now prevents a massive, expensive repair job five years down the line.

    Match your mounting method to your specific roof type to avoid structural damage and ensure your panels actually stay secure during a storm.

    Focus on long-term efficiency over the cheapest upfront cost—the goal is to save money on your bills, not just spend less on the initial installation.

    The Real Cost of Cutting Corners

    “I’ve seen too many people treat mounting hardware like an afterthought to save a few bucks upfront, only to watch their efficiency tank when a cheap bracket fails or rusts through. If your mounting system isn’t solid, your entire investment is just sitting there waiting to leak money.”

    Tobias Nkemdirim

    Making It Stick

    Solar panel mounting hardware Making It Stick

    At the end of the day, getting your solar setup right comes down to the details you usually can’t see once the panels are up. We’ve looked at how the right attachment method can save you a massive headache during a storm, and why investing in high-quality, corrosion-resistant hardware is the only way to ensure you aren’t replacing parts in five years just to keep the lights on. It’s about doing the job once and doing it right. If you pick the wrong mounting system, you aren’t just risking your hardware; you’re essentially throwing money directly into the wind by compromising the efficiency of your entire energy system.

    I know that looking at all these technical specs can feel overwhelming, especially when you’re trying to balance a tight budget. But remember, every smart choice you make with your mounting hardware is a step toward a home that works for you, not against you. You don’t need a professional-grade laboratory to build a sustainable life; you just need to be intentional about the small things. Stop settling for “good enough” when it comes to your energy infrastructure. By focusing on these foundational elements now, you’re building a resilient, low-cost future that stays efficient for decades to come.

    Frequently Asked Questions

    How do I know if my roof structure can actually handle the extra weight of the panels and the mounting hardware?

    Before you go buying hardware, you need to look at your rafters. I always tell clients: don’t guess. If you aren’t comfortable climbing up there with a flashlight, hire a structural engineer for a quick assessment. You’re looking for the spacing and the wood’s condition. If your rafters are spaced too far apart or show signs of rot, that extra load could cause real damage. It’s better to spend a little on a pro now than fix a sagging roof later.

    If I'm renting, are there any mounting options that won't cause permanent damage to the roof?

    Look, I get it. I spent years in rentals where I couldn’t even hang a picture without losing my deposit, let alone drill into the roof. If you’re renting, you’ll want to avoid traditional roof penetrations. Look into ground-mounted racks or portable solar folding kits instead. If you must use the roof, some lightweight, non-penetrating ballasted systems exist, but they’re heavy. Stick to balcony rails or ground setups to keep your landlord happy.

    Is it worth spending more on high-end mounting rails, or can I get away with cheaper alternatives and still maintain efficiency?

    Look, I get the urge to cut corners to save cash, but don’t skimp on the rails. I’ve seen too many DIY setups fail because cheap aluminum warped under heavy snow or high winds. If your mounting system shifts, your panel alignment goes sideways, and that kills your efficiency. Buy mid-range, sturdy rails. You don’t need the most expensive luxury brand, but you do need hardware that won’t bend when the weather gets real.

  • Understanding How Solar Inverters Work

    Understanding How Solar Inverters Work

    I remember standing in my old rental apartment, shivering in a room that felt more like a walk-in freezer than a living space, staring at a utility bill that made absolutely no sense. I knew I needed to go solar, but every time I searched for solar inverters explained, I was met with a wall of technical jargon and salespeople trying to upsell me on systems that cost more than my entire annual rent. It’s frustrating because most of the “experts” out there talk like they’re reading a textbook, completely ignoring the fact that most people just want to stop bleeding money to the grid without needing a PhD in electrical engineering.

    I’m not here to sell you a premium, over-engineered setup that you don’t actually need. Instead, I’m going to strip away the fluff and give you the practical reality of how these devices actually work in a real home. My goal is to provide a breakdown of solar inverters explained through the lens of efficiency and actual cost-savings. We’ll look at what matters—reliability, compatibility, and ROI—so you can make a smart decision that keeps your footprint small and your bank account intact.

    Table of Contents

    The Magic of the Dc to Ac Conversion Process

    The Magic of the Dc to Ac Conversion Process

    To understand why this piece of hardware is the heart of your setup, you have to look at the physics of what’s actually happening. Your solar panels are essentially collecting raw, “wild” energy in the form of Direct Current (DC). While that’s great for a battery, your fridge, laptop, and lights all run on Alternating Current (AC). This is where the dc to ac conversion process comes into play. The inverter acts as a translator, taking that steady stream of DC and flipping it back and forth rapidly to create the rhythmic wave of AC that your home appliances crave.

    It isn’t just about flipping a switch, though; it’s about precision. A high-quality unit uses something called Maximum Power Point Tracking (MPPT) to ensure it’s squeezing every possible drop of energy out of your panels, even when a cloud drifts by. If the conversion is sloppy, you’re essentially leaking money through your roof. When I’m auditing a home, I always look at the solar inverter efficiency ratings because even a 2% difference in how well that conversion happens can mean a noticeable dent in your monthly utility bill over the course of a year.

    Mastering Solar Inverter Efficiency Ratings to Save Money

    Mastering Solar Inverter Efficiency Ratings to Save Money

    When you’re looking at spec sheets, it’s easy to get lost in a sea of percentages, but here is the reality: not all conversion is created equal. Most people see a 95% efficiency rating and think they’re golden, but they forget that energy loss happens at every single stage of the dc to ac conversion process. If your hardware is subpar, you’re essentially paying for sunlight that never actually reaches your appliances. I always tell my clients to look past the headline number and check the efficiency curve—how well the unit performs when the sun isn’t at its absolute peak.

    You also need to consider how different setups handle energy loss. For instance, if you have a complex roofline with partial shading, the debate between string inverter vs microinverter becomes a financial one, not just a technical one. A string inverter might be cheaper upfront, but if one panel gets shaded, the whole system’s efficiency tanks. Choosing the right hardware isn’t about buying the most expensive gear; it’s about minimizing the gap between what your panels produce and what your home actually consumes.

    5 Ways to Make Sure Your Inverter Actually Pays for Itself

    • Don’t get blinded by the sticker price. A cheap inverter might save you a few bucks today, but if it has a low efficiency rating, it’s literally bleeding money every time the sun is out. Look for high conversion efficiency so you’re getting the most bang for your buck from your panels.
    • Match your inverter to your actual load. I see people all the time buying massive, high-capacity inverters for a tiny apartment setup. It’s overkill and inefficient. Size it to what you actually need to run—fridge, lights, laptop—so you aren’t wasting energy just keeping the system idling.
    • Check for smart monitoring features. If you can’t see what’s happening with your power in real-time on your phone, you’re flying blind. I use data to find leaks, and you should too. Being able to see exactly how much energy is being converted helps you spot issues before they wreck your monthly budget.
    • Think about your future expansion. If you’re planning to add more panels or a battery later, don’t buy a “closed” system. Get an inverter that’s modular or expandable. It’s way cheaper to buy a slightly better unit now than to rip out the whole setup and start over in two years.
    • Keep it cool and ventilated. This isn’t just about hardware longevity; heat is the enemy of efficiency. If your inverter is tucked away in a cramped, unventilated cupboard, it’s going to struggle, get hot, and lose more energy to heat dissipation. Give it some breathing room so it can work smarter, not harder.

    The Bottom Line on Your Inverter

    The Bottom Line on Your Inverter.

    Don’t just look at the price tag; check the efficiency rating. A cheaper inverter that wastes more energy as heat is actually costing you more in the long run through higher utility bills.

    Think of the inverter as the brain of your entire solar setup. If it’s not converting DC to AC smoothly, all that sunlight hitting your roof is basically being wasted.

    Investing in a quality inverter is a way to future-proof your home. It’s the difference between a system that barely keeps the lights on and one that actually helps you slash your energy footprint.

    ## The Real Cost of Cheap Hardware

    “Most people focus on the price tag of a solar kit, but if you’re buying a low-quality inverter just to save a few bucks upfront, you’re basically pouring money down a leak. A smart inverter isn’t just a box that converts power; it’s the gatekeeper that ensures the energy you’re paying for actually makes it to your appliances instead of bleeding out as wasted heat.”

    Tobias Nkemdirim

    The Bottom Line on Your Inverter

    At the end of the day, choosing a solar inverter isn’t just about picking a piece of hardware; it’s about understanding how that device dictates the efficiency of your entire system. We’ve looked at how the conversion from DC to AC works and why obsessing over those efficiency ratings is the difference between a system that pays for itself and one that just sits there wasting potential. If you ignore the quality of your inverter, you’re essentially leaving money on the table every time the sun comes up. Remember, a high-quality unit is the bridge between raw sunlight and actual savings in your bank account.

    I know that transitioning to solar can feel like a massive, expensive hurdle, but it doesn’t have to be overwhelming. You don’t need a million-dollar setup to make a dent in your carbon footprint or your monthly utility bills. It starts with making smart, data-driven decisions about the components that run your home. My goal has always been to prove that sustainability shouldn’t be a luxury reserved for the wealthy. By picking the right tech and refusing to settle for inefficiency, you’re taking a massive step toward a home that is both kind to the planet and kind to your wallet.

    Frequently Asked Questions

    Do I actually need a battery backup, or can I just run my appliances directly from the inverter?

    It depends on your lifestyle, but here’s the reality: if you go without a battery, you’re basically a slave to the sun. You can run appliances directly from the inverter while the panels are cranking, but the second a cloud passes over or the sun dips, your power vanishes. If you want to keep your fridge running and your lights on after dark without breaking the bank on massive upgrades, you’re going to need that battery buffer.

    How much extra will it cost to upgrade to a hybrid inverter compared to a standard string inverter?

    On average, expect to pay anywhere from $500 to $1,500 more upfront for a hybrid inverter compared to a standard string setup. It’s a steeper initial investment, but I look at it through the lens of long-term efficiency. A standard inverter is a one-way street, while a hybrid acts like a smart hub, managing both your panels and a battery bank. If you want energy independence, that extra cost is your ticket to actually using your power when the sun isn’t out.

    Can a cheap, low-efficiency inverter actually mess up my other home appliances?

    Short answer: Yes, absolutely. I’ve seen it happen during audits. A cheap, low-quality inverter often produces “dirty” power—meaning the sine wave is jagged rather than smooth. This creates electrical noise and voltage fluctuations. If you plug sensitive gear like your laptop or a high-end fridge into a bad inverter, those spikes can fry delicate circuitry or cause motors to run hot and die prematurely. Don’t gamble your expensive appliances just to save a few bucks upfront.

  • Common Solar Panel Troubleshooting Steps

    Common Solar Panel Troubleshooting Steps

    I remember standing on a client’s roof last summer, squinting against the glare, only to realize they were about to pay a technician hundreds of dollars just to wipe some bird droppings off a glass surface. It’s frustrating because the industry loves to make solar panel troubleshooting sound like some high-level engineering mystery that requires a specialized degree to solve. Most of the time, your system isn’t “broken” in the way you think; it’s just being choked by something simple that you could probably fix yourself with a garden hose and a bit of common sense.

    I’m not here to sell you a premium maintenance contract or bury you in technical jargon that doesn’t pay the bills. My goal is to give you the straightforward, data-backed steps to identify why your output is dropping so you can stop bleeding money. We’re going to walk through the actual, hands-on ways to handle solar panel troubleshooting without the corporate fluff, focusing on practical fixes that keep your energy costs low and your system running exactly how it should.

    Table of Contents

    Solving a Solar Panel Efficiency Drop Without Breaking the Bank

    Solving a Solar Panel Efficiency Drop Without Breaking the Bank

    When I’m out on an audit and a client tells me their output has tanked, my first instinct isn’t to suggest a massive hardware overhaul. Most of the time, a solar panel efficiency drop isn’t caused by a broken system, but by simple neglect. I usually start with the basics: cleaning solar panels for performance. It sounds almost too simple, but a thick layer of dust, pollen, or even bird droppings can create micro-shadows that significantly choke your energy production. Grab a soft brush and some water; it’s the cheapest way to reclaim your lost wattage.

    If the panels look clean, I move on to the “brain” of the setup. I always tell people to keep a close eye on their monitoring app for any solar inverter error codes. These codes are basically the system trying to talk to you, telling you exactly where the hiccup is. Before you call an expensive technician, do a quick visual scan for any obvious signs of wear or loose cables. Checking solar wiring connections for any fraying or corrosion can save you a massive headache—and a much larger bill—down the road.

    Deciphering Solar Inverter Error Codes to Protect Your Investment

    Deciphering Solar Inverter Error Codes to Protect Your Investment

    When your system goes dark, the first place I look isn’t the roof—it’s the inverter screen. Most people see a flashing red light or a cryptic string of numbers and immediately panic about the cost of a technician. But before you reach for your wallet, take a second to actually read those solar inverter error codes. They aren’t just random glitches; they are the brain of your setup trying to tell you exactly what’s wrong. Whether it’s a grid synchronization issue or a communication error, decoding these signals is the fastest way to perform effective photovoltaic system diagnostics without paying for an unnecessary service call.

    I’ve seen plenty of homeowners mistake a simple software hiccup for a total hardware failure. Sometimes, a code might point toward solar battery storage problems or even a minor surge, rather than a broken panel. My advice? Keep a small notebook or a digital log of every code you encounter. If you notice a pattern, it’s a sign of a deeper issue that needs addressing. Don’t let a simple error message turn into a massive, expensive headache just because you didn’t stop to decipher the data first.

    5 Quick Wins to Get Your Solar Output Back Where It Belongs

    • Grab a soft cloth and check for grime; it sounds basic, but a thick layer of dust or even bird droppings can create “hot spots” that tank your efficiency. Just a quick rinse can make a massive difference in how much power you actually pull from the sun.
    • Keep an eye on your shading situation. I’ve seen so many people plant a beautiful hedge or install a new trellis only to realize they’ve accidentally cast a shadow over a single cell, which can drag down the performance of the entire string.
    • Check your wiring for any visible wear or loose connections. If you see any fraying or if a connector looks a bit dodgy, you’re likely losing energy to resistance before it even hits your inverter—and that’s just money leaking out of your pocket.
    • Watch your weather patterns and local debris. After a heavy storm or a windy day, check for fallen branches or even leaves that might be partially obscuring your panels; even a little bit of debris can disrupt the flow.
    • Monitor your monitoring app like a hawk. If you notice a sudden, unexplained dip in production that doesn’t align with the weather, don’t ignore it; that’s your first real clue that something mechanical or electrical is starting to fail.

    The Bottom Line for Your Solar Setup

    Don’t ignore a sudden dip in production; a simple cleaning or a quick check for shading can often fix efficiency drops without calling an expensive technician.

    Treat your inverter like the brain of your system—learn those error codes so you can catch small electrical glitches before they turn into costly hardware failures.

    Efficiency isn’t just about the tech; it’s about regular, low-cost maintenance that ensures you’re actually getting the ROI you were promised.

    ## Stop Guessing, Start Measuring

    “Most people think a drop in solar production means they need a massive, expensive overhaul, but usually, it’s just a loose connection or a layer of grime that’s quietly bleeding your savings dry. Don’t let a simple fix slip through the cracks just because the tech feels intimidating.”

    Tobias Nkemdirim

    Keeping Your System Running Smoothly

    Keeping Your System Running Smoothly maintenance.

    Look, troubleshooting your solar setup doesn’t have to be this intimidating or expensive. We’ve covered the essentials: from clearing away debris and dust that choke your efficiency to actually understanding what those cryptic inverter error codes are trying to tell you. Most of the time, the fix isn’t a massive, costly overhaul; it’s just about staying on top of regular maintenance and catching small issues before they turn into hardware failures. If you can spot a drop in production early and tackle the simple stuff—like checking connections or cleaning your panels—you’re already ahead of most homeowners. Don’t let a minor glitch turn into a massive drain on your wallet.

    At the end of the day, solar power is one of the best tools we have for taking control of our own energy independence. It’s about more than just the tech; it’s about making sure that investment actually works for you and your budget. Every time you fix a leak or optimize a panel, you’re reclaiming your power and making a sustainable lifestyle a lot more accessible. It might feel like a chore sometimes, but the payoff—lower bills and a smaller footprint—is worth every bit of effort. Keep that thermometer handy, stay observant, and don’t let your energy go to waste.

    Frequently Asked Questions

    Is it worth calling a professional if my energy output is still lower than expected after a deep clean?

    Look, I get the hesitation—calling a pro feels like another unexpected expense. But if you’ve scrubbed the panels and checked the obvious stuff, yet the numbers still aren’t adding up, stop guessing. You might be looking at a faulty cell or a failing component that a handheld thermometer or a simple cleaning won’t fix. At a certain point, chasing ghosts wastes more time and money than just calling an expert to find the real leak.

    How can I tell if a drop in production is just due to bad weather or if a specific panel is actually failing?

    Check your monitoring app first. If your entire system’s output is down proportionally, it’s likely just a cloudy day or heavy rain. But if you see one specific string or panel lagging significantly behind the others while the rest are performing well, that’s a red flag. I usually grab my multimeter to check the voltage; if one panel is pulling way less than its neighbors, you’ve likely got a hardware failure rather than a weather problem.

    Are there any cheap DIY tools I can use to monitor my system's performance more accurately?

    You don’t need a massive budget to get real data. Honestly, a decent clamp meter is your best friend; it lets you check current and voltage without tearing everything apart. If you’re feeling techy, grab an ESP32 or an Arduino and some cheap sensors to build a basic monitoring node. It’s a fun weekend project that gives you much more granular data than most standard apps, helping you spot leaks before they cost you.

  • How Net Metering Works

    How Net Metering Works

    I remember sitting in my old rental apartment, staring at a utility bill that felt more like a punishment than a service. I was trying so hard to be sustainable, but it felt like the system was designed to keep me paying, no matter how much I tried to optimize. Most people talk about solar power like it’s this magic bullet, but they gloss over the actual mechanics of how you get your money back. They throw around jargon that makes you feel like you need a PhD just to understand your own meter. I’m tired of the gatekeeping, so let’s get straight to it: I’m giving you net metering explained without the corporate fluff or the confusing math.

    My goal isn’t to sell you a fancy solar array or a lifestyle you can’t afford; it’s to show you how to make the grid work for your wallet. I’ve spent enough time auditing homes and checking heat leaks to know that every cent counts when you’re trying to live sustainably on a budget. In this guide, I’m going to break down exactly how those credits work and how you can stop essentially giving your excess energy away for free. No hype, just the practical data you need to decide if solar actually makes sense for your home.

    Table of Contents

    Turning Excess Solar Production Into Real Savings

    Turning Excess Solar Production Into Real Savings

    Think of it this way: your solar panels aren’t just working for you when you’re home; they’re working for you even when you’re out running errands. On a clear, sunny afternoon when nobody is home to run the dishwasher or the AC, your panels are likely pumping out more power than your house can actually use. Instead of that energy just disappearing into the grid for nothing, net metering allows you to feed that excess solar production back to the utility company. It’s essentially like having a savings account for electricity.

    This is where the math actually starts to make sense for your wallet. Through a process involving bi-directional metering, the utility company tracks both the power you pull from the grid and the power you send back. Those credits accumulate over your utility billing cycles, acting as a buffer for those cloudy days or long winter nights when your production dips. For anyone looking at their long-term photovoltaic system ROI, this isn’t just a neat technical feature—it’s the mechanism that turns a solar installation from a cool gadget into a legitimate tool for slashing your monthly overhead.

    The Magic of Solar Energy Credits and Your Wallet

    The Magic of Solar Energy Credits and Your Wallet

    Think of it this way: your solar setup isn’t just a one-way street where you pull power from the grid. When your panels are cranking out more electricity than your appliances can handle during a sunny afternoon, that energy doesn’t just vanish. Thanks to bi-directional metering, your utility meter actually runs backward. It tracks every single kilowatt you push back into the grid, turning that surplus into a digital currency of sorts.

    These solar energy credits act like a bank account for your electricity. Instead of the utility company just taking your extra power for free, they credit your account for the value of that excess solar production. This is a massive part of calculating your total photovoltaic system ROI. If you produce a ton of power in July but use very little, those credits roll over to cover your usage during the darker, colder months.

    It essentially smooths out your monthly costs. Instead of seeing massive spikes in your utility billing cycles during the winter, you’re tapping into the “savings” you banked during the summer. It’s a practical way to ensure you’re getting every cent’s worth out of your hardware.

    5 Ways to Actually Make Net Metering Work for You

    • Watch your production peaks. Most people don’t realize their panels are cranking out the most power at noon when they aren’t even home. Understanding your peak production helps you decide if you need a battery or if net metering alone is enough to cover your evening usage.
    • Check your local utility’s “buyback” rate. Not all net metering is created equal. Some companies give you a 1:1 credit for every kilowatt you send back, while others try to lowball you with “avoided cost” rates. I always check the fine print to make sure I’m not getting shortchanged.
    • Size your system based on annual usage, not just daily peaks. Since net metering allows you to bank credits during the sunny months to use during the cloudy ones, you can be more strategic about how much hardware you actually install.
    • Keep an eye on your meter readings. I still carry my infrared thermometer to find heat leaks, but I also keep a close eye on my digital utility portal. If your credits aren’t accumulating the way the math says they should, something is wrong with your setup or your billing.
    • Don’t ignore the seasonal shift. You’ll likely be a “net producer” in the summer and a “net consumer” in the winter. Use the surplus you build up in July to offset those expensive heating bills in January so you aren’t hit with a massive bill when the sun isn’t cooperating.

    The Bottom Line on Net Metering

    Think of net metering as a way to stop your solar panels from working for free; instead of letting excess energy go to waste, you’re essentially using the grid as a giant battery to lower your future bills.

    It’s one of the most practical ways to shorten your return on investment, making solar much more accessible for people who don’t have massive budgets for home upgrades.

    Before you commit to a system, check your local utility’s specific rules, because while the concept is simple, the way they credit your energy can vary significantly from one area to another.

    The Bottom Line on Net Metering

    “Think of net metering as your home’s way of refusing to let excess energy go to waste; it turns your solar panels from a simple power source into a smart financial tool that works for you even when the sun isn’t shining.”

    Tobias Nkemdirim

    The Bottom Line on Your Solar Investment

    The Bottom Line on Your Solar Investment

    At the end of the day, net metering is the bridge between just having solar panels and actually making them work for your bank account. We’ve looked at how sending your surplus energy back to the grid turns those sunny afternoons into credits, and how those credits act as a buffer against high utility bills during the months when you’re using more power than you’re producing. It isn’t just a technicality or a regulatory quirk; it is a fundamental tool that ensures you aren’t essentially giving away free electricity to the utility company. When you understand the math behind these credits, the whole solar transition starts to feel a lot less like a luxury expense and more like a calculated, smart move for your household budget.

    I know that switching to solar can feel like a massive, intimidating leap, especially when you’re trying to balance a tight budget. But if there’s one thing my time auditing homes has taught me, it’s that sustainability shouldn’t be a gated community for the wealthy. By leveraging things like net metering, you are taking a practical step toward a home that is both efficient and economically resilient. You don’t need to overhaul your entire life overnight to make a difference. Start by understanding your local policies, look for those small leaks in your energy spending, and remember that every kilowatt saved is a win for your wallet and the planet.

    Frequently Asked Questions

    Does net metering actually work if I use most of my power at night when the sun isn't out?

    That’s the million-dollar question, and honestly, it’s where most people get tripped up. The short answer is yes, it absolutely works. Think of net metering like a bank account for your electricity. During the day, your panels overproduce and “deposit” that extra energy into the grid. At night, when you’re cranking the lights and the TV, you “withdraw” that energy back. As long as your meter is spinning backward during the day, you’re covered.

    How much can I realistically expect to see my monthly utility bill drop once I start getting these credits?

    Look, I can’t give you a single magic number because it depends entirely on your roof’s orientation and your actual consumption patterns. But from what I see during my audits, if your system is sized correctly, you aren’t just looking at a small discount; you’re often looking at offsetting the vast majority of your daytime usage. For most, it means your bill drops from a heavy monthly burden to just the basic connection fees.

    Are there specific types of solar setups or battery systems that make net metering more or less effective?

    It really depends on your setup. If you’re strictly grid-tied without a battery, you’re basically relying on the utility to act as your “storage,” which makes net metering your best friend. However, if you add a battery system, you’re shifting toward “self-consumption.” This is great for backup power during outages, but if your local utility has poor net metering rates, you might actually be better off sending that extra power to the grid instead of storing it.

  • Information on Solar Energy Tax Credits

    Information on Solar Energy Tax Credits

    I remember sitting in my old rental apartment, shivering through a February freeze because I couldn’t justify the cost of turning up the heat. I used to think going green was a luxury reserved for people with massive savings and zero utility bills, a myth pushed by companies that make sustainability feel unreachable. But when I started digging into the actual math of solar energy tax credits, I realized the biggest barrier isn’t the technology—it’s the lack of clear, honest information. Most people talk about these credits like they’re some complex financial instrument for the elite, but that’s just a way to keep the status quo intact while we keep overpaying for power.

    I’m not here to sell you a dream or drown you in jargon. My goal is to strip away the fluff and show you exactly how to use these incentives to stop wasting money and start making your home work for you. I’ll walk you through the practical reality of claiming these credits so you can lower your carbon footprint without draining your bank account. This isn’t about being perfect; it’s about making smart, data-driven moves that actually stick.

    Table of Contents

    The Itc Solar Tax Credit Explained for Real People

    The Itc Solar Tax Credit Explained for Real People

    Look, I get it. When you start digging into government jargon, “tax credits” can feel like a massive headache designed to keep you from actually making a change. But here’s the reality: the ITC solar tax credit explained simply is just a way for the government to pay you back for doing the right thing. Instead of a rebate check in the mail, this credit gets applied directly to your federal taxes, effectively slashing the total cost of your system.

    When I’m running a solar investment ROI analysis for a client, this credit is usually the biggest lever we have. It’s not just a small discount; it’s a massive chunk of the upfront cost that stays in your pocket rather than disappearing into your utility bill every month.

    The good news is that federal solar tax credit eligibility is pretty straightforward for most homeowners. As long as you’re installing a system for your primary residence—not a massive commercial farm—you’re likely in the running. It’s one of those rare moments where being sustainable actually makes financial sense from day one.

    Federal Solar Tax Credit Eligibility Is Your Home Ready

    Federal Solar Tax Credit Eligibility Is Your Home Ready?

    Before you start eyeing those sleek panels on your neighbor’s roof, you need to know if you actually qualify. The good news is that federal solar tax credit eligibility is surprisingly broad, but it isn’t a “one size fits all” situation. Generally, if you own your home—or even if you’re a renter with a landlord who is willing to upgrade the property—you can tap into these incentives. The system is designed for residential setups, meaning the gear has to be installed at your primary residence to count.

    I often see people get hung up on the technicalities, but for most homeowners, the barrier to entry is lower than you’d think. To maximize your solar installation savings, you just need to ensure the system is connected to your home’s electrical system and used primarily for your own power needs. I always tell my clients to treat this like a home audit: check your ownership status and your tax liability first. If you don’t have a significant enough tax bill to offset the credit, you’ll want to look into how the credit carries forward, so you don’t leave money on the table.

    How to Actually Maximize Your Credit (Without the Headache)

    • Keep every single receipt from your installation. I’ve seen people lose out on thousands because they didn’t realize that things like mounting hardware, wiring, and even battery storage qualify under the same credit. If it’s part of the solar system, document it.
    • Don’t forget about the battery loophole. If you’re adding energy storage to your setup to manage peak loads, that’s a huge win for both your efficiency and your tax credit. The ITC covers standalone battery storage now, which is a game changer for making your home more resilient.
    • Check your tax liability before you commit. This is a non-refundable credit, meaning it reduces the tax you owe, but it won’t give you a “refund” check if you don’t owe any taxes. If you’re a freelancer with a low-income year, run the numbers with a pro first.
    • Look beyond the federal level. Depending on where you live, your state might offer an additional layer of incentives on top of the federal ITC. It’s like a double dip—one for the feds and one for your local community—that can shave a massive chunk off your upfront costs.
    • Time your installation strategically. Since the credit is based on the year the system is “placed in service,” try to avoid scheduling your install for late December. If there’s a delay in inspections or paperwork, you might end up pushing your credit into the next tax year.

    The Bottom Line on Solar Credits

    These tax credits aren’t just “perks” for the wealthy; they are essential tools designed to slash the upfront cost of solar, making it actually realistic for average homeowners to switch.

    Don’t assume you’re ineligible just because you rent or have a small setup—eligibility often comes down to how your specific home is connected to the grid and how you file your taxes.

    Treat the tax credit as a way to recoup your investment faster, essentially using the government’s money to help pay off the system that’s going to lower your monthly utility bills for years.

    ## Making Sustainability a Reality, Not a Luxury

    “Solar tax credits aren’t just some bureaucratic loophole; they’re a tool to level the playing field. We need to stop treating green energy like a luxury for the wealthy and start using these incentives to make energy independence accessible for every household trying to cut their bills.”

    Tobias Nkemdirim

    Making the Move

    Making the Move to solar energy.

    At the end of the day, navigating solar tax credits doesn’t have to be an overwhelming math problem. We’ve looked at how the ITC works, checked your eligibility, and broken down how these credits can slash the upfront cost of your installation. It’s about recognizing that these incentives are specifically designed to bridge the gap between wanting to be sustainable and actually being able to afford it. If you’ve done the groundwork and confirmed your home is ready, you’re already ahead of most people. Don’t let the paperwork intimidate you; the goal is simply to stop leaving money on the table while you transition to a cleaner setup.

    I know that switching to solar can feel like a massive, daunting leap, especially when you’re already managing a tight monthly budget. But I’ve seen firsthand how much of a difference it makes when you stop fighting against your own house and start working with smarter technology. This isn’t just about chasing a tax break; it’s about taking control of your utility bills and decoupling your lifestyle from rising energy costs. You don’t need a massive inheritance to make a meaningful impact on your footprint or your bank account. Start small, use the credits available to you, and build a home that works for you, not against you.

    Frequently Asked Questions

    What happens if my tax bill for the year is lower than the total credit amount I earned?

    This is a common worry, especially when you’re trying to budget for a big upgrade. Here’s the deal: the federal solar tax credit is a non-refundable credit. That means if your credit is bigger than what you owe the IRS, you don’t get the leftover cash as a refund check. However, you can “roll it over.” You can carry the remaining balance forward to offset your taxes in future years. It’s not instant cash, but it’s still money you won’t have to pay later.

    Can I actually use these credits if I'm a renter or if I live in a multi-family home?

    This is where it gets tricky, and honestly, it’s where a lot of people assume they’re out of luck. If you’re renting, you can’t claim the credit yourself because you don’t own the system. However, if you live in a multi-family home, you might still have an opening. If you’re a co-owner of a condo or a unit in a shared building, there are ways to split that credit. Don’t let the paperwork discourage you; just look closer at your ownership structure.

    Does the credit cover the entire solar installation, or just the panels themselves?

    It’s not just the panels. This is a common misconception, but the credit actually applies to the entire solar energy system needed to make it work. I’m talking about the mounting hardware, the inverters, the wiring, and even the battery storage if you’re adding that to your setup. Basically, if it’s a necessary component of your solar installation, it’s part of the cost you can claim to lower your tax bill.

  • Optimal Solar Panel Orientation

    Optimal Solar Panel Orientation

    I still remember standing in my old apartment, shivering through a February freeze because my landlord had neglected the insulation, feeling like I was literally throwing money into a void. It’s that same feeling of wasted potential that hits me whenever I see a DIY solar setup where the solar panel orientation is completely botched. People will try to sell you these hyper-expensive, complex tracking systems that claim to follow the sun perfectly, but honestly? Most of that is just expensive fluff designed to pad a salesperson’s commission. You don’t need a NASA-grade computer to get decent results; you just need to stop letting your hardware sit idle when the sun is actually working.

    I’m not here to give you a theoretical lecture or a sales pitch for high-end tech you can’t afford. Instead, I’m going to show you how to find that “sweet spot” for your specific roof or yard using nothing but basic logic and a bit of observation. I’ll walk you through the actual math of tilt and direction so you can squeeze every cent of value out of your investment. My goal is simple: help you set things up right the first time so your energy bills actually drop, without breaking your bank account in the process.

    Table of Contents

    Mastering Azimuth Angle Solar Energy Without Breaking the Bank

    Mastering Azimuth Angle Solar Energy Without Breaking the Bank

    When people talk about setting up a system, they usually obsess over the tilt, but they often overlook the azimuth angle solar energy capture. Basically, this is just the compass direction your panels face. If you’re in the Northern Hemisphere, you want them pointing true south. It sounds obvious, but I’ve seen so many DIY setups where a single tree or a neighbor’s roofline forces a slight tilt or a shift in direction, and suddenly you’re losing a massive chunk of your potential harvest. You don’t need a PhD to get this right; you just need to know where north is and make sure your panels aren’t looking the wrong way.

    The real trick to maximizing your ROI is accounting for seasonal sunlight variations. The sun isn’t a static lightbulb; it arcs differently in July than it does in December. While you can’t move your roof, you can adjust your mounting hardware to find that sweet spot. It’s about finding the balance between summer peaks and winter lows so you aren’t left in the dark when the days get short. Precision matters here, but don’t get paralyzed by the math—just aim for that southern sweet spot.

    Finding Your Optimal Tilt Angle for Solar Panels

    Finding Your Optimal Tilt Angle for Solar Panels

    Once you’ve nailed down your direction, the next move is figuring out the tilt. I’ve spent a lot of time looking at rooflines, and it’s easy to assume a flat installation is fine, but that’s a mistake if you actually want to see a return on your investment. Finding the optimal tilt angle for solar panels is essentially a balancing act between your local latitude and the sun’s path through the sky. If you live further north, you’ll generally want a steeper angle to catch that lower winter sun; if you’re closer to the equator, you can afford to go flatter.

    It’s not just about a single number, though. You have to account for seasonal sunlight variations to ensure you aren’t just crushing it in July while freezing in terms of production in January. I usually tell my clients to aim for a tilt that favors their highest energy usage months. If you’re running heavy heating loads in the winter, tilting those panels slightly steeper can help squeeze out that extra bit of juice when you need it most. It’s about solar panel placement for maximum yield throughout the entire year, not just on the brightest days.

    Quick Wins to Get More Juice From Your Setup

    • Don’t just point them south and forget it; I always suggest checking for “micro-shadows” from a single tree branch or a chimney that might be killing your midday peak.
    • If you’re in a spot that gets heavy morning fog or afternoon clouds, you might actually want to tweak your azimuth slightly off-center to catch the clearest light windows.
    • Keep those surfaces clean because even a thin layer of dust or pollen acts like a thermal blanket, blocking the sun from actually hitting the cells.
    • If you’re mounting on a roof, make sure you aren’t fighting the natural slope; trying to force an angle that fights your roofline often costs more in mounting hardware than you’ll ever save in energy.
    • Use a basic solar pathfinder app on your phone to track the sun’s movement across your specific yard before you bolt anything down—it’s better to spend ten minutes planning than six months regretting a bad angle.

    The Bottom Line on Getting Your Setup Right

    You don’t need a PhD to get this right—just point your panels toward the equator (south if you’re in the Northern Hemisphere) and adjust the tilt based on your local latitude to catch the most direct rays.

    Don’t set it and forget it; your sun’s path changes with the seasons, so if you can afford a simple adjustable mount, tweaking your angle twice a year can squeeze out way more power.

    Always prioritize shade management over everything else; even a small branch casting a shadow over a single cell can tank your entire system’s efficiency, making all your careful angle calculations useless.

    ## The Real Cost of Being Lazy with Placement

    “If you just slap your panels on the roof wherever they fit, you’re basically throwing money directly into the wind. It’s not about having the most expensive setup; it’s about making sure every single photon you catch actually makes it into your battery instead of being wasted by a bad angle.”

    Tobias Nkemdirim

    Making Every Ray Count

    Optimizing solar panel angles, Making Every Ray Count.

    At the end of the day, getting your solar orientation right isn’t about chasing some impossible, perfect mathematical peak; it’s about minimizing the gap between what you pay and what you produce. We’ve looked at how the azimuth angle determines your direction and how adjusting your tilt can make or break your seasonal efficiency. If you take nothing else away from this, remember that even a few degrees of difference can be the deciding factor between a system that barely covers your lights and one that actually slashes your monthly bills. Don’t just bolt them on and forget them—take the time to measure, check your angles, and ensure you aren’t leaving money on the table simply because of a bad installation.

    I know that diving into the technical side of energy efficiency can feel overwhelming, especially when you’re trying to make a sustainable lifestyle work on a budget. But remember, you don’t need a massive engineering degree to make a difference. By taking these small, intentional steps to optimize your setup, you are proving that sustainability isn’t a luxury reserved for the wealthy. You’re taking control of your own power, quite literally. Let’s stop letting good sunlight go to waste and start making our homes work harder for us and the planet.

    Frequently Asked Questions

    Does it actually matter if my roof faces north, or can I still make this work?

    Look, I’ll be straight with you: if you’re in the northern hemisphere, a north-facing roof is far from ideal. You’re essentially looking at the “shadow side” of your house. But don’t panic and scrap the whole idea. You can still make it work by using high-efficiency panels or mounting them on ground racks instead of the roof. It’s about maximizing what little light you get rather than settling for mediocrity.

    If I live in a place with a lot of clouds, should I prioritize tilt angle over everything else?

    Look, if you’re living under constant cloud cover, the math shifts a bit. You shouldn’t ignore tilt, but you shouldn’t obsess over it either. In cloudy climates, the light is more “diffuse”—it’s coming from everywhere, not just a direct point in the sky. While a precise tilt still helps, your priority should actually be maximizing surface area and keeping those panels spotless. If they’re covered in grime or shade, the angle won’t save you.

    Is it worth spending extra money on a tracking system to follow the sun, or is a fixed setup enough for most people?

    Look, I get the temptation. Tracking systems look amazing on paper because they squeeze every drop of juice out of the day, but for most people, they’re overkill. Between the extra upfront cost and the mechanical parts that eventually break, the math rarely adds up for a standard home. Unless you have a massive roof or a specific high-energy need, stick to a solid fixed setup. It’s reliable, low-maintenance, and keeps your ROI actually realistic.

  • Expected Lifespan of Solar Panels

    Expected Lifespan of Solar Panels

    I remember sitting in my old rental apartment, shivering under three blankets while staring at a utility bill that felt like a personal insult. I knew then that efficiency wasn’t just a buzzword; it was a survival tactic for anyone trying to live sustainably without going broke. Now, when I’m out on an audit and someone asks me about solar panel lifespan, I see that same look of hesitation. Most people are being sold this dream of “set it and forget it” energy, but the truth is much messier than the glossy brochures suggest. You shouldn’t have to gamble your entire savings on a piece of hardware just because a salesperson promised it would last forever.

    I’m not here to give you the polished marketing pitch or some theoretical lecture from a textbook. Instead, I’m going to give you the unfiltered reality of how long these systems actually perform before they start dragging down your savings. We’re going to look at the real-world factors that kill efficiency and how you can actually protect your investment. My goal is to make sure you get the most out of your tech so that sustainable living actually stays affordable for the long haul.

    Table of Contents

    Understanding the Real Photovoltaic Degradation Rate

    Understanding the Real Photovoltaic Degradation Rate.

    When I’m out on an audit, I usually tell people to stop thinking of solar panels as “set it and forget it” appliances. They are working components, and like any piece of tech, they wear down. What we’re really looking at is the photovoltaic degradation rate, which is essentially the speed at which your panels lose their ability to convert sunlight into electricity. It isn’t a sudden crash; it’s a slow, predictable slide. On average, you can expect a steady annual energy output decline of about 0.5% to 0.8%. That might sound negligible, but over twenty years, that math starts to bite into your savings.

    The rate of this decline isn’t the same for every setup, though. If you’re looking at high-end monocrystalline vs polycrystalline durability, you’ll notice the former generally holds its efficiency much longer under stress. Factors like extreme temperature swings and UV exposure play a massive role in how quickly those cells degrade. I always check the solar panel warranty terms during my consultations because manufacturers often guarantee a specific performance level—usually around 80%—at the 25-year mark. Knowing that number helps you plan your finances so you aren’t caught off guard when the efficiency dips.

    Monocrystalline vs Polycrystalline Durability Which Saves More

    Monocrystalline vs Polycrystalline Durability Which Saves More

    When you’re looking at the price tag, polycrystalline panels usually look like the winner because they’re cheaper upfront. But as someone who audits homes for long-term efficiency, I rarely recommend them if you’re planning to stay in your house for more than a few years. The reality of monocrystalline vs polycrystalline durability comes down to how they handle stress. Monocrystalline cells are sliced from a single crystal, making them more efficient and, more importantly, more resilient to the elements.

    Polycrystalline panels tend to have a higher annual energy output decline compared to their monocrystalline counterparts. Because they are made from multiple fragments, they often struggle more with temperature fluctuations. If you live in an area with extreme heat or heavy storms, the superior weather resistance for solar cells found in monocrystalline models is worth the extra initial investment. You aren’t just buying better tech; you’re buying a more stable energy yield that won’t leave you scrambling to replace a failing system a decade too early.

    5 Ways to Make Sure Your Solar Investment Doesn't Die Early

    • Keep your panels clean, but don’t go overboard. A layer of dust or bird droppings can create “hot spots” that actually degrade the cells faster. I usually just check them after a heavy dust storm or a dry spell; a quick rinse with a hose is usually enough to keep the efficiency up without risking cracks from high-pressure cleaners.
    • Don’t ignore your inverter. Everyone obsesses over the panels, but the inverter is the heartbeat of the system and it’ll likely fail long before the silicon does. If you’re planning a long-term setup, budget for an inverter replacement every 10 to 15 years so you aren’t left with a bunch of expensive, useless glass on your roof.
    • Watch out for shade creep. It’s easy to forget that a neighbor’s new tree or a growing hedge can cast shadows. Even partial shading on a single cell can force the whole string to work harder or cause thermal stress, which is a fast track to shortening the lifespan of your hardware.
    • Check your mounting hardware regularly. I’ve seen too many installs where the bolts loosen over time due to wind vibration or thermal expansion. If your panels are rattling or shifting, you’re risking micro-cracks in the cells. A quick visual inspection once a year can catch a loose bracket before it becomes a structural nightmare.
    • Invest in a good monitoring system. You can’t fix what you can’t see. Using an app to track your daily yield lets you spot a sudden drop in production immediately. If your output dips unexpectedly, it’s usually a sign of a failing component or a technical issue that needs addressing before the damage becomes permanent.

    The Bottom Line on Your Solar Investment

    Don’t let the “25-year warranty” fool you into thinking the panels stop working overnight; they just slowly lose efficiency, so you need to plan for a gradual dip in power, not a sudden blackout.

    If you’re on a tight budget, don’t just chase the cheapest polycrystalline panels—investing a bit more upfront in monocrystalline tech usually pays off because they handle degradation much better over the long haul.

    Longevity isn’t just about the hardware; if you don’t keep your system clean and properly installed, you’re essentially throwing money away by cutting your own lifespan short.

    ## The Real Math of Solar

    “Don’t let the marketing hype fool you into thinking solar is a ‘set it and forget it’ miracle; you need to look at the actual degradation rates, because a cheap panel that dies in ten years is just more expensive electronic waste, not a smart investment.”

    Tobias Nkemdirim

    The Long Game: Making Your Investment Count

    The Long Game: Making Your Investment Count

    At the end of the day, choosing solar isn’t just about picking the flashiest tech on the market; it’s about understanding the math of degradation and material quality. We’ve looked at how even the best monocrystalline panels will slowly lose efficiency over decades and why you can’t just ignore the difference between high-end durability and cheap, short-term fixes. If you want to stop overpaying for electricity, you have to treat your solar setup as a long-term infrastructure project rather than a quick gadget. Don’t let the initial price tag scare you away, but don’t buy into the hype of low-quality panels that will leave you back at the mercy of utility companies in ten years.

    I know that transitioning to renewable energy can feel overwhelming, especially when you’re trying to balance a tight budget with the desire to do better for the planet. But remember, sustainability shouldn’t be a luxury reserved for the wealthy. Every smart, durable decision you make now is a step toward true energy independence. You aren’t just buying hardware; you’re building a shield against rising costs and a smaller footprint for your future. Let’s stop settling for “convenient” energy waste and start investing in systems that actually stand the test of time.

    Frequently Asked Questions

    How do I know if my panels are actually failing or if it's just a dirty surface affecting my output?

    Before you assume your tech is dying, grab a cloth and some water. I’ve seen too many people panic about low output when they actually just have a layer of dust or pollen choking their cells. If a quick cleaning doesn’t bump your numbers back up, check your inverter for error codes or use your multimeter to see if the voltage is dropping unexpectedly. If the math doesn’t add up after a wash, then we’re talking real degradation.

    Is it worth paying extra for high-end panels now, or am I better off with cheaper ones that I can just replace in ten years?

    Look, I get the temptation to go cheap and “upgrade later,” but that’s usually a trap. Replacing a whole system in ten years isn’t just a headache; it’s a massive waste of resources and money. If you can swing the upfront cost, go for the high-end panels. They have better degradation rates and better warranties. It’s about playing the long game—investing in efficiency that actually lasts, rather than paying twice for the same result.

    What kind of maintenance do I actually need to do to make sure these things hit their full lifespan?

    Look, you don’t need a massive maintenance budget, but you can’t just “set it and forget it” if you want that 25-year lifespan. Mostly, it’s about keeping them clean. Dust, bird droppings, or even pollen buildup can create shade that kills your efficiency. I usually just recommend a quick rinse with a hose and a soft brush. Also, keep an eye on your inverter—it’s the part most likely to fail before the panels do.

  • Different Types of Solar Panels

    Different Types of Solar Panels

    I remember sitting in my old rental apartment, shivering under three blankets while staring at a utility bill that felt like a personal insult. I wanted to go solar, but every time I searched for information, I was met with a wall of high-end jargon and sales pitches designed to drain your bank account. Most people think you need a massive, specialized setup to make a difference, but the truth is that the industry loves to overcomplicate solar panel types just to justify a higher price tag. You don’t need a luxury tech suite on your roof; you just need a system that actually works for your specific space and budget.

    I’m not here to sell you on the most expensive hardware on the market. Instead, I’m going to break down the different solar panel types based on what they actually do for your energy independence and your wallet. We’ll skip the fluff and look at the data so you can decide which option stops you from throwing money away on inefficient tech. My goal is simple: helping you pick a setup that keeps your bills low and your carbon footprint even lower.

    Table of Contents

    Smart Solar Panel Cost Comparison for Every Homeowner

    Smart Solar Panel Cost Comparison for Every Homeowner

    When I’m auditing a home, I don’t just look at the roof; I look at the bank statement. Most people get paralyzed by the upfront price tag, but a proper solar panel cost comparison isn’t just about finding the cheapest hardware—it’s about finding the best return on your investment. If you buy the absolute cheapest panels on the market, you might find their photovoltaic cell efficiency is so low that you’ll need twice as many of them to actually power your fridge and lights, which ends up costing you more in the long run.

    For most of my clients, I recommend looking at the sweet spot between monocrystalline and polycrystalline options. Monocrystalline panels are the gold standard for residential use because they handle limited space well, but they come with a premium. If you have a massive roof and a tight budget, polycrystalline might be your way to jumpstart your transition to renewable energy solutions without a massive hit to your savings. My advice? Don’t just chase the lowest sticker price; chase the lowest cost per kilowatt-hour over the next ten years.

    Best Solar Panels for Residential Use Without the Luxury Price Tag

    Best Solar Panels for Residential Use Without the Luxury Price Tag

    If you’re looking for the best solar panels for residential use without needing a massive upfront investment, you should probably stop looking at the high-end, premium brands that market themselves through luxury lifestyle ads. Most of those “top-tier” options offer a marginal increase in photovoltaic cell efficiency that takes a decade to actually pay for itself. For a standard home, polycrystalline panels are often the sweet spot. They aren’t quite as sleek as monocrystalline, but they are significantly more affordable and still provide a solid return on investment for anyone trying to stabilize their monthly utility costs.

    I always tell my clients that you have to balance performance with your actual budget. While high-end monocrystalline panels boast impressive solar energy conversion rates, they often come with a price tag that makes the “payback period” feel endless. If you’re working with a tighter budget, opting for mid-range polycrystalline modules allows you to scale your system larger for the same price. It’s better to have a larger array of efficient panels than a tiny, expensive one that barely makes a dent in your power bill.

    5 Ways to Pick the Right Tech Without Getting Ripped Off

    • Don’t get blinded by efficiency percentages; if you have a massive roof with plenty of sun, buying the most expensive, high-efficiency monocrystalline panels might actually be a waste of cash compared to more affordable options.
    • Check your local shade situation before you buy—if you’ve got trees constantly blocking the sun, you’ll need panels that handle low-light conditions well, or you’re just buying expensive glass that won’t do anything.
    • Look past the sticker price and calculate the “cost per watt”—it’s the only way to see if a slightly more expensive panel is actually going to save you more money over the next ten years.
    • Keep an eye on the degradation rate; some cheaper panels lose their ability to generate power way too fast, which means you’ll be paying for a full replacement much sooner than you planned.
    • Match the panel type to your actual energy needs, not your neighbor’s—if you’re just trying to offset your heating and basic lights, you don’t need a top-tier commercial setup that costs a fortune.

    The Bottom Line: What You Actually Need to Know

    Don’t get blinded by high-end efficiency ratings; for most of us, finding the sweet spot between decent performance and a realistic upfront cost is what actually makes solar viable.

    Match your panel type to your specific roof setup—wasting money on premium monocrystalline panels when you have massive, unobstructed roof space is just bad math.

    View solar as a long-term tool to kill your utility bills, not just a way to feel good about the planet; if the math doesn’t work for your monthly budget, it’s not the right setup for you.

    ## Stop chasing the hype, start chasing the math

    “I’ve spent too many hours pointing my infrared thermometer at drafty windows to let people believe you need a million-dollar setup to go green. When it comes to solar, don’t get blinded by the flashy high-end tech; you just need to find the specific panel type that actually matches your roof’s footprint and your monthly budget so you can stop subsidizing the grid.”

    Tobias Nkemdirim

    Making the Right Call for Your Home

    Making the Right Call for Your Home.

    At the end of the day, choosing between monocrystalline, polycrystalline, or thin-film isn’t about finding the most expensive tech on the market; it’s about finding the specific fit for your roof and your wallet. I’ve seen too many people get caught up in the hype of high-end luxury panels when a more practical, mid-range option would have achieved the same reduction in their monthly utility bills. Whether you prioritize the high efficiency of mono-panels or the cost-effectiveness of poly, the goal remains the same: stop letting your hard-earned money leak out of your house through inefficient energy habits. Just remember to audit your space and your budget before you sign anything.

    Transitioning to solar can feel overwhelming, like you need a massive inheritance just to make a dent in your carbon footprint. But that’s a misconception I’m determined to bust. You don’t need a perfect, futuristic setup to start making an impact; you just need to start. Every kilowatt you generate yourself is a step toward energy independence and a smaller environmental footprint. Don’t wait for the “perfect” moment or the “perfect” technology to arrive. Grab your data, pick the panels that make sense for your reality, and start reclaiming your power today.

    Frequently Asked Questions

    Do I actually need the most expensive high-efficiency panels, or can I get away with cheaper ones if I have enough roof space?

    Honestly? If you’ve got plenty of roof real estate, you don’t need to chase those ultra-premium, high-efficiency panels. I see people overspending on top-tier tech thinking it’s the only way, but if your roof is large enough, you can hit your energy goals using more affordable, standard panels. Just spread them out. It’s about total system output, not just the specs on a single cell. Don’t pay a luxury premium for efficiency you don’t actually need.

    How much of a difference does panel type actually make in terms of my monthly electricity bill?

    It’s not just about the upfront cost; it’s about your ROI. If you go with cheap, low-efficiency polycrystalline panels, you’ll need a much larger roof footprint to generate the same power as high-efficiency monocrystalline ones. That means more hardware and more installation costs. I always tell my clients: look at the yield per square foot. The right panel type can be the difference between shaving $40 off your bill or actually hitting that net-zero target.

    If I'm renting or on a tight budget, are there any solar options that don't require a massive upfront investment?

    Look, I get it. Most solar talk assumes you own a house and have a huge savings account, but that’s not everyone’s reality. If you’re renting, look into portable solar generators—they’re basically “plug-and-play” power stations that you can take with you when you move. If you’re a homeowner on a budget, focus on small-scale DIY kits or even just balcony panels. You don’t need a full roof installation to start cutting costs.

  • Solar Options for Apartment Dwellers

    Solar Options for Apartment Dwellers

    I still remember sitting in my old rental apartment, shivering through February while staring at a utility bill that felt like a personal insult. I wanted to do something about it, but every time I searched for sustainable solutions, I was met with the same gatekeeping: “You need a roof, a massive budget, and a detached house to go green.” It’s a complete myth that renewable energy is only for homeowners with huge backyards. The truth is, the conversation around solar panels for apartments is often buried under expensive, complicated jargon that makes renters feel like they’re just out of luck.

    I’m not here to sell you a lifestyle you can’t afford or a system that requires a contractor and a prayer. My goal is to show you the actual, practical ways to harness solar energy when you don’t own the building. We’re going to look at portable setups, community solar programs, and balcony-ready tech that actually works for small-scale living. I promise to keep this data-driven and realistic, focusing on how you can lower your monthly costs without needing to tear up your lease or break the bank.

    Table of Contents

    Renter Friendly Solar Kits That Actually Work

    Renter Friendly Solar Kits That Actually Work

    If you’re living in a leased space, you probably can’t go drilling holes into the roof to mount a permanent array. This is where plug and play solar systems become a game changer. These kits are designed for simplicity; they essentially allow you to capture sunlight and feed that energy directly into your existing electrical setup or a battery unit without needing a licensed electrician to rewire your entire unit. I’ve seen a lot of people assume they’re stuck with the grid, but these modular setups change that.

    For those of us with limited square footage, a balcony solar panel installation is often the most realistic path forward. You can secure lightweight, high-efficiency panels to your balcony railing using non-permanent clamps. When paired with portable solar power stations, you aren’t just generating power; you’re creating a mobile energy reservoir. You can charge your laptop, run a small fan, or keep your phone alive during a blackout, all while significantly lowering your reliance on the local utility provider. It’s about making the most of the small footprint you have.

    Maximizing Small Space Renewable Energy Without the Stress

    Maximizing Small Space Renewable Energy Without the Stress

    The biggest hurdle with small-scale setups isn’t the tech itself; it’s the logistics of where to put it. If you don’t have a sprawling backyard, you have to get creative with your vertical and perimeter space. For most of my clients, a balcony solar panel installation is the most realistic starting point. You aren’t trying to power a whole building here; you’re looking to offset the heavy hitters like your laptop, phone, or even a small LED lamp setup. The trick is to position your panels where they get the most consistent light, even if that means moving them slightly throughout the day.

    If your balcony isn’t an option, don’t write off the idea entirely. I often suggest looking into portable solar power stations paired with foldable panels. These are great because they aren’t permanent fixtures—you can set them up near a sunny window during the day and tuck them away when you’re not using them. It’s all about incremental gains. You don’t need to achieve total energy independence overnight to make a dent in your monthly costs and your carbon footprint.

    5 Small Wins to Boost Your Apartment’s Solar Potential

    • Prioritize window placement. I always tell my clients to look at their light—if you can’t get a portable panel near a south-facing window, you’re basically fighting an uphill battle against physics.
    • Invest in a high-capacity power station. Since you can’t rewire the building, you need a way to actually store the juice you catch; a good portable battery acts as your personal, green grid.
    • Don’t ignore the “phantom load.” Even with solar, you’re wasting energy if you have old tech plugged in 24/7; use smart strips to make sure your solar juice isn’t leaking out through standby power.
    • Think vertical if you’re short on floor space. I’ve seen some clever setups using balcony railings or even tension rods to hold lightweight panels without drilling holes in the walls.
    • Track your sun hours with an app. It sounds nerdy, but knowing exactly when your balcony gets direct light helps you time when to charge your devices so you aren’t relying on the expensive grid during peak hours.

    The Bottom Line on Apartment Solar

    Focus on portable, plug-and-play kits that don’t require drilling holes or permanent installations to keep your security deposit safe.

    Prioritize high-efficiency panels that maximize every inch of your balcony or windowsill, since space is your biggest constraint.

    Treat solar as part of a larger strategy; it works best when you’re also tackling the small energy leaks in your space to stop wasting what you generate.

    ## Energy Autonomy Isn't Just for Homeowners

    “I used to think solar was a luxury reserved for people with sprawling suburban roofs and huge bank accounts, but that’s a misconception that keeps too many of us stuck paying inflated utility bills. Even in a cramped apartment, you can reclaim a bit of that energy independence; it’s not about going completely off-grid, it’s about making sure every watt you pay for is actually working for you.”

    Tobias Nkemdirim

    Making the Switch

    Making the Switch to portable solar power.

    At the end of the day, transitioning to solar in an apartment isn’t about having a sprawling rooftop or a massive budget; it’s about making the most of the tools available to you. We’ve looked at how portable kits can bridge the gap, how to optimize every inch of your balcony, and why you don’t need to wait for homeownership to start taking control of your power usage. Whether you’re plugging in a small power station to charge your laptop or setting up a compact panel by the window, these incremental shifts add up. It’s about moving away from the “set it and forget it” mentality of utility bills and moving toward a system where you actually understand and manage your footprint.

    I know it can feel overwhelming when you’re staring at a lease agreement that says “no permanent modifications,” but don’t let that stop you. Sustainability shouldn’t be a luxury reserved for people with detached houses and massive solar arrays. Every watt you generate yourself is a win for your wallet and a small victory for the planet. Start small, stay practical, and remember that consistency beats perfection every single time. You don’t need to overhaul your entire life overnight to stop wasting energy and start living more intentionally.

    Frequently Asked Questions

    Can I actually plug these portable solar kits into my apartment's wall outlets to charge my devices?

    Short answer: No, and you definitely shouldn’t try. These kits are designed to charge via USB or DC ports directly into your devices or a portable power station. Trying to “backfeed” your apartment’s electrical system through a wall outlet is dangerous, illegal in most places, and could fry your circuits. Think of these kits as independent power banks for your tech, not a way to bypass your utility meter. Keep it simple and safe.

    What happens to my solar setup if my landlord decides to change the rules or if I have to move suddenly?

    This is the part that makes most renters hesitate, but here’s the reality: since you’re using portable, plug-and-play kits, your setup is essentially “plug, play, and pack.” If your landlord pushes back or you get a sudden notice to move, you aren’t stuck with permanent hardware. You just unplug the panels, grab your gear, and take it to your next spot. It’s an investment in your lifestyle, not a permanent fixture of the building.

    How much of a dent can these small-scale kits really make in my monthly electricity bill?

    Look, I’ll give it to you straight: don’t expect these kits to power your AC or your oven. If you’re looking to wipe out your entire bill, you’ll be disappointed. But? If you use them to offset your “vampire loads”—like charging laptops, running LED lighting, or powering your router—you can realistically shave 10% to 15% off your monthly costs. It’s about incremental wins, not a total overhaul.

  • How to Determine Solar Panel Sizing

    How to Determine Solar Panel Sizing

    I was sitting in my first rental apartment last winter, shivering under three blankets while staring at a utility bill that felt like a personal insult. It wasn’t just the heating; it was the realization that most people approach energy upgrades with a “more is better” mindset that actually drains your wallet. I see it all the time: people getting hyped up by sales reps and overspending on massive, overkill arrays because they think they need to “future-proof” everything. But honestly? Most of that is just wasted capital. Getting your solar panel sizing wrong usually means one of two things: you’re paying for capacity you’ll never actually use, or you’re underpowered and still stuck paying the grid for the difference.

    I’m not here to sell you a dream or a massive installation project that takes a decade to pay off. My goal is to help you find that sweet spot where your system actually matches your real-world consumption. In this guide, I’m going to show you how to calculate exactly what you need based on your actual data, not some salesperson’s estimate. We’re going to focus on smart, efficient math so you can stop overpaying for power and start seeing a real return on your investment.

    Table of Contents

    Decoding Your Average Daily Kilowatt Hour Usage Without Wasting Money

    Decoding Your Average Daily Kilowatt Hour Usage Without Wasting Money

    Before you even look at a brochure for a new setup, you need to stop guessing. Most people make the mistake of looking at their monthly bill and just picking a random number, but that’s how you end up with a system that’s either way too small or an expensive, oversized paperweight. You need to find your actual average daily kilowatt hour usage. Grab your utility bills from the last twelve months—not just last month, because seasonal shifts change everything—and find the total kilowatt-hours (kWh) used. Divide that total by 365. That number is your baseline.

    Once you have that daily average, don’t just stop there. I always tell my clients to look at their “peak” days, like those brutal mid-winter stretches when the heater is working overtime. If you only size your system for your lowest usage month, you’re going to be buying power from the grid exactly when you can least afford it. Understanding this baseline is the most critical part of any photovoltaic system calculation because it prevents you from throwing money at hardware you don’t actually need.

    Using Solar Irradiance by Location to Avoid Buying Excess Capacity

    Using Solar Irradiance by Location to Avoid Buying Excess Capacity

    Once you’ve nailed down your daily energy needs, the next mistake I see people make is assuming a solar panel works the same way in sunny Arizona as it does in cloudy Seattle. You can’t just pick a number out of a hat. You have to account for solar irradiance by location, which is basically a measure of how much actual sunlight hits your roof on average. If you live in a region with high solar intensity, you can get away with a much smaller, cheaper array to meet your goals. If you’re in a gloomier climate, you’ll need more surface area to compensate for those gray days.

    I’ve seen too many people get caught in the trap of buying a massive system because they’re afraid of not having enough power. But if you over-calculate based on a “worst-case” sun scenario, you’re just throwing money at hardware that sits idle most of the year. Instead, use local irradiance data to fine-tune your photovoltaic system calculation. It’s about finding that sweet spot where you generate enough to cover your usage without paying for extra panels that will never actually pay for themselves.

    5 Ways to Size Your System Without Wasting Cash

    • Audit your “vampire loads” before you buy anything. I’ve seen people size massive arrays just to power old, inefficient appliances that could be replaced with something more efficient for half the cost. Check your actual usage, not just your bill’s peak numbers.
    • Don’t buy for your “best case” scenario. If you size your system based on a record-breaking sunny summer, you’re going to be left in the dark come February. Build your capacity around your median usage to keep things realistic.
    • Account for your battery storage needs, not just the panels. A huge solar array is useless if you don’t have a way to capture that energy for when the sun goes down. Sizing the panels without a plan for the storage is just an expensive way to export power back to the grid.
    • Look at your roof’s orientation, not just the square footage. You might have plenty of space, but if it’s all north-facing or shaded by a neighbor’s tree, those panels won’t hit their rated output. I always check the shading patterns before I even think about the math.
    • Leave a small “buffer” for future growth, but don’t overdo it. Maybe you’re planning to get an EV next year, so add a little headroom—but don’t buy a system for a lifestyle you don’t actually have yet. That’s just money sitting idle on your roof.

    The Bottom Line: Don't Buy More Than You Need

    Stop guessing and start measuring; your actual daily kWh usage is the only number that matters when deciding how many panels to install.

    Don’t let a salesperson talk you into a massive, overpriced array just because it looks impressive—match your capacity to your local solar irradiance to keep the ROI realistic.

    Aim for the “sweet spot” where your system covers your essentials without leaving you with expensive, wasted excess capacity that you’ll never actually use.

    ## The Trap of Over-Engineering

    Most people think more panels equals more savings, but that’s just a fast track to wasting money on hardware that’ll sit idle half the year. Real efficiency isn’t about how much power you can grab; it’s about sizing your system so precisely that every single watt you generate actually serves a purpose.
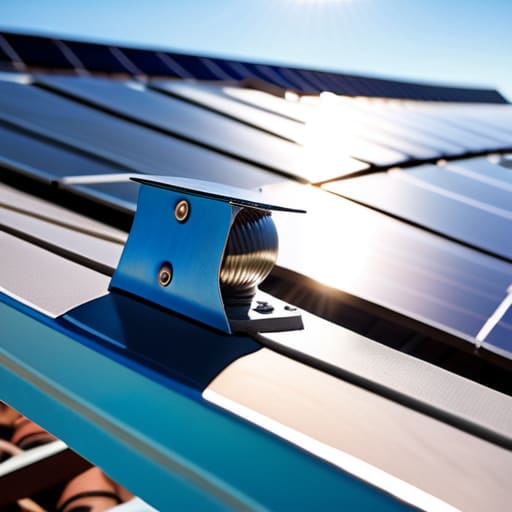
    Tobias Nkemdirim

    Cutting Through the Noise

    Cutting Through the Noise with solar data.

    At the end of the day, sizing your solar system isn’t about buying the biggest, flashiest setup on the market; it’s about the math. We’ve looked at how to accurately track your daily kilowatt-hour usage so you aren’t paying for juice you never use, and how to factor in your local solar irradiance to ensure your investment actually pays off. If you skip these steps, you’re just guessing—and in this economy, guessing is expensive. Don’t let a salesperson talk you into an oversized array just to pad their margins. Stick to the data, focus on your actual consumption, and build a system that fits your life, not their sales quota.

    Transitioning to renewable energy shouldn’t feel like a luxury reserved for the wealthy. It’s about taking control of your own utility costs and making a deliberate choice to stop wasting resources just because it’s the “easy” way out. Every kilowatt you generate on your own roof is a step toward a more resilient, sustainable way of living. It might feel daunting to start, but remember that progress beats perfection every single time. Start small, be smart with your numbers, and let’s build homes that are as efficient as they are affordable.

    Frequently Asked Questions

    What if my energy usage changes during the summer versus the winter—should I size for my highest month or my average?

    This is the classic dilemma. If you size for your peak winter usage, you’ll end up with a massive, expensive system that produces way too much excess power in the summer. If you size for your average, you might find yourself scrambling for power during those cold snaps. My advice? Aim for a middle ground. Size for your high-usage seasons, but prioritize adding a battery or a smart energy management system to bridge that seasonal gap.

    Do I need to account for future upgrades, like getting an electric vehicle, when I'm calculating my current panel needs?

    Look, if you’re planning on getting an EV in the next couple of years, you absolutely have to account for it now. An electric car is basically a second, much larger appliance running on your meter. If you size your system only for your current lights and fridge, you’ll end up with a massive deficit the moment you plug in that charger. It’s much cheaper to add a few extra panels during the initial install than to rewire everything later.

    If I can't afford a system that covers 100% of my usage right now, is it better to start small or wait until I can do the whole thing?

    Start small. Seriously, don’t wait until you have a massive lump sum sitting in the bank. If you wait, you’re just paying the utility company for power you could have been generating yourself. I always tell my clients to build a scalable foundation. Buy what you can afford now, aim for the biggest “bang for your buck” in terms of immediate savings, and then expand the system as your budget allows. Every kilowatt you generate today is money back in your pocket.