I remember standing in my old rental apartment three years ago, shivering in a room that felt more like a walk-in freezer than a living space. I had the heater cranked up to the max, but my hands were still numb, and my bank account was taking a massive hit every month. I pulled out my infrared thermometer, scanned the floorboards, and realized I wasn’t just losing heat through the windows—I was losing it through the very veins of the house. Most people think you need a massive, expensive renovation to fix a drafty home, but they completely overlook the silent energy thief: insulating water pipes. If your pipes are bare, you’re essentially paying your utility company to heat up your walls instead of your water.
I’m not here to sell you some high-tech, overpriced thermal system that requires a degree in engineering to install. My goal is to show you how practical, low-cost fixes can stop that thermal leakage immediately. I’m going to walk you through the exact, no-nonsense steps for insulating water pipes so you can keep your hot water hot and your monthly bills predictably low. No fluff, no marketing hype—just straightforward data and methods that actually work for real people on a budget.
Table of Contents
Reducing Hot Water Temperature Drop Without Breaking the Bank
One of the biggest culprits in a high utility bill is the heat lost while water is literally traveling from your heater to your tap. If you notice your shower starts lukewarm and then gets scorching hot, you’re likely dealing with a significant temperature drop. Instead of upgrading your entire water heater—which is expensive and overkill—focus on reducing hot water temperature drop by addressing the transit. When water sits in uninsulated pipes, it loses thermal energy to the surrounding air, forcing your heater to work overtime to compensate.
I usually recommend a simple foam pipe insulation installation for most residential setups. It’s a low-cost, high-impact move. When I’m doing audits, I look for those long stretches of exposed copper or PEX in basements or crawlspaces. Using pre-slit foam sleeves is a DIY job you can finish in an afternoon for the price of a few pizzas. It’s one of those energy saving plumbing tips that actually pays for itself within a single season by keeping that heat exactly where it belongs: in the water.
Comparing Pipe Insulation Materials to Find Your Best Value
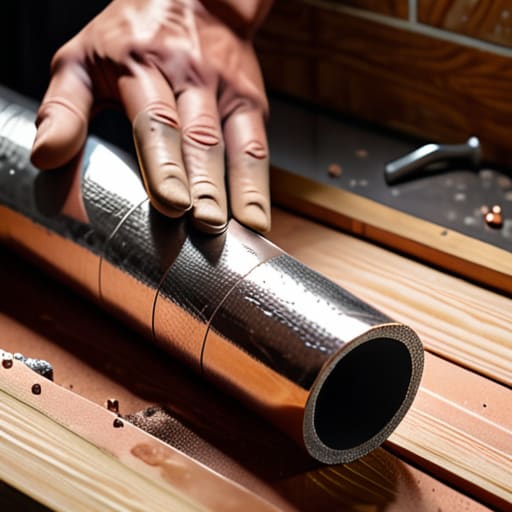
When you’re looking at a pipe insulation materials comparison, it’s easy to get overwhelmed by the sheer number of options at the hardware store. Most people default to those black foam tubes because they’re cheap and easy to find, and honestly, for a quick DIY project, they do the job. Foam pipe insulation installation is probably the lowest barrier to entry if you’re on a tight budget. Just slit them open, slide them over the pipes, and secure them with tape. They’re decent for basic temperature retention, but they aren’t the heavy-duty solution for every scenario.
If you’re dealing with more extreme conditions, like an unheated basement or an exterior wall, you might want to step up to elastomeric rubber or even fiberglass sleeves. While they cost a bit more upfront, they offer much better thermal resistance. This is especially crucial when it comes to preventing frozen pipes in winter, where a cheap foam sleeve might fail you when the temperature really drops. I usually tell my clients to look at the R-value; it’s the only metric that actually tells you how much work the material is doing to keep your heat where it belongs.
Five Quick Wins to Stop Heat Loss in Your Plumbing
- Focus on the “hot zones” first; start by insulating the pipes that run through unheated areas like crawlspaces, attics, or garages where the temperature drop is most aggressive.
- Don’t skip the joints and elbows; heat loves to escape from bends in the pipe, so make sure your insulation wraps tightly around every turn rather than just the straight runs.
- Grab a roll of foam tape for the gaps; even the best foam sleeves can leave tiny cracks at the connections, so use a bit of adhesive tape to seal those seams and keep the thermal barrier airtight.
- Check your water heater’s proximity; if your heater is far from your taps, prioritize insulating the longest stretches of pipe to ensure the water stays hot by the time it actually hits your shower.
- Measure twice, cut once; if your insulation is too loose or oversized, it won’t hug the pipe properly, creating air pockets that actually work against you and let the heat leak out.
The Bottom Line: Quick Wins for Your Pipes
Don’t overthink the materials; for most standard homes, foam sleeves are the most cost-effective way to stop heat loss without a massive upfront investment.
Focus your efforts on the “danger zones”—the sections of pipe that run through unheated areas like crawlspaces, attics, or garages where temperature drops are most extreme.
Treat insulation as a long-term savings tool, not just a DIY project; the small amount you spend now on lagging will pay for itself by lowering your monthly water heating costs.
## The Cost of Neglect
“Every time you turn on the tap and wait for the water to get warm, you’re literally watching your money leak out of your walls. Insulating your pipes isn’t some high-tech luxury; it’s just basic common sense to stop paying for heat that never even reaches your shower.”
Tobias Nkemdirim
Wrapping It All Up
At the end of the day, insulating your pipes isn’t about some massive, expensive renovation; it’s about stopping the small, invisible leaks in your budget. We’ve looked at how adjusting your water heater temperature can save you a surprising amount, and how picking the right material—whether it’s foam sleeves or more heavy-duty options—makes all the difference in how long that heat actually lasts. If you take the time to walk through your utility room with a bit of insulation in hand, you’re essentially plugging the holes where your money is escaping. It’s a practical, low-effort win that pays for itself faster than almost any other home hack I’ve audited.
I know it can feel overwhelming to tackle home efficiency, especially when it feels like you need a massive bank account to make a real dent in your carbon footprint. But I promise you, sustainability is built on these small, intentional decisions. You don’t need to live in a high-tech, solar-powered mansion to make an impact; you just need to stop wasting what you already have. Every pipe you wrap and every degree you optimize is a step toward a home that works for you, rather than against your wallet. Let’s stop letting our energy go to waste just because it’s easier to leave it alone.
Frequently Asked Questions
Do I really need to insulate the cold water pipes, or is it just for the hot ones?
It’s a common question, and honestly, most people think it’s just about keeping the hot water hot. But if you’re looking at the data, insulating your cold water pipes is a smart move too. In colder months, those pipes can lose heat to the surrounding air or even freeze, which is a nightmare for your plumbing. Keeping them insulated stabilizes the temperature and protects your setup from unnecessary thermal stress. It’s just more efficient overall.
How do I handle insulation if my pipes are tucked away in tight, awkward spots or behind walls?
I get it—not every pipe is sitting pretty in an open basement. When they’re tucked behind walls or in tight crawlspaces, it’s tempting to just skip them. Don’t. If you can reach them, use flexible foam sleeves; they’re easier to maneuver than rigid stuff. For those truly inaccessible spots, focus on the “ends” of the runs where they exit the wall. It’s about sealing the leaks you can reach to protect the whole system.
Is it worth the effort to insulate pipes in a basement or an unheated crawlspace compared to the rest of the house?
If you’re asking if you should prioritize the basement or crawlspace, the answer is a massive yes. In fact, that’s where the real battle is won. While insulating pipes in a conditioned room helps, it’s nothing compared to stopping heat loss in a freezing crawlspace. If your pipes are sitting in unheated air, they’re basically radiators working in reverse—bleeding energy into the ground. Focus your effort there first; that’s where you’ll see the biggest dent in your bills.
