Author: Tobias Nkemdirim

  • Effective Sprays for Solar Panel Maintenance

    Effective Sprays for Solar Panel Maintenance

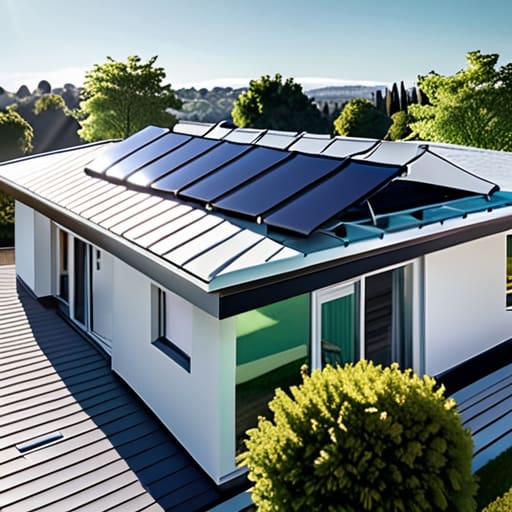
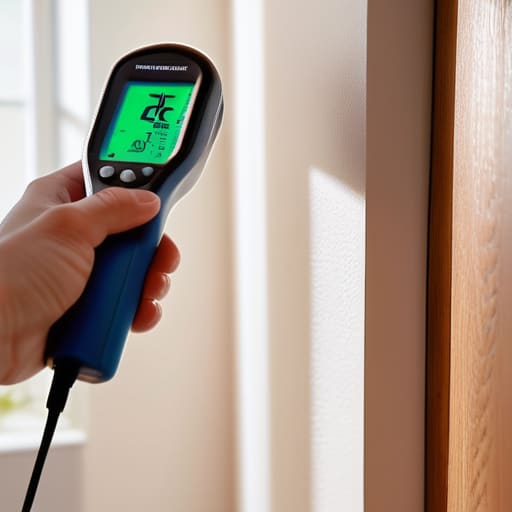
    I was standing on a client’s roof last Tuesday, clicking my infrared thermometer against a set of panels that looked perfectly fine to the naked eye, only to see the efficiency numbers tanking. It’s the same frustration I had growing up in that drafty rental; you think you’re doing everything right, but you’re literally leaking money through things you can’t see. Most people think they need a professional crew or some heavy-duty industrial chemical wash to fix this, but honestly, a lot of that high-end marketing is just noise. You don’t need a massive budget to fix a layer of grime; often, the right solar panel cleaning spray is the difference between a system that actually pays for itself and one that’s just an expensive piece of glass sitting on your roof.

    I’m not here to sell you on some miracle product that costs a fortune. My goal is to cut through the marketing fluff and show you how to maintain your setup without breaking the bank. I’ll be sharing my no-nonsense breakdown of which sprays actually work, how to apply them without damaging your cells, and how to ensure you’re getting every single watt of free energy possible.

    Table of Contents

    Preventing Solar Panel Grime to Keep Bills Low

    Preventing Solar Panel Grime to Keep Bills Low

    The thing about solar panels is that they’re basically giant magnets for whatever is floating in your local air. If you live near a busy road or in an area with high pollen, that thin layer of film builds up faster than you think. I’ve seen it happen during my audits—people think their system is failing because the output is dropping, but really, they’re just looking at a layer of grit. Preventing solar panel grime isn’t just about aesthetics; it’s about ensuring those photons actually reach the cells instead of getting bounced away by a dusty surface.

    To keep things running smoothly, you need to be strategic about how you clean. I always tell people to steer clear of harsh chemicals or stiff brushes that can scratch the glass. Instead, look into non-abrasive solar cleaners that lift the dirt without compromising the surface. If you want to get really proactive, some newer solar panel coating technology can actually help water bead off more effectively, making the self-cleaning process a bit more efficient during rainstorms. It’s all about those small, consistent habits that keep your energy output from dipping.

    Maximize Solar Efficiency Without Breaking the Bank

    Maximize Solar Efficiency Without Breaking the Bank

    When I’m out doing audits, I often see homeowners who think they’ve hit a plateau with their energy savings, only to realize their hardware is just struggling to breathe through a layer of grit. To truly maximize solar efficiency, you have to look beyond just the occasional rinse. It’s about a consistent rhythm of care. I always tell my clients that photovoltaic cell maintenance shouldn’t be a massive, expensive quarterly project; it’s more about small, manageable habits that ensure your investment actually performs the way the manufacturer promised.

    If you’re looking to level up, I’d suggest looking into non-abrasive solar cleaners rather than reaching for whatever harsh chemical is sitting under your sink. Using something too aggressive can actually damage the protective layers on your panels, which is the last thing you want when you’re trying to lower long-term costs. I’ve found that staying on top of the grime is the most cost-effective way of improving energy output without needing to buy more hardware. It’s simple math: cleaner panels mean more juice, which means a faster return on what you’ve already spent.

    5 Ways to Keep Your Panels Working Harder

    • Skip the harsh detergents; most household soaps leave a film that actually traps more dirt, so stick to a dedicated solar spray that rinses clean.
    • Timing is everything—don’t spray your panels in the heat of the midday sun or you’ll deal with water spots that act like tiny magnifying glasses for heat damage.
    • Use a soft-bristled brush or a microfiber cloth with your spray to avoid micro-scratches that can permanently drop your energy output.
    • Check your local water quality first; if you have hard water, use a deionized spray to prevent calcium buildup from blocking the light.
    • Don’t wait for a massive buildup to act; a quick, light spray once a month is way more effective (and cheaper) than a heavy-duty scrub once a year.

    The Bottom Line on Keeping Your Panels Productive

    Don’t let a thin layer of dust or bird droppings act like a tax on your electricity; regular cleaning with a proper spray ensures you’re actually capturing the sunlight you’re paying for.

    Skip the harsh chemicals that can damage the glass; stick to a dedicated solar cleaner to protect your investment and keep your efficiency numbers where they should be.

    Think of cleaning as a maintenance task, not a chore—a quick spray every few months is a small effort that prevents massive energy waste and keeps your utility bills from creeping up.

    ## Don't Let Dirt Tax Your Energy

    “I’ve seen too many people treat solar panels like ‘set and forget’ appliances, but if you let a layer of grime build up, you’re essentially paying a hidden tax on every kilowatt you fail to capture. A decent cleaning spray isn’t a luxury; it’s a tool to make sure the hardware you already invested in actually does its job.”

    Tobias Nkemdirim

    Keeping the Momentum Going

    Keeping the Momentum Going with solar maintenance.

    At the end of the day, maintaining your solar setup doesn’t need to be a massive, expensive undertaking. We’ve looked at how a bit of regular maintenance—specifically using the right cleaning spray—can prevent grime from choking your output and eating into your monthly savings. It’s about moving away from the “set it and forget it” mindset that leads to wasted energy. By choosing a cleaner that actually protects your panels rather than leaving behind harsh residues, you’re ensuring that your investment works as hard as it possibly can. It’s a small, data-backed habit that pays off every time your meter stops spinning quite so fast.

    I know it can feel like one small task won’t change much in the grand scheme of the climate crisis, but that’s where we get it wrong. Sustainability isn’t just about the big, flashy tech; it’s about the smart, intentional ways we manage what we already have. Every bit of sunlight you capture instead of letting it bounce off a layer of dust is a win for your wallet and a win for the planet. Don’t let your hard-earned energy go to waste just because of a little bit of dirt. Keep your panels clean, keep your bills low, and let’s make living sustainably a standard, not a luxury.

    Frequently Asked Questions

    Is it actually worth buying a specialized spray, or can I just use a garden hose and some mild soap?

    Look, I get the temptation to just grab the garden hose and some dish soap—it’s easier and cheaper. But here’s the reality: standard soaps can leave a thin film that actually attracts more dust over time, creating a cycle of grime. If you’re on a tight budget, a soft cloth and plain water are fine, but a dedicated spray is worth it for the long game. It breaks down the buildup without leaving that sticky residue.

    How often do I really need to clean them to see a noticeable difference in my energy savings?

    Honestly, it depends on your environment, but I usually tell people to check them every few months. If you’ve got heavy pollen, dust, or bird droppings building up, you’ll see a drop in efficiency almost immediately. I always say: don’t wait for a massive bill to notice. If you see a visible film of grime, clean them. It’s better to spend twenty minutes cleaning now than losing 10-15% of your power output all month.

    Will using a harsh cleaning chemical actually damage the anti-reflective coating on my panels?

    Short answer: Yes, absolutely. Don’t do it. Most solar panels have a specialized anti-reflective coating designed to catch as much light as possible, and harsh chemicals—especially anything with abrasives or high acidity—can eat right through that layer. Once that coating is compromised, your efficiency takes a massive hit, and you’re basically paying for hardware that’s underperforming. Stick to a soft brush and plain water; it’s safer for your wallet and your panels.

  • How Ground Source Geothermal Heating Functions

    How Ground Source Geothermal Heating Functions

    I still remember sitting in my old rental apartment, shivering under three blankets while watching my utility bill climb higher than the temperature inside. It felt like a scam—paying a fortune just to fight a losing battle against the cold. Most people think you need to be a millionaire or live in a high-tech eco-mansion to access serious efficiency, but that’s a lie. People get so lost in the jargon of geothermal heating mechanics that they miss the actual point: it’s about tapping into a constant, free energy source right under your feet to stop flushing money down the drain.
    I’m not here to sell you a lifestyle brand or some over-engineered fantasy that requires a PhD to operate. My goal is to strip away the complexity and show you how these systems actually function in a real-world setting. I’ll break down the practical realities of how heat moves from the earth into your living room, without the fluff or the sales pitch. You’re going to walk away knowing exactly how this tech works and, more importantly, whether it’s a smart investment for your specific home and budget.

    Table of Contents

    Mastering the Geothermal Energy Exchange Process

    Mastering the Geothermal Energy Exchange Process.

    To understand how this actually works in a real home, you have to look at the geothermal energy exchange process as a continuous loop of moving heat rather than creating it. Unlike a furnace that burns fuel to generate warmth, a geothermal system essentially acts as a heat mover. It relies on the fact that even when the air above ground is freezing, the temperature a few feet below the surface stays relatively constant. By tapping into this stable temperature, the system uses a fluid to pull warmth from the earth during the winter and dump excess heat back into the ground during the summer.

    The efficiency of this movement depends heavily on your specific setup, specifically the choice between closed-loop vs open-loop systems. In a closed-loop setup—which is what I see most often in residential audits—a continuous loop of high-density polyethylene pipe circulates a heat-transfer fluid. The success of this entire operation hinges on the thermal conductivity of soil in your backyard; if your soil doesn’t transfer heat well, your system has to work much harder to achieve the same results. It’s all about optimizing that subsurface connection to ensure you aren’t fighting against your own landscape.

    How the Refrigerant Evaporation Cycle Saves You Money

    How the Refrigerant Evaporation Cycle Saves You Money

    To understand why this tech actually pays off, you have to look at the physics of the refrigerant evaporation cycle. Think of it like a high-tech version of how sweat cools your skin. Inside the unit, a specialized fluid absorbs heat from the ground—even when it’s freezing outside—and turns from a liquid into a gas. This phase change is where the magic happens; it’s the moment the system captures that low-grade warmth from the earth and concentrates it into something usable for your living room.

    Because we aren’t burning fuel to create heat, but rather just moving it, the efficiency is insane. Whether you are looking at closed-loop vs open-loop systems, the core principle remains the same: you’re leveraging the constant temperature of the earth to do the heavy lifting. Instead of your furnace fighting an uphill battle against the winter air, the system just pulls from a steady, reliable source. It’s a smarter way to manage your home’s climate without constantly flushing money down the drain every time the temperature drops.

    5 Ways to Get the Most Out of Your Geothermal Setup

    • Don’t ignore your loop integrity; even a tiny pressure drop in your ground loop means your heat pump is working twice as hard to move half the energy, which is basically just throwing money into the dirt.
    • Size your system for your actual footprint, not your “dream home” plans; an oversized heat pump will cycle too frequently, which kills efficiency and puts unnecessary wear on the compressor.
    • Keep your indoor air filters spotless, because if your airflow is restricted, the entire thermal exchange process stalls out, forcing the system to struggle against its own mechanics.
    • Insulate your heat pump’s distribution lines as heavily as you would your exterior walls; there’s no point in extracting heat from the earth if you’re losing it all through the pipes before it even reaches your living room.
    • Monitor your thermostat’s “deadband”—the temperature gap between heating and cooling—to ensure the system isn’t constantly toggling between modes, which is a massive energy drain.

    The Bottom Line on Geothermal Efficiency

    You aren’t actually “creating” heat; you’re just moving it. By leveraging the constant temperature of the earth, you stop fighting the weather and start using physics to do the heavy lifting.

    The real savings happen in the cycle. The way the refrigerant moves heat from the ground into your home is what prevents you from constantly burning through expensive, traditional fuels.

    It’s a long-term play for your wallet. While the tech sounds complex, the goal is simple: stop flushing money down the drain on inefficient heating and start investing in a system that works with nature, not against it.

    ## Efficiency Isn't About Luxury

    “Most people think sustainable heating is a luxury reserved for the wealthy, but geothermal mechanics prove otherwise; it’s just about stoping the cycle of fighting against your environment and instead, finally working with it to keep your money in your pocket.”

    Tobias Nkemdirim

    Making the Switch Count

    Making the Switch Count with geothermal heating.

    At the end of the day, geothermal heating isn’t just some complex physics experiment; it’s a practical way to stop fighting against the seasons and start working with them. By understanding how the ground-source exchange works and how the refrigerant cycle pulls heat from the earth, you can see that this isn’t just about “going green.” It’s about reclaiming control over your monthly expenses. Instead of paying for inefficient combustion or high-voltage electric resistance, you’re leveraging a constant, natural thermal reservoir to keep your space comfortable. It’s a shift from wasting energy to managing it intelligently through smart mechanics.

    I know the upfront costs can feel intimidating—I’ve stood in drafty apartments myself, staring at utility bills that felt like a punishment. But when you look at the long-term data, the math starts to change. Investing in geothermal is one of the most effective ways to decouple your comfort from the volatility of fossil fuel prices. You don’t need to be a millionaire to start thinking this way; you just need to start prioritizing efficiency over convenience. Let’s stop throwing money into the air and start building homes that actually respect both our wallets and the planet.

    Frequently Asked Questions

    Is the upfront cost of installing a geothermal loop actually worth it if I'm on a tight budget?

    Look, I get it. The sticker shock on a geothermal install is real, and when you’re watching every cent, it feels impossible. If you’re looking for immediate relief next month, this isn’t it. But if you’re playing the long game, it’s a different story. Between the massive drop in monthly utility bills and the available tax credits, the system eventually pays for itself. It’s an investment in stopping the slow leak of cash from your bank account.

    How much maintenance should I expect to do compared to a standard gas or electric furnace?

    Honestly, it’s a relief. If you’re coming from a standard gas or electric furnace, you’re going to love this. Since the heavy lifting happens underground in a sealed loop, there’s far less mechanical wear and tear in your living space. You’ll still need to swap filters and check the heat pump regularly, but you aren’t dealing with constant combustion or messy fuel deliveries. It’s much more “set it and forget it” than a gas furnace.

    Will a geothermal system actually work in my specific climate, or is it only efficient in certain regions?

    I get this question a lot when I’m out on audits. The short answer? Yes, it’ll work almost anywhere. Unlike air-source heat pumps that struggle when the temperature drops below freezing, geothermal taps into the earth’s constant temperature. Whether you’re in a humid coastal area or a place where the ground freezes solid, that subterranean warmth stays stable. You aren’t fighting the weather; you’re bypassing it entirely to keep your costs predictable.

  • Managing Dehumidifier Energy Consumption

    Managing Dehumidifier Energy Consumption

    I still remember the damp, heavy chill of my first rental apartment—the kind of moisture that settles into your bones and makes your clothes feel slightly limp. I spent most of my nights listening to the constant, aggressive hum of a cheap dehumidifier, terrified that every hour it ran was just another dent in my bank account. Most people will tell you that managing humidity is an “all or nothing” game where you either live in a swamp or pay a massive premium on your electric bill. They make it sound like you have to choose between a healthy home and a functional budget, but that’s just not true. The reality of dehumidifier energy use isn’t about buying the most expensive, high-tech unit on the market; it’s about understanding how to run what you have without bleeding money.

    I’m not here to sell you on some “smart” gadget that costs more than your monthly rent. Instead, I’m going to give you the actual, data-driven ways to monitor your dehumidifier energy use and optimize it for real-world living. We’re going to look at the small, practical tweaks that actually move the needle on your utility costs. My goal is to help you keep your air dry and your carbon footprint small without sacrificing your sanity or your savings.

    Table of Contents

    Choosing Energy Star Rated Dehumidifiers to Save Big

    Choosing Energy Star Rated Dehumidifiers to Save Big.

    When I’m auditing a home, I often see people buying the cheapest unit they can find at a big-box store, only to realize later they’re essentially paying a “convenience tax” every single month. If you want to see a real difference in your monthly statement, you need to look for energy star rated dehumidifiers. These units are engineered to pull moisture from the air without pulling massive amounts of current from your socket. It’s a classic case of spending a little more upfront to avoid a massive headache—and a massive bill—down the line.

    It’s also worth noting that not all technology is created equal when it comes to efficiency. You’ll often see a debate about compressor vs desiccant energy consumption; generally, compressor models are much more efficient for standard home use, whereas desiccant types can be power-hungry. I always tell my clients to match the machine to the space. If you try to run a small unit in a massive basement, it’ll run non-stop, spiking your kilowatt hours per day and defeating the whole purpose of owning one. Match the capacity to your room size, and you’ll actually see the savings.

    Understanding Kilowatt Hours Per Day Dehumidifier Realities

    Understanding Kilowatt Hours Per Day Dehumidifier Realities.

    When I’m out on an audit, I often see people staring at their utility bills, wondering why the numbers are spiking. Usually, it’s because they’re treating their dehumidifier like a set-it-and-forget-it appliance without looking at the actual math. To get a real sense of your costs, you have to look at the kilowatt hours per day dehumidifier models actually pull while running. It isn’t just about the wattage on the sticker; it’s about how long that compressor stays engaged to hit your target.

    The math changes drastically depending on whether you’re running a compressor model or a desiccant one. In my experience, the compressor vs desiccant energy consumption debate is huge for your wallet; compressors are generally more efficient for standard home use, whereas desiccants can be real power hogs if you aren’t careful. You also can’t ignore the impact of room size on power usage. If you try to dry out a massive, uninsulated basement with a small unit, it’ll run 24/7, effectively turning your dehumidifier into a very expensive heater that does nothing but drain your bank account.

    5 Ways to Stop Your Dehumidifier from Eating Your Budget

    • Set the humidity target to 45-50%. If you try to dry out your house to 30%, you’re just fighting a losing battle against physics and watching your meter spin for no reason.
    • Keep it in the center of the room, not tucked in a corner. Air needs to circulate around the unit to work efficiently; if it’s choked for space, the motor works twice as hard to pull in the same amount of moisture.
    • Clean those filters weekly. I see this all the time during audits—dusty filters force the machine to struggle, which spikes your energy draw. A quick rinse can actually make a measurable difference in your monthly bill.
    • Use a continuous drain hose if you can. Relying on the internal tank means the machine shuts off and on constantly; a steady drain keeps the cycle more consistent and prevents unnecessary energy spikes from constant restarts.
    • Seal the room you’re treating. There’s no point in running a high-powered machine if you have a drafty window or a gap under the door letting in more humid air. Close the loop so the machine isn’t trying to dehumidify the entire neighborhood.

    The Bottom Line: Keeping it Dry Without Draining Your Wallet

    Don’t just look at the price tag on the box; check the energy label. A slightly more expensive, efficient model will pay for itself in lower monthly bills long before you know it.

    Stop running your unit on max power 24/7. Use a built-in humidistat to set a target level so the machine only kicks in when it actually needs to work.

    Keep the airflow clear. If your dehumidifier is tucked in a cramped corner or covered in dust, it’s working twice as hard for half the result, which is just throwing money away.

    ## The Real Cost of Dampness

    “Most people see a dehumidifier as a way to save their walls from mold, but they forget it’s also a constant drain on their bank account; if you aren’t monitoring the actual draw, you’re basically just paying a monthly tax for inefficient air.”

    Tobias Nkemdirim

    Cutting the Humidity Without Cutting Your Budget

    Cutting the Humidity Without Cutting Your Budget

    At the end of the day, managing moisture in your home doesn’t have to be a constant drain on your wallet. We’ve looked at how much sense it makes to invest in an Energy Star model and how to actually track those kilowatt-hours so you aren’t flying blind. It really comes down to intentionality. Whether you are setting a timer to avoid running the unit during peak pricing or simply ensuring the room is sealed tight so the machine isn’t fighting against a drafty window, these small adjustments add up. You don’t need a massive home automation system to see a difference; you just need to stop letting energy leak through the cracks of your daily routine.

    I know it can feel overwhelming to think that every small appliance is another way to lose money, but I promise you, it isn’t. Living sustainably isn’t about living in deprivation; it’s about being smart with the resources you already have. When you optimize your dehumidifier, you aren’t just lowering a number on a utility bill—you are reclaiming control over your living space and your impact on the planet. Start with one small tweak this week. You’ll find that efficiency is a habit, not a luxury, and once you start seeing those savings, you won’t want to go back.

    Frequently Asked Questions

    Is it actually cheaper to run a dehumidifier on a timer rather than leaving it on 24/7?

    It depends on your home’s moisture baseline, but generally, yes—running it on a timer is cheaper. If you leave it on 24/7, you’re paying to fight humidity that might not even be there. I usually recommend setting it to kick in during the peak humidity hours or when you’re actually home. It prevents that constant, wasteful cycle and keeps your bill from creeping up for no reason. Just don’t let the levels spike too high.

    How much of an impact does the actual room temperature have on my electricity bill when the unit is running?

    Here’s the reality: temperature is a massive factor. Dehumidifiers work by pulling moisture from the air, but they struggle in cold rooms. If your space is chilly, the unit has to work twice as hard to process that air, often causing the coils to frost up. This triggers the defrost cycle, which eats up electricity without actually removing any water. Keeping your room at a steady, moderate temperature is the easiest way to keep those bills from spiking.

    At what point does the cost of running a dehumidifier outweigh the benefits of preventing mold?

    It’s a balancing act, but here’s the reality: if you’re constantly fighting mold with chemicals or expensive repairs, the electricity cost is already a losing battle. The cost only outweighs the benefit when you’re running a massive, inefficient unit in a space that’s actually well-sealed. If your humidity stays high despite the machine running, you don’t have a dehumidifier problem—you have a structural leak or ventilation issue that no amount of power can fix.

  • Ways to Prevent Heat Loss From Water Tanks

    Ways to Prevent Heat Loss From Water Tanks

    I still remember the winter I spent in that drafty rental apartment, shivering every time I stepped into the shower because the water temperature felt like it was dropping by the second. I used to think I just needed a bigger heater or a more expensive boiler, but the truth was much simpler and, frankly, a bit embarrassing. I was literally watching my money vanish into thin air because I hadn’t looked at the basics. Most people think that insulating water tanks requires some high-end, professional retrofit that costs a fortune, but that’s a total myth. You don’t need a massive capital investment to stop your hot water from losing its edge; you just need to stop the heat from escaping through the sides of the tank like it’s looking for an exit.

    I’m not here to sell you on expensive, complicated HVAC systems or “smart” gadgets that do nothing but drain your wallet. My goal is to give you the straightforward, data-backed reality of how to do this yourself. I’ll show you exactly how to tackle the job using low-cost materials that actually work, so you can keep your water hot and your utility bills down to earth.

    Table of Contents

    Lowering Utility Bills With Insulation and Smart Heat Retention

    Lowering Utility Bills With Insulation and Smart Heat Retention

    When I’m auditing a home, the water heater is often the biggest “silent” thief of electricity or gas. Most people assume that once the water is hot, the job is done. But if your tank isn’t wrapped, it’s constantly fighting a losing battle against the ambient air in your utility closet or basement. This is where reducing standby heat loss becomes a game-changer for your wallet. Instead of your heater cycling on and off all night just to maintain temperature, a proper layer of thermal protection keeps that heat locked inside where it belongs.

    I always recommend looking into specific water heater jacket benefits because they are one of the most cost-effective upgrades you can make. You don’t need a massive renovation; you just need high-quality thermal insulation materials for tanks to create a barrier. By installing a simple jacket, you aren’t just being “green”—you are directly lowering utility bills with insulation that pays for itself within a few months. It’s a small, pragmatic step that turns a massive energy drain into a much more controlled, efficient system.

    Reducing Standby Heat Loss Without Breaking the Bank

    Reducing Standby Heat Loss Without Breaking the Bank

    Most people don’t realize that their water heater is essentially a giant, expensive radiator that stays on all day, even when nobody is using it. This constant leakage is what we call standby heat loss, and it’s a massive silent killer for your monthly budget. I’ve seen so many homes where the tank sits in a utility closet, radiating heat into the surrounding air instead of keeping the water hot for your shower. It’s incredibly frustrating to see that much energy just vanish.

    The good news is that reducing standby heat loss doesn’t require a massive renovation or a high-end plumber. If you’re looking for a high-impact, low-cost fix, I always suggest looking into a water heater jacket. These are essentially thermal blankets designed specifically for your unit. By using high-quality thermal insulation materials for tanks, you create a barrier that traps the heat exactly where it belongs. It’s one of those small, pragmatic wins that pays for itself within a few months of seeing your utility statement.

    5 Quick Wins to Stop Your Hot Water from Escaping

    • Grab a high-quality thermal jacket specifically designed for your tank size; it’s a much tighter, more effective fit than trying to DIY something with old blankets.
    • Check your temperature settings—if your thermostat is cranked up way past 60°C (140°F), you’re just fighting a losing battle against heat loss and wasting electricity.
    • Don’t forget the pipes; wrapping the first meter of pipe coming out of the tank in foam lagging can stop a massive amount of heat from bleeding out before it even reaches your tap.
    • Use my favorite tool—an infrared thermometer—to scan your tank and pipes; if you see a sudden temperature drop, you’ve found a leak or a spot that needs more insulation.
    • If you’re dealing with an older, uninsulated tank, even a basic reflective wrap can act as a decent barrier to keep that stored energy where it belongs.

    The Bottom Line on Tank Insulation

    Stop letting heat bleed out of your water tank; a simple, inexpensive insulation jacket is one of the fastest ways to see a drop in your monthly energy spend.

    Focus on the “low-hanging fruit” first—insulating your pipes and tank provides immediate thermal retention without needing a massive upfront investment.

    Efficiency isn’t about buying expensive tech; it’s about plugging the leaks in your current system so you aren’t paying to heat air that’s just escaping into the room.

    The Invisible Leak

    “Most people focus on drafty windows, but they completely ignore the massive heat sink sitting in their utility closet. An uninsulated water tank is basically just a slow leak for your bank account; wrapping it isn’t just about being ‘green,’ it’s about stopping your money from evaporating into thin air.”

    Tobias Nkemdirim

    The Bottom Line on Heat Retention

    The Bottom Line on Heat Retention.

    At the end of the day, insulating your water tank isn’t some complex engineering project; it’s just common sense. We’ve looked at how a simple thermal jacket can stop heat from bleeding into the air and how managing standby loss can keep your utility bills from spiking for no reason. I’ve seen too many people pay for energy they never actually use, simply because they ignored the hardware sitting in their utility closet. By focusing on these small, high-impact adjustments, you aren’t just saving a few cents on your monthly statement—you are actively plugging the leaks in your home’s thermal envelope.

    I know that when you’re staring at a rising energy bill, it feels like the system is rigged against you. But sustainability shouldn’t be a luxury reserved for people with massive budgets and solar arrays. It starts with these practical, low-cost wins that anyone can implement. Every bit of heat you trap is a win for your wallet and a win for the planet. Don’t let your hard-earned money evaporate through a preventable mistake; take a moment to check your setup, grab some insulation, and start taking control of your energy footprint today.

    Frequently Asked Questions

    Do I need to worry about the insulation affecting the temperature settings on my water heater?

    Short answer: No, you don’t need to worry about the thermostat itself. The insulation sits on the outside of the tank, so it won’t mess with the internal sensors or your temperature settings. Think of it like wearing a puffer jacket; your body heat stays the same, you’re just not losing it to the air. Just make sure you don’t wrap the actual heating elements or any pressure relief valves. Keep the sensors clear, and you’re good.

    Is it worth buying a pre-made jacket, or can I just use leftover materials I have around the house?

    Look, if you’re trying to save money, DIY is tempting, but it’s a gamble. Using leftover scraps for a makeshift jacket wrap or insulation can work for small, specific gaps, but it’s rarely as effective as a purpose-built solution. If you’re repurposing materials, focus on high-density stuff. Otherwise, invest in a decent, pre-made thermal jacket for your tank. It’s a small upfront cost that pays for itself much faster than a patchwork job.

    How often should I check the insulation to make sure it hasn't degraded or become damp?

    I’d recommend a quick visual check every six months—ideally when you switch from heating to cooling or vice versa. Grab your thermometer and run it along the tank; if you see sudden temperature drops, the insulation is failing. Most importantly, feel for dampness. If the jacket feels soggy or looks discolored, moisture has likely seeped in, which actually destroys its effectiveness. Don’t wait for a massive bill to realize your insulation is compromised.

  • How Geothermal Heating Systems Work

    How Geothermal Heating Systems Work

    I still remember sitting in my old rental apartment, shivering under three blankets while watching the utility meter spin like it was possessed. It was a losing battle; I was paying a premium just to fight a drafty house that couldn’t hold onto a single degree of warmth. Most people hear about geothermal heating systems and immediately think they need a massive inheritance or a literal estate to make it work. They get sold this idea that sustainable living is a luxury reserved for the ultra-wealthy, which is a complete load of rubbish.

    I’m not here to sell you on some high-concept, shiny green dream that costs more than your car. My goal is to strip away the marketing fluff and look at the actual data. I’ll show you how geothermal heating systems actually function in a real-world budget and whether the upfront cost truly pays off in long-term savings. We’re going to look at the practical reality of the installation, the efficiency gains, and how you can stop bleeding money through your floorboards without going broke.

    Table of Contents

    Understanding Geothermal Heat Pump Efficiency for Your Wallet

    Understanding Geothermal Heat Pump Efficiency for Your Wallet

    When I’m auditing a home, I’m usually looking for where the money is leaking out—literally. Most people think of heating as a constant battle against the air temperature, but that’s where the inefficiency lies. Geothermal heat pump efficiency works because it stops fighting the weather. Instead of trying to create heat from scratch using expensive electricity or gas, these systems tap into the ground temperature stability found just a few feet below the surface. Because the earth stays at a relatively constant temperature year-round, your unit isn’t working overtime to fight a sub-zero wind chill; it’s just moving existing warmth from the soil into your living room.

    Of course, the math gets a bit more complex depending on your property. You’ll likely run into the debate between closed loop vs open loop systems. A closed loop is generally the standard for residential setups, using a sealed pipe network to circulate fluid, while open loop systems pull directly from groundwater. While the upfront geothermal installation costs can feel like a gut punch compared to a standard furnace, you have to look at the long-term math. You aren’t just buying a heater; you’re investing in a system that treats your home like a thermal battery.

    Why Ground Temperature Stability Changes Everything

    Why Ground Temperature Stability Changes Everything.

    The reason this works so much better than a standard furnace comes down to one thing: the earth doesn’t care what the weather is doing above the surface. While your neighbor is struggling with a heat pump that’s fighting a sub-zero wind chill, your system is tapping into a constant, reliable source. Because of ground temperature stability, the earth stays at a relatively consistent temperature just a few feet down, regardless of whether it’s a heatwave or a blizzard.

    I usually explain it like this: why try to pull heat from freezing air when you can pull it from a steady, lukewarm underground reservoir? This consistency is what drives high geothermal heat pump efficiency. Instead of your HVAC system working overtime to combat extreme temperature swings, it’s just performing a steady exchange. It’s a much more predictable and stable way to manage your home’s climate. Whether you end up with closed loop vs open loop systems, the core advantage remains the same—you’re leveraging the planet’s own thermal inertia to keep your living room warm without the massive energy spikes.

    How to Make Geothermal Actually Work for Your Budget

    • Get a professional site assessment before you buy anything. I’ve seen people try to DIY the loop layout, but if your soil conductivity isn’t right, you’re just burying money in the backyard.
    • Don’t ignore your home’s insulation while installing the system. A geothermal heat pump is efficient, but it’s still fighting a losing battle if your heat is leaking out through old, drafty windows.
    • Size the system correctly for your specific square footage. Oversizing a unit is a common mistake that leads to “short-cycling,” which wears out the components and kills your energy savings.
    • Look into local government rebates and tax credits immediately. Since I started auditing homes, I’ve realized that these incentives are often the only reason the upfront cost becomes manageable for a regular person.
    • Pair your system with smart thermostats. You’ve invested in high-end tech; don’t manage it with a manual dial. Using data to automate your heating cycles is the easiest way to squeeze every bit of efficiency out of the system.

    The Bottom Line on Geothermal

    Don’t let the upfront cost scare you off; while the installation is more expensive than a standard furnace, the massive drop in your monthly utility bills means the system eventually pays for itself.

    Unlike air-source pumps that struggle when it’s freezing outside, geothermal relies on the constant temperature of the earth, making it a much more reliable way to keep your home steady without cranking the thermostat.

    Think of it as a long-term investment in your home’s efficiency rather than just a repair; you’re essentially trading high, unpredictable energy costs for a stable, low-impact system that lasts.

    ## The Real Math of Geothermal

    “Look, I’ve spent way too many winters shivering in drafty rentals because heating felt like a luxury I couldn’t afford. Geothermal isn’t just some high-tech flex for eco-conscious billionaires; it’s a practical, data-backed way to stop throwing your hard-earned money into the air every time the temperature drops.”

    Tobias Nkemdirim

    The Bottom Line on Going Geothermal

    The Bottom Line on Going Geothermal.

    Look, I know the upfront cost of a geothermal installation can feel like a gut punch when you’re looking at your bank balance. But after auditing enough homes, the math becomes pretty clear: you aren’t just buying a heating system; you’re investing in long-term energy independence. By leveraging that constant ground temperature we talked about, you’re moving away from the volatile, expensive cycle of fossil fuels and toward a system that actually works with the planet instead of against it. It’s about moving from a mindset of constant, expensive repairs to one of predictable, low-cost efficiency that pays for itself over time.

    At the end of the day, my goal has always been to prove that sustainability isn’t a luxury reserved for people with massive estates. Whether you start with a full geothermal overhaul or just focus on smaller efficiency upgrades first, the principle remains the same: stop letting your hard-earned money leak out of your windows and into the atmosphere. We have the tech to live comfortably without draining our wallets or the environment. It’s time to stop settling for inefficient, expensive “convenience” and start making smart, data-driven choices for our homes and our future.

    Frequently Asked Questions

    How much is this actually going to cost me upfront compared to a standard heat pump?

    Let’s be real: the upfront cost is the biggest hurdle. You’re looking at a much steeper initial investment compared to a standard air-source heat pump—often double or even triple the price. That’s because you’re paying for the ground loops and the specialized excavation. It’s a heavy lift for your bank account right now, but I always look at the long game. If you can stomach the entry cost, the efficiency payoff eventually balances the scales.

    Do I need a massive backyard to install the ground loops, or can this work for smaller properties?

    That’s a common concern, and honestly, it’s the first thing I check when I’m auditing a site. You don’t necessarily need a massive estate. If you have a standard suburban lot, we can often look into horizontal loops in a smaller, concentrated area, or even vertical boreholes if space is tight. Vertical systems take up way less surface area, though they can be a bit more of an upfront investment. It’s all about the layout.

    How long does the system actually last before I’m looking at expensive repairs or a full replacement?

    Look, I know the “upfront cost” anxiety is real, but here’s the data: you’re playing the long game here. The indoor heat pump unit usually lasts about 20 to 25 years. The real MVP, though, is the ground loop—that underground piping can easily last 50 years or more. If you keep up with basic filter changes and don’t neglect maintenance, you aren’t looking at a replacement anytime soon. It’s an investment, not a quick fix.

  • The Cost of Using Electric Blankets

    The Cost of Using Electric Blankets

    I still remember shivering in my first rental apartment, watching the thermostat climb while my bank account drained. I’d spent more on central heating than I did on groceries, trying to warm up rooms I wasn’t even using. It’s a massive waste, and honestly, the way people talk about heating solutions can be so misleading. You’ll see ads suggesting you need a high-tech, smart-home overhaul to stay warm, but when you’re just trying to survive a cold Tuesday, you really just need to know the actual electric blanket cost and whether it’s going to bite you in the long run.

    I’m not here to sell you on some luxury heated duvet that costs a month’s rent. My goal is to strip away the marketing fluff and give you the raw data on what you’re actually paying for—both at the checkout and on your monthly utility bill. I’ll break down the upfront price versus the long-term running costs so you can decide if this is a smart efficiency move or just another way to throw money at the wind. Let’s get into the numbers.

    Table of Contents

    Calculating the Real Cost of Running a Heated Blanket Overnight

    Calculating the Real Cost of Running a Heated Blanket Overnight

    To figure out if this is actually a budget-friendly move, we have to move past the sticker price and look at the math. I usually grab my thermometer and a meter to see how much juice a device is actually pulling, but you can do the math on a napkin. Most standard heated throws pull between 60 and 100 watts. If you’re running one for eight hours while you sleep, you’re looking at roughly 0.5 to 0.8 kWh per night.

    When I calculate the cost of running a heated blanket overnight, I don’t just look at the immediate electricity bill; I look at the offset. If that blanket allows you to drop your thermostat by just two degrees, you’re likely saving more on your central heating than you’re spending on the blanket itself. It’s all about that net energy gain. When doing an electric blanket price comparison, don’t just hunt for the cheapest unit at a big-box store. A slightly higher upfront investment in a model with precise digital controls often means less wasted energy, which is the real win for your wallet in the long run.

    Finding the Best Value Electric Blankets Without Breaking the Bank

    Finding the Best Value Electric Blankets Without Breaking the Bank.

    When you’re looking for the best value electric blankets, it’s easy to get distracted by the shiny, high-tech models with ten different heat settings and built-in massage features. But from an efficiency standpoint, those extra bells and whistles usually just drive up the initial price without actually lowering your monthly bills. I always tell my clients to look past the marketing fluff and focus on the build quality and the safety certifications. A cheap, unbranded blanket from a random discount site might save you twenty bucks today, but if the internal wiring is shoddy, you’re looking at a potential fire hazard or a unit that fails after one season.

    Instead, I recommend doing a quick electric blanket price comparison that looks at both the upfront cost and the energy rating. Look for models that use microfibre or high-quality fleece; these materials retain heat better, meaning you won’t have to crank the thermostat up as high to feel comfortable. My rule of thumb is to find a middle-ground brand—something reliable that offers a decent warranty. You want a blanket that is built to last, not one that ends up in a landfill because the heating element burnt out by February.

    How to Keep Your Blanket Costs (and Carbon Footprint) Low

    • Don’t just look at the price tag; check the wattage. A blanket that uses 60W is going to be significantly cheaper to run over a winter than a heavy-duty model pulling 150W, even if the initial cost is slightly higher.
    • Use a timer if your model allows it. Most of us fall asleep with the blanket on, but you don’t need it running at full blast at 4:00 AM when your body temperature has already stabilized.
    • Layer up with a standard duvet. If you use a thick topper over your electric blanket, it traps the heat much more effectively, meaning you can turn the setting down to “low” and still stay warm.
    • Check the safety ratings before you buy. Cheap, unbranded blankets from random marketplaces might seem like a steal, but they often have poor thermal regulation, which wastes energy and—more importantly—is a fire risk.
    • Inspect your cables regularly. If you notice any fraying or weird hot spots, ditch it. A damaged heating element isn’t just inefficient; it’s a way of literally throwing money (and safety) out the window.

    The Bottom Line on Electric Blankets

    Don’t just look at the price tag on the box; the real win is in the daily running cost, which is usually just pennies compared to cranking up your central heating.

    Prioritize safety and efficiency by looking for models with auto-shutoff features and low wattage—it’s a small upfront investment that prevents wasted energy and potential hazards.

    Use a heated blanket as a targeted tool rather than a supplement; if you use it to pre-warm your bed and then turn your thermostat down a degree or two, you’ll see the actual savings on your monthly bill.

    ## The Real Math Behind the Warmth

    “When I’m auditing a home, I see people cranking the thermostat just to feel a bit of warmth in bed, and that’s where the money vanishes. An electric blanket isn’t just a comfort item; it’s a precision tool. If you use one correctly, you’re essentially heating a human-sized space instead of an entire room, which is the smartest way to slash your heating bill without actually freezing.”

    Tobias Nkemdirim

    The Bottom Line on Staying Warm

    The Bottom Line on Staying Warm.

    When you look at the numbers, an electric blanket isn’t just a comfort item; it’s a strategic tool for managing your energy budget. We’ve looked at how the initial purchase price compares to the long-term savings on your heating bill, and the math usually favors the blanket. By focusing on targeted heating—warming your body instead of an entire, drafty room—you’re effectively cutting down on wasted kilowatt-hours. Just remember to keep an eye on the quality of the controller and the safety ratings when you’re shopping. Investing in a decent model might cost a few extra dollars upfront, but it’s a small price to pay for peace of mind and lower monthly utility statements.

    At the end of the day, living sustainably shouldn’t feel like a luxury reserved for people with massive bank accounts. It’s about making intentional choices with the resources we have. Whether it’s sealing a window draft or switching to a heated blanket, these small, data-driven adjustments add up to a massive difference in both your wallet and your carbon footprint. We don’t need to overhaul our entire lives to make an impact; we just need to stop wasting energy simply because it’s the easiest option. Stay warm, stay smart, and keep those bills low.

    Frequently Asked Questions

    How much longer will my electric blanket actually last before it becomes an inefficient waste of money?

    Most decent electric blankets should last about five to ten years, but it’s not just about time; it’s about the integrity of the wiring. If you notice any hot spots, frayed cords, or if it takes way longer to warm up than it used to, that’s your sign. From an efficiency standpoint, an aging blanket with uneven heating is just a drain on your meter. If it’s acting up, replace it—it’s safer and cheaper in the long run.

    Are there specific safety features I should look for that won't drive the upfront price way up?

    Don’t get distracted by fancy “smart” features that just add cost. For safety, focus on the basics: an auto-shutoff timer is non-negotiable—it’s your best defense against forgetting it’s on. You also want to ensure it has Overheat Protection (OHP). If you’re on a budget, skip the app-controlled versions and stick to models with high ETL or UL certification ratings. Those marks mean the electrical components have actually been tested for safety.

    Is it cheaper to invest in a high-quality heated throw or just stick to a standard electric blanket?

    It really depends on how you use it. If you’re just looking to warm up your feet while watching TV, a standard electric blanket is your best bet for low upfront costs. But if you’re someone who spends every evening curled up on the sofa, I’d argue for the high-quality heated throw. They’re more durable and often have better temperature controls, meaning you won’t be replacing a cheap one every single season.

  • Implementing Gray Water Recycling for Home Use

    Implementing Gray Water Recycling for Home Use

    I remember standing in my old rental’s tiny bathroom, staring at the drain after a quick shower and feeling a massive sense of guilt. It felt like I was watching money—and perfectly usable water—literally swirl down the pipes for no reason. Most people think gray water recycling requires some high-tech, expensive plumbing overhaul that only a mansion could afford, but that’s just nonsense. You don’t need a massive budget or a degree in civil engineering to stop wasting the resources you’ve already paid for; you just need to stop letting “convenience” dictate your utility bills.

    In this guide, I’m stripping away the complex jargon and the overpriced equipment sales pitches. I’m going to show you the practical, low-cost ways to repurpose your sink and shower water for your garden or toilets without turning your home into a science experiment. My goal is to give you a realistic roadmap for making your home more efficient, one bucket or simple diversion at a time. We’re focusing on smart, small changes that actually work for real people living in real homes.

    Table of Contents

    Gray Water vs Black Water Knowing the Difference

    Gray Water vs Black Water Knowing the Difference

    Before you start setting up any DIY collection buckets, you need to get one thing straight: not all wastewater is created equal. If you mix them up, you’re not just wasting time; you’re creating a massive hygiene hazard. The simplest way to look at gray water vs black water is to follow the source. Gray water comes from your sinks, showers, and washing machines. It’s relatively clean, though it does contain traces of soap or hair. Black water, on the other hand, is the stuff coming from your toilets. It’s full of pathogens and bacteria, making it a total no-go for any home reuse project.

    When I’m auditing a site, I always tell people that the goal is reducing your domestic water footprint without turning your backyard into a biohazard. You can safely use gray water for things like irrigation, but you have to be smart about it. For instance, if you’re looking into safe gray water reuse for plants, you need to ensure you aren’t using heavy chemicals or bleach in your laundry. Keep it simple, keep it clean, and always keep the “black” stuff strictly for the sewer.

    Reducing Domestic Water Footprint on a Budget

    Reducing Domestic Water Footprint on a Budget.

    Look, I get it. When people hear about “residential water reclamation systems,” they immediately picture some high-tech, expensive setup installed by a contractor. But if you’re living in a rental or working with a tight budget, you don’t need a complex overhaul to start reducing domestic water footprint. Most of the impact comes from the low-tech stuff. I always tell my clients to start with the “bucket method” in the shower. While you’re waiting for the water to warm up, catch that initial cold run in a bucket. It’s free, it’s simple, and that water is perfect for your houseplants or flushing the toilet later.

    If you have a small outdoor space, you can also look into safe gray water reuse for plants. Instead of letting your vegetable garden soak up treated tap water, use the leftover water from rinsing veggies or boiling pasta (just let it cool first, obviously). It’s a small shift, but reusing household wastewater this way turns a “waste” product into a resource. You’re essentially bypassing the utility company for your non-potable needs, which is one of the smartest ways to keep your monthly overhead low.

    5 Low-Cost Ways to Start Recycling Gray Water Today

    • Keep it simple with a bucket in the shower. While you’re waiting for the water to warm up, catch that initial cold rinse in a bucket. It’s free, easy water you can use immediately for your houseplants or to flush the toilet.
    • Swap your laundry detergent for something biocompatible. If you’re planning to reuse sink or washing machine water for your garden, you need to ditch the harsh chemicals and phosphates. Stick to plant-safe, biodegradable soaps so you aren’t accidentally poisoning your soil.
    • Set up a basic gravity-fed system for your laundry. You don’t need a high-tech filtration unit; just routing your washing machine’s discharge hose into a large drum can give you a massive reservoir of water for outdoor cleaning or irrigation.
    • Use your kitchen rinse water for the garden. Instead of letting the water from washing vegetables or rinsing grains go straight down the drain, collect it in a basin. It’s nutrient-rich and much better for your plants than treated tap water.
    • Focus on “point-of-use” collection. Don’t try to overhaul your entire plumbing system—that’s expensive and unnecessary. Just focus on the high-volume areas like the bathroom sink or the laundry room to get the biggest bang for your buck without a massive upfront investment.

    The Bottom Line on Gray Water

    You don’t need a complex, expensive plumbing overhaul to start saving; even simple methods like collecting shower water in a bucket can make a dent in your utility bills.

    Always keep a strict line between gray water and black water to ensure you aren’t accidentally introducing bacteria into your garden or home systems.

    Think of water recycling as a long-term efficiency play—it’s about making small, smart shifts in how you use resources so you stop paying for water you’ve already used once.

    Rethinking What We Call "Waste"

    “We’ve been conditioned to think that once water goes down the drain, its job is done—but that’s just leaving money on the table. Gray water isn’t waste; it’s a resource that’s just waiting for a second chance to be useful.”

    Tobias Nkemdirim

    Making Every Drop Count

    Making Every Drop Count with gray water.

    At the end of the day, gray water recycling isn’t about installing a high-tech, expensive filtration system that requires a degree to operate. It’s about understanding the difference between what we actually need to treat and what we can simply repurpose. Whether you’re collecting shower runoff to water your garden or finding ways to divert laundry water for your toilet flush, these small shifts add up. I’ve seen firsthand how these tiny adjustments can significantly lower a monthly utility bill while simultaneously cutting down on the sheer volume of fresh water we pull from the grid. It’s a practical way to stop treating every single drop of water like it’s a precious, one-time-use resource.

    I know it can feel overwhelming to think about changing your entire lifestyle for the sake of the planet, but sustainability doesn’t have to be an all-or-nothing game. You don’t need to live off the grid to make a difference; you just need to be a bit more intentional with what you’re already using. We have to stop accepting waste just because it’s the convenient way to live. By reclaiming your gray water, you’re taking a stand against inefficiency and proving that a sustainable home is accessible to everyone, regardless of their budget. Let’s start treating our resources with the respect they actually deserve.

    Frequently Asked Questions

    Is it actually safe to use gray water on my vegetable garden, or am I risking contamination?

    Look, I get the hesitation. I’ve been there, staring at a bucket of sink water wondering if I’m about to poison my kale. Here’s the data-driven reality: it’s safe if you’re smart about it. Avoid using water with heavy bleach or harsh chemicals. Ideally, use it on the soil around your veggies rather than spraying it directly onto the leaves. As long as you’re mindful of what’s in your soap, you’re good to go.

    How much work is it really to set up a DIY filtration system compared to just using the tap?

    Look, I’ll be straight with you: it’s more work than turning a tap, but it’s not rocket science. If you’re just diverting shower water to water your plants, you can set up a basic gravity-fed bucket system in an afternoon. But if you want something more permanent with actual filtration, you’re looking at a weekend project involving sand, gravel, and some plumbing tweaks. It’s an upfront time investment, but once it’s running, the savings start hitting your bills immediately.

    Are there specific soaps or detergents I need to ditch to make sure my recycled water doesn't ruin my plants?

    This is where most people trip up. If you’re reusing water for your garden, you have to ditch anything with boron, salts, or heavy fragrances. I always tell my clients to check labels for sodium and chlorine; they’ll eventually kill your soil’s microbiome. Stick to biodegradable, plant-safe soaps—the kind that are phosphate-free. It’s a small switch, but it ensures you’re actually nourishing your plants rather than accidentally poisoning them with your laundry runoff.

  • How to Use Smart Plugs for Energy Efficiency

    How to Use Smart Plugs for Energy Efficiency

    I remember sitting in my old rental apartment, shivering through a February freeze, staring at a utility bill that felt like a personal insult. I used to think that “going green” meant installing expensive solar arrays or high-end smart home ecosystems that cost more than my monthly rent. But after years of auditing homes and obsessing over heat leaks, I realized the real culprits are much smaller—and much cheaper to fix. Most people treat smart plugs usage like a tech toy for gadget lovers, but they’re actually missing the point. They aren’t just for turning your lights on with your voice; they are tools to stop the silent bleed of vampire power from devices you aren’t even using.

    I’m not here to sell you on a futuristic lifestyle you can’t afford. Instead, I’m going to show you exactly how to use these little devices to reclaim control over your electricity meter. I’ll walk you through the practical, data-backed ways to integrate smart plugs usage into your daily routine so you can cut unnecessary costs without needing a massive budget. No hype, no complicated setups—just straightforward ways to make your home work for your wallet and the planet.

    Table of Contents

    Reducing Phantom Energy Loads Without Lifting a Finger

    Reducing Phantom Energy Loads Without Lifting a Finger

    Most people don’t realize that their electronics are essentially “bleeding” money 24/7. Even when your TV or coffee maker is turned off, they’re still pulling a tiny bit of power just to stay in standby mode. I call this the “ghost in the machine” effect, and it adds up fast. By reducing phantom energy loads through a few simple settings, you can stop this invisible drain without ever having to manually unplug a cord again.

    The real magic happens when you start scheduling electrical devices to kill power completely during the hours you’re actually sleeping or at work. I usually set my smart plugs to cut the circuit to my entertainment center at midnight and bring it back online just before I wake up. It’s a low-effort way to ensure you aren’t paying for electricity you aren’t even using. You don’t need to be a tech genius to do this; you just need to stop letting your appliances stay on life support when they should be dead to the grid.

    Real Time Power Consumption Tracking to Guard Your Wallet

    Real Time Power Consumption Tracking to Guard Your Wallet

    Most people treat their electricity bill like a mystery novel—you only find out the ending at the end of the month when the total is way higher than expected. I hate that uncertainty. When I’m auditing a home, I always tell clients that you can’t manage what you don’t measure. This is where real-time power consumption tracking becomes a game-changer. Instead of guessing which device is the culprit, you can see exactly how many watts your old coffee maker or that gaming PC is pulling in the moment you plug them in.

    It’s about turning invisible data into actionable savings. Once you see the spikes on your phone, you start making different choices. You might realize your media center is drawing a steady stream of power even when it’s “off,” or that your space heater is working way harder than it needs to. By leveraging remote power control via smartphone, you can monitor these patterns from anywhere. It’s not just about being tech-savvy; it’s about having the hard data you need to stop the bleeding and take control of your monthly budget.

    5 Practical Ways to Put Your Smart Plugs to Work

    • Target your “vampire” electronics like gaming consoles and coffee makers; set them to cut power completely during your sleep hours so they aren’t sipping electricity all night.
    • Use scheduling to automate your space heaters or fans, ensuring they only run when you’re actually in the room and not just burning cash in an empty house.
    • Group your holiday lights or seasonal decor under a single smart plug so you can kill the power from your phone instead of crawling under the tree to find the switch.
    • Set up “away mode” routines that turn off non-essential lamps and chargers the second you leave the house, preventing that accidental “did I leave the iron on?” panic.
    • Use the energy monitoring feature to identify which specific appliance is the biggest culprit in your monthly bill, then decide if it’s actually worth the runtime.

    The Bottom Line on Smart Plugs

    The Bottom Line on Smart Plugs.

    Stop letting “vampire power” drain your bank account; use smart plugs to kill the phantom loads from devices you aren’t even using.

    Use the data to your advantage by tracking real-time usage, so you can spot which appliances are actually bleeding money.

    You don’t need a full home automation overhaul to see results—start small with a few plugs to automate your biggest energy offenders.

    The Hidden Cost of "Off"

    Most people think a device is off just because the little light is out, but my infrared thermometer and my utility bills tell a different story. Smart plugs turn that invisible, constant drain into something you can actually see and control, because if you aren’t managing your power, you’re just subsidizing the grid for no reason.

    Tobias Nkemdirim

    The Bottom Line on Smart Plugs

    At the end of the day, smart plugs aren’t just some trendy tech gadget to clutter your living room; they are practical tools for reclaiming control over your utility bills. We’ve looked at how they kill off those silent phantom loads that bleed your bank account dry and how real-time tracking turns invisible energy waste into actionable data. By automating your devices and monitoring exactly what they pull from the grid, you’re moving away from guesswork and toward a precision-managed home. It’s about making sure every watt you pay for is actually doing something useful, rather than just heating up a wall or sitting idle in standby mode.

    I know that making sustainable changes can feel overwhelming, especially when you’re staring down a rising cost of living. But remember, you don’t need to install a full solar array or replace every appliance in your house to make a difference. Efficiency starts with these small, intentional shifts in how we interact with our environment. Every time you automate a lamp or cut off a standby heater via your phone, you are voting with your wallet for a cleaner, smarter future. Let’s stop letting convenience dictate our carbon footprint and start building homes that are as efficient as they are affordable.

    Frequently Asked Questions

    Are smart plugs actually efficient enough to justify the upfront cost, or am I just spending more money to save a few cents?

    Look, I get the skepticism. If you’re only using them for a single lamp, you’re basically throwing money away. But if you target your “vampire” appliances—like that old coffee maker, the gaming console, or your desktop setup—the math changes fast. I’ve seen plugs pay for themselves in a few months just by killing phantom loads. Don’t buy one for everything; buy them for the high-draw stuff that stays plugged in 24/7.

    Will using these plugs with my older, vintage electronics pose any safety risks or cause power surges?

    That’s a fair concern, especially since I spend half my weekends tinkering with old tech. Generally, a smart plug is just a controlled gate for electricity; it won’t suddenly spike the voltage. However, the risk lies in the device itself. If your vintage gear has faulty wiring or old capacitors, it’s already a fire hazard. Use the plug to monitor the draw—if you see erratic spikes on your app, pull the plug immediately.

    How much of an actual difference will these make if I'm mostly using them for low-power devices like lamps or chargers?

    Look, if you’re just talking about a single phone charger, the impact is negligible. But it’s rarely just one device. If you’ve got a whole setup—lamp, charger, tablet, maybe a small fan—all plugged in and idling, those little leaks add up. I’ve run my infrared thermometer over walls where “vampire” devices were generating tiny amounts of heat all night. It’s about the cumulative effect. It won’t make you rich, but it stops the slow bleed.

  • Using Draft Excluders to Keep Heat in

    Using Draft Excluders to Keep Heat in

    I still remember sitting in my old rental apartment three years ago, wrapped in two blankets and staring at a heating bill that made absolutely no sense. I’d point my infrared thermometer at the base of the front door, and the reading would plummet—a literal river of cold air flowing right into my living room. It’s infuriating because most people think they need to drop thousands on new windows or high-end insulation to fix this, but that’s just not true. Often, the simplest solution is just getting decent draft excluders to plug the gaps that are currently bleeding your bank account dry.

    I’m not here to sell you on some overpriced, “eco-friendly” luxury gadget that costs more than the heat it saves. My goal is to give you the straight truth about which draft excluders actually work and how to install them without a massive headache. I’ll show you how to spot the leaks I look for during my audits and help you pick the most cost-effective options for your specific space. Let’s stop paying to heat the neighborhood and start keeping that warmth where it belongs: inside your home.

    Table of Contents

    Preventing Heat Loss Without Breaking the Bank

    Preventing Heat Loss Without Breaking the Bank

    When I’m auditing a house, I don’t always look for the massive, expensive upgrades first. Most people think they need to tear down walls to see real results, but that’s just not true. Often, the biggest wins come from focusing on the gaps you can actually see—or feel. I’m talking about the air whistling through a window frame or the cold breeze rolling under a bedroom door. These are the tiny “energy leaks” that turn your heater into a glorified space heater for the outdoors.

    If you want to start reducing heating bills without a massive upfront investment, you need to look at your entry points. One of my favorite low-cost strategies involves simple weatherstripping techniques around window frames. It’s a cheap, tactile fix that makes a massive difference in how a room actually feels. You don’t need a contractor; you just need to be observant. By sealing those small gaps, you aren’t just saving money—you’re making sure the heat you’ve already paid for actually stays where it belongs.

    Smart Ways of Insulating Door Bottoms Today

    Smart Ways of Insulating Door Bottoms Today

    If you’re looking at your door and seeing a gap that’s letting in a constant stream of cold air, you don’t necessarily need a contractor to fix it. One of the most effective weatherstripping techniques involves using self-adhesive foam or rubber strips along the door frame itself. I usually grab my infrared thermometer during audits to show people exactly where that temperature drop is happening; most of the time, it’s not just the bottom of the door, but the sides too. Adding a strip of high-density foam is a cheap, DIY way of improving home insulation without a massive renovation project.

    For those who want something more heavy-duty, consider installing a screw-on door sweep. Unlike the fabric tubes that slide around, a metal or heavy-duty brush sweep stays anchored, providing a much more consistent seal against the floor. It’s one of those small, practical energy efficiency home improvements that actually makes a measurable difference in how your room feels. When you stop that airflow, you’re not just staying warmer; you’re actively reducing heating bills by making sure the energy you’ve already paid for actually stays inside your living space.

    Five Quick Wins to Stop the Drafts

    • Check your door seals with my trusty infrared thermometer; if you see a sudden temperature drop right at the floor level, you’ve found a leak that needs a physical barrier immediately.
    • Don’t just rely on the bottom of the door; look for gaps around the sides and top of the frame, as a heavy fabric draft excluder won’t help if the air is whistling through the hinges.
    • If you’re on a tight budget, DIY a “door snake” using an old pair of tights or a long sock filled with rice or dried beans—it’s a zero-cost way to block that freezing air.
    • For external doors, prioritize weighted excluders that sit heavy against the threshold, ensuring they actually stay in place when the wind picks up outside.
    • Think about placement; if you have a room that stays particularly cold, placing a long, fabric excluder at the base of the door can help trap the warmth that’s already inside that specific space.

    The Bottom Line on Blocking Drafts

    You don’t need a professional retrofit to see a difference; sealing the gaps under your doors is one of the fastest, cheapest ways to stop paying to heat the street.

    Prioritize high-traffic areas like front doors and hallway entries, as these are where your thermal energy is most likely to escape.

    Think long-term efficiency over convenience—taking ten minutes to install a proper excluder pays for itself in lower utility bills within the first month.

    The Real Cost of a Draft

    I’ve spent too many audits pointing my infrared thermometer at door gaps only to see the heat bleeding out like money through a hole in a pocket; a draft excluder isn’t just a piece of fabric, it’s a tiny, practical barrier between you and a massive utility bill.

    Tobias Nkemdirim

    Final Thoughts on Sealing the Gaps

    Final Thoughts on Sealing the Gaps.

    At the end of the day, tackling drafts isn’t about installing high-tech, expensive systems that require a contractor. It’s about being observant. Whether you’re rolling up a heavy towel for a quick fix, installing a permanent brush strip on a sliding door, or using simple adhesive foam around window frames, you are effectively plugging the holes in your wallet. We’ve covered how small, strategic investments in door bottoms and window seals can drastically change the thermal profile of a room. By focusing on these high-impact, low-cost areas, you stop the constant cycle of heating air that just escapes into the street.

    I know it can feel overwhelming when you look at your utility bills and see those numbers climbing, but don’t let that paralysis stop you from taking action. You don’t need to overhaul your entire house overnight to make a difference. Start with one door, one window, or one drafty corner. Every bit of heat you trap inside is a win for your bank account and a step toward a more sustainable lifestyle. We don’t have to accept inefficiency just because it’s the status quo; we can build homes that are actually comfortable, one small seal at a time.

    Frequently Asked Questions

    Will a heavy fabric draft excluder actually work for a door that opens and closes frequently, or will it just get in the way?

    It’s a valid concern. If you’re constantly moving in and out, a heavy, weighted fabric excluder can feel like a nuisance. However, if you get a “twin draft guard” style—the kind that slides under the door—it moves with the door and stays in place. It’s much more practical for high-traffic entrances. If you prefer the classic weighted fabric rolls, just make sure they aren’t so heavy that they impede the door’s swing.

    Are there specific types of draft excluders that work better for sliding doors versus traditional hinged ones?

    Sliding doors are tricky because you can’t just hang a heavy fabric “snake” across the bottom without blocking the track. For those, I usually recommend brush strips or silicone weather stripping. You screw or stick them directly into the door frame or the bottom of the door itself. They create a tight seal while still letting the door glide smoothly. It’s a bit more precise than a traditional excluder, but it’s worth the extra effort to stop that cold air from creeping in.

    Can I use DIY materials like old socks or sand to make my own, or is it worth the investment to buy a professional seal?

    Honestly, you can definitely go the DIY route with old socks or sand—I’ve done it myself when I was living in that freezing rental. It’s great for a quick, zero-cost fix. But if you want something that actually stays in place and lasts more than a week, investing in a proper, weighted seal is worth it. DIY is a good start, but professional seals offer better long-term efficiency.

  • What to Use When Cleaning Solar Panels

    What to Use When Cleaning Solar Panels

    I was out on a client’s roof last Tuesday, clicking my infrared thermometer against a panel that looked perfectly fine to the naked eye, only to see the efficiency numbers tanking. The culprit wasn’t a broken inverter; it was a stubborn, crusty layer of grime that the homeowner had tried to scrub off with some harsh, industrial-grade degreaser they found in the garage. People think they need these expensive, specialized solar panel cleaning chemicals to get peak performance, but honestly, most of the high-priced stuff marketed online is just expensive water wrapped in fancy branding. You don’t need a chemistry degree or a massive budget to keep your array running; you just need to stop making mistakes that actually damage the glass.

    I’m not here to sell you on some “miracle solution” that costs more than your monthly power bill. My goal is to give you the straight truth about which solar panel cleaning chemicals actually work and, more importantly, which ones you should never touch if you want your panels to last. I’ll show you how to maintain your system using practical, data-backed methods that protect your investment and keep your energy output high without wasting a single cent.

    Table of Contents

    Avoiding Solar Panel Efficiency Loss Without Spending a Fortune

    Avoiding Solar Panel Efficiency Loss Without Spending a Fortune

    Look, I get it. When you see your energy output dipping, the instinct is to grab whatever heavy-duty degreaser is under the sink. Please, don’t do that. Using harsh, acidic, or highly alkaline products is a fast track to permanent damage. The biggest danger lies in abrasive cleaner risks; if you use a scrub that’s too rough, you’ll create microscopic scratches on the glass. Those tiny grooves trap even more dirt and degrade the surface, leading to a permanent solar panel efficiency loss that no amount of cleaning can fix.

    If you’re on a tight budget, you don’t need fancy, branded kits to see results. For most of the homes I audit, the goal is simply preventing mineral buildup from hard water. If you have access to it, deionized water cleaning is the gold standard because it leaves zero residue behind. If that’s too expensive, just stick to a soft microfiber cloth and a gentle, pH balanced solar cleaner or even just plain water. It’s about being smart and consistent, not spending a fortune on chemicals that might actually do more harm than good.

    Why Ph Balanced Solar Cleaners Are Your Best Budget Friend

    Why Ph Balanced Solar Cleaners Are Your Best Budget Friend

    When I’m out on a site audit, I see people trying to save a few bucks by grabbing whatever heavy-duty degreaser or harsh soap is sitting under their sink. That’s a massive mistake. Most household cleaners are far too aggressive, and the abrasive cleaner risks are real—you can actually create microscopic scratches on the glass surface. Once that protective coating is compromised, you aren’t just losing efficiency; you’re inviting permanent damage that’s expensive to fix.

    This is why I always advocate for ph balanced solar cleaners. These solutions are specifically formulated to lift grime and bird droppings without eating away at the panel’s sealant or glass. It’s about long-term stability rather than a quick, aggressive scrub. By using something gentle, you’re effectively preventing mineral buildup and ensuring that your photovoltaic panel maintenance doesn’t accidentally become a costly repair job. It’s a small upfront cost that protects your entire investment, keeping your energy output steady without the headache of degrading your hardware.

    5 Ways to Clean Without Costing the Earth (or Your Wallet)

    • Skip the harsh household detergents; things like dish soap or degreasers often leave a film that actually attracts more dust, forcing you to clean even more often.
    • Stick to distilled water if you have hard water at home, because mineral buildup from tap water can create a crust on the glass that’s a nightmare to scrub off later.
    • Test your cleaner on a tiny corner first; I always use my infrared thermometer to check if a new solution is causing any weird thermal issues or residue buildup.
    • Avoid anything with abrasive chemicals or grit; you don’t want to create micro-scratches on the surface that trap dirt and kill your energy yield over time.
    • Use a soft microfiber cloth or a specialized solar brush rather than a sponge, which can trap grit and scratch the panels, making them less efficient in the long run.

    The Bottom Line on Keeping Your Panels Clean

    The Bottom Line on Keeping Your Panels Clean

    Skip the harsh household chemicals; they might seem cheap, but they’ll strip the anti-reflective coating off your panels and cost you way more in lost efficiency long-term.

    Stick to pH-balanced cleaners or even just plain water to protect your investment and ensure you’re actually capturing every bit of sunlight you’re paying for.

    Regular, gentle maintenance is better than a heavy-duty deep clean once a year—consistency is what keeps your energy bills low and your carbon footprint small.

    ## The Real Cost of Cheap Cleaners

    “I’ve seen too many people try to save a few bucks with harsh detergents, only to end up with micro-scratches that kill their panel’s efficiency for years. At the end of the day, if you’re using the wrong chemicals, you aren’t just cleaning your panels—you’re actively sabotaging your return on investment.”

    Tobias Nkemdirim

    The Bottom Line on Keeping Your Panels Clean

    At the end of the day, maintaining your solar setup doesn’t require a massive budget or a professional cleaning crew. It’s really about being smart with what you use. We’ve looked at why skipping the harsh, abrasive chemicals is non-negotiable and how sticking to a pH-balanced cleaner protects your investment from long-term degradation. Remember, the goal isn’t just to make the panels look shiny; it’s about ensuring that every photon hitting those cells actually turns into usable power. If you use the wrong stuff, you aren’t just risking the glass—you’re directly sabotaging your own energy savings and your return on investment.

    I know that managing a sustainable home can sometimes feel like a constant battle of small details, but these are the details that matter. Every time you choose a gentle, effective cleaning method over a cheap, damaging shortcut, you are making a choice that favors both your wallet and the planet. We don’t need to be wealthy to live efficiently; we just need to be intentional with our maintenance. Keep your panels clean, keep your data in check, and stop letting wasted sunlight slip through your fingers. It’s a small habit that pays off in every single monthly utility statement.

    Frequently Asked Questions

    Can I just use a garden hose and some dish soap, or will that actually damage the coating on my panels over time?

    I get why you’d think that—it’s easy and cheap. But honestly? I wouldn’t recommend it for the long haul. Most dish soaps are actually pretty harsh; they contain degreasers and salts that can strip away the anti-reflective coating on your cells. Once that coating is gone, your efficiency takes a permanent hit. If you’re on a budget, stick to plain water or a dedicated pH-neutral cleaner to protect your investment.

    How often do I realistically need to clean them to see a difference in my monthly energy savings?

    Honestly, it depends on your local environment, but I usually tell my clients to aim for once every three months. If you live somewhere with heavy pollen, dust, or bird activity, you might see a noticeable spike in your bills if you skip it. I always check my data: if I see a dip in output during a clear week, it’s time to grab the bucket. Don’t wait for the grime to become a crust.

    Are there specific chemicals I should absolutely avoid if I want to prevent permanent buildup or "clouding" on the glass?

    Look, if you want to avoid permanent “clouding,” stay far away from harsh abrasives or high-alkaline cleaners like heavy-duty degreasers and bleach. I’ve seen cases where people use industrial cleaners to scrub off bird droppings, only to realize they’ve actually etched the glass surface. Once that microscopic pitting happens, your efficiency is shot for good. Stick to mild, pH-neutral soaps; it’s better to spend ten extra minutes cleaning than to replace an entire panel.