Category: Energy

  • Using Solar Energy for Domestic Hot Water

    Using Solar Energy for Domestic Hot Water

    I still remember standing in my old rental apartment, shivering under three blankets while staring at a utility bill that looked more like a mortgage payment. Every time I turned on the hot water for a shower, I felt like I was literally burning cash just to stay warm for ten minutes. There’s this massive misconception that you need to be a millionaire or live in a high-tech eco-mansion to make a dent in your energy costs, but that’s total nonsense. In reality, something as straightforward as solar water heating can stop that constant drain on your bank account without requiring a lifestyle overhaul.

    I’m not here to sell you on some futuristic, overpriced gadget that requires a PhD to maintain. My goal is to give you the straightforward truth about how these systems actually work in a real home, the genuine costs involved, and where you might be wasting money. I’ll show you how to look at your setup through a practical lens so you can stop overpaying for hot water and start actually seeing the savings.

    Table of Contents

    Photovoltaic vs Solar Thermal Choosing the Smarter Way to Save

    Photovoltaic vs Solar Thermal Choosing the Smarter Way to Save

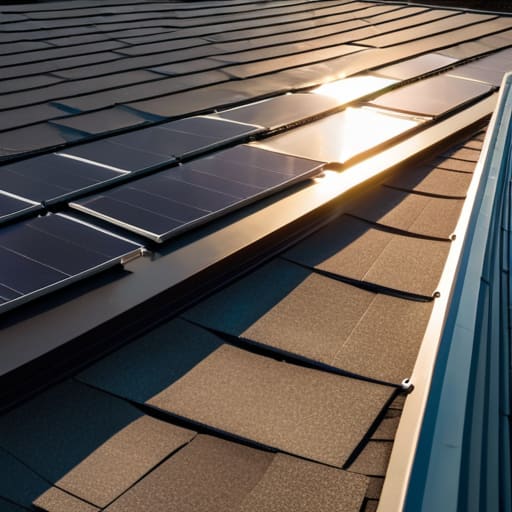
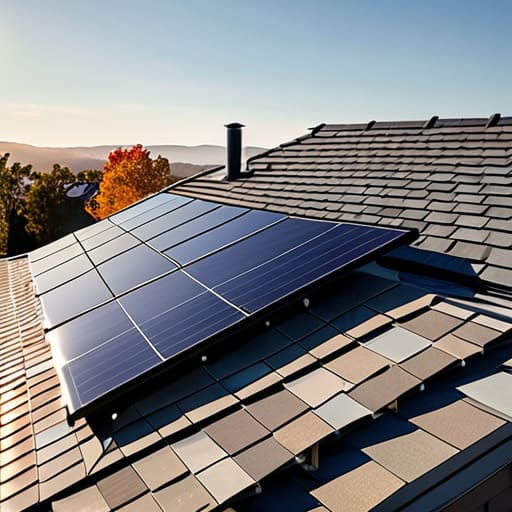
    When people start looking into this, they usually get stuck on the big debate: photovoltaic vs solar thermal. It’s easy to get confused because both use the sun, but they do very different jobs. PV panels (photovoltaics) create electricity to run your lights, fridge, and gadgets. Solar thermal, on the other hand, is a specialist. It’s designed specifically to capture heat to warm your water. If your main goal is reducing the massive energy drain of showers and dishwashers, focusing on renewable energy for domestic hot water is often the most direct way to see a drop in your monthly utility bill.
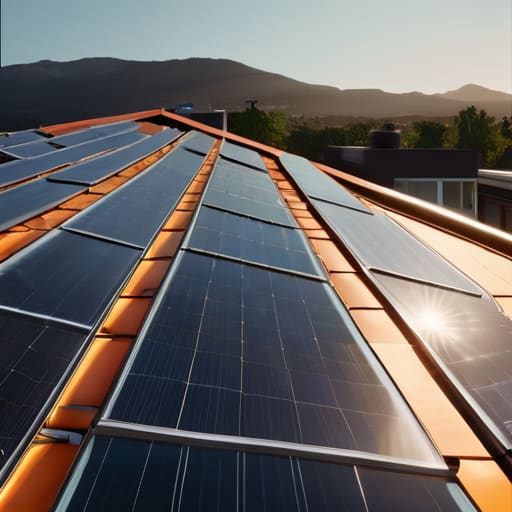
    Choosing between them usually comes down to your specific setup and budget. If you go the thermal route, you’ll likely choose between flat plate solar collectors, which are great for steady, predictable climates, or evacuated tube collectors, which are much more efficient in colder, harsher environments. While the initial solar hot water installation costs can vary depending on the tech you pick, the efficiency you gain by heating water directly—rather than using electricity to heat a coil—is hard to beat.

    Mastering Solar Thermal Efficiency Without Breaking the Bank

    Mastering Solar Thermal Efficiency Without Breaking the Bank

    When you’re looking at solar hot water installation costs, it’s easy to get overwhelmed by the upfront price tag. But if you approach it like an audit, you’ll see where the real value lies. You don’t need the most expensive setup to see a return; you just need to pick the right hardware for your specific climate. For instance, if you live somewhere with harsh winters, investing in evacuated tube collectors is a game-changer because they trap heat much more effectively than standard models. If you’re in a milder area, basic flat plate collectors might do the job just fine without draining your savings.

    The real secret to long-term savings isn’t just the installation; it’s how you manage the system afterward. I’ve seen too many people install these units and then forget about them, only to wonder why their bills aren’t dropping. A little bit of regular solar water heater maintenance—like checking for scale buildup or inspecting seals—ensures you aren’t losing efficiency to preventable leaks. It’s about making sure your renewable energy for domestic hot water actually works for you, rather than becoming another expensive thing to fix.

    5 Low-Cost Tweaks to Get More Heat from Your Solar Setup

    • Insulate your hot water pipes like your life depends on it; if your pipes are bare, you’re basically watching your hard-earned money leak heat back into the attic or crawlspace.
    • Don’t let your tank sit in the shade; even a little bit of extra sunlight on the tank itself can help maintain temperatures, especially if you’re using a hybrid system.
    • Check your glazing regularly for dust and grime; it sounds minor, but a thick layer of dirt acts like a blindfold for your collectors, cutting down how much thermal energy they can actually grab.
    • Set your thermostat to the lowest functional temperature; there’s no point in heating water to a scalding 160°F if 130°F does the job—you’re just wasting solar gain and stressing your components.
    • Tighten up your plumbing connections to prevent micro-leaks; even a tiny drip can lead to massive heat loss and, eventually, a much more expensive repair bill than you planned for.

    The Bottom Line: Is Solar Water Heating Worth It?

    Don’t let the upfront cost scare you; the real win is in the long-term math of slashing those monthly utility bills.

    Focus on solar thermal if your primary goal is hot water, but consider PV if you want to power your entire home’s ecosystem.

    Efficiency isn’t about buying the most expensive tech; it’s about smart installation and minimizing heat loss so you aren’t just heating the outdoors.

    The Real Cost of Convenience

    Most people think going green requires a massive upfront investment, but I see it differently: every time you run a standard electric water heater, you’re essentially paying a ‘convenience tax’ to a utility company that doesn’t care about your budget. Solar thermal isn’t a luxury; it’s a way to stop renting your hot water and start owning it.

    Tobias Nkemdirim

    Making the Switch

    Making the Switch to solar water heating.

    At the end of the day, moving toward solar water heating isn’t about chasing some high-tech trend; it’s about practical resource management. We’ve looked at how solar thermal systems can outperform PV for direct heating and how you can maximize your efficiency without needing a massive upfront investment. Whether you’re choosing between different collector types or just looking for ways to optimize your existing setup, the goal remains the same: stopping the bleed of money through inefficient heating. By focusing on the right tech and maintaining your system properly, you’re essentially turning your roof into a tool that works for your wallet instead of against it.

    I know that making changes to your home can feel overwhelming, especially when you’re trying to balance a budget. But I’ve seen firsthand how much of a difference these small, calculated shifts make in a monthly utility statement. You don’t need to be an expert or a millionaire to start taking control of your energy footprint. Every degree of heat you capture from the sun is a degree you don’t have to pay a utility company for. Let’s stop letting energy leak away simply because it’s the easy way out. Start small, stay data-driven, and let the sun do the heavy lifting for once.

    Frequently Asked Questions

    How much of an actual dent will this make in my monthly utility bill compared to my current setup?

    Look, I get the skepticism. I’ve audited enough drafty apartments to know that “efficiency” can sometimes feel like a vague promise. If you’re switching from a standard electric tank to a well-placed solar thermal system, you’re looking at slashing your water heating costs—which usually account for about 15-20% of a home’s energy use—by a massive margin. Depending on your sun exposure, you could see your monthly water bill drop by 50% or more. It’s real math, not just marketing.

    I live in a place with grey skies most of the year; will a solar thermal system even work for me?

    I get this question a lot, and the short answer is: yes. I’ve run audits in climates that felt perpetually damp and overcast, and the data doesn’t lie—solar thermal doesn’t need direct, blazing sunlight to function. It works on diffuse radiation. Even through grey clouds, there’s enough ambient light to heat your water. It’s not as hyper-efficient as a clear summer day, but it’s still a massive win for your wallet compared to electric heating.
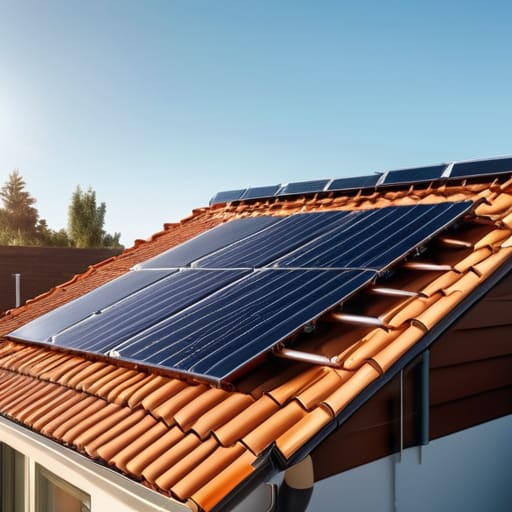
    What kind of maintenance am I looking at to make sure these systems don't become an expensive headache in a few years?

    Look, I’ve seen too many people treat solar thermal like a “set it and forget it” gadget, only to realize they’ve bought a future headache. To keep things running, you need to check your collector panels for debris or leaks every few months—I usually grab my thermometer to spot any weird temperature drops. Most importantly, keep an eye on your anode rod and scale buildup. A little preventative cleaning goes a long way in avoiding massive repair bills.

  • Installing a Charger for Electric Vehicles at Home

    Installing a Charger for Electric Vehicles at Home

    I spent most of last Tuesday staring at a utility bill that looked more like a phone number than a monthly expense, and it hit me: people are being sold this idea that owning an EV is a luxury reserved for those with massive solar arrays and high-end smart homes. There’s this pervasive myth that electric vehicle charging has to be this complex, high-tech ritual that drains your wallet just as fast as it drains your battery. Honestly, it’s exhausting. We get caught up in the hype of expensive hardware and proprietary networks, completely ignoring the fact that efficiency is actually about strategy, not just how much gear you can buy.

    I’m not here to sell you on some futuristic lifestyle you can’t afford; I’m here to show you how to make it work with what you actually have. In this guide, I’m stripping away the marketing fluff to give you the practical, data-backed ways to manage your electric vehicle charging without breaking the bank. We’re going to talk about timing, load management, and those small, smart adjustments that keep your costs low and your carbon footprint even lower.

    Table of Contents

    Level 2 Charging vs Level 1 Finding Your Sweet Spot

    Level 2 Charging vs Level 1 Finding Your Sweet Spot

    When I first started auditing homes, I realized most people treat their EV like a smartphone—just plugging it in whenever they remember. But if you’re relying solely on a standard wall outlet, you’re stuck in the slow lane. Comparing level 2 charging vs level 1 usually comes down to your daily mileage and your patience. Level 1 is basically just using your existing household socket; it’s fine for a plug-in hybrid or if you barely drive, but for a full EV, it can feel like trying to fill a swimming pool with a teaspoon.

    If you have the budget, installing a dedicated Level 2 station is the real game-changer for efficiency. It uses a 240V connection—similar to what your dryer uses—to deliver a much more robust flow of power. This isn’t just about speed; it’s about smart charging solutions that allow you to top up fully overnight without stressing your home’s electrical system. For most of my clients, finding that sweet spot means having a Level 2 setup at home so they never have to worry about whether they’ll have enough juice for the morning commute.

    Smart Charging Solutions That Protect Your Wallet and Planet

    Smart Charging Solutions That Protect Your Wallet and Planet

    If you want to stop bleeding money on utility bills, you need to look beyond just plugging in. This is where smart charging solutions actually pay for themselves. Instead of letting your car pull power the second you get home—usually when peak demand makes electricity most expensive—you can program your charger to wait until the middle of the night. I always tell my clients that it’s about working with the grid, not against it. By shifting your load to off-peak hours, you aren’t just saving cash; you’re ensuring your car is pulling from a cleaner, more stable energy mix.

    It’s also worth getting a bit technical with your hardware. A charger equipped with an integrated battery management system does more than just move electrons; it monitors the health of your vehicle’s cells to prevent unnecessary degradation. I’ve seen too many people rush into using high-speed options when they don’t need to, which can be a waste of both time and energy. If you’re charging at home, patience is your best efficiency tool. Slow, controlled sessions are much kinder to your car’s longevity and your monthly budget.

    5 Practical Ways to Stop Overpaying for Your EV Charge

    • Stop charging during peak hours. Most utility companies charge a premium when everyone else is running their AC or appliances; if you can, set your car to pull power late at night or early in the morning when rates drop.
    • Check your home’s electrical capacity before installing a heavy-duty charger. I’ve seen too many people spend a fortune on a Level 2 setup only to realize their home’s panel can’t handle the load without a massive, expensive upgrade.
    • Use a smart plug or integrated app to monitor your actual consumption. You can’t fix what you don’t measure, and seeing the real-time data helps you spot if your charger is drawing more power than it should.
    • Don’t obsess over a “full” charge every single night. If you’re just commuting locally, keeping your battery between 20% and 80% is often more efficient for the long-term health of the cells and keeps your daily energy draw predictable.
    • Inspect your charging cable and port regularly for any signs of wear or debris. It sounds nitpicky, but a poor connection creates resistance, and resistance creates heat—which is just wasted energy that you’re paying for.

    The Bottom Line on Charging Smartly

    You don’t need a high-end home setup to be efficient; choosing between Level 1 and Level 2 is about matching your daily mileage to your actual hardware needs so you aren’t over-investing.

    Automation is your best friend—using smart charging apps to time your sessions avoids peak rates and ensures you’re pulling power when it’s cleanest and cheapest.

    Efficiency isn’t just about the car; it’s about managing your home’s total load so that charging your vehicle doesn’t turn into an accidental energy drain on your wallet.

    ## Efficiency is about more than just the plug

    “Charging an EV shouldn’t feel like a luxury or a logistical headache; it’s just about being smart with when and how you draw power so you aren’t paying a premium for energy that could have been cheaper and cleaner if you’d just timed it right.”

    Tobias Nkemdirim

    Making the Most of Your Miles

    Making the Most of Your Miles.

    At the end of the day, optimizing your EV charging isn’t about buying the most expensive hardware on the market; it’s about being intentional with how you use the grid. We’ve looked at how choosing the right level of charging can save you time, and how smart, scheduled charging can keep your costs down while minimizing your carbon footprint. Whether you’re sticking to a simple Level 1 setup or investing in a more robust Level 2 station, the goal is the same: stop treating energy like an infinite resource and start treating it like the valuable asset it actually is.

    I know that transitioning to electric can feel like a massive, expensive leap, but these small shifts in your daily routine are where the real impact happens. You don’t need a solar-powered mansion to make a difference; you just need to be a little more observant of how your home and car interact. If we all take a second to stop wasting energy just because it’s convenient, we can build a future that is both affordable and sustainable. Let’s stop overpaying for power and start using it smarter.

    Frequently Asked Questions

    Is it actually better for my battery's long-term health to charge to 100% every night, or should I stick to that 80% rule?

    Look, I get the urge to top it off to 100% so you’re ready to go, but if you want that battery to last, stick to the 80% rule. Think of it like this: keeping a battery constantly topped up at max capacity is like keeping a rubber band stretched to its limit—eventually, it loses its snap. Charging to 80% reduces chemical stress, meaning you won’t be facing a massive battery replacement bill down the road.

    How much will my monthly electricity bill actually jump if I start charging a heavy-duty EV every single day?

    Look, I get the anxiety. I’ve run the numbers on enough audits to know that a sudden spike in your utility bill is the last thing anyone wants. For a heavy-duty EV, you’re likely looking at an extra $30 to $60 a month, depending on your local kWh rates. It’s not a massive jump, but if you’re charging during peak hours, that cost creeps up fast. Aim for off-peak windows to keep it lean.

    Can I safely run a Level 2 charger on an older home's electrical system without risking a fire or tripping the breakers?

    Honestly? You shouldn’t touch it without a proper audit first. I’ve seen too many older homes with outdated wiring that just isn’t built for that kind of continuous, heavy load. If your panel is already maxed out, a Level 2 charger is a recipe for tripped breakers or, worse, overheating wires. Grab your thermometer—or better yet, call an electrician—to check your service capacity before you plug anything in. Safety over convenience, always.

  • Ways to Maximize Solar Panel Output

    Ways to Maximize Solar Panel Output

    I remember sitting in my old rental apartment, staring at a utility bill that felt like a personal insult, while the wind whistled through gaps I couldn’t afford to seal. It’s that same frustration I see now when people dive into the world of renewables. You’ll see companies pitching these massive, high-tech setups that cost more than a used car, claiming they’re the only way to achieve real solar panel efficiency. Honestly? It’s mostly marketing fluff designed to separate you from your savings. You don’t need a PhD or a massive inheritance to stop wasting sunlight; you just need to understand how your specific setup is actually performing.

    I’m not here to sell you on some futuristic, overpriced dream. My goal is to give you the straightforward truth based on the data I collect during my audits and the practical tweaks I use in my own projects. We’re going to look at how to squeeze every possible watt out of your system without breaking the bank. I’ll show you how to identify the real bottlenecks and make small, smart changes that actually move the needle on your monthly costs.

    Table of Contents

    Monocrystalline vs Polycrystalline Efficiency Choosing What Saves You Money

    Monocrystalline vs Polycrystalline Efficiency Choosing What Saves You Money

    When you’re looking at a spec sheet, the first thing that’s going to jump out at you is the difference between monocrystalline and polycrystalline cells. From my experience auditing setups, the biggest distinction is the solar cell conversion rate. Monocrystalline panels are made from a single, continuous crystal structure, which means they’re more efficient at turning sunlight into usable electricity. If you have limited roof space—maybe you’re in a tight urban rental or a small cottage—you want these. They pack more punch per square inch, even if the upfront cost is a bit steeper.

    Polycrystalline panels, on the other hand, are made by melting multiple silicon crystals together. They look a bit more “marbled” and usually come with a lower price tag, which is great for tight budgets. However, because their efficiency is slightly lower, you’ll need more physical space to generate the same amount of power as a mono setup. It really comes down to a math problem: are you willing to pay more now to save more on your monthly bills later, or is the lower initial investment more important for your current cash flow?

    Improving Photovoltaic Performance Without Spending a Fortune

    Improving Photovoltaic Performance Without Spending a Fortune

    Most people think that once the panels are on the roof, the work is done. That’s a mistake. If you want to actually see a return on your investment, you have to look at the small, practical things that influence your daily output. One of the biggest culprits I see during audits is simple dust and debris buildup. It sounds trivial, but a layer of grime can significantly drop your solar cell conversion rate over a few months. I usually tell my clients that a quick rinse with a hose twice a year is often enough to keep things running at peak levels without hiring a professional cleaning crew.

    Another thing to watch is shade. Even a small branch from a nearby tree casting a shadow over a single corner of a panel can throw off the entire string’s performance. It’s not just about the sun hitting the glass; it’s about managing the factors affecting solar energy yield in your specific microclimate. You don’t need high-tech sensors to notice this—just keep an eye on your monitoring app. If you see a sudden dip in production on a clear day, go outside and check for shadows or bird droppings. It’s about being observant, not expensive.

    5 Low-Cost Ways to Keep Your Solar Output from Tanking

    • Keep the dust off. It sounds basic, but a layer of grime or even bird droppings can act like a literal blanket, blocking the light your cells are starving for. A quick rinse with water once a month can actually make a measurable difference in your daily yield.
    • Watch your shade game. I’ve audited plenty of setups where a single overgrown tree branch was cutting the efficiency of an entire string of panels. If a shadow hits even a small part of a panel, it can bottleneck the energy flow for the whole system.
    • Mind the temperature. It’s a common misconception that heat is your friend; actually, solar panels are like most electronics—they hate getting too hot. If you’re installing new ones, make sure there’s enough airflow underneath them to keep them from overheating and losing voltage.
    • Check your wiring and connections. I always carry my thermometer to look for hot spots, but you should be looking for “cold” spots in your energy production. Loose or corroded connections create resistance, and resistance is just another word for wasted money.
    • Angle matters more than you think. If your panels are fixed in place, you’re stuck with them, but if you have an adjustable mount, tilt them toward the sun as the seasons change. Even a few degrees of adjustment can stop you from letting good sunlight go to waste.

    The Bottom Line on Solar Efficiency

    The Bottom Line on Solar Efficiency.

    Don’t get distracted by the highest percentage numbers; focus on the long-term ROI by picking panels that actually fit your specific budget and roof layout.

    Efficiency isn’t just about the hardware you buy, but how well you maintain it—keeping panels clean and well-ventilated is a zero-cost way to stop losing power.

    Small, strategic tweaks to your setup can prevent massive energy waste, proving you don’t need a massive solar farm to start seeing lower utility bills.

    Efficiency isn't about the highest number on a spec sheet

    At the end of the day, I don’t care if a panel has a theoretical efficiency rating of 24% if it’s sitting in a corner where it can’t actually catch the sun; true efficiency is about making sure every single photon you pay for actually ends up powering your home instead of just heating up the roof.

    Tobias Nkemdirim

    The Bottom Line on Solar Efficiency

    At the end of the day, maximizing your solar efficiency isn’t about chasing some impossible, high-tech dream; it’s about making informed, practical choices with the tools you have. We’ve looked at how picking the right panel type—like the higher-performing monocrystalline—can set your foundation, and how simple maintenance like keeping things clean can prevent unnecessary energy leaks. You don’t need a massive budget to see a real difference in your monthly utility statement. It really comes down to smart, incremental improvements that ensure every bit of sunlight hitting your roof is actually working for your wallet and the planet.

    I know that transitioning to renewable energy can feel overwhelming, especially when you’re trying to balance a budget. But remember, sustainability shouldn’t be a luxury reserved for the wealthy. Every small step you take to optimize your setup is a step toward true energy independence. Whether you’re just starting your solar journey or you’re already looking for ways to squeeze more power out of your existing array, stay focused on the data and the long-term gains. You’re doing more than just lowering a bill; you’re building a smarter, more resilient way to live.

    Frequently Asked Questions

    Is it actually worth paying the premium for high-efficiency panels if my roof space is already limited?

    If you’re working with a cramped roof, the answer is a hard yes. When space is your biggest constraint, every square inch has to earn its keep. High-efficiency panels might cost more upfront, but they pack more punch in a smaller footprint. It’s basically the difference between getting a decent return on a tiny investment versus wasting that precious real estate on low-output tech that leaves you still chasing more power.

    How much does dirt or seasonal debris actually impact my daily energy yield?

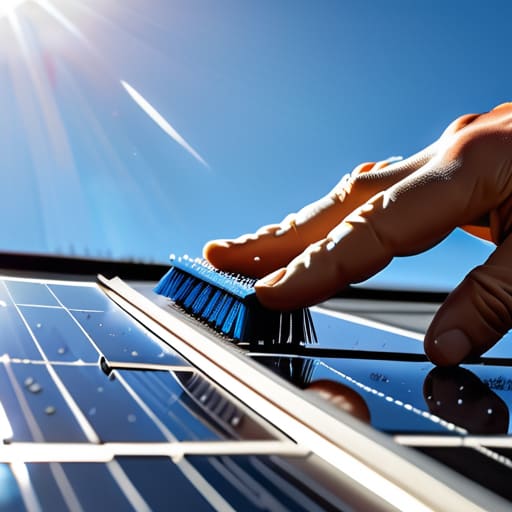
    It’s a bigger deal than most people realize. I’ve seen setups where a thick layer of dust or a handful of autumn leaves dropped the output by 15% or even 25%. It’s not just about the shade; it’s about how that debris disrupts the entire cell’s flow. If you’re seeing a dip in your daily yield, grab a soft brush or some water. Keeping them clear is the easiest way to stop leaking money.

    Can I boost my system's efficiency by upgrading my inverter, or is that just throwing more money at the problem?

    It’s a valid question, and honestly, it depends on what you’re starting with. If you’re running an old, budget-tier inverter that’s constantly running hot, you’re likely losing a significant chunk of your harvested energy to heat. Upgrading to a high-efficiency model—especially a pure sine wave inverter—can definitely squeeze more usable power out of your panels. It’s not just “throwing money” if the efficiency gain actually pays for the unit through lower losses.

  • How Geothermal Heating Systems Work

    How Geothermal Heating Systems Work

    I still remember sitting in my old rental apartment, shivering under three blankets while watching the utility meter spin like it was possessed. It was a losing battle; I was paying a premium just to fight a drafty house that couldn’t hold onto a single degree of warmth. Most people hear about geothermal heating systems and immediately think they need a massive inheritance or a literal estate to make it work. They get sold this idea that sustainable living is a luxury reserved for the ultra-wealthy, which is a complete load of rubbish.

    I’m not here to sell you on some high-concept, shiny green dream that costs more than your car. My goal is to strip away the marketing fluff and look at the actual data. I’ll show you how geothermal heating systems actually function in a real-world budget and whether the upfront cost truly pays off in long-term savings. We’re going to look at the practical reality of the installation, the efficiency gains, and how you can stop bleeding money through your floorboards without going broke.

    Table of Contents

    Understanding Geothermal Heat Pump Efficiency for Your Wallet

    Understanding Geothermal Heat Pump Efficiency for Your Wallet

    When I’m auditing a home, I’m usually looking for where the money is leaking out—literally. Most people think of heating as a constant battle against the air temperature, but that’s where the inefficiency lies. Geothermal heat pump efficiency works because it stops fighting the weather. Instead of trying to create heat from scratch using expensive electricity or gas, these systems tap into the ground temperature stability found just a few feet below the surface. Because the earth stays at a relatively constant temperature year-round, your unit isn’t working overtime to fight a sub-zero wind chill; it’s just moving existing warmth from the soil into your living room.

    Of course, the math gets a bit more complex depending on your property. You’ll likely run into the debate between closed loop vs open loop systems. A closed loop is generally the standard for residential setups, using a sealed pipe network to circulate fluid, while open loop systems pull directly from groundwater. While the upfront geothermal installation costs can feel like a gut punch compared to a standard furnace, you have to look at the long-term math. You aren’t just buying a heater; you’re investing in a system that treats your home like a thermal battery.

    Why Ground Temperature Stability Changes Everything

    Why Ground Temperature Stability Changes Everything.

    The reason this works so much better than a standard furnace comes down to one thing: the earth doesn’t care what the weather is doing above the surface. While your neighbor is struggling with a heat pump that’s fighting a sub-zero wind chill, your system is tapping into a constant, reliable source. Because of ground temperature stability, the earth stays at a relatively consistent temperature just a few feet down, regardless of whether it’s a heatwave or a blizzard.

    I usually explain it like this: why try to pull heat from freezing air when you can pull it from a steady, lukewarm underground reservoir? This consistency is what drives high geothermal heat pump efficiency. Instead of your HVAC system working overtime to combat extreme temperature swings, it’s just performing a steady exchange. It’s a much more predictable and stable way to manage your home’s climate. Whether you end up with closed loop vs open loop systems, the core advantage remains the same—you’re leveraging the planet’s own thermal inertia to keep your living room warm without the massive energy spikes.

    How to Make Geothermal Actually Work for Your Budget

    • Get a professional site assessment before you buy anything. I’ve seen people try to DIY the loop layout, but if your soil conductivity isn’t right, you’re just burying money in the backyard.
    • Don’t ignore your home’s insulation while installing the system. A geothermal heat pump is efficient, but it’s still fighting a losing battle if your heat is leaking out through old, drafty windows.
    • Size the system correctly for your specific square footage. Oversizing a unit is a common mistake that leads to “short-cycling,” which wears out the components and kills your energy savings.
    • Look into local government rebates and tax credits immediately. Since I started auditing homes, I’ve realized that these incentives are often the only reason the upfront cost becomes manageable for a regular person.
    • Pair your system with smart thermostats. You’ve invested in high-end tech; don’t manage it with a manual dial. Using data to automate your heating cycles is the easiest way to squeeze every bit of efficiency out of the system.

    The Bottom Line on Geothermal

    Don’t let the upfront cost scare you off; while the installation is more expensive than a standard furnace, the massive drop in your monthly utility bills means the system eventually pays for itself.

    Unlike air-source pumps that struggle when it’s freezing outside, geothermal relies on the constant temperature of the earth, making it a much more reliable way to keep your home steady without cranking the thermostat.

    Think of it as a long-term investment in your home’s efficiency rather than just a repair; you’re essentially trading high, unpredictable energy costs for a stable, low-impact system that lasts.

    ## The Real Math of Geothermal

    “Look, I’ve spent way too many winters shivering in drafty rentals because heating felt like a luxury I couldn’t afford. Geothermal isn’t just some high-tech flex for eco-conscious billionaires; it’s a practical, data-backed way to stop throwing your hard-earned money into the air every time the temperature drops.”

    Tobias Nkemdirim

    The Bottom Line on Going Geothermal

    The Bottom Line on Going Geothermal.

    Look, I know the upfront cost of a geothermal installation can feel like a gut punch when you’re looking at your bank balance. But after auditing enough homes, the math becomes pretty clear: you aren’t just buying a heating system; you’re investing in long-term energy independence. By leveraging that constant ground temperature we talked about, you’re moving away from the volatile, expensive cycle of fossil fuels and toward a system that actually works with the planet instead of against it. It’s about moving from a mindset of constant, expensive repairs to one of predictable, low-cost efficiency that pays for itself over time.

    At the end of the day, my goal has always been to prove that sustainability isn’t a luxury reserved for people with massive estates. Whether you start with a full geothermal overhaul or just focus on smaller efficiency upgrades first, the principle remains the same: stop letting your hard-earned money leak out of your windows and into the atmosphere. We have the tech to live comfortably without draining our wallets or the environment. It’s time to stop settling for inefficient, expensive “convenience” and start making smart, data-driven choices for our homes and our future.

    Frequently Asked Questions

    How much is this actually going to cost me upfront compared to a standard heat pump?

    Let’s be real: the upfront cost is the biggest hurdle. You’re looking at a much steeper initial investment compared to a standard air-source heat pump—often double or even triple the price. That’s because you’re paying for the ground loops and the specialized excavation. It’s a heavy lift for your bank account right now, but I always look at the long game. If you can stomach the entry cost, the efficiency payoff eventually balances the scales.

    Do I need a massive backyard to install the ground loops, or can this work for smaller properties?

    That’s a common concern, and honestly, it’s the first thing I check when I’m auditing a site. You don’t necessarily need a massive estate. If you have a standard suburban lot, we can often look into horizontal loops in a smaller, concentrated area, or even vertical boreholes if space is tight. Vertical systems take up way less surface area, though they can be a bit more of an upfront investment. It’s all about the layout.

    How long does the system actually last before I’m looking at expensive repairs or a full replacement?

    Look, I know the “upfront cost” anxiety is real, but here’s the data: you’re playing the long game here. The indoor heat pump unit usually lasts about 20 to 25 years. The real MVP, though, is the ground loop—that underground piping can easily last 50 years or more. If you keep up with basic filter changes and don’t neglect maintenance, you aren’t looking at a replacement anytime soon. It’s an investment, not a quick fix.

  • How to Use Smart Plugs for Energy Efficiency

    How to Use Smart Plugs for Energy Efficiency

    I remember sitting in my old rental apartment, shivering through a February freeze, staring at a utility bill that felt like a personal insult. I used to think that “going green” meant installing expensive solar arrays or high-end smart home ecosystems that cost more than my monthly rent. But after years of auditing homes and obsessing over heat leaks, I realized the real culprits are much smaller—and much cheaper to fix. Most people treat smart plugs usage like a tech toy for gadget lovers, but they’re actually missing the point. They aren’t just for turning your lights on with your voice; they are tools to stop the silent bleed of vampire power from devices you aren’t even using.

    I’m not here to sell you on a futuristic lifestyle you can’t afford. Instead, I’m going to show you exactly how to use these little devices to reclaim control over your electricity meter. I’ll walk you through the practical, data-backed ways to integrate smart plugs usage into your daily routine so you can cut unnecessary costs without needing a massive budget. No hype, no complicated setups—just straightforward ways to make your home work for your wallet and the planet.

    Table of Contents

    Reducing Phantom Energy Loads Without Lifting a Finger

    Reducing Phantom Energy Loads Without Lifting a Finger

    Most people don’t realize that their electronics are essentially “bleeding” money 24/7. Even when your TV or coffee maker is turned off, they’re still pulling a tiny bit of power just to stay in standby mode. I call this the “ghost in the machine” effect, and it adds up fast. By reducing phantom energy loads through a few simple settings, you can stop this invisible drain without ever having to manually unplug a cord again.

    The real magic happens when you start scheduling electrical devices to kill power completely during the hours you’re actually sleeping or at work. I usually set my smart plugs to cut the circuit to my entertainment center at midnight and bring it back online just before I wake up. It’s a low-effort way to ensure you aren’t paying for electricity you aren’t even using. You don’t need to be a tech genius to do this; you just need to stop letting your appliances stay on life support when they should be dead to the grid.

    Real Time Power Consumption Tracking to Guard Your Wallet

    Real Time Power Consumption Tracking to Guard Your Wallet

    Most people treat their electricity bill like a mystery novel—you only find out the ending at the end of the month when the total is way higher than expected. I hate that uncertainty. When I’m auditing a home, I always tell clients that you can’t manage what you don’t measure. This is where real-time power consumption tracking becomes a game-changer. Instead of guessing which device is the culprit, you can see exactly how many watts your old coffee maker or that gaming PC is pulling in the moment you plug them in.

    It’s about turning invisible data into actionable savings. Once you see the spikes on your phone, you start making different choices. You might realize your media center is drawing a steady stream of power even when it’s “off,” or that your space heater is working way harder than it needs to. By leveraging remote power control via smartphone, you can monitor these patterns from anywhere. It’s not just about being tech-savvy; it’s about having the hard data you need to stop the bleeding and take control of your monthly budget.

    5 Practical Ways to Put Your Smart Plugs to Work

    • Target your “vampire” electronics like gaming consoles and coffee makers; set them to cut power completely during your sleep hours so they aren’t sipping electricity all night.
    • Use scheduling to automate your space heaters or fans, ensuring they only run when you’re actually in the room and not just burning cash in an empty house.
    • Group your holiday lights or seasonal decor under a single smart plug so you can kill the power from your phone instead of crawling under the tree to find the switch.
    • Set up “away mode” routines that turn off non-essential lamps and chargers the second you leave the house, preventing that accidental “did I leave the iron on?” panic.
    • Use the energy monitoring feature to identify which specific appliance is the biggest culprit in your monthly bill, then decide if it’s actually worth the runtime.

    The Bottom Line on Smart Plugs

    The Bottom Line on Smart Plugs.

    Stop letting “vampire power” drain your bank account; use smart plugs to kill the phantom loads from devices you aren’t even using.

    Use the data to your advantage by tracking real-time usage, so you can spot which appliances are actually bleeding money.

    You don’t need a full home automation overhaul to see results—start small with a few plugs to automate your biggest energy offenders.

    The Hidden Cost of "Off"

    Most people think a device is off just because the little light is out, but my infrared thermometer and my utility bills tell a different story. Smart plugs turn that invisible, constant drain into something you can actually see and control, because if you aren’t managing your power, you’re just subsidizing the grid for no reason.

    Tobias Nkemdirim

    The Bottom Line on Smart Plugs

    At the end of the day, smart plugs aren’t just some trendy tech gadget to clutter your living room; they are practical tools for reclaiming control over your utility bills. We’ve looked at how they kill off those silent phantom loads that bleed your bank account dry and how real-time tracking turns invisible energy waste into actionable data. By automating your devices and monitoring exactly what they pull from the grid, you’re moving away from guesswork and toward a precision-managed home. It’s about making sure every watt you pay for is actually doing something useful, rather than just heating up a wall or sitting idle in standby mode.

    I know that making sustainable changes can feel overwhelming, especially when you’re staring down a rising cost of living. But remember, you don’t need to install a full solar array or replace every appliance in your house to make a difference. Efficiency starts with these small, intentional shifts in how we interact with our environment. Every time you automate a lamp or cut off a standby heater via your phone, you are voting with your wallet for a cleaner, smarter future. Let’s stop letting convenience dictate our carbon footprint and start building homes that are as efficient as they are affordable.

    Frequently Asked Questions

    Are smart plugs actually efficient enough to justify the upfront cost, or am I just spending more money to save a few cents?

    Look, I get the skepticism. If you’re only using them for a single lamp, you’re basically throwing money away. But if you target your “vampire” appliances—like that old coffee maker, the gaming console, or your desktop setup—the math changes fast. I’ve seen plugs pay for themselves in a few months just by killing phantom loads. Don’t buy one for everything; buy them for the high-draw stuff that stays plugged in 24/7.

    Will using these plugs with my older, vintage electronics pose any safety risks or cause power surges?

    That’s a fair concern, especially since I spend half my weekends tinkering with old tech. Generally, a smart plug is just a controlled gate for electricity; it won’t suddenly spike the voltage. However, the risk lies in the device itself. If your vintage gear has faulty wiring or old capacitors, it’s already a fire hazard. Use the plug to monitor the draw—if you see erratic spikes on your app, pull the plug immediately.

    How much of an actual difference will these make if I'm mostly using them for low-power devices like lamps or chargers?

    Look, if you’re just talking about a single phone charger, the impact is negligible. But it’s rarely just one device. If you’ve got a whole setup—lamp, charger, tablet, maybe a small fan—all plugged in and idling, those little leaks add up. I’ve run my infrared thermometer over walls where “vampire” devices were generating tiny amounts of heat all night. It’s about the cumulative effect. It won’t make you rich, but it stops the slow bleed.

  • Ways to Reduce Air Conditioning Costs

    Ways to Reduce Air Conditioning Costs

    I still remember sitting in my old rental apartment, watching the utility meter spin like a frantic stopwatch every time I dared to touch the thermostat. I was broke, sweating through my shirts, and felt like I was being punished just for wanting to breathe. Most “experts” will tell you that the only way to reduce air conditioning costs is to shell out thousands for a new, high-efficiency HVAC system or some fancy smart-home gadget that costs more than it saves. Honestly? That’s a load of rubbish. You shouldn’t have to be wealthy just to stay comfortable in your own living room.

    I’m not here to sell you on expensive hardware or complicated tech that requires a degree to operate. My goal is to give you the straightforward, data-backed tactics I use during my professional audits to stop energy leaks in their tracks. We’re going to focus on small, high-impact adjustments—the kind of stuff that actually moves the needle on your monthly bill without requiring a massive upfront investment. If you’re ready to stop throwing money out the window and start cooling smarter, let’s get into it.

    Table of Contents

    Smart Thermostat Energy Savings for Real People

    Smart Thermostat Energy Savings for Real People

    I used to think smart thermostats were just overpriced gadgets for tech enthusiasts, but after seeing the data, I changed my mind. Most of us waste a massive amount of energy cooling rooms we aren’t even using. By automating your schedule, you aren’t just being “high-tech”—you’re actively lowering monthly utility expenses by ensuring your AC isn’t working overtime when you’re at work or asleep. It’s about precision, not just convenience.

    The real secret, though, lies in finding your optimal thermostat temperature settings. I always tell my clients: don’t set it to 60 degrees thinking it’ll cool the house faster; it won’t. It just makes the compressor run longer and harder. Instead, aim for a consistent, reasonable temperature and let the automation handle the shifts. When you pair these settings with a bit of awareness about how your sun hits your windows, the smart thermostat energy savings start to show up clearly on your next bill. It’s a small investment that pays for itself by stopping the constant cycle of over-cooling an empty house.

    Optimal Thermostat Temperature Settings That Save Cash

    Optimal Thermostat Temperature Settings That Save Cash

    Look, I’ve spent too many afternoons standing in drafty living rooms with my infrared thermometer, watching the temperature climb because someone set the AC to “Arctic Blast” just to feel a chill. It’s a common mistake, but it’s an expensive one. Finding the optimal thermostat temperature settings isn’t about living in a sauna; it’s about finding that sweet spot where you’re comfortable without forcing your compressor to run non-stop. Generally, aiming for 78°F (26°C) when you’re home and bumping it up a few degrees when you’re out is the smartest way to start lowering monthly utility expenses without a massive lifestyle shift.

    The trick is to avoid “thermostat wars.” Every time you crank the dial down to 65°F thinking it’ll cool the house faster, you’re actually just wasting money—the unit works at the same speed regardless of the setting. Instead, focus on steady, incremental adjustments. If you pair these settings with better airflow, you’ll notice a massive difference. It’s all about working smarter, not harder, to keep your space livable while keeping your bank account intact.

    5 Low-Cost Moves to Stop Your AC from Bleeding Cash

    • Seal those sneaky air leaks. I always grab my infrared thermometer when I walk into a room; if I see a cold draft coming from a window frame or a door gap, that’s literally money flying out of your house. Grab some weatherstripping or even just a cheap door snake to keep the cool air where it belongs.
    • Manage your sunlight like a pro. It sounds simple, but keeping your blinds or curtains closed during the hottest part of the day is a game changer. You’re essentially stopping the greenhouse effect from turning your living room into an oven before the AC even has to kick in.
    • Stop the “phantom” heat from appliances. Your oven, dryer, and even some older electronics dump a ridiculous amount of heat into your space. If you’re trying to keep costs down, try to avoid heavy cooking or laundry during peak heat hours—don’t make your AC fight your kitchen appliances.
    • Clean your filters every single month. A clogged filter makes your unit work twice as hard to pull in air, which spikes your electricity usage. It’s a five-minute job that costs zero dollars but keeps your system running efficiently instead of straining against dust.
    • Aim your fans in the right direction. Ceiling fans don’t actually lower the temperature of a room, but they create a wind-chill effect on your skin. Use them to circulate the air so you can feel comfortable even if you bump that thermostat up a couple of degrees.

    The Bottom Line on Keeping Your Cool and Your Cash

    Stop fighting your thermostat; set it to a realistic temperature and let smart tech handle the adjustments so you aren’t paying to cool an empty house.

    Small, low-cost tweaks—like sealing window gaps or using heavy curtains—are often more effective at keeping the heat out than just cranking up the AC.

    Efficiency isn’t about luxury upgrades; it’s about making smart, data-backed decisions that stop your money from literally leaking out of your windows.

    ## The Cost of Convenience

    “We’ve been conditioned to think that keeping a house ice-cold is just the price of comfort, but most of that extra spending is actually just paying to cool the air leaking out of your windows. Real efficiency isn’t about living in a freezer; it’s about making sure the energy you pay for actually stays where it belongs.”

    Tobias Nkemdirim

    Cutting the Cord on High Cooling Costs

    Cutting the Cord on High Cooling Costs.

    At the end of the day, lowering your AC bill isn’t about making massive, expensive renovations or living in a literal icebox. It’s about the small, intentional shifts we’ve talked about—from dialing in your thermostat settings to making sure your smart tech is actually working for you rather than against you. I’ve seen firsthand how a few simple adjustments can stop your hard-earned money from literally evaporating into thin air. When you combine smart temperature management with basic maintenance, you aren’t just saving a few bucks; you are stopping the cycle of wasted energy that most people just accept as an inevitable part of summer.

    I know it can feel overwhelming when you look at those rising utility rates, but don’t let the scale of the problem paralyze you. You don’t need a massive budget to make a meaningful dent in your environmental impact or your monthly expenses. Start with one tweak this week—maybe it’s a new schedule for your thermostat or a quick check of your air filters. These minor wins add up to a much larger, more sustainable lifestyle. Remember, efficiency is a marathon, not a sprint, and every single watt you save is a step toward a smarter, more affordable way to live.

    Frequently Asked Questions

    Are there specific window treatments or films that actually work, or is it just a waste of money?

    Look, I’ve spent way too many hours pointing my infrared thermometer at window frames to give you a generic answer. Some stuff is hype, but heat-rejecting window films are a game-changer if you have large, sun-facing windows. They block the infrared spectrum before it even enters the room. If you’re on a tighter budget, heavy blackout curtains are your best bet. It’s not just about aesthetics; it’s about creating a thermal barrier that actually holds the cool air in.

    Should I focus more on upgrading my old AC unit or just finding ways to make my current one run more efficiently?

    Look, I get the urge to just swap the whole unit out, but don’t go buying a new AC until you’ve audited your current setup. If your unit is relatively recent, focus on efficiency first—clean those coils and check your ductwork for leaks. It’s way cheaper than a massive upfront investment. However, if your unit is a decade old and struggling, that’s when the math shifts toward an upgrade. Check your efficiency ratings first.

    How much of a difference will cleaning my filters and vents actually make on my monthly bill?

    Honestly? It makes a massive difference. When your filters are clogged with dust, your AC has to work twice as hard just to pull in enough air to cool the room. It’s like trying to breathe through a thick cloth while running—you’re going to burn way more energy. I’ve seen units pull significantly more power just because they were struggling against a dirty vent. Clean them regularly; it’s the easiest way to stop throwing money away.

  • Simple Energy Saving Habits for Families

    Simple Energy Saving Habits for Families

    I still remember sitting in my old rental apartment, shivering under three blankets while staring at a utility bill that felt like a personal insult. I used to think that being “green” meant dropping thousands on solar panels or high-tech smart home systems that most of us simply can’t afford. But after years of auditing homes and seeing where the real money actually disappears, I’ve realized that most of the mainstream advice is just noise. Real energy saving habits aren’t about buying your way into sustainability; they are about stopping the bleeding caused by the invisible leaks and lazy patterns we’ve all been taught to accept as normal.

    I’m not here to sell you on expensive gadgets or complicated lifestyle overhauls that won’t even move the needle on your monthly costs. Instead, I’m going to give you the straightforward, data-backed tactics I use in my own consulting work to reclaim control over your home. We’re going to focus on low-cost, high-impact shifts that actually stick. My goal is to show you how to tighten up your routine and shrink your footprint without needing a massive bank account to do it.

    Table of Contents

    Minimizing Phantom Power Loads Without Spending a Dime

    Minimizing Phantom Power Loads Without Spending a Dime

    You’d be surprised how much money is quietly bleeding out of your wall sockets while you sleep. I call it the “vampire drain,” but in my professional audits, I just refer to it as minimizing phantom power loads. Even when your TV is off or your laptop is closed, those little standby lights and internal transformers are still pulling current. It feels insignificant in the moment, but when you add up every charger, coffee maker, and gaming console in your house, you’re essentially paying a “laziness tax” every single month.

    The best part is that you don’t need to buy expensive “smart” gear to fix this. The most effective way to start reducing utility bills is to simply use a basic power strip. By flipping one switch at the end of the night, you physically sever the connection, ensuring your devices aren’t sipping electricity for no reason. It’s a low-effort, high-impact way of lowering your carbon footprint at home without having to replace a single piece of equipment. It’s about being intentional rather than just being convenient.

    Mastering Energy Efficient Appliance Usage for Lower Bills

    Mastering Energy Efficient Appliance Usage for Lower Bills

    Once you’ve tackled the phantom loads, it’s time to look at the heavy hitters: your appliances. Most people treat their washing machine or dishwasher like a “set it and forget it” tool, but that’s a mistake. I’ve seen so many households running half-empty loads just because it’s convenient, which is essentially throwing money down the drain. To get real results in reducing utility bills, you need to wait for full loads and, if your machine allows it, switch to cold water cycles. Heating water accounts for a massive chunk of a laundry cycle’s energy draw, so skipping the heat is a simple win for your wallet.

    I also tell my clients to pay attention to the “thermal dance” of their kitchen and laundry rooms. For instance, running your dishwasher during off-peak hours can make a difference depending on your local grid. If you really want to level up your energy efficient appliance usage, start looking at your cooking habits—using a microwave or an air fryer for smaller meals is far more efficient than preheating a massive oven for twenty minutes. It’s about being intentional rather than just being busy.

    Small Tweaks to Stop the Energy Bleed

    • Seal the gaps before the heat does. I’ve spent way too many hours with my infrared thermometer pointing at drafty window frames; even a tiny crack can act like a vacuum, sucking the warmth right out of your living room. Use some cheap weatherstripping or even a simple door snake to keep that expensive air inside where it belongs.
    • Stop treating your thermostat like a suggestion. It’s tempting to crank the heat to 75°F when you get home, but the real win is consistency. Dropping the temp by just two degrees and using a programmable timer can shave a noticeable chunk off your monthly bill without making you freeze.
    • Wash cold, dry smart. Most modern detergents work perfectly well in cold water, and you’ll save a massive amount of energy by not heating up the laundry water every single time. When it comes to the dryer, stop over-drying your clothes; it’s a huge power drain and wears out your fabrics faster.
    • Let your radiators breathe. If you’ve got heavy curtains or a sofa pushed right up against a heater, you’re essentially paying to heat your furniture instead of the room. Keep the area around your heat sources clear so the convection can actually do its job.
    • Optimize your lighting by habit, not just by switch. It sounds basic, but getting into the rhythm of turning off lights when you leave a room—and switching to LEDs as your old bulbs die—is the lowest-effort way to stop wasting power. It’s about being intentional with the energy you’re actually using.

    The Bottom Line on Cutting Waste

    Efficiency isn’t about buying expensive new gadgets; it’s about auditing your current habits and plugging the leaks—both literal and electrical—that are draining your wallet.

    Small, data-backed changes, like managing phantom loads and optimizing appliance timing, compound over time to create significant savings on your monthly bills.

    You don’t need a massive renovation budget to live sustainably; staying observant and making smart, low-cost adjustments is the most effective way to shrink your footprint.

    The Cost of Convenience

    We’ve been conditioned to think that comfort requires constant, high-energy consumption, but true efficiency isn’t about deprivation—it’s about stopping the silent leaks in our habits that drain both our wallets and the planet.

    Tobias Nkemdirim

    The Bottom Line on Your Energy Bills

    The Bottom Line on Your Energy Bills.

    At the end of the day, cutting your energy costs isn’t about buying a fleet of expensive solar panels or high-tech smart gadgets. It’s about the small, intentional shifts we discussed: killing phantom loads that drain your wallet while you sleep and actually being mindful of how we run our appliances. I’ve spent enough time with my infrared thermometer to know that energy leakage is often invisible, but it’s definitely costing you money. By mastering these habits, you aren’t just tweaking your routine; you are actively plugging the holes in your budget and reclaiming control over your monthly overhead.

    I know it can feel overwhelming to think about “going green” when you’re just trying to make ends meet, but sustainability shouldn’t be a luxury reserved for the wealthy. Every time you choose to unplug a charger or run a full load of laundry instead of a half-empty one, you are making a choice that favors both your bank account and the planet. We don’t need perfection; we just need to stop being lazy with our resources. Start with one habit this week, track the difference, and watch how those small, smart changes eventually add up to a much lighter footprint and a much heavier wallet.

    Frequently Asked Questions

    I’ve tried unplugging stuff, but how do I actually know which appliances are the biggest culprits for phantom power?

    Honestly, guessing is a waste of time. If you want the real data, grab a cheap plug-in energy monitor—they’re a lifesaver for my audits. You plug it in, run the device for a bit, and it shows you exactly how many watts it’s pulling while it’s “off.” I usually find that older game consoles or cheap desktop chargers are the biggest offenders. Don’t just assume; verify the numbers so you actually see the savings.

    Are there any low-cost tech upgrades that actually pay for themselves within a few months?

    Honestly, if you want a quick ROI, skip the fancy smart home ecosystems for now and grab some heavy-duty weatherstripping and door sweeps. I’ve audited enough drafty apartments to know that sealing air leaks is the fastest way to stop throwing money out the window. If you want something more “techy,” get a programmable thermostat. It’s a small upfront cost that pays for itself almost immediately by ensuring you aren’t heating an empty house.

    How much of a difference does sealing window drafts actually make compared to just turning the thermostat down?

    Honestly, it’s a massive difference. Turning the thermostat down is great, but if you’re fighting a constant draft, you’re basically trying to heat the entire neighborhood. I’ve used my infrared thermometer on houses where the window frames were bleeding heat like a sieve; the temperature drop was immediate. Sealing those gaps stops the “leak” so your heater doesn’t have to work overtime. Fix the envelope first, then adjust the dial.

  • Understanding Different Home Insulation Types

    Understanding Different Home Insulation Types

    I still remember sitting in my old rental apartment, shivering under three layers of blankets while the radiator hissed uselessly against the draft. I’d watch the money literally vanish through the cracks in the window frames, feeling like I was paying a “poverty tax” just to stay warm. Most people think you need a massive renovation budget to fix this, but that’s a lie. You don’t need to gut your house to see a difference; you just need to understand the actual utility of different home insulation types instead of falling for the most expensive marketing hype.

    I’m not here to sell you on high-end, eco-luxury solutions that cost more than your mortgage. My goal is to cut through the jargon and show you which materials actually work for your specific space and budget. We’re going to look at the data behind various home insulation types so you can stop heating the outdoors and start keeping your money where it belongs. No fluff, no unnecessary complexity—just practical ways to make your home efficient without breaking the bank.

    Table of Contents

    Thermal Resistance Explained Why Your Bills Are Skyrocketing

    Thermal Resistance Explained Why Your Bills Are Skyrocketing

    When I’m auditing a home, the first thing I do isn’t looking at the brand of the heater; it’s looking at the envelope. Most people think they have a heating problem, but they actually have a containment problem. This is where thermal resistance explained becomes crucial. Think of thermal resistance as a barrier’s ability to fight back against temperature transfer. The higher that resistance, the harder it is for the heat you’ve paid for to escape through your walls or attic.

    In the industry, we measure this using the R-value. If you’re looking at an R-value comparison guide, you’ll see that a higher number means better performance. I often see renters or budget-conscious homeowners trying to compensate for low R-values by cranking up the thermostat, but that’s just throwing money into a void. Instead of fighting the weather, you need to focus on preventing heat loss at the source. If your insulation can’t hold the line, no amount of high-tech HVAC gear is going to stop your utility bills from skyrocketing every single winter.

    Preventing Heat Loss Without Breaking Your Bank Account

    Preventing Heat Loss Without Breaking Your Bank Account

    When I walk into a client’s house and pull out my infrared thermometer, I usually see the same thing: heat bleeding out through the gaps in the attic or through thin, outdated wall cavities. Most people think they need a massive renovation to fix this, but preventing heat loss is actually about targeting the high-impact areas first. You don’t need to strip your house to the studs to see a difference in your monthly utility bill.

    If you’re working with a tight budget, I usually recommend looking into blown-in cellulose insulation. It’s a fantastic, eco-friendly option that fills those hard-to-reach nooks and crannies in your attic much more effectively than traditional batts. While some people get caught up in the debate of spray foam vs fiberglass, the real trick is matching the material to your specific space and budget. I always tell my clients to look at an R-value comparison guide before they buy anything; it’s the only way to ensure you’re actually getting the thermal protection you’re paying for rather than just throwing money at a problem.

    My Go-To Strategies for Finding the Right Insulation

    • Focus on your “envelope” first. Before you buy expensive rolls of fiberglass, use my infrared thermometer to find exactly where the heat is escaping—usually around window frames or attic hatches—so you aren’t wasting money on materials where they aren’t needed.
    • Don’t sleep on blown-in cellulose for attics. It’s often more affordable than rigid foam boards and uses recycled paper, making it a win for both your budget and the planet.
    • Check your floorboards if you’re in an older rental or house. Adding a layer of mineral wool under floorboards can stop that nasty draft coming up from the crawlspace, which is a total game-changer for keeping your feet warm.
    • Avoid the “more is better” trap. You don’t need the thickest, most expensive spray foam to see results; sometimes a well-placed layer of rock wool provides better thermal resistance for a fraction of the cost.
    • Think about the gaps, not just the big spaces. Small cracks in walls can be filled with simple expanding foam, which is a cheap, quick way to supplement your main insulation layers and stop those tiny energy leaks.

    The Bottom Line on Insulation

    The Bottom Line on Insulation guide.

    Insulation isn’t a luxury; it’s a practical tool to stop your money from literally leaking through your walls and ceiling.

    You don’t need to overhaul your entire house at once—start by identifying your biggest heat leaks with a simple thermometer or even just your hands.

    The goal is to find the balance between cost and R-value that fits your specific budget, ensuring you get the most thermal bang for your buck.

    ## The Real Cost of Doing Nothing

    “I’ve stood in rooms where the thermostat is cranked to max, yet you can still feel the chill bleeding through the walls. Most people think they have a heating problem, but usually, they just have an insulation problem—they’re essentially paying to heat the neighborhood instead of their own living room.”

    Tobias Nkemdirim

    The Bottom Line on Insulation

    At the end of the day, picking the right insulation isn’t about finding the most expensive material on the market; it’s about matching the right solution to your specific home and budget. Whether you decide to go with blown-in cellulose for those hard-to-reach attic gaps, or you opt for rigid foam boards to seal up a drafty basement, the goal remains the same: stopping the bleed. I’ve seen too many people waste hundreds of dollars every winter simply because they ignored the thermal envelope of their house. By understanding R-values and identifying where your heat is actually escaping, you can make data-driven decisions that pay for themselves in much lower utility bills.

    I know that looking at home efficiency can feel overwhelming, especially when you’re trying to balance a tight budget with a desire to do better for the planet. But remember, sustainability shouldn’t be a luxury reserved for people with massive bank accounts. Every small upgrade you make, from a simple weatherstrip to a more robust layer of fiberglass, is a win for your wallet and a win for the environment. Don’t wait for a “perfect” time to start; just start where you are. You have the power to turn your home from a sieve into a sanctuary, one smart, efficient choice at a time.

    Frequently Asked Questions

    I live in a rental apartment—can I actually install insulation, or am I stuck with whatever the landlord provided?

    Look, I get it. I spent years in a rental that felt more like a walk-in freezer than a living room. Since you can’t tear down walls to add fiberglass batts, you have to get creative with “non-invasive” solutions. Think heavy thermal curtains, draft stoppers for doors, or even window insulation film. It’s not as permanent as a full retrofit, but it stops the heat from escaping without risking your security deposit.

    Which insulation type is actually the most cost-effective if I'm looking for the fastest return on my investment?

    If you want the fastest ROI, focus on your attic first. It’s usually the biggest culprit for heat loss, and blowing in cellulose or adding fiberglass batts is relatively cheap compared to a full-scale renovation. I’ve seen people spend thousands on fancy windows only to realize their attic was basically a sieve. Fix the ceiling of your living space first; it’s the quickest way to see your utility bills actually drop.

    Are there specific materials I should avoid if I'm trying to keep my home's carbon footprint as low as possible?

    If you’re prioritizing a low footprint, steer clear of high-embodied carbon materials like spray foam or certain rigid polystyrene boards. They’re effective, but the energy required to manufacture them is massive. I usually recommend looking toward natural alternatives instead. Think sheep’s wool, hemp, or cellulose made from recycled paper. They perform great, they’re much easier on the planet, and they don’t leave behind that heavy chemical footprint most synthetic options do.

  • Choosing Energy Efficient Lighting for Your Home

    Choosing Energy Efficient Lighting for Your Home

    I still remember sitting in my old rental apartment, shivering in a room that felt more like a walk-in freezer than a living space. I’d turn on every lamp I owned just to feel a sense of warmth, only to realize I was essentially paying a premium to heat the air with old, inefficient bulbs. Most people think that upgrading to energy efficient lighting requires a massive upfront investment or a complete home renovation, but that’s a total myth. You don’t need a designer budget to stop bleeding money through your light fixtures; you just need to stop letting outdated tech dictate your monthly utility bills.

    I’m not here to sell you on some high-end, “smart” ecosystem that costs more than your monthly rent. My goal is to give you the actual, data-backed reality of what works for a normal household. I’ll show you exactly which swaps offer the highest return on investment and how to pick the right lumens without turning your bedroom into a sterile hospital ward. This is about practical, low-cost changes that keep your bills down and your footprint small, no fluff included.

    Table of Contents

    The Truth About Led vs Incandescent Comparison

    The Truth About Led vs Incandescent Comparison

    I’ve spent way too many hours with my infrared thermometer pointed at old-school light fixtures, and the data doesn’t lie: incandescent bulbs are essentially tiny space heaters that happen to produce a little bit of light. When you run an LED vs incandescent comparison, the gap isn’t just about the electricity used; it’s about wasted thermal energy. An incandescent bulb converts about 90% of its energy into heat rather than light, which is a massive drain on your wallet and your home’s climate control.

    Switching to LEDs is the most straightforward way of reducing household energy consumption without needing a degree in engineering. While the upfront cost might be a few cents more per bulb, the math works out in your favor almost immediately. You aren’t just buying a bulb; you’re investing in a cost-effective bulb replacement that lasts years longer. I always tell my clients to stop looking at the sticker price and start looking at the lifespan. If you’re still using those old, warm-to-the-touch bulbs, you’re essentially paying a “waste tax” every single month.

    Smart Cost Effective Bulb Replacement for Every Room

    Smart Cost Effective Bulb Replacement for Every Room

    When I’m auditing a space, I don’t just look at the wattage; I look at how the light actually functions in the room. You shouldn’t treat every bulb the same way. For instance, your living room needs a warm, inviting glow, whereas a home office demands crisp, clear light to keep you focused. Instead of grabbing the cheapest pack of bulbs at the grocery store, look for sustainable lighting solutions that match the specific task. If you’re upgrading a kitchen, aim for higher lumens to ensure you aren’t squinting over a cutting board, but keep the bedroom bulbs dim and warm to help your circadian rhythm.

    A cost-effective bulb replacement strategy is all about prioritizing high-use areas. If you have a hallway light that stays on for hours, that’s your first target. I always tell my clients to invest a little more upfront in high-quality LEDs for those central zones. If you want to take it a step further, look into smart lighting automation. Setting timers or motion sensors in bathrooms or laundry rooms ensures you aren’t paying to light an empty room, which is one of the fastest ways to see a real difference in your monthly statement.

    5 Quick Wins to Stop Draining Your Bank Account Through Your Light Fixtures

    • Stop over-lighting your spaces. I see this all the time during audits: people have high-wattage bulbs in every corner of a room when they only really need task lighting over a desk or a reading nook. Use localized lamps instead of blasting the whole ceiling.
    • Get a grip on your lumens, not just your watts. When you’re shopping, stop looking at how much power a bulb pulls and start looking at the brightness (lumens). You can get the same light output with a fraction of the energy if you know what number to look for on the box.
    • Layer your lighting to save. Instead of turning on the “big light” in the living room, use a mix of dimmable LEDs and small accent lights. It creates a better vibe and lets you control exactly how much energy you’re actually pulling from the grid.
    • Don’t ignore the “vampire” draw of smart bulbs. While I love tech, some smart bulbs have a tiny constant draw even when they’re “off.” If you’re going smart, pick reputable brands that are actually rated for low standby power so you aren’t losing money while you sleep.
    • Clean your fixtures regularly. It sounds basic, but dust buildup on bulbs and shades can block a significant amount of light. If your room feels dim, don’t immediately reach for a higher-wattage bulb; just wipe the dust off and see if you can actually see better.

    The Bottom Line on Your Lighting Bill

    Stop thinking of LEDs as an expense; they’re a long-term investment that pays for itself in energy savings within months, not years.

    Don’t just swap bulbs blindly—match the color temperature to the room’s purpose so you aren’t wasting energy on harsh, unnecessary light.

    Focus on the high-traffic areas first; upgrading the bulbs in your kitchen and living room offers the fastest ROI on your utility bill.

    The Cost of Convenience

    “I’ve walked into too many homes where people are literally burning money through their ceiling fixtures just because they haven’t bothered to check the wattage. Upgrading your lighting isn’t some luxury lifestyle hack; it’s basic math that keeps more cash in your pocket and less waste in the grid.”

    Tobias Nkemdirim

    The Bottom Line on Your Lighting

    The Bottom Line on Your Lighting.

    At the end of the day, upgrading your lighting isn’t about some massive, expensive overhaul of your entire house; it’s about making intentional choices where they actually count. We’ve looked at why ditching those old incandescent bulbs for LEDs is a no-brainer for your wallet, and how tailoring your bulb types to specific rooms—like using warm tones for the bedroom and bright, crisp light for your workspace—can change the whole vibe of your home. It really comes down to stopping the bleed of energy that happens every time you flip a switch in a room filled with inefficient tech.

    I know that when you’re staring at a mounting utility bill, these small changes can feel insignificant, but they aren’t. Every time you swap a bulb or dim a light you don’t need, you are reclaiming a tiny bit of your hard-earned money and reducing your footprint. Sustainability shouldn’t be a luxury reserved for people with huge budgets; it’s a series of smart, practical habits that anyone can adopt. Start small, keep track of your savings, and remember that efficiency is a mindset, not just a checklist.

    Frequently Asked Questions

    Are LED bulbs actually better for the environment when you consider how much waste they create if they burn out too quickly?

    It’s a fair question. I’ve seen plenty of cheap, low-quality LEDs die after just a few months, and that’s a massive waste. But even with a shorter lifespan, the math still favors LEDs. The energy they save during their life far outweighs the carbon footprint of manufacturing them. My advice? Don’t buy the cheapest generic ones. Invest in a mid-range, reputable brand. You’ll get the efficiency without the constant cycle of landfill waste.

    If I switch to smart bulbs to save energy, am I actually increasing my electricity usage because of the "vampire power" they draw while plugged in?

    It’s a fair question, and I get why you’re skeptical. Here’s the data: yes, smart bulbs have a tiny “vampire draw” because they need to stay connected to your Wi-Fi. But even with that standby power, the energy you save by using efficient LED technology far outweighs the cost of the idle draw. You’re essentially trading a few cents of standby power for significant savings on your main lighting bill. It’s a net win.

    How do I find the right color temperature so my home doesn't end up feeling like a cold, sterile hospital ward?

    Look, I’ve seen too many people swap to LEDs only to turn their living rooms into a sterile hospital ward. It’s a common mistake. To keep things cozy, look for the Kelvin (K) rating on the box. For living areas and bedrooms, aim for “Warm White” (around 2700K to 3000K). If you’re in a kitchen or workspace where you actually need to see what you’re doing, “Cool White” (around 4000K) works better.

  • Essential Solar Panel Maintenance

    Essential Solar Panel Maintenance

    I was auditing a small bungalow last month when the homeowner pointed proudly at his pristine, high-end solar array, yet his energy production numbers were absolutely tanking. He’d been told that solar is “set it and forget it,” a convenient lie sold by people who don’t care about your monthly overhead. The truth is, neglecting basic solar panel maintenance is basically like leaving a window cracked open in mid-winter; you’re literally watching your hard-earned investment leak money right through the roof. Most people think they need a specialized technician and a massive service contract to keep things running, but that’s just expensive fluff designed to pad someone else’s pocket.

    I’m not here to sell you on complex engineering or high-priced maintenance packages that you don’t actually need. My goal is to give you the straight, data-driven reality of what it takes to keep your system performing at its peak without breaking the bank. I’ll show you the few, high-impact tasks that actually move the needle, so you can stop wasting power and start seeing the real savings you were promised when you first went solar.

    Table of Contents

    Simple Solar Panel Debris Removal to Protect Your Savings

    Simple Solar Panel Debris Removal to Protect Your Savings

    I’ve seen it too many times during my audits: a homeowner thinks their system is failing, but it’s actually just buried under a layer of grit. Whether it’s fallen leaves from a nearby oak or a buildup of pollen, even a thin film can cause significant solar panel shading issues. When light can’t hit the cells directly, your production drops, and you end up paying the utility company for power you should have been generating for free.

    Performing regular solar panel debris removal doesn’t require a degree in engineering, but it does require a bit of discipline. I usually recommend a gentle rinse with a garden hose—never a high-pressure washer, as you’ll crack the glass—once or twice a year. If you notice stubborn spots, a soft brush and some water usually do the trick. It’s one of those small, low-cost habits that goes a long way toward maximizing solar energy output and ensuring you actually get the return on investment you were promised when you first installed the system.

    Maximizing Solar Energy Output Without Breaking the Bank

    Maximizing Solar Energy Output Without Breaking the Bank

    You don’t need a massive budget or a degree in electrical engineering to make sure your setup is actually pulling its weight. Most of the time, the drop in performance people complain about isn’t a broken system; it’s just neglect. I always tell my clients to keep a close eye on solar panel shading issues. A single overgrown branch or even a persistent buildup of grime in one corner can cast a shadow that drags down the efficiency of your entire array. It’s a common trap—you think because they’re up on the roof, they’re “set and forget,” but that’s exactly when you start losing money.

    If you want to get serious about maximizing solar energy output, you should schedule an annual solar system checkup. Think of it like an oil change for your house; it’s a small upfront effort that prevents much more expensive repairs down the line. While you’re up there, take a quick look at your inverter. If the lights are flashing weirdly or the display looks off, don’t ignore it—a bit of proactive troubleshooting now can save you from a total system failure during the peak of summer.

    Small Checks to Keep Your System From Slacking

    • Grab a soft brush or a microfiber cloth to wipe away any stubborn grime; you don’t want a layer of dirt acting like a shade over your investment.
    • Keep an eye on your inverter’s display regularly; if the numbers look lower than they should be for a sunny day, something is definitely off.
    • Check your mounting hardware once or twice a year to make sure nothing has rattled loose or started to corrode, especially after a bad storm.
    • Watch for any shading from overgrown trees or new neighbors’ structures; even a small shadow can tank your entire system’s efficiency.
    • Inspect your wiring for any signs of wear or animal damage; a single frayed wire can be the difference between a productive day and a total loss.

    The Bottom Line: Keep Your System Efficient

    Don’t treat your panels like “set and forget” tech; a little regular cleaning and debris checks are the easiest ways to prevent your energy output from dipping.

    Keep a close eye on your monitoring app—if you see a sudden drop in production, it’s usually a sign of a physical issue like dust buildup or a shade problem rather than a hardware failure.

    Prioritize low-cost maintenance like sweeping and inspecting connections over expensive professional services to keep your ROI high without draining your bank account.

    The Real Cost of Neglect

    “I’ve seen too many people treat solar panels like ‘set it and forget it’ tech, but ignoring a little grime is basically just handing money back to the utility companies. A bit of maintenance isn’t just about the gear; it’s about making sure your investment actually pays you back.”

    Tobias Nkemdirim

    Don't Let Your Investment Go to Waste

    Don't Let Your Investment Go to Waste.

    At the end of the day, maintaining your solar setup isn’t about being a perfectionist; it’s about protecting your wallet. We’ve looked at how a little bit of debris removal and some smart, low-cost optimization can keep your energy output from dipping unnecessarily. You don’t need an expensive technician to come out every month to tell you what you can see with your own eyes. By staying on top of the basics—keeping those panels clear and checking for shade—you ensure that your system is actually doing the heavy lifting it was designed to do. It’s about making sure every photon counts toward lowering those monthly utility bills.

    I know that sometimes these small maintenance tasks feel like just another thing on an endless to-do list, but I promise you, it’s worth the effort. Transitioning to solar is a massive step toward independence, and keeping it running efficiently is how you actually reclaim control over your energy costs. You don’t need a massive budget to live sustainably; you just need to be intentional with what you already have. Stop letting dust and neglect eat away at your savings. Take a moment this weekend to check your arrays, and let’s keep making smart, efficient choices together.

    Frequently Asked Questions

    How often do I actually need to clean my panels if I live in an area with low dust or frequent rain?

    Honestly, if you’re lucky enough to live somewhere where the rain does the heavy lifting, you don’t need to be out there every week. I’ve found that for low-dust areas, a quick visual check once a quarter is usually plenty. Just grab your infrared thermometer or a camera to see if there’s any actual buildup. If the rain is frequent, nature is basically your free maintenance crew—just don’t get complacent.

    Is it safe for me to clean the panels myself, or am I going to risk damaging the cells or voiding my warranty?

    Look, I get the hesitation. You don’t want to trade a small cleaning task for a massive repair bill. Generally, yes, you can do this yourself, but there are rules. Avoid high-pressure washers—they can crack the cells or compromise the seals. Stick to a soft brush and water. Most importantly, check your installer’s manual first. If they explicitly say “professional cleaning only,” listen to them so you don’t accidentally void that warranty.

    Can I tell just by looking at my energy bills if my panels are underperforming due to dirt or technical issues?

    You can’t know for sure with just one glance, but you can definitely spot the red flags. If you notice a sudden, unexplained dip in your energy production—especially when the weather is clear—that’s a huge warning sign. I always check the daily yield data on my monitoring app against the historical averages for that same month. If the numbers are tanking while the sun is shining, you’re likely looking at either heavy grime buildup or a technical glitch.