Author: Tobias Nkemdirim

  • Ways to Reduce Air Conditioning Costs

    Ways to Reduce Air Conditioning Costs

    I still remember sitting in my old rental apartment, watching the utility meter spin like a frantic stopwatch every time I dared to touch the thermostat. I was broke, sweating through my shirts, and felt like I was being punished just for wanting to breathe. Most “experts” will tell you that the only way to reduce air conditioning costs is to shell out thousands for a new, high-efficiency HVAC system or some fancy smart-home gadget that costs more than it saves. Honestly? That’s a load of rubbish. You shouldn’t have to be wealthy just to stay comfortable in your own living room.

    I’m not here to sell you on expensive hardware or complicated tech that requires a degree to operate. My goal is to give you the straightforward, data-backed tactics I use during my professional audits to stop energy leaks in their tracks. We’re going to focus on small, high-impact adjustments—the kind of stuff that actually moves the needle on your monthly bill without requiring a massive upfront investment. If you’re ready to stop throwing money out the window and start cooling smarter, let’s get into it.

    Table of Contents

    Smart Thermostat Energy Savings for Real People

    Smart Thermostat Energy Savings for Real People

    I used to think smart thermostats were just overpriced gadgets for tech enthusiasts, but after seeing the data, I changed my mind. Most of us waste a massive amount of energy cooling rooms we aren’t even using. By automating your schedule, you aren’t just being “high-tech”—you’re actively lowering monthly utility expenses by ensuring your AC isn’t working overtime when you’re at work or asleep. It’s about precision, not just convenience.

    The real secret, though, lies in finding your optimal thermostat temperature settings. I always tell my clients: don’t set it to 60 degrees thinking it’ll cool the house faster; it won’t. It just makes the compressor run longer and harder. Instead, aim for a consistent, reasonable temperature and let the automation handle the shifts. When you pair these settings with a bit of awareness about how your sun hits your windows, the smart thermostat energy savings start to show up clearly on your next bill. It’s a small investment that pays for itself by stopping the constant cycle of over-cooling an empty house.

    Optimal Thermostat Temperature Settings That Save Cash

    Optimal Thermostat Temperature Settings That Save Cash

    Look, I’ve spent too many afternoons standing in drafty living rooms with my infrared thermometer, watching the temperature climb because someone set the AC to “Arctic Blast” just to feel a chill. It’s a common mistake, but it’s an expensive one. Finding the optimal thermostat temperature settings isn’t about living in a sauna; it’s about finding that sweet spot where you’re comfortable without forcing your compressor to run non-stop. Generally, aiming for 78°F (26°C) when you’re home and bumping it up a few degrees when you’re out is the smartest way to start lowering monthly utility expenses without a massive lifestyle shift.

    The trick is to avoid “thermostat wars.” Every time you crank the dial down to 65°F thinking it’ll cool the house faster, you’re actually just wasting money—the unit works at the same speed regardless of the setting. Instead, focus on steady, incremental adjustments. If you pair these settings with better airflow, you’ll notice a massive difference. It’s all about working smarter, not harder, to keep your space livable while keeping your bank account intact.

    5 Low-Cost Moves to Stop Your AC from Bleeding Cash

    • Seal those sneaky air leaks. I always grab my infrared thermometer when I walk into a room; if I see a cold draft coming from a window frame or a door gap, that’s literally money flying out of your house. Grab some weatherstripping or even just a cheap door snake to keep the cool air where it belongs.
    • Manage your sunlight like a pro. It sounds simple, but keeping your blinds or curtains closed during the hottest part of the day is a game changer. You’re essentially stopping the greenhouse effect from turning your living room into an oven before the AC even has to kick in.
    • Stop the “phantom” heat from appliances. Your oven, dryer, and even some older electronics dump a ridiculous amount of heat into your space. If you’re trying to keep costs down, try to avoid heavy cooking or laundry during peak heat hours—don’t make your AC fight your kitchen appliances.
    • Clean your filters every single month. A clogged filter makes your unit work twice as hard to pull in air, which spikes your electricity usage. It’s a five-minute job that costs zero dollars but keeps your system running efficiently instead of straining against dust.
    • Aim your fans in the right direction. Ceiling fans don’t actually lower the temperature of a room, but they create a wind-chill effect on your skin. Use them to circulate the air so you can feel comfortable even if you bump that thermostat up a couple of degrees.

    The Bottom Line on Keeping Your Cool and Your Cash

    Stop fighting your thermostat; set it to a realistic temperature and let smart tech handle the adjustments so you aren’t paying to cool an empty house.

    Small, low-cost tweaks—like sealing window gaps or using heavy curtains—are often more effective at keeping the heat out than just cranking up the AC.

    Efficiency isn’t about luxury upgrades; it’s about making smart, data-backed decisions that stop your money from literally leaking out of your windows.

    ## The Cost of Convenience

    “We’ve been conditioned to think that keeping a house ice-cold is just the price of comfort, but most of that extra spending is actually just paying to cool the air leaking out of your windows. Real efficiency isn’t about living in a freezer; it’s about making sure the energy you pay for actually stays where it belongs.”

    Tobias Nkemdirim

    Cutting the Cord on High Cooling Costs

    Cutting the Cord on High Cooling Costs.

    At the end of the day, lowering your AC bill isn’t about making massive, expensive renovations or living in a literal icebox. It’s about the small, intentional shifts we’ve talked about—from dialing in your thermostat settings to making sure your smart tech is actually working for you rather than against you. I’ve seen firsthand how a few simple adjustments can stop your hard-earned money from literally evaporating into thin air. When you combine smart temperature management with basic maintenance, you aren’t just saving a few bucks; you are stopping the cycle of wasted energy that most people just accept as an inevitable part of summer.

    I know it can feel overwhelming when you look at those rising utility rates, but don’t let the scale of the problem paralyze you. You don’t need a massive budget to make a meaningful dent in your environmental impact or your monthly expenses. Start with one tweak this week—maybe it’s a new schedule for your thermostat or a quick check of your air filters. These minor wins add up to a much larger, more sustainable lifestyle. Remember, efficiency is a marathon, not a sprint, and every single watt you save is a step toward a smarter, more affordable way to live.

    Frequently Asked Questions

    Are there specific window treatments or films that actually work, or is it just a waste of money?

    Look, I’ve spent way too many hours pointing my infrared thermometer at window frames to give you a generic answer. Some stuff is hype, but heat-rejecting window films are a game-changer if you have large, sun-facing windows. They block the infrared spectrum before it even enters the room. If you’re on a tighter budget, heavy blackout curtains are your best bet. It’s not just about aesthetics; it’s about creating a thermal barrier that actually holds the cool air in.

    Should I focus more on upgrading my old AC unit or just finding ways to make my current one run more efficiently?

    Look, I get the urge to just swap the whole unit out, but don’t go buying a new AC until you’ve audited your current setup. If your unit is relatively recent, focus on efficiency first—clean those coils and check your ductwork for leaks. It’s way cheaper than a massive upfront investment. However, if your unit is a decade old and struggling, that’s when the math shifts toward an upgrade. Check your efficiency ratings first.

    How much of a difference will cleaning my filters and vents actually make on my monthly bill?

    Honestly? It makes a massive difference. When your filters are clogged with dust, your AC has to work twice as hard just to pull in enough air to cool the room. It’s like trying to breathe through a thick cloth while running—you’re going to burn way more energy. I’ve seen units pull significantly more power just because they were struggling against a dirty vent. Clean them regularly; it’s the easiest way to stop throwing money away.

  • Maintaining Energy Efficient Heating and Cooling

    Maintaining Energy Efficient Heating and Cooling

    I still remember sitting in my old rental apartment, wrapped in three layers of blankets, watching the thermostat climb while my bank account drained. I’d point my infrared thermometer at the window frames, watching the heat bleed out into the night like wasted cash. Most people think that getting an energy efficient hvac system requires a massive down payment and a lifestyle overhaul, but that’s a total myth. The industry loves to sell you on these high-tech, overpriced gadgets that promise the world, but often, you’re just paying for a shiny brand name instead of actual thermal performance.

    I’m not here to sell you on expensive, flashy upgrades that you don’t actually need. My goal is to strip away the marketing fluff and give you the data-driven reality of what works for a normal budget. I’ll show you how to audit your current setup, identify the real culprits behind your high bills, and make smart, practical adjustments to your heating and cooling. We’re going to focus on high-impact moves that keep your home comfortable without making you choose between a warm living room and a grocery budget.

    Table of Contents

    Decoding the Seer Rating Explained Without the Confusion

    Decoding the Seer Rating Explained Without the Confusion

    When you’re browsing unit specs, you’re going to see “SEER” thrown around constantly. It stands for Seasonal Energy Efficiency Ratio, and honestly, it’s just a way to measure how much cooling your system provides for every watt of electricity it pulls. Think of it like the MPG on a car. A higher number means the unit is doing more work with less fuel. If you’re looking at SEER rating explained in plain terms, it’s essentially the math that tells you how much of your money is actually cooling your living room versus just disappearing into the atmosphere.

    I’ve seen people get caught up in trying to chase the highest number possible, thinking it’s a magic bullet. But here’s the reality: there’s a point of diminishing returns. You want a high enough rating to ensure you’re actually reducing utility bills with HVAC upgrades, but you don’t need to go overboard if your home is already well-insulated. It’s about finding that sweet spot where the upfront cost of a high-efficiency unit aligns with the long-term savings on your monthly statement.

    High Efficiency Heat Pumps Sustainable Comfort That Saves You Cash

    High Efficiency Heat Pumps Sustainable Comfort That Saves You Cash

    If you’re still relying on an old furnace or a window AC unit, you’re essentially burning money to fight the weather. I’ve audited enough homes to know that the biggest culprits for sky-high bills are often outdated heating and cooling systems. This is where high-efficiency heat pumps change the game. Unlike traditional systems that generate heat through combustion, a heat pump simply moves it from one place to another. It’s a much more elegant way to manage your indoor temperature, and it’s one of the most effective ways of reducing utility bills with HVAC upgrades.

    The real magic happens when you pair a modern heat pump with smart thermostat integration. I always tell my clients that a high-end unit is only as good as the brain controlling it. By using a smart thermostat, you can automate your home’s climate based on when you’re actually there, rather than heating an empty house all day. It’s about being intentional with your energy use. You don’t need to overhaul your entire house to see a difference; you just need to stop using technology that works against your wallet and the planet.

    5 Low-Cost Moves to Stop Your HVAC From Bleeding Cash

    • Stop ignoring your air filters. I see this all the time during audits—people letting thick layers of dust choke their systems. A clogged filter makes your unit work twice as hard to pull in air, which spikes your bill and wears out the motor. Swap them out every 90 days; it’s a five-minute job that pays for itself in energy savings.
    • Seal the leaks around your ductwork. If you have exposed ducts in a basement or attic, you’re basically paying to heat the crawlspace instead of your living room. Grab some foil tape or duct mastic to seal those gaps. It’s not glamorous, but if you don’t fix the leaks, even the most expensive high-efficiency unit is just throwing money into the void.
    • Get smart with your thermostat settings. You don’t need to live in a cave, but “set it and forget it” is a myth that costs you money. Use a programmable thermostat to dial back the intensity when you’re at work or sleeping. Even a 2-degree shift can make a noticeable dent in your monthly utility statement.
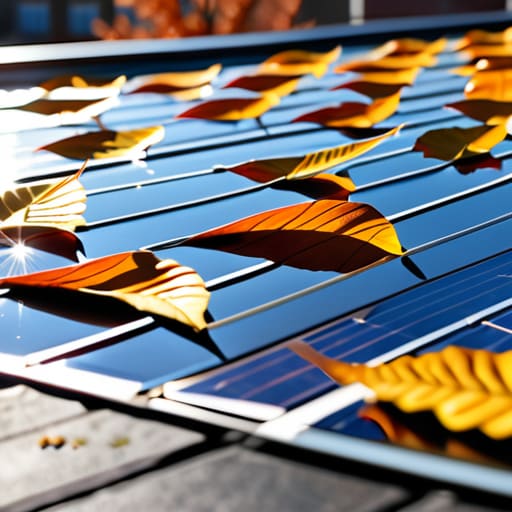
    • Keep your outdoor unit clear of debris. I’ve walked up to houses where the condenser was practically buried in tall grass or surrounded by dead leaves. Your HVAC needs to “breathe” to release heat effectively. Keep a one-foot clearance around the unit so it isn’t struggling against a wall of weeds.
    • Optimize your airflow with strategic fan use. If you have a ceiling fan, use it to help circulate the air your HVAC is working so hard to move. In the summer, run them counter-clockwise to create a breeze; in the winter, switch them to clockwise at a low speed to push the trapped warm air down from the ceiling. It takes the heavy lifting off your main system.

    The Bottom Line on Your HVAC Upgrade

    Don’t just chase the highest SEER rating you see on a sticker; look for the sweet spot where the efficiency boost actually justifies the upfront cost for your specific home.

    If you’re looking for the best bang for your buck in terms of both comfort and carbon footprint, a high-efficiency heat pump is almost always the smartest move.

    Efficiency isn’t just about the machine itself—it’s about making sure you aren’t paying to heat the outdoors through leaks or poor insulation.

    ## The Cost of Convenience

    “We’ve been conditioned to think that comfort requires massive amounts of power, but that’s just bad math. A high-efficiency system isn’t a luxury item for the wealthy; it’s a tool to stop the literal drain on your bank account every time the seasons shift.”

    Tobias Nkemdirim

    Making the Shift

    Making the Shift to efficient HVAC systems.

    At the end of the day, upgrading your HVAC isn’t just about picking a shiny new unit from a catalog; it’s about understanding how your home actually breathes. We’ve looked at how decoding SEER ratings can prevent you from overpaying for mediocre performance, and why heat pumps are arguably the smartest investment you can make for both your wallet and the planet. Whether you are looking at a full system overhaul or just optimizing what you already have, the goal remains the same: stop letting your hard-earned money leak out through inefficient machinery and poorly insulated ducts. It is about being intentional with your energy use so that your comfort doesn’t come at an unreasonable cost.

    I know that looking at these upgrades can feel overwhelming, especially when you’re staring down a massive quote from a contractor. But remember, sustainability shouldn’t be a luxury reserved for the wealthy. Every small, data-driven decision you make—from choosing a higher efficiency rating to switching to a heat pump—is a step toward a more resilient lifestyle. You don’t have to do everything at once, but you do have to start somewhere. Let’s stop treating energy waste as an inevitability and start treating it as a problem we can actually solve. Your future self, and your bank account, will thank you.

    Frequently Asked Questions

    How long does it actually take for the energy savings to pay off the upfront cost of a high-efficiency unit?

    It really depends on your local utility rates and how much you’re currently overpaying, but I usually see the “break-even” point land between five and seven years. If you live in a climate with brutal winters, that timeline can shrink. I always tell my clients: don’t just look at the sticker price. Look at the monthly delta. If the unit pays for itself in savings by the time it needs its first major service, you’ve won.

    Can I just upgrade my current thermostat, or do I need to replace the entire HVAC system to see a real difference?

    It depends on how much of a “leak” you’re trying to plug. If your system is relatively new, a smart thermostat is a massive win—it stops you from heating an empty house. But if your unit is a decade old and struggling, a new thermostat is just putting a band-aid on a broken bone. I usually tell clients: upgrade the brain (thermostat) first, but if the lungs (the HVAC) are failing, you’re just wasting money.

    Are there specific maintenance habits I should follow to make sure my system doesn't start wasting energy after a year or two?

    Look, an HVAC system is only as efficient as the care you give it. If you let dust build up, your unit works twice as hard to do half the job. Start with a monthly filter check—don’t wait for it to look gray. Clean your outdoor condenser coils annually to keep airflow clear, and if you notice a sudden spike in your bill, grab your thermometer. Small leaks or debris can tank your efficiency fast.

  • Safety Precautions for Cleaning Solar Panels

    Safety Precautions for Cleaning Solar Panels

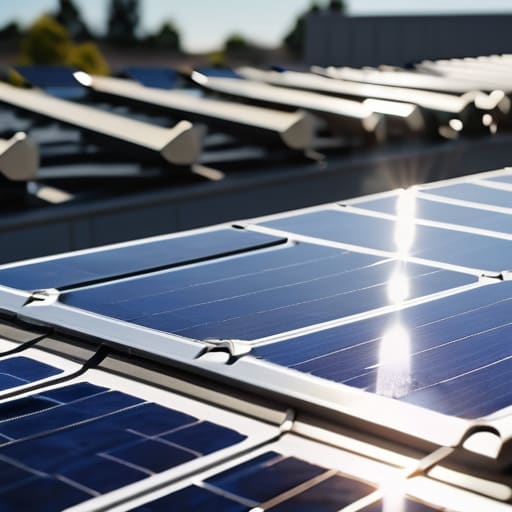
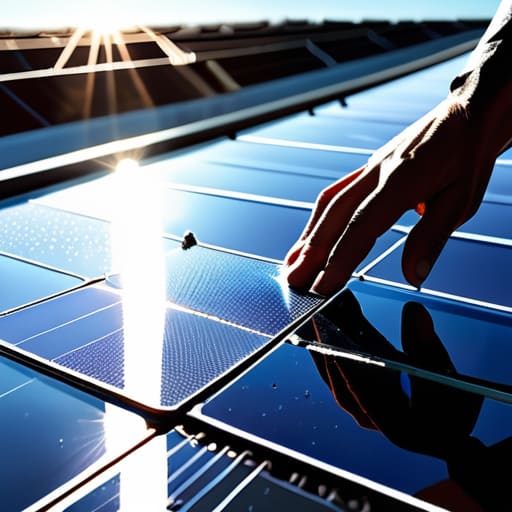
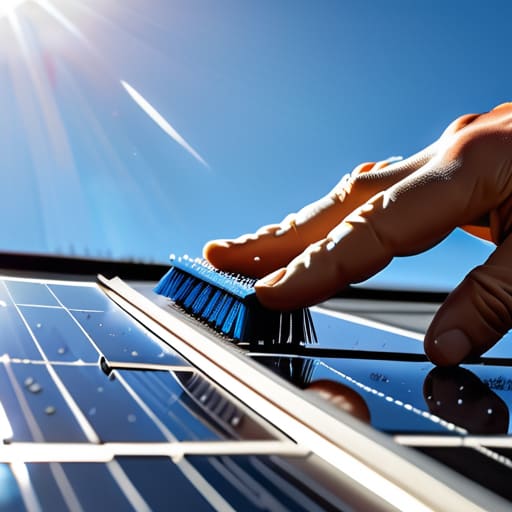
    I was standing on a ladder last Tuesday, my handheld infrared thermometer tucked into my pocket, watching a client attempt to scrub his array with a high-pressure washer and a prayer. It’s one of those moments where my stomach just sinks. People think they’re being “proactive” about their energy savings, but they’re actually gambling with their lives just to shave a few cents off their monthly bill. There is a massive, dangerous gap between “keeping things clean” and actually understanding solar panel cleaning safety, and honestly, the DIY community is doing a terrible job of explaining that distinction.

    I’m not here to sell you a fancy, overpriced cleaning kit or tell you to hire a specialized firm every time a bird leaves a mess. My goal is to give you the straightforward, data-driven reality of what you can actually handle yourself without ending up in the ER. I’ll walk you through the specific risks—from electrical hazards to structural stability—so you can keep your system running at peak efficiency without risking your life or your home’s integrity. Let’s get into the practical stuff.

    Table of Contents

    Preventing Falls From Roofs Without Breaking the Bank

    Preventing Falls From Roofs Without Breaking the Bank

    Look, I get it. When you’re trying to squeeze every bit of efficiency out of your system, the last thing you want to do is drop a hundred bucks on professional-grade scaffolding. But after growing up in drafty rentals, I’ve learned that cutting corners to save money usually ends up costing you way more in the long run—especially if you’re dealing with gravity. If you aren’t comfortable on a ladder, don’t pretend you are. Preventing falls from roofs starts with being honest about your own limits. If your roof pitch is steep or your ladder feels sketchy, it’s cheaper to hire a pro than to pay a deductible.

    If you do decide to DIY, please don’t just wing it. Invest in a decent harness or at least some high-traction footwear; your grip is your only lifeline up there. I always tell my clients that proper working at heights protocols aren’t just for industrial sites—they’re for anyone standing on a slope. You don’t need a massive budget, but you do need a solid plan and the right gear to make sure you actually make it back down to the ground in one piece.

    Smart Solar Panel Cleaning Equipment Safety for Homeowners

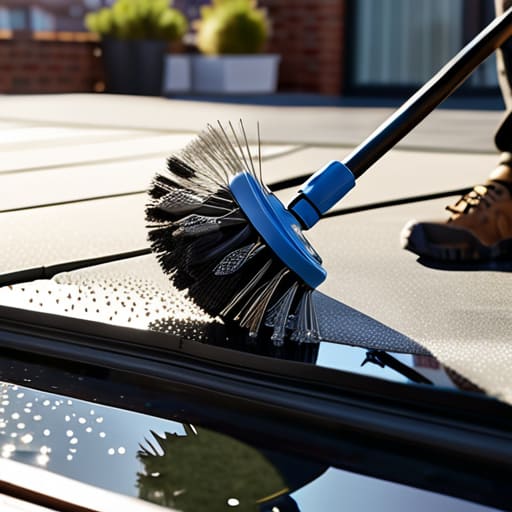
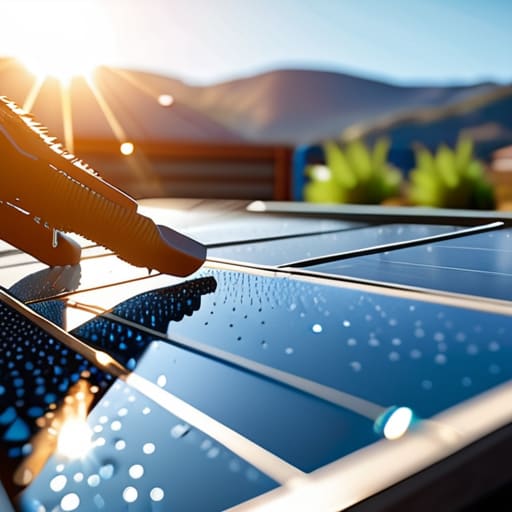
    If you aren’t climbing up there yourself, you’re already winning. The smartest way to approach solar panel cleaning equipment safety is to invest in tools that keep your feet firmly on the ground. I’m a big fan of telescopic water-fed poles. They allow you to reach the center of your array from the safety of a ladder or even the driveway. It’s much better to spend a little extra on a high-quality, lightweight pole than to deal with the consequences of a slip.

    When you are choosing your gear, keep in mind that you aren’t just dealing with dirt; you’re dealing with a live system. Even though the panels are sealed, you need to be mindful of handling photovoltaic electrical components correctly. Never use metal brushes or abrasive tools that could scratch the glass or compromise the protective coating. I always check my gear for any signs of wear before I start. Using soft, non-conductive materials is a simple way to ensure you aren’t accidentally creating a path for a surge or a short while you’re trying to boost your efficiency.

    5 Ways to Keep Your Skin (and Your Roof) Intact While You Clean

    5 Ways to Keep Your Skin (and Your Roof) Intact While You Clean
    • Watch out for the “silent” danger of electrical shock; even if your panels look fine, never use a metal-bodied brush or any conductive tools near the mounting hardware, especially if the surface is wet.
    • Check the weather forecast like a hawk—if there’s even a slight chance of rain or high winds, scrap the plan for today because a slippery roof combined with a sudden gust is a recipe for a disaster I don’t want to see.
    • Don’t go it alone; if you’re planning on getting more than a few feet up, grab a friend to act as a spotter or at least someone to keep an eye on you from the ground—it’s much better to have an extra set of eyes than to be stuck in a bad spot by yourself.
    • Test your ladder before you commit to a climb; I always check for cracks or loose rungs first, because a ladder that feels “mostly fine” is usually the one that fails right when you’re mid-ascent.
    • Keep an eye on your physical limits and don’t push through the heat; cleaning panels is surprisingly draining work, and if you start feeling dizzy or overheated, get down immediately—no amount of efficiency gains is worth a heatstroke.

    The Bottom Line: Clean Panels, Zero Accidents

    Prioritize your physical safety over a slightly higher energy yield; no amount of extra sunlight is worth a fall from a roof.

    Invest in the right tools—like telescopic poles or long-reach brushes—so you can clean from the ground and keep your feet on solid footing.

    Treat solar maintenance like any other home project: do your research, check the weather, and never cut corners on safety gear just to save a few minutes.

    The Real Cost of a Shortcut

    “I’ve seen people try to save twenty bucks by skipping a proper ladder or a safety harness, but no amount of energy savings is worth a trip to the ER. In this game, the smartest way to manage your solar investment is making sure you’re actually around to see the ROI.”

    Tobias Nkemdirim

    Bottom Line: Safety First, Savings Second

    Bottom Line: Safety First, Savings Second.

    At the end of the day, keeping your solar panels clean is one of the smartest moves you can make to keep your energy bills from spiking, but it shouldn’t come at the cost of your physical well-being. We’ve covered how to avoid those dangerous rooftop climbs by using the right extension poles, why you need to double-check your gear, and how to avoid the temptation of “quick and dirty” methods that end in a trip to the ER. Remember, the goal is a high-performing system, not a high-risk afternoon. Always prioritize your stability over a slightly faster cleaning time, and make sure you have the right tools for the job before you even step near a ladder.

    I know the drive to be more sustainable can feel overwhelming, especially when you’re trying to balance a tight budget with the desire to do right by the planet. But true sustainability isn’t just about carbon footprints; it’s about creating a lifestyle that is manageable and safe for the long haul. You don’t need a professional crew to make a difference, but you do need to be smart about how you maintain your setup. Take it slow, use the data from your monitoring apps to see if cleaning is actually necessary, and protect your most valuable asset: yourself. Keep those panels shining, but keep your feet firmly on the ground.

    Frequently Asked Questions

    Is it actually worth the risk of climbing up there myself, or should I just hire a pro and call it a day?

    Look, I get the urge to DIY to save a few bucks—I’ve been there. But honestly? If your roof is steep, high, or if you’re uncomfortable with heights, just hire a pro. The cost of a professional cleaning is a lot less than an ER visit or a broken ladder. If you’re just doing a quick, low-stakes rinse on a single-story flat roof with the right gear, go for it. Otherwise, let the experts handle the climb.

    How do I know if my roof is too steep or slippery to handle cleaning without a professional harness?

    Look, if you have to ask, you’re probably already playing with fire. Grab your infrared thermometer—or better yet, just look up. If your roof pitch is over 4:12 (about 18 degrees) or if you see even a hint of moss, lichen, or loose slate, stop right there. If you can’t walk comfortably on a flat surface without feeling like you’re on ice, it’s too slippery. Don’t gamble your safety; call a pro.

    Can I just use my garden hose and a soft brush, or am I going to accidentally damage the panels or cause an electrical issue?

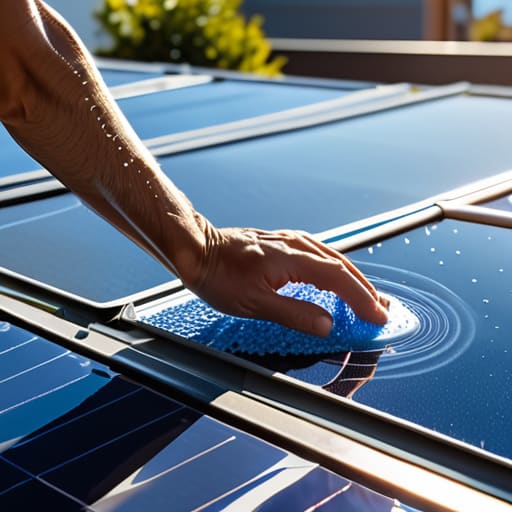
    You can use a garden hose, but don’t just blast them with high pressure—you’ll end up with micro-cracks in the cells that are a nightmare to fix. A soft brush is fine, but avoid anything abrasive that could scratch the anti-reflective coating. Most importantly, never clean them while they’re hot from the sun; the thermal shock from cold water can actually crack the glass. Stick to early morning or late evening to play it safe.

  • Improving Washing Machine Efficiency

    Improving Washing Machine Efficiency

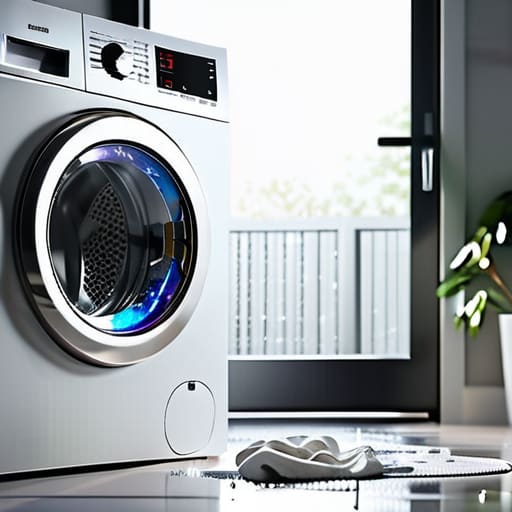
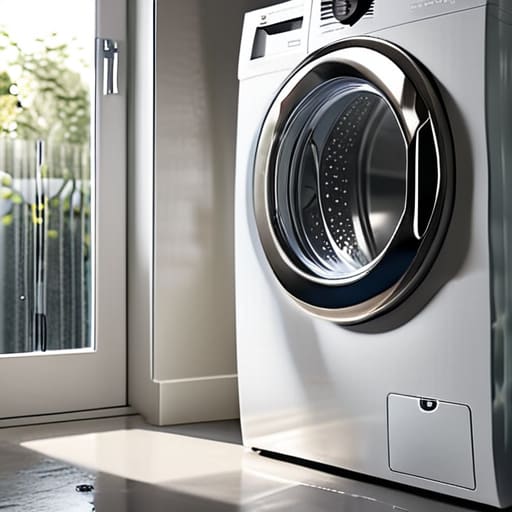
    I still remember sitting on the floor of my first cramped rental, staring at a utility bill that felt like a personal insult. I was trying to be responsible, but my old, clunky washer was basically a black hole for electricity. Most people think that to fix your laundry machine efficiency, you need to drop two grand on a high-tech, smart-enabled model that promises the world but mostly just adds more complexity. Honestly? That’s a lie. You don’t need a luxury appliance to stop bleeding money every time you run a cycle; you just need to stop fighting against how these machines actually work.

    I’m not here to sell you on expensive upgrades or complicated gadgets that require a PhD to operate. Instead, I’m going to show you the practical, data-driven tweaks that actually move the needle on your monthly costs. We’re going to look at how you load your clothes, the temperature settings you’re likely overusing, and the small habits that turn a massive energy drain into a streamlined, low-impact process. Let’s get your bills down without making your life any harder.

    Table of Contents

    The Truth About Front Load vs Top Load Efficiency

    The Truth About Front Load vs Top Load Efficiency

    I’ve spent enough time with my infrared thermometer pointed at different appliance seals to know that not all washers are created equal. When you look at front load vs top load efficiency, the physics are pretty straightforward. Front loaders use gravity to tumble clothes through a small amount of water, whereas traditional top loaders often have to fill the entire drum just to get the clothes submerged. This difference is the main driver behind why front loaders typically have much lower water consumption per load.

    If you’re looking to cut down on your monthly overhead, the front-loading design is almost always the smarter play. Because they use less water, they also require less energy to heat that water up—which is where a huge chunk of your electricity goes. I always tell my clients to look for energy star certified washers if they want to stop guessing and start seeing real results on their utility statements. It’s not just about the machine itself; it’s about choosing a system that doesn’t force you to pay for wasted resources every single week.

    Cutting Down Washing Machine Electricity Usage Today

    Cutting Down Washing Machine Electricity Usage Today

    If you aren’t ready to drop hundreds on a brand-new appliance, you can still make a dent in your washing machine electricity usage by changing how you actually operate the machine you have. The biggest culprit is almost always the temperature setting. Most modern detergents are engineered to work perfectly in cold water, so stop heating up your tap just to get your clothes clean. Heating water accounts for the vast majority of a cycle’s energy draw; switching to a cold wash is one of the easiest high efficiency laundry tips I can give you without spending a dime.

    Beyond the temperature, you need to stop the “small load” habit. I see this all the time during my audits—people running half-empty machines because it’s “easier.” It’s actually a massive waste of both power and water consumption per load. Wait until you have a full basket, but don’t overstuff it to the point where the motor struggles. If you’re looking to upgrade in the future, prioritize energy star certified washers, but for right now, just being more intentional with your cycles will go a long way in reducing your monthly bills.

    Small Tweaks to Stop Your Washer from Bleeding Cash

    • Stop washing on hot. I know it feels like it gets things cleaner, but heating water is where the bulk of your machine’s energy goes. Switching to cold or even just lukewarm cycles can slash your energy consumption instantly without hurting your clothes.
    • Only run full loads. I’ve seen so many people run half-empty machines just because they have a few gym clothes to wash. It’s a waste of water, electricity, and your time. Wait until you have a full load, but don’t overstuff it to the point where the motor struggles.
    • Ditch the fabric softener. It’s basically a chemical coating that builds up on your machine’s sensors and reduces efficiency over time. If you want that soft feel without the waste, a splash of white vinegar in the softener compartment does the job much better.
    • Clean your lint filter and drum regularly. If your machine is working harder to push water through a buildup of gunk or hair, it’s pulling more power. A quick clean every few weeks keeps the mechanical parts running smoothly and efficiently.
    • Check your water temperature settings. If your machine has a “sensor wash” or “eco” mode, use it. These modes are designed to calculate exactly how much water and heat are needed for the specific load weight, preventing that “just in case” excess energy waste.

    The Bottom Line on Your Laundry Bills

    Stop running half-empty loads; wait for a full basket to make sure every kilowatt is actually doing work.

    Ditch the high-heat settings for most clothes—cold water washes are easier on your wallet and your fabric.

    Check your machine’s age; if it’s a decade old, you’re likely paying a “waste tax” every month that a modern, efficient model would eliminate.

    The Real Cost of Convenience

    “We’ve been conditioned to think that a heavy-duty, high-heat wash is the only way to get things clean, but that’s just paying a premium for wasted energy. Efficiency isn’t about buying a new machine every three years; it’s about actually understanding how the one you have works so you stop bleeding money through your utility bill.”

    Tobias Nkemdirim

    Making the Most of Your Machine

    Making the Most of Your Machine.

    At the end of the day, optimizing your laundry doesn’t require a complete overhaul of your home or a massive bank account. It comes down to the small, intentional choices we make every week: choosing the right load size, opting for cold water cycles when possible, and understanding whether your front loader or top loader is actually working for you rather than against you. I’ve spent enough time with my infrared thermometer and energy meters to know that efficiency isn’t about perfection; it’s about reducing waste. By implementing these simple tweaks, you aren’t just lowering your monthly utility bills, you’re also extending the lifespan of your appliances and keeping unnecessary energy consumption out of the grid.

    I know it can feel overwhelming to try and “live green” in a world that makes convenience so easy. But remember, sustainability shouldn’t be a luxury reserved for the wealthy. Every time you skip a heavy heat cycle or wait for a full load, you are making a conscious decision to live more mindfully. We don’t need a handful of people doing zero-waste living perfectly; we need millions of people doing it imperfectly through smart, incremental changes. Start with your laundry room this week. It’s a small step, but it’s a powerful way to take control of both your finances and your environmental footprint.

    Frequently Asked Questions

    Is it actually worth the extra cost to buy a high-efficiency model, or should I just stick with what I have and use better habits?

    Honestly, it depends on your current setup. If your machine is a total energy hog from the early 2000s, upgrading to a high-efficiency model will eventually pay for itself in lower utility bills. But if your machine is still decent, don’t rush out and spend hundreds. Focus on habits first—wash in cold water and only run full loads. That’s free. Upgrade when your old one dies; until then, just optimize how you use it.

    How much does using eco-friendly or cold-water detergents actually impact the machine's energy consumption?

    Honestly, it’s a massive factor. Most of the energy a washing machine uses goes toward heating the water, not the actual spinning. When you switch to cold-water detergents or just run a cold cycle, you’re cutting out that heavy heating load entirely. I’ve seen the data: using cold water can slash a single load’s energy use by up to 90%. It’s one of those tiny, low-effort shifts that actually moves the needle on your bill.

    Are there specific signs, like weird noises or longer cycle times, that tell me my machine is becoming an energy hog?

    If your machine starts sounding like a jet engine during the spin cycle or if it’s suddenly taking twice as long to finish a standard load, pay attention. Those are red flags. Usually, it means the motor is struggling or the heating element is failing, both of which pull way more power than they should. I always tell my clients: if you’re spending more time waiting for laundry and more money on your bill, your machine is dying.

  • Optimizing Heating Schedules With Smart Thermostats

    Optimizing Heating Schedules With Smart Thermostats

    I still remember sitting in my old rental apartment, shivering under three blankets because I was too terrified to touch the thermostat, fearing the next utility bill would be a knockout blow. It’s a frustrating cycle: you either freeze to save money or burn through your paycheck just to feel human. Most people think they need a massive solar array or a massive budget to fix this, but the truth is usually hiding in your settings. We’ve been sold this idea that smart thermostat programming is some complex, futuristic magic trick, when in reality, most people are just using these devices as glorified, expensive manual switches.

    I’m not here to sell you on some high-tech lifestyle you can’t afford; I’m here to show you how to actually make your gear work for you. I’ve spent countless hours auditing homes and staring at data patterns to figure out where the efficiency actually lives. In this guide, I’m going to give you the straightforward, no-fluff tactics to automate your comfort without draining your bank account. We’re going to stop wasting energy on empty rooms and start treating your home like the efficient ecosystem it should be.

    Table of Contents

    Harness Adaptive Learning Algorithms to Slash Your Monthly Bills

    Harness Adaptive Learning Algorithms to Slash Your Monthly Bills.

    Most people treat their thermostats like a basic dial, but you’re essentially sitting on a piece of high-tech hardware that can think for itself. If you aren’t utilizing adaptive learning algorithms, you’re leaving money on the table. These systems don’t just follow a schedule; they observe your actual behavior. They learn how long it takes your specific space to heat up on a Tuesday morning versus a Saturday afternoon. Instead of you constantly fiddling with the dial, the device builds a thermal profile of your home, ensuring you aren’t burning fuel just to reach a target temperature that you won’t even feel.

    To really maximize your energy efficiency optimization, you need to lean into the automation. I always suggest setting up geofencing temperature settings through your phone. It’s a game-changer. The moment you leave a certain radius around your house, the system knows you’re gone and dials back the intensity. You aren’t heating a vacant living room while you’re stuck in traffic; you’re only ramping things back up when you’re actually on your way home. It’s about working smarter, not harder, to keep your footprint small.

    Geofencing Temperature Settings Comfort Only When Youre Home

    Geofencing Temperature Settings Comfort Only When Youre Home

    If you’ve ever pulled into your driveway after a long day only to realize your house is either a sauna or an icebox, you know the frustration. Most people think they need to manually fiddle with the dial every time they leave the house, but that’s just wasted effort. By utilizing geofencing temperature settings, your thermostat uses your phone’s GPS to create a virtual boundary around your home. The second you cross that line heading to work or the grocery store, the system knows you’re gone and automatically shifts into eco-mode.

    This isn’t about living in discomfort; it’s about energy efficiency optimization that actually works with your lifestyle. Instead of heating or cooling an empty living room for eight hours straight, your system waits until you’re actually approaching the property to start ramping back up. It’s a seamless part of your smart home automation settings that ensures you aren’t burning money on empty air. I’ve seen firsthand how much this reduces the “phantom load” of heating a house that nobody is even using.

    5 Ways to Stop Wasting Money on Empty Air

    • Stop the “set it and forget it” trap; even with a smart device, you need to audit your schedule every few months to make sure your heating isn’t fighting against your actual lifestyle.
    • Use the “Pre-heat” window strategically; don’t let your thermostat crank the heat the second you walk through the door, but program it to start ramping up 30 minutes before you arrive so you aren’t paying for peak-hour surges.
    • Sync your thermostat with your local utility’s “Time-of-Use” rates; if your provider charges more during certain windows, program your home to pre-cool or pre-heat during the cheaper, off-peak hours.
    • Don’t ignore the humidity factor; if you live in a damp climate, use your smart settings to manage humidity levels, because dry air actually feels warmer, meaning you can drop the temp a couple of degrees without feeling the chill.
    • Master the “Away” mode manual override; if you’re heading out for a long weekend, don’t just rely on the sensor—manually trigger a deep energy-saving mode so you aren’t maintaining a “lived-in” temperature for an empty house.

    The Bottom Line: Stop Heating Empty Air

    Stop treating your thermostat like a manual switch; let the adaptive learning do the heavy lifting so you aren’t fighting the settings every single day.

    Use geofencing to create a digital barrier between your comfort and your wallet, ensuring you only pay for climate control when you’re actually walking through the door.

    Treat your programming as a tool for both your bank account and the planet—every degree you don’t waste is money saved and carbon avoided.

    ## Stop Heating Air for Nobody

    A smart thermostat isn’t just a fancy gadget to show off; it’s a tool to stop the bleeding. If you aren’t actively sitting in a room, you shouldn’t be paying to keep it at seventy degrees. Stop treating your HVAC system like an all-day convenience and start treating it like the utility it is.

    Tobias Nkemdirim

    The Bottom Line on Smart Control

    The Bottom Line on Smart Control.

    At the end of the day, programming your thermostat isn’t about mastering complex tech; it’s about reclaiming control over your space and your wallet. By leaning into adaptive learning and setting up geofencing, you’re essentially building a digital barrier against wasted energy. You’ve moved past the era of heating an empty house or letting your money leak through the vents while you’re at work. These aren’t just minor tweaks; they are intentional shifts in how you manage your home. When you automate these decisions, you stop fighting with your heating system and start making it work for you, ensuring that every kilowatt used is actually serving a purpose.

    I know it can feel overwhelming to try and “go green” when the world feels like it’s moving too fast, but sustainability shouldn’t be a luxury reserved for people with massive budgets. It’s found in the small, smart, and sometimes even boring decisions we make every single day. Every degree you shave off during the hours you’re away is a win for your bank account and a win for the planet. Don’t wait for a massive renovation to make an impact. Start with the tech you already have in your hands and stop wasting energy just because it’s convenient. Your future self—and your utility bill—will thank you.

    Frequently Asked Questions

    Will these automated schedules actually save me money, or am I just paying for a fancy gadget that does the same thing my old manual one did?

    Look, I get the skepticism. I’ve seen plenty of “smart” tech end up as expensive paperweights. But here’s the reality: a manual thermostat relies on you being perfect every single day. You’ll forget to turn it down before work, or you’ll leave it high while you’re out running errands. A smart one doesn’t get lazy. It catches those micro-wastes you miss, and over a month, those saved degrees translate into actual cash in your pocket.

    How much of a learning curve is there before the thermostat actually "gets" my routine?

    Honestly, it’s not overnight. Most smart thermostats need about a week or two of consistent data to really “get” you. They’re essentially studying your patterns—when you actually kick off the heat and when you’re likely to be back. Don’t get frustrated if it feels a bit off during the first few days. Just keep your manual adjustments minimal during that learning phase so the algorithm doesn’t get confused by conflicting data.

    If I live in an older rental with bad insulation, will a smart schedule even make a dent in my heating costs?

    Look, I get it. I grew up in a drafty rental where the heat felt like it was fighting a losing battle against the walls. If your insulation is trash, a smart schedule won’t fix the thermal leaks, but it will stop you from throwing money into a void. Instead of heating a freezing box all day while you’re at work, you’re only running the system when it actually matters. It’s about damage control.

  • Simple Energy Saving Habits for Families

    Simple Energy Saving Habits for Families

    I still remember sitting in my old rental apartment, shivering under three blankets while staring at a utility bill that felt like a personal insult. I used to think that being “green” meant dropping thousands on solar panels or high-tech smart home systems that most of us simply can’t afford. But after years of auditing homes and seeing where the real money actually disappears, I’ve realized that most of the mainstream advice is just noise. Real energy saving habits aren’t about buying your way into sustainability; they are about stopping the bleeding caused by the invisible leaks and lazy patterns we’ve all been taught to accept as normal.

    I’m not here to sell you on expensive gadgets or complicated lifestyle overhauls that won’t even move the needle on your monthly costs. Instead, I’m going to give you the straightforward, data-backed tactics I use in my own consulting work to reclaim control over your home. We’re going to focus on low-cost, high-impact shifts that actually stick. My goal is to show you how to tighten up your routine and shrink your footprint without needing a massive bank account to do it.

    Table of Contents

    Minimizing Phantom Power Loads Without Spending a Dime

    Minimizing Phantom Power Loads Without Spending a Dime

    You’d be surprised how much money is quietly bleeding out of your wall sockets while you sleep. I call it the “vampire drain,” but in my professional audits, I just refer to it as minimizing phantom power loads. Even when your TV is off or your laptop is closed, those little standby lights and internal transformers are still pulling current. It feels insignificant in the moment, but when you add up every charger, coffee maker, and gaming console in your house, you’re essentially paying a “laziness tax” every single month.

    The best part is that you don’t need to buy expensive “smart” gear to fix this. The most effective way to start reducing utility bills is to simply use a basic power strip. By flipping one switch at the end of the night, you physically sever the connection, ensuring your devices aren’t sipping electricity for no reason. It’s a low-effort, high-impact way of lowering your carbon footprint at home without having to replace a single piece of equipment. It’s about being intentional rather than just being convenient.

    Mastering Energy Efficient Appliance Usage for Lower Bills

    Mastering Energy Efficient Appliance Usage for Lower Bills

    Once you’ve tackled the phantom loads, it’s time to look at the heavy hitters: your appliances. Most people treat their washing machine or dishwasher like a “set it and forget it” tool, but that’s a mistake. I’ve seen so many households running half-empty loads just because it’s convenient, which is essentially throwing money down the drain. To get real results in reducing utility bills, you need to wait for full loads and, if your machine allows it, switch to cold water cycles. Heating water accounts for a massive chunk of a laundry cycle’s energy draw, so skipping the heat is a simple win for your wallet.

    I also tell my clients to pay attention to the “thermal dance” of their kitchen and laundry rooms. For instance, running your dishwasher during off-peak hours can make a difference depending on your local grid. If you really want to level up your energy efficient appliance usage, start looking at your cooking habits—using a microwave or an air fryer for smaller meals is far more efficient than preheating a massive oven for twenty minutes. It’s about being intentional rather than just being busy.

    Small Tweaks to Stop the Energy Bleed

    • Seal the gaps before the heat does. I’ve spent way too many hours with my infrared thermometer pointing at drafty window frames; even a tiny crack can act like a vacuum, sucking the warmth right out of your living room. Use some cheap weatherstripping or even a simple door snake to keep that expensive air inside where it belongs.
    • Stop treating your thermostat like a suggestion. It’s tempting to crank the heat to 75°F when you get home, but the real win is consistency. Dropping the temp by just two degrees and using a programmable timer can shave a noticeable chunk off your monthly bill without making you freeze.
    • Wash cold, dry smart. Most modern detergents work perfectly well in cold water, and you’ll save a massive amount of energy by not heating up the laundry water every single time. When it comes to the dryer, stop over-drying your clothes; it’s a huge power drain and wears out your fabrics faster.
    • Let your radiators breathe. If you’ve got heavy curtains or a sofa pushed right up against a heater, you’re essentially paying to heat your furniture instead of the room. Keep the area around your heat sources clear so the convection can actually do its job.
    • Optimize your lighting by habit, not just by switch. It sounds basic, but getting into the rhythm of turning off lights when you leave a room—and switching to LEDs as your old bulbs die—is the lowest-effort way to stop wasting power. It’s about being intentional with the energy you’re actually using.

    The Bottom Line on Cutting Waste

    Efficiency isn’t about buying expensive new gadgets; it’s about auditing your current habits and plugging the leaks—both literal and electrical—that are draining your wallet.

    Small, data-backed changes, like managing phantom loads and optimizing appliance timing, compound over time to create significant savings on your monthly bills.

    You don’t need a massive renovation budget to live sustainably; staying observant and making smart, low-cost adjustments is the most effective way to shrink your footprint.

    The Cost of Convenience

    We’ve been conditioned to think that comfort requires constant, high-energy consumption, but true efficiency isn’t about deprivation—it’s about stopping the silent leaks in our habits that drain both our wallets and the planet.

    Tobias Nkemdirim

    The Bottom Line on Your Energy Bills

    The Bottom Line on Your Energy Bills.

    At the end of the day, cutting your energy costs isn’t about buying a fleet of expensive solar panels or high-tech smart gadgets. It’s about the small, intentional shifts we discussed: killing phantom loads that drain your wallet while you sleep and actually being mindful of how we run our appliances. I’ve spent enough time with my infrared thermometer to know that energy leakage is often invisible, but it’s definitely costing you money. By mastering these habits, you aren’t just tweaking your routine; you are actively plugging the holes in your budget and reclaiming control over your monthly overhead.

    I know it can feel overwhelming to think about “going green” when you’re just trying to make ends meet, but sustainability shouldn’t be a luxury reserved for the wealthy. Every time you choose to unplug a charger or run a full load of laundry instead of a half-empty one, you are making a choice that favors both your bank account and the planet. We don’t need perfection; we just need to stop being lazy with our resources. Start with one habit this week, track the difference, and watch how those small, smart changes eventually add up to a much lighter footprint and a much heavier wallet.

    Frequently Asked Questions

    I’ve tried unplugging stuff, but how do I actually know which appliances are the biggest culprits for phantom power?

    Honestly, guessing is a waste of time. If you want the real data, grab a cheap plug-in energy monitor—they’re a lifesaver for my audits. You plug it in, run the device for a bit, and it shows you exactly how many watts it’s pulling while it’s “off.” I usually find that older game consoles or cheap desktop chargers are the biggest offenders. Don’t just assume; verify the numbers so you actually see the savings.

    Are there any low-cost tech upgrades that actually pay for themselves within a few months?

    Honestly, if you want a quick ROI, skip the fancy smart home ecosystems for now and grab some heavy-duty weatherstripping and door sweeps. I’ve audited enough drafty apartments to know that sealing air leaks is the fastest way to stop throwing money out the window. If you want something more “techy,” get a programmable thermostat. It’s a small upfront cost that pays for itself almost immediately by ensuring you aren’t heating an empty house.

    How much of a difference does sealing window drafts actually make compared to just turning the thermostat down?

    Honestly, it’s a massive difference. Turning the thermostat down is great, but if you’re fighting a constant draft, you’re basically trying to heat the entire neighborhood. I’ve used my infrared thermometer on houses where the window frames were bleeding heat like a sieve; the temperature drop was immediate. Sealing those gaps stops the “leak” so your heater doesn’t have to work overtime. Fix the envelope first, then adjust the dial.

  • Using a Smart Home Hub for Energy Control

    Using a Smart Home Hub for Energy Control

    I remember sitting in my old rental apartment, shivering through a February frost because my radiator was fighting a losing battle against a drafty window. I spent half my paycheck just trying to stay warm, and back then, the idea of “smart tech” felt like a luxury for people with more money than sense. Most people will tell you that you need a massive, expensive ecosystem to actually see a difference, but honestly? That’s just marketing fluff. You don’t need a house full of blinking gadgets to be efficient; you just need smart home hubs that actually talk to each other and work for your specific budget.

    I’m not here to sell you on a futuristic lifestyle that costs a fortune. My goal is to cut through the technical jargon and show you which setups actually move the needle on your utility bills. I’ll be sharing the no-nonsense truth about which controllers are worth your time and which ones are just expensive paperweights. We’re going to focus on practical, data-driven ways to automate your energy savings so you can stop leaking cash and start living more sustainably without breaking the bank.

    Table of Contents

    Mastering Iot Device Connectivity Solutions Without Breaking the Bank

    Mastering Iot Device Connectivity Solutions Without Breaking the Bank

    When I first started auditing homes, I noticed a recurring pattern: people buy a bunch of gadgets that don’t actually talk to each other. You end up with five different apps just to manage your lights and thermostat, which is the opposite of efficient. To avoid this mess, you need to prioritize smart home ecosystem interoperability. Instead of chasing every shiny new gadget, look for devices that play well together from the jump. This prevents you from wasting money on hardware that ends up sitting in a drawer because it won’t connect to your existing setup.

    If you’re looking to scale up without a massive upfront investment, pay close attention to matter and thread protocol compatibility. These aren’t just tech buzzwords; they are the keys to making sure your devices stay connected reliably without needing a dozen different bridges. I always tell my clients to look for gear that supports these standards because it future-proofs your home. It’s much cheaper to buy one compatible device today than to replace an entire ecosystem of “dumb” smart tech two years from now when nothing syncs anymore.

    Choosing Local vs Cloud Processing Hubs to Protect Your Wallet

    Choosing Local vs Cloud Processing Hubs to Protect Your Wallet

    When you’re looking at different setups, you’ll quickly realize the big debate is between local vs cloud processing hubs. Most people default to cloud-based systems because they’re easy to set up, but there’s a hidden cost to that convenience. When your commands have to travel to a server halfway across the world and back just to turn off a light, you’re dealing with latency and a constant reliance on an internet connection. If your Wi-Fi drops, your entire “smart” home becomes a collection of expensive paperweights.

    I always lean toward a centralized home automation controller that handles everything locally. Not only is it faster, but it’s also more resilient. If you want to truly future-proof your setup, you should prioritize matter and thread protocol compatibility. This ensures that your devices can talk to each other directly without needing to ping a manufacturer’s server every five seconds. By keeping the processing inside your own four walls, you aren’t just gaining speed and privacy; you’re building a more stable, efficient system that won’t leave you in the dark just because your ISP is having a bad day.

    5 Ways to Make Your Hub Work Harder (Without Working Harder)

    • Prioritize Matter and Thread compatibility. I’ve seen too many people buy a hub that locks them into one ecosystem, only to realize later they can’t add the cheap, energy-efficient sensors they actually need. Look for hardware that plays well with others so you aren’t stuck replacing everything in two years.
    • Automate based on occupancy, not just schedules. A timer is fine, but a hub connected to motion or door sensors is better. There’s no point in heating a room that nobody is using just because it’s 6:00 PM; let the hub kill the power the second you walk out the door.
    • Use your hub to create “Energy Scenes.” Instead of manually turning things off, program a “Leaving Home” button or automation that shuts down non-essential smart plugs and dims the lights all at once. It’s one tap to stop the bleed.
    • Keep an eye on your hub’s “vampire load.” It sounds small, but a hub that stays constantly pinging a dozen high-draw devices can add up. I always check if my hub is managing device sleep cycles effectively to ensure the whole system isn’t just adding to the baseline power draw.
    • Don’t overcomplicate the dashboard. If your hub’s interface is a mess, you won’t use it. Keep your most important energy-saving controls—like your thermostat and smart blinds—front and center so you can make quick adjustments when you notice a temperature spike.

    The Bottom Line on Smart Hubs

    Don’t get distracted by flashy, expensive ecosystems; focus on hubs that prioritize local processing to save on subscription fees and keep your data secure.

    Prioritize interoperability so you aren’t forced into a single brand’s expensive loop, allowing you to add cheap, efficient sensors as your budget allows.

    Treat your smart hub as an investment in efficiency, not just a gadget, by using it to automate the heavy hitters like heating and lighting.

    The Real Purpose of a Hub

    “A smart hub shouldn’t just be another expensive gadget on your shelf; it’s the brain of your home that ensures you aren’t burning money just to keep the lights on.”

    Tobias Nkemdirim

    Cutting the Cord on Energy Waste

    Cutting the Cord on Energy Waste.

    At the end of the day, picking a smart home hub isn’t about buying the most expensive gadget on the shelf; it’s about finding the right tool to manage your environment. We’ve looked at how you can bridge different IoT devices without a massive upfront investment and why choosing local processing can actually save you money in the long run by keeping your data secure and your latency low. Whether you go with a cloud-based setup for convenience or a local hub for more control, the goal remains the same: stopping the invisible leaks in your energy usage. If you focus on connectivity that actually works for your specific space, you aren’t just playing with tech—you’re building a more efficient home.

    I know that looking at a list of smart devices can feel overwhelming, especially when you’re trying to stick to a budget. But remember, you don’t have to automate your entire house overnight to see a difference. Start small, pick one area where you notice the most waste, and let a smart hub do the heavy lifting for you. Sustainability shouldn’t be a luxury reserved for people with huge bank accounts; it’s about making smart, intentional choices with what we have. Let’s stop letting our hard-earned money vanish into thin air through inefficient habits and start taking control of our footprint, one device at a time.

    Frequently Asked Questions

    Will adding a smart hub actually lower my monthly utility bill, or is it just another gadget to manage?

    It’s a fair question. If you just buy a hub and let it sit there, it’s just another expensive paperweight. But if you use it to automate your heavy hitters—like scheduling your thermostat to drop when you’re at work or ensuring lights aren’t running in empty rooms—it pays for itself. I don’t look at hubs as gadgets; I look at them as the brains that stop your home from bleeding energy while you aren’t paying attention.

    Do I need to replace all my old devices to work with a new hub, or can I integrate what I already have?

    You definitely don’t need to scrap everything and start from scratch. That’s exactly how you end up wasting money. Most modern hubs are designed to be “polyglot”—they speak multiple languages like Zigbee, Z-Wave, or even just standard Wi-Fi. Before you buy anything new, check your existing gear’s compatibility. I always tell my clients: if it still works and it’s connected, find a way to bridge it into your new system instead of tossing it.

    How much extra electricity does the hub itself consume by being plugged in 24/7?

    It’s a fair question. I’ve actually run the numbers on a few setups during my audits. Most smart hubs are incredibly low-draw, usually pulling between 2 to 5 watts. Even running 24/7, you’re looking at maybe $5 to $10 extra on your annual electricity bill. Honestly, the tiny cost of keeping the hub alive is a drop in the bucket compared to the massive savings you get from the automation it manages.

  • How Thermal Curtains Affect Indoor Temperature Stability

    How Thermal Curtains Affect Indoor Temperature Stability

    I still remember sitting in my old studio apartment three years ago, shivering under three layers of blankets while my heater groaned in a losing battle against the drafty windows. I’d spent my last bit of savings on a “smart” thermostat, thinking that was the silver bullet, but the truth was much simpler and much cheaper. People love to tell you that you need a full-scale retrofit or expensive double-glazing to fix a cold room, but they completely overlook the immediate thermal curtains impact on your daily comfort. Most of the “energy experts” online will try to sell you a thousand-dollar insulation package, when often, you’re just leaking money through your window frames every single night.

    I’m not here to sell you on some lifestyle aesthetic or overpriced home decor. My goal is to give you the raw, data-driven truth about how much these curtains actually matter for your wallet and your carbon footprint. I’ll show you exactly how to spot the heat leaks in your own space and how to pick the right fabrics so you can stop overpaying for utilities without needing a massive renovation budget.

    Table of Contents

    How Thermal Insulation Fabric Technology Slashes Your Monthly Bills

    How Thermal Insulation Fabric Technology Slashes Your Monthly Bills

    When I’m auditing a room, I don’t just look at the thermostat; I look at the windows. Most people think a curtain is just a piece of fabric to hide a messy room, but if you’re using high-quality thermal insulation fabric technology, that fabric becomes a functional barrier. These specialized textiles are engineered with dense weaves or even integrated layers that trap air. This creates a buffer zone between your living space and the cold glass, which is essentially a giant heat sink during the winter.

    It’s not just about blocking light—though there is a huge difference between blackout vs thermal curtains when it comes to light control—it’s about active temperature regulation. By installing these, you’re essentially adding a layer of invisible insulation to your walls. This is one of the most underrated methods for reducing heating costs with drapes because it stops the “radiant cooling” effect where your body feels cold just by being near a window. Instead of your heater working overtime to fight a losing battle against the draft, the fabric does the heavy lifting for you.

    Smart Temperature Regulation Home Decor for Every Budget

    Smart Temperature Regulation Home Decor for Every Budget

    The truth is, you don’t need a massive budget to start upgrading your home’s thermal envelope. If you’re renting or living in a space where you can’t touch the windows, you can still leverage temperature regulation home decor to make a dent in your utility bills. I often tell my clients that you don’t have to choose between aesthetics and savings. You can find heavy, textured fabrics that look like high-end linen but actually function as effective energy efficiency window coverings. Even a budget-friendly set of heavy drapes can create a much-needed buffer between your living space and a drafty window pane.

    When you’re shopping, don’t get distracted by marketing fluff; look for density. I usually check the weight of the fabric myself. While many people debate blackout vs thermal curtains, the real goal is finding something with enough mass to act as a barrier. By prioritizing reducing heating costs with drapes that have a tight weave, you’re essentially adding a layer of invisible insulation to your walls. It’s a low-effort, high-reward way to stabilize your indoor climate without a professional retrofit.

    5 Low-Cost Ways to Maximize Your Thermal Curtain Impact

    • Seal the gaps. Even the best thermal curtains won’t work if heat is just whistling around the edges. I always check the sides and the top; if there’s a gap between the fabric and the wall, your expensive warm air is basically walking right out the window.
    • Size matters more than you think. Don’t just buy curtains that barely cover the glass. To actually trap a layer of insulating air, you need them to be wide enough to overlap the window frame significantly and long enough to hit the floor.
    • The “Day vs. Night” strategy. This is a simple one: pull them wide open during sunny hours to let the sun do the heating for free, but the second the sun dips, close them tight to lock that warmth inside.
    • Double up if you’re serious. If you’re dealing with an old, drafty rental like I used to, one layer might not cut it. Pairing thermal curtains with a simple honeycomb blind creates an extra air pocket that acts like a secondary barrier against the cold.
    • Check your hardware. If you’re using a thin, flimsy rod, your heavy thermal fabric might sag, creating massive air leaks at the top. Invest in a sturdy rod that can hold the weight so the curtain stays flush against the window.

    The Bottom Line: Why Thermal Curtains Are a Non-Negotiable

    Stop viewing curtains as just decor; they are a functional barrier that keeps your expensive heat inside the room where you actually need it.

    You don’t need a massive, expensive retrofit to see results—hanging heavy, thermal-lined fabric is one of the fastest ways to lower your utility bills.

    Think of thermal curtains as a passive energy tool that works 24/7, helping you maintain a steady temperature without constantly cranking up the thermostat.

    The Real Cost of a Cold Room

    “I’ve spent enough time pointing an infrared thermometer at drafty window frames to know that a window isn’t just a view—it’s a massive hole in your wallet. Thermal curtains aren’t just a decor choice; they’re a practical barrier that stops you from literally paying to heat the neighborhood.”

    Tobias Nkemdirim

    Making the Switch

    Making the Switch to thermal curtains.

    At the end of the day, thermal curtains aren’t just a design choice; they are a practical tool for reclaiming control over your living space. We’ve looked at how specialized fabric technology acts as a barrier against the elements and how choosing the right decor can help you manage your indoor climate without touching the thermostat. By addressing these small thermal leaks, you aren’t just decorating—you are actively plugging the holes in your wallet. It’s about making sure the energy you pay for actually stays inside the rooms where you need it, rather than bleeding out through your windows.

    I know that when you’re staring at a mounting utility bill, a few yards of heavy fabric might feel like a minor fix, but these small, smart changes are exactly how we build a more sustainable lifestyle. You don’t need a massive solar array or a total home overhaul to start making a difference. It starts with recognizing that efficiency is accessible to everyone, regardless of your budget. Let’s stop letting our hard-earned money escape through the glass and start building homes that work for us, not against us.

    Frequently Asked Questions

    How do I know if my current curtains are actually doing anything, or if I'm just wasting money on decorative fabric?

    The easiest way to tell? Grab your infrared thermometer. I do this during every audit. On a cold night, aim it at the space between your current curtains and the windowpane. If you’re seeing a massive temperature gap—like a 10-degree difference—your curtains are basically just expensive wallpaper. If they feel thin or light, they aren’t trapping any heat. If you can feel a draft hitting your ankles, your fabric isn’t doing its job.

    Will thermal curtains make my room feel too dark or stuffy during the day?

    That’s a fair concern, and honestly, it’s one I hear a lot during my audits. If you go for heavy, blackout-style thermal curtains, yeah, your room might feel a bit cave-like during the day. But you don’t have to sacrifice light for efficiency. I usually recommend layering: use sheer thermal liners that let soft light through while still trapping heat, or just keep them open during sunny hours to let the sun do the heating work for free.

    Are these curtains worth the investment if I'm living in a rental and can't change the windows themselves?

    Absolutely. In fact, I’d argue they’re even more essential for renters. Since you can’t go ripping out old single-pane windows or upgrading to double glazing without losing your security deposit, you have to find workarounds. Thermal curtains are a non-permanent, low-cost hack. I’ve audited plenty of apartments where a simple heavy drape acted as a secondary barrier, stopping drafts and saving the tenant a significant chunk on their heating bill. It’s a win-win.

  • Managing Energy Use in Electric Ovens

    Managing Energy Use in Electric Ovens

    I still remember sitting in my old rental apartment, staring at a utility bill that felt more like a punishment than a monthly expense. I’d spent the whole evening cooking a simple meal, only to realize my oven was essentially a giant, glowing space heater running in the middle of my kitchen. People love to talk about solar panels and smart thermostats when they want to discuss sustainability, but they completely ignore the massive, invisible drain of oven energy consumption happening right in your kitchen every single night. It’s one of the most inefficient appliances we own, and most of us are just letting it bleed money because we haven’t been taught a better way.

    I’m not here to sell you on some expensive, high-tech smart oven or tell you to stop cooking altogether. Instead, I’m going to show you the practical, data-driven hacks I’ve learned from auditing homes and testing my own gear. We’re going to look at how to cook smarter, not harder, by adjusting your habits and using the right tools to slash your electricity usage. My goal is simple: stop wasting power just because it’s convenient, and start keeping more of your hard-earned cash in your pocket.

    Table of Contents

    The Real Preheating Oven Energy Cost Youre Paying

    The Real Preheating Oven Energy Cost Youre Paying

    Most people think the heavy lifting happens while the food is actually cooking, but the real drain often occurs before you even put a tray in. When you flip that dial, your oven pulls a massive surge of power to climb from room temperature to 400°F. I’ve seen it firsthand during audits: people preheat for twenty minutes for a dish that only needs ten. That preheating oven energy cost isn’t just a minor annoyance; it’s a spike in your demand that hits your wallet every single time you cook.

    If you’re looking at reducing kitchen electricity bills, you have to stop treating preheating like a mandatory ritual for every meal. For something like a simple tray of roasted vegetables or a quick bake, waiting for that “beep” is often overkill. Unless you’re working with delicate pastries that need a precise, immediate blast of heat, you can usually skip the long wait. By timing your oven use more strategically, you’re not just saving a few cents—you’re cutting out the most wasteful part of the entire process.

    How the Impact of Oven Temperature on Power Drains You

    How the Impact of Oven Temperature on Power Drains You.

    It’s easy to assume that once the oven hits the target temperature, the heavy lifting is done. That’s a misconception. The real issue is how much energy it takes to maintain that heat against the ambient temperature of your kitchen. If you’re cranking your dial up to 450°F for a dish that only needs 350°F, you aren’t just cooking faster; you’re forcing the heating elements to cycle on and off constantly to fight off heat loss. This constant struggle is a massive factor in the impact of oven temperature on power draw, and it’s one of the most preventable drains on your utility bill.

    I’ve seen it time and again during audits: people set their ovens way too high “just to be safe.” If you want to focus on reducing kitchen electricity bills, you need to treat temperature with more precision. For instance, switching to convection vs conventional oven usage can be a game-changer. A convection fan circulates hot air more effectively, often allowing you to drop the temperature by 25°F without losing any cooking quality. It’s a small tweak, but it keeps your energy consumption from spiking unnecessarily.

    5 Low-Effort Hacks to Stop Your Oven from Eating Your Budget

    • Stop the “Preheat Trap”: Unless you’re baking a delicate soufflé or a sponge cake, you probably don’t need a 20-minute preheat. For most roasts or casseroles, just pop them in and let the oven climb to temp while they cook. You’ll save a decent chunk of electricity every single time.
    • Use the “Small Batch” Rule: If you’re only cooking one chicken breast or a handful of veggies, don’t fire up the full-sized oven. Use a toaster oven or an air fryer instead. They use a fraction of the energy because they aren’t trying to heat up a massive, empty metal box.
    • Keep the Door Shut (Seriously): Every time you peek to see if the timer is almost up, you’re letting out a massive wave of heat. I’ve used my infrared thermometer to see how fast the internal temp drops just from a 10-second glance—it’s a massive energy drain. Use the oven light and the window instead.
    • Master the “Residual Heat” Finish: About five to ten minutes before your food is actually done, turn the oven off entirely. The thermal mass inside stays hot enough to finish the job without pulling any more power from the grid. It’s a simple way to squeeze every bit of value out of the energy you’ve already paid for.
    • Ditch the Extra Trays: If you’re roasting something, don’t crowd the oven with multiple heavy baking sheets. It forces the heating elements to work overtime to maintain the temperature. Keep it minimal and give the air space to circulate; it’s more efficient and usually results in better cooking.

    The Bottom Line on Cutting Oven Costs

    Skip the long preheat; unless you’re baking delicate pastries, your oven usually hits temp fast enough to start cooking immediately without wasting extra juice.

    Watch your temperature settings like a hawk, because every 25-degree jump adds up to a noticeable spike in your monthly utility bill.

    Stop leaving the oven door ajar to “check” on things; every time you do that, you’re literally letting your money escape into the kitchen air.

    ## The Invisible Drain

    “Most people treat their oven like a furnace that needs to run constantly, but in reality, you’re just throwing money into a heating element that’s working harder than it needs to. If you aren’t timing your heat, you’re basically just paying a ‘convenience tax’ to your utility company.”

    Tobias Nkemdirim

    Cutting the Cord on Oven Waste

    Cutting the Cord on Oven Waste.

    At the end of the day, managing your oven’s energy isn’t about making massive, expensive renovations to your kitchen; it’s about being intentional with how you use the tools you already have. We’ve looked at how unnecessary preheating cycles eat into your budget and how cranking the temperature higher than necessary creates a massive, invisible drain on your meter. By adjusting your habits—like using the residual heat after you’ve turned the dial down or opting for smaller appliances when a quick meal is all you need—you can drastically reduce your monthly utility overhead. It really comes down to stopping the mindless waste that happens when we just let the oven run because it’s easier.

    I know it can feel like these small tweaks don’t matter in the grand scheme of the climate crisis, but that’s where we get it wrong. Every kilowatt-hour you save is a win for your bank account and a small step toward a more sustainable lifestyle. Living efficiently shouldn’t be a luxury reserved for people with massive solar arrays and smart homes; it’s about making smart, data-backed choices in our everyday routines. Start small, watch your bills drop, and remember that sustainability is built on consistency, not perfection. You’ve got this.

    Frequently Asked Questions

    Is it actually cheaper to use a microwave or air fryer for small meals instead of firing up the full oven?

    If you’re just reheating leftovers or cooking a single chicken breast, the oven is your biggest enemy. It’s a massive, inefficient box that takes forever to heat up just to cook a tiny amount of food. Use the microwave for speed and pure efficiency, or the air fryer if you want that crunch. The air fryer is the sweet spot—it’s much faster and uses far less power than a full-sized oven.

    Does leaving the oven door cracked open while cooking actually save any energy, or does it just make my kitchen a sauna?

    Leaving the door cracked is a terrible idea. I’ve seen this during audits: people think they’re “venting” or doing something clever, but you’re actually just forcing the heating element to work overtime to compensate for the lost heat. You aren’t saving a cent; you’re just turning your kitchen into a sauna and spiking your electricity bill. Keep the door shut, maintain that steady temperature, and let the oven do its job.

    Should I be worried about the energy spike when I use the broiler versus the standard bake setting?

    Don’t sweat the spike, but do be mindful of how you use it. Broiling pulls a massive amount of power because it’s basically a high-intensity blast of heat aimed at a single element. It’s much more aggressive than the steady, circulating heat of a bake setting. If you’re just broiling for a few minutes to crisp something, the total energy used is actually quite low. Just avoid leaving it on longer than necessary.

  • A Guide to Cleaning Solar Panels Safely

    A Guide to Cleaning Solar Panels Safely

    I was standing on my client’s driveway last Tuesday, pointing my infrared thermometer at a rooftop array, when I realized just how much money was literally evaporating into thin air. The panels looked fine from the ground, but the thermal readings told a different story: a thick, invisible layer of grime was choking their output. Most people think you need some expensive, high-tech service to maintain their setup, but that’s a myth that keeps your utility bills unnecessarily high. In reality, a solid solar panel cleaning guide shouldn’t cost you a fortune; it just requires a bit of strategy and the right tools to make sure you aren’t throwing money away every time the sun comes out.

    I’m not here to sell you on fancy gadgets or complicated maintenance schedules that eat up your weekend. Instead, I’m going to walk you through a practical, no-nonsense approach to keeping your system running at peak efficiency without breaking the bank. We’ll cover everything from the safest cleaning solutions to the exact timing you need to avoid damaging your cells. My goal is to give you a straightforward roadmap so you can stop wasting energy and start actually seeing the savings you were promised when you went solar.

    Table of Contents

    Guide Overview

    Total Time: 1-2 hours
    Estimated Cost: $20-60
    Difficulty: Beginner

    Tools & Supplies

    • Soft-bristle brush or squeegee for debris removal
    • Garden hose with spray nozzle for rinsing
    • Telescopic pole for reaching rooftop panels
    • Deionized or distilled water (optional for spot prevention)
    • Mild, non-abrasive soap (1 small bottle)
    • Microfiber cloths (2-3 cloths)

    Step-by-Step Instructions

    • 1. First, grab your gear and check the weather. You want to do this on a cool, overcast morning or late in the evening. If you try to clean your panels while the sun is beating down, the water will evaporate almost instantly, leaving behind streaks of mineral deposits that actually block more light.
    • 2. Before you even touch the glass, give them a quick rinse with a garden hose. This isn’t about deep cleaning yet; it’s about loosening the heavy grit, bird droppings, and dried leaves. If you start scrubbing immediately without this step, you’ll likely end up scratching the surface with the very dirt you’re trying to remove.
    • 3. Fill up a bucket with lukewarm water and add a tiny bit of mild, biodegradable soap. Avoid anything harsh like dish detergents with heavy degreasers or abrasive cleaners; these can leave a filmy residue on the panels that actually attracts more dust in the long run.
    • 4. Use a soft-bristled brush or a squeegee designed specifically for solar panels. I always tell my clients to avoid using anything abrasive, like a kitchen sponge, because even micro-scratches can reduce the efficiency of your cells over time. Work in gentle, circular motions to dislodge the stubborn grime.
    • 5. If you’re dealing with particularly nasty spots—like dried bird lime—don’t reach for the chemicals. Instead, let the soapy water sit on the spot for a minute to soften the mess before you gently scrub. It’s much more effective than trying to force it off with sheer pressure.
    • 6. Once you’ve finished scrubbing, do a final rinse with clean water. Make sure you rinse from the top down to ensure all the soap suds are completely gone. You want to see a crystal-clear surface once the water clears, otherwise, you’re just setting yourself up for a new layer of buildup.
    • 7. Finally, take a quick look at your monitoring app or your meter. A clean panel should show an immediate uptick in output. If you don’t see a bump in your production numbers, you might have a deeper issue, or perhaps there’s still a layer of film preventing the light from hitting those cells properly.

    Mastering Solar Panel Efficiency Maintenance Without Breaking the Bank

    Mastering Solar Panel Efficiency Maintenance Without Breaking the Bank

    Look, you don’t need to hire a professional crew every month to keep your setup running well. Most people think they need expensive, specialized gear, but effective solar panel efficiency maintenance is actually quite low-tech if you’re smart about it. The biggest mistake I see is people scrubbing too hard or using abrasive sponges. You have to be careful about preventing micro-cracks during cleaning; those tiny fractures are invisible to the eye but can absolutely wreck your energy output over time. Stick to soft brushes or even just a microfiber cloth to avoid any structural damage.

    Timing is also everything. I always tell my clients that the best time of day to clean solar panels is early morning or late evening when the glass isn’t baking in the sun. If you spray cold water onto a scorching hot panel, you risk thermal shock, which is a nightmare for the cells. Also, if you’re dealing with stubborn spots like removing bird droppings from solar panels, don’t just scrape at them. Let some water soak the mess first to soften it up, then gently rinse it away. It’s about being methodical, not forceful.

    The Best Time of Day to Clean Solar Panels Safely

    The Best Time of Day to Clean Solar Panels Safely

    Timing is everything here, and it’s not just about your schedule—it’s about physics. I always tell my clients to avoid cleaning during the peak heat of the day. If you spray cold water onto glass that’s been baking under the midday sun, you risk thermal shock. This can lead to structural damage, and preventing micro-cracks during cleaning should be at the top of your priority list if you want these panels to last decades.

    The sweet spot is usually early morning or late evening when the panels are cool to the touch. Not only is this safer for the hardware, but it also gives you a better window to work without getting heat exhaustion yourself. When you’re using different solar panel rinse methods, doing it during these cooler hours ensures the water doesn’t evaporate instantly, which helps you avoid those annoying, streaky mineral deposits left behind by hard water. Stick to the twilight hours; your panels (and your wallet) will thank you for the extra care.

    5 Pro-Tips to Keep Your Efficiency High and Your Costs Low

    • Ditch the harsh chemicals; a simple solution of water and a tiny bit of mild soap is all you need to avoid leaving a residue that actually attracts more dust later.
    • Never use a pressure washer unless you want to crack a cell; the force is way too intense for the glass and can cause micro-fractures that kill your output.
    • Watch out for hard water spots; if your tap water is heavy on minerals, use distilled water for the final rinse so you aren’t leaving behind a film that blocks the sun.
    • Use soft-bristled tools like a squeegee or a microfiber cloth to prevent scratching the anti-reflective coating, which is vital for catching every bit of light.
    • Don’t forget the surrounding area; trimming back overgrown branches or clearing debris from near your panels ensures they aren’t sitting in permanent shade.

    The Bottom Line: Keep Your Energy Gains from Slipping Away

    Don’t let a layer of grime or dust act like a tax on your electricity; regular cleaning is the simplest way to ensure your panels actually produce what you paid for.

    Prioritize safety and efficiency by cleaning during the cooler parts of the day to avoid thermal shock to the glass and to keep yourself from overheating.

    You don’t need expensive professional services to see results—staying on top of basic maintenance with a little water and a soft brush is enough to stop wasting money.
    ## Efficiency isn't just about the tech

    “A layer of dust might look harmless, but it’s basically a tax on your sunlight. If you aren’t keeping those panels clean, you’re paying for energy you’ve already harvested but simply aren’t letting into your home.”

    Tobias Nkemdirim

    Don't Let Your Investment Gather Dust

    Don't Let Your Investment Gather Dust.

    At the end of the day, keeping your solar setup running smoothly doesn’t require a massive budget or a professional crew. It really comes down to the basics: timing your cleaning for the cooler parts of the day to avoid thermal shock, using the right gentle tools, and staying consistent with your checks. I’ve seen too many people let a thin layer of grime or bird droppings act like a shroud over their savings, quietly dragging down their energy output day after day. By spending just a little bit of time on regular maintenance, you ensure that every ray of sunlight is actually being converted into power rather than being lost to inefficiency.

    Transitioning to solar is a huge step toward independence, but it isn’t a “set it and forget it” situation. It’s an active part of managing your home’s ecosystem. I truly believe that sustainable living is about stewardship—taking care of the tools we use to power our lives. When you take the time to clean those panels, you aren’t just cleaning glass; you are maximizing your ROI and honoring the commitment you made to the planet. Keep that infrared thermometer handy, stay observant, and remember that small, intentional actions are what ultimately drive real, long-term change.

    Frequently Asked Questions

    Is it actually worth the effort to clean them if I live in an area where it rains frequently?

    I get asked this a lot. It’s tempting to think the rain does the heavy lifting for you, but that’s a bit of a myth. Rain is great for rinsing away loose dust, but it’s terrible at removing bird droppings, pollen, or that stubborn, sticky grime that builds up over time. If those spots sit there, they create “hot spots” that kill your efficiency. A quick manual wipe ensures you aren’t leaving money on the table.

    Can I just use my garden hose, or am I going to risk damaging the cells with too much pressure?

    A garden hose is fine, but you need to be careful with the pressure. I’ve seen enough DIY jobs go wrong to know that a high-pressure nozzle can actually force water into the seals or crack the glass. Stick to a standard spray setting—nothing aggressive. If you can’t clean it with a gentle flow, you’re using too much force. Keep it low-pressure, keep it steady, and you won’t risk damaging the cells.

    How often should I actually be checking my output to know if they're dirty enough to warrant a cleaning?

    I don’t like guessing, so I usually check my monitoring app once a month. If you see a steady, gradual dip in your daily kilowatt-hour production that doesn’t align with the weather, that’s your red flag. Don’t wait for a massive drop; if your output looks sluggish on a clear, sunny day, your panels are likely choking on dust or grime. Catch it early before that efficiency loss starts eating your budget.