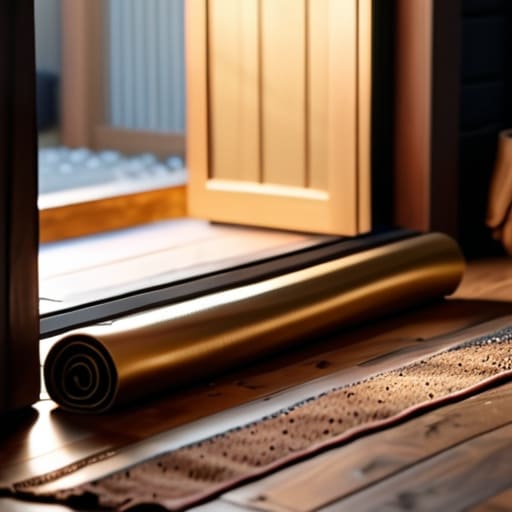
I still remember sitting in my old rental apartment three years ago, wrapped in two blankets and staring at a heating bill that made absolutely no sense. I’d point my infrared thermometer at the base of the front door, and the reading would plummet—a literal river of cold air flowing right into my living room. It’s infuriating because most people think they need to drop thousands on new windows or high-end insulation to fix this, but that’s just not true. Often, the simplest solution is just getting decent draft excluders to plug the gaps that are currently bleeding your bank account dry.
I’m not here to sell you on some overpriced, “eco-friendly” luxury gadget that costs more than the heat it saves. My goal is to give you the straight truth about which draft excluders actually work and how to install them without a massive headache. I’ll show you how to spot the leaks I look for during my audits and help you pick the most cost-effective options for your specific space. Let’s stop paying to heat the neighborhood and start keeping that warmth where it belongs: inside your home.
Table of Contents
Preventing Heat Loss Without Breaking the Bank

When I’m auditing a house, I don’t always look for the massive, expensive upgrades first. Most people think they need to tear down walls to see real results, but that’s just not true. Often, the biggest wins come from focusing on the gaps you can actually see—or feel. I’m talking about the air whistling through a window frame or the cold breeze rolling under a bedroom door. These are the tiny “energy leaks” that turn your heater into a glorified space heater for the outdoors.
If you want to start reducing heating bills without a massive upfront investment, you need to look at your entry points. One of my favorite low-cost strategies involves simple weatherstripping techniques around window frames. It’s a cheap, tactile fix that makes a massive difference in how a room actually feels. You don’t need a contractor; you just need to be observant. By sealing those small gaps, you aren’t just saving money—you’re making sure the heat you’ve already paid for actually stays where it belongs.
Smart Ways of Insulating Door Bottoms Today

If you’re looking at your door and seeing a gap that’s letting in a constant stream of cold air, you don’t necessarily need a contractor to fix it. One of the most effective weatherstripping techniques involves using self-adhesive foam or rubber strips along the door frame itself. I usually grab my infrared thermometer during audits to show people exactly where that temperature drop is happening; most of the time, it’s not just the bottom of the door, but the sides too. Adding a strip of high-density foam is a cheap, DIY way of improving home insulation without a massive renovation project.
For those who want something more heavy-duty, consider installing a screw-on door sweep. Unlike the fabric tubes that slide around, a metal or heavy-duty brush sweep stays anchored, providing a much more consistent seal against the floor. It’s one of those small, practical energy efficiency home improvements that actually makes a measurable difference in how your room feels. When you stop that airflow, you’re not just staying warmer; you’re actively reducing heating bills by making sure the energy you’ve already paid for actually stays inside your living space.
Five Quick Wins to Stop the Drafts
- Check your door seals with my trusty infrared thermometer; if you see a sudden temperature drop right at the floor level, you’ve found a leak that needs a physical barrier immediately.
- Don’t just rely on the bottom of the door; look for gaps around the sides and top of the frame, as a heavy fabric draft excluder won’t help if the air is whistling through the hinges.
- If you’re on a tight budget, DIY a “door snake” using an old pair of tights or a long sock filled with rice or dried beans—it’s a zero-cost way to block that freezing air.
- For external doors, prioritize weighted excluders that sit heavy against the threshold, ensuring they actually stay in place when the wind picks up outside.
- Think about placement; if you have a room that stays particularly cold, placing a long, fabric excluder at the base of the door can help trap the warmth that’s already inside that specific space.
The Bottom Line on Blocking Drafts
You don’t need a professional retrofit to see a difference; sealing the gaps under your doors is one of the fastest, cheapest ways to stop paying to heat the street.
Prioritize high-traffic areas like front doors and hallway entries, as these are where your thermal energy is most likely to escape.
Think long-term efficiency over convenience—taking ten minutes to install a proper excluder pays for itself in lower utility bills within the first month.
The Real Cost of a Draft
I’ve spent too many audits pointing my infrared thermometer at door gaps only to see the heat bleeding out like money through a hole in a pocket; a draft excluder isn’t just a piece of fabric, it’s a tiny, practical barrier between you and a massive utility bill.
Tobias Nkemdirim
Final Thoughts on Sealing the Gaps

At the end of the day, tackling drafts isn’t about installing high-tech, expensive systems that require a contractor. It’s about being observant. Whether you’re rolling up a heavy towel for a quick fix, installing a permanent brush strip on a sliding door, or using simple adhesive foam around window frames, you are effectively plugging the holes in your wallet. We’ve covered how small, strategic investments in door bottoms and window seals can drastically change the thermal profile of a room. By focusing on these high-impact, low-cost areas, you stop the constant cycle of heating air that just escapes into the street.
I know it can feel overwhelming when you look at your utility bills and see those numbers climbing, but don’t let that paralysis stop you from taking action. You don’t need to overhaul your entire house overnight to make a difference. Start with one door, one window, or one drafty corner. Every bit of heat you trap inside is a win for your bank account and a step toward a more sustainable lifestyle. We don’t have to accept inefficiency just because it’s the status quo; we can build homes that are actually comfortable, one small seal at a time.
Frequently Asked Questions
Will a heavy fabric draft excluder actually work for a door that opens and closes frequently, or will it just get in the way?
It’s a valid concern. If you’re constantly moving in and out, a heavy, weighted fabric excluder can feel like a nuisance. However, if you get a “twin draft guard” style—the kind that slides under the door—it moves with the door and stays in place. It’s much more practical for high-traffic entrances. If you prefer the classic weighted fabric rolls, just make sure they aren’t so heavy that they impede the door’s swing.
Are there specific types of draft excluders that work better for sliding doors versus traditional hinged ones?
Sliding doors are tricky because you can’t just hang a heavy fabric “snake” across the bottom without blocking the track. For those, I usually recommend brush strips or silicone weather stripping. You screw or stick them directly into the door frame or the bottom of the door itself. They create a tight seal while still letting the door glide smoothly. It’s a bit more precise than a traditional excluder, but it’s worth the extra effort to stop that cold air from creeping in.
Can I use DIY materials like old socks or sand to make my own, or is it worth the investment to buy a professional seal?
Honestly, you can definitely go the DIY route with old socks or sand—I’ve done it myself when I was living in that freezing rental. It’s great for a quick, zero-cost fix. But if you want something that actually stays in place and lasts more than a week, investing in a proper, weighted seal is worth it. DIY is a good start, but professional seals offer better long-term efficiency.
