Blog

  • Ways to Maximize Solar Panel Output

    Ways to Maximize Solar Panel Output

    I remember sitting in my old rental apartment, staring at a utility bill that felt like a personal insult, while the wind whistled through gaps I couldn’t afford to seal. It’s that same frustration I see now when people dive into the world of renewables. You’ll see companies pitching these massive, high-tech setups that cost more than a used car, claiming they’re the only way to achieve real solar panel efficiency. Honestly? It’s mostly marketing fluff designed to separate you from your savings. You don’t need a PhD or a massive inheritance to stop wasting sunlight; you just need to understand how your specific setup is actually performing.

    I’m not here to sell you on some futuristic, overpriced dream. My goal is to give you the straightforward truth based on the data I collect during my audits and the practical tweaks I use in my own projects. We’re going to look at how to squeeze every possible watt out of your system without breaking the bank. I’ll show you how to identify the real bottlenecks and make small, smart changes that actually move the needle on your monthly costs.

    Table of Contents

    Monocrystalline vs Polycrystalline Efficiency Choosing What Saves You Money

    Monocrystalline vs Polycrystalline Efficiency Choosing What Saves You Money

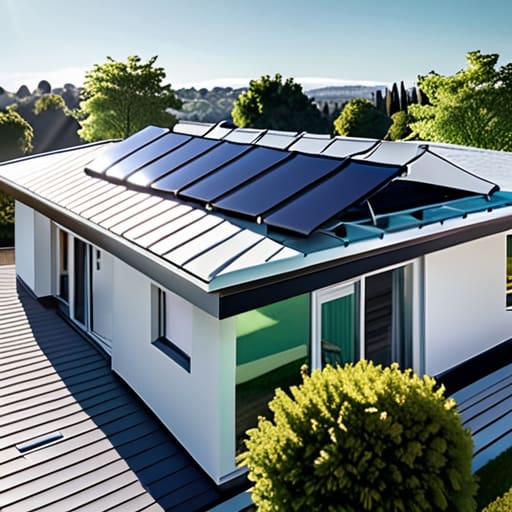
    When you’re looking at a spec sheet, the first thing that’s going to jump out at you is the difference between monocrystalline and polycrystalline cells. From my experience auditing setups, the biggest distinction is the solar cell conversion rate. Monocrystalline panels are made from a single, continuous crystal structure, which means they’re more efficient at turning sunlight into usable electricity. If you have limited roof space—maybe you’re in a tight urban rental or a small cottage—you want these. They pack more punch per square inch, even if the upfront cost is a bit steeper.

    Polycrystalline panels, on the other hand, are made by melting multiple silicon crystals together. They look a bit more “marbled” and usually come with a lower price tag, which is great for tight budgets. However, because their efficiency is slightly lower, you’ll need more physical space to generate the same amount of power as a mono setup. It really comes down to a math problem: are you willing to pay more now to save more on your monthly bills later, or is the lower initial investment more important for your current cash flow?

    Improving Photovoltaic Performance Without Spending a Fortune

    Improving Photovoltaic Performance Without Spending a Fortune

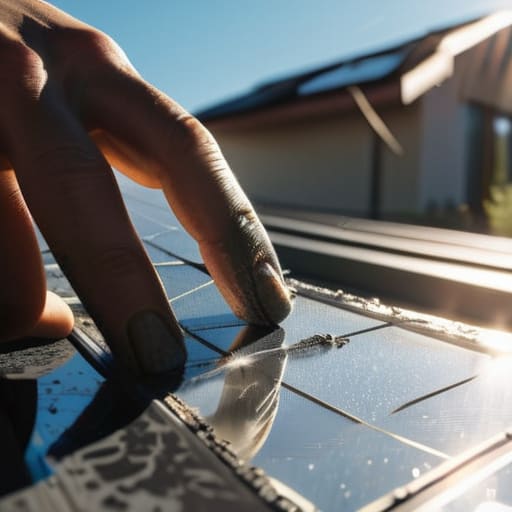
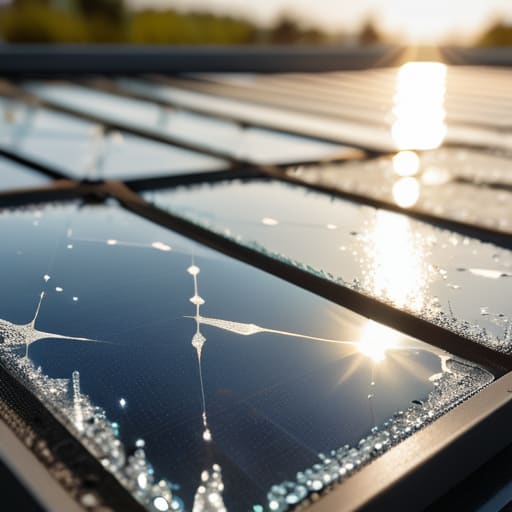
    Most people think that once the panels are on the roof, the work is done. That’s a mistake. If you want to actually see a return on your investment, you have to look at the small, practical things that influence your daily output. One of the biggest culprits I see during audits is simple dust and debris buildup. It sounds trivial, but a layer of grime can significantly drop your solar cell conversion rate over a few months. I usually tell my clients that a quick rinse with a hose twice a year is often enough to keep things running at peak levels without hiring a professional cleaning crew.

    Another thing to watch is shade. Even a small branch from a nearby tree casting a shadow over a single corner of a panel can throw off the entire string’s performance. It’s not just about the sun hitting the glass; it’s about managing the factors affecting solar energy yield in your specific microclimate. You don’t need high-tech sensors to notice this—just keep an eye on your monitoring app. If you see a sudden dip in production on a clear day, go outside and check for shadows or bird droppings. It’s about being observant, not expensive.

    5 Low-Cost Ways to Keep Your Solar Output from Tanking

    • Keep the dust off. It sounds basic, but a layer of grime or even bird droppings can act like a literal blanket, blocking the light your cells are starving for. A quick rinse with water once a month can actually make a measurable difference in your daily yield.
    • Watch your shade game. I’ve audited plenty of setups where a single overgrown tree branch was cutting the efficiency of an entire string of panels. If a shadow hits even a small part of a panel, it can bottleneck the energy flow for the whole system.
    • Mind the temperature. It’s a common misconception that heat is your friend; actually, solar panels are like most electronics—they hate getting too hot. If you’re installing new ones, make sure there’s enough airflow underneath them to keep them from overheating and losing voltage.
    • Check your wiring and connections. I always carry my thermometer to look for hot spots, but you should be looking for “cold” spots in your energy production. Loose or corroded connections create resistance, and resistance is just another word for wasted money.
    • Angle matters more than you think. If your panels are fixed in place, you’re stuck with them, but if you have an adjustable mount, tilt them toward the sun as the seasons change. Even a few degrees of adjustment can stop you from letting good sunlight go to waste.

    The Bottom Line on Solar Efficiency

    The Bottom Line on Solar Efficiency.

    Don’t get distracted by the highest percentage numbers; focus on the long-term ROI by picking panels that actually fit your specific budget and roof layout.

    Efficiency isn’t just about the hardware you buy, but how well you maintain it—keeping panels clean and well-ventilated is a zero-cost way to stop losing power.

    Small, strategic tweaks to your setup can prevent massive energy waste, proving you don’t need a massive solar farm to start seeing lower utility bills.

    Efficiency isn't about the highest number on a spec sheet

    At the end of the day, I don’t care if a panel has a theoretical efficiency rating of 24% if it’s sitting in a corner where it can’t actually catch the sun; true efficiency is about making sure every single photon you pay for actually ends up powering your home instead of just heating up the roof.

    Tobias Nkemdirim

    The Bottom Line on Solar Efficiency

    At the end of the day, maximizing your solar efficiency isn’t about chasing some impossible, high-tech dream; it’s about making informed, practical choices with the tools you have. We’ve looked at how picking the right panel type—like the higher-performing monocrystalline—can set your foundation, and how simple maintenance like keeping things clean can prevent unnecessary energy leaks. You don’t need a massive budget to see a real difference in your monthly utility statement. It really comes down to smart, incremental improvements that ensure every bit of sunlight hitting your roof is actually working for your wallet and the planet.

    I know that transitioning to renewable energy can feel overwhelming, especially when you’re trying to balance a budget. But remember, sustainability shouldn’t be a luxury reserved for the wealthy. Every small step you take to optimize your setup is a step toward true energy independence. Whether you’re just starting your solar journey or you’re already looking for ways to squeeze more power out of your existing array, stay focused on the data and the long-term gains. You’re doing more than just lowering a bill; you’re building a smarter, more resilient way to live.

    Frequently Asked Questions

    Is it actually worth paying the premium for high-efficiency panels if my roof space is already limited?

    If you’re working with a cramped roof, the answer is a hard yes. When space is your biggest constraint, every square inch has to earn its keep. High-efficiency panels might cost more upfront, but they pack more punch in a smaller footprint. It’s basically the difference between getting a decent return on a tiny investment versus wasting that precious real estate on low-output tech that leaves you still chasing more power.

    How much does dirt or seasonal debris actually impact my daily energy yield?

    It’s a bigger deal than most people realize. I’ve seen setups where a thick layer of dust or a handful of autumn leaves dropped the output by 15% or even 25%. It’s not just about the shade; it’s about how that debris disrupts the entire cell’s flow. If you’re seeing a dip in your daily yield, grab a soft brush or some water. Keeping them clear is the easiest way to stop leaking money.

    Can I boost my system's efficiency by upgrading my inverter, or is that just throwing more money at the problem?

    It’s a valid question, and honestly, it depends on what you’re starting with. If you’re running an old, budget-tier inverter that’s constantly running hot, you’re likely losing a significant chunk of your harvested energy to heat. Upgrading to a high-efficiency model—especially a pure sine wave inverter—can definitely squeeze more usable power out of your panels. It’s not just “throwing money” if the efficiency gain actually pays for the unit through lower losses.

  • Hardware Used in Solar Installations

    Hardware Used in Solar Installations

    I remember standing on a client’s roof last October, clicking my infrared thermometer against a poorly installed array, and feeling that familiar surge of frustration. The panels were fine, but the solar panel mounting hardware was absolute junk—cheap, flimsy rails that were already starting to sag under the weight. It’s the same story I see everywhere: people spend thousands on high-end photovoltaic cells only to skimp on the actual skeleton holding them up. You don’t need a “premium” branded kit that costs more than the panels themselves, but you definitely shouldn’t be buying the bottom-of-the-barrel stuff that’ll fail the first time a heavy storm rolls through.

    I’m not here to sell you on some overpriced, over-engineered system that eats your entire budget before you even flip the switch. My goal is to cut through the marketing fluff and show you exactly what you need to keep your setup secure and efficient without breaking the bank. We’re going to look at the real-world durability of different mounting options so you can build a system that actually lasts, keeps your bills low, and stays put when the weather gets rough.

    Table of Contents

    Smart Photovoltaic Mounting Solutions for Tight Budgets

    Smart Photovoltaic Mounting Solutions for Tight Budgets

    When you’re working with a tight budget, it’s easy to get tunnel vision on the panels themselves and forget that the skeleton holding them up is just as important. I’ve seen too many DIY setups fail because someone tried to save a few bucks by using whatever scrap metal they had lying around. If you want to do this right without draining your savings, look for roof-mounted solar installation kits that bundle the essentials. These kits are usually more cost-effective than buying every bracket and rail separately, and they ensure the components are actually compatible.

    If you aren’t installing on a roof, you’ll likely be looking at ground mount solar hardware. My advice? Don’t skimp on the quality of your connections. Even if you’re buying a budget-friendly frame, make sure you’re using corrosion resistant solar fasteners. It’s a small upfront cost that prevents a massive headache—and a total system teardown—down the road when the elements start hitting your setup. You want your gear to last as long as the cells themselves, not just until the first big storm hits.

    Choosing Durable Solar Array Structural Components

    Choosing Durable Solar Array Structural Components.

    When you’re picking out your solar array structural components, don’t get blinded by the flashy marketing of high-end commercial kits. I’ve seen too many DIY setups fail because someone skimped on the actual skeleton holding the panels up. If you’re doing a roof-mounted solar installation kit, the integrity of your rails and clamps is everything. You need materials that can handle the weight of the panels plus the extra load of wind and snow without buckling.

    I always tell my clients to look closely at the metal quality. If you live anywhere near the coast or even just in a high-humidity area, you absolutely need corrosion resistant solar fasteners. There is nothing more frustrating than spending thousands on panels only to have the whole system compromised by rust in five years because you used cheap, standard bolts. It’s a small upfront cost that saves you a massive headache—and a massive repair bill—down the road. Stick to stainless steel or heavily galvanized options; it’s just basic math for long-term efficiency.

    5 Ways to Pick Hardware That Actually Lasts (Without Breaking the Bank)

    • Don’t skimp on the material; stick to anodized aluminum or stainless steel so you aren’t replacing rusted-out brackets in three years.
    • Check your roof’s load capacity before buying heavy-duty rails, because adding weight you didn’t account for is a recipe for structural headaches.
    • Look for universal mounting kits that work with multiple panel brands—it gives you more flexibility if you decide to expand your setup later.
    • Double-check the wind rating on your mounting hardware; a cheap mount might save you twenty bucks now, but it won’t save your panels during a storm.
    • Prioritize hardware with integrated grounding features to save yourself the extra time and the cost of buying separate grounding clips.

    Quick Wins for Your Solar Setup

    Don’t get blinded by high-end brands; focus on finding mounting gear that balances durability with your actual budget so you can start seeing those utility savings sooner.

    Always prioritize materials that can actually handle your local weather, because replacing a failed mount is way more expensive and wasteful than just buying the right hardware the first time.

    Keep it simple and modular—using scalable mounting components makes it way easier to expand your system later without having to scrap everything and start from scratch.

    ## Don't Let Bad Hardware Kill Your ROI

    “I’ve seen too many people invest heavily in high-end panels only to have their energy savings wiped out because they cheaped out on the mounting hardware. If your racking isn’t secure and properly angled, you aren’t just risking damage—you’re literally letting potential energy leak out of your budget.”

    Tobias Nkemdirim

    Getting It Right for the Long Haul

    Getting It Right for the Long Haul.

    At the end of the day, picking your mounting hardware isn’t just about finding the cheapest rails or brackets on a spreadsheet. It’s about balancing your upfront costs with the reality of how long those panels need to sit on your roof. Whether you opted for budget-friendly aluminum profiles or decided to invest a bit more in heavy-duty, corrosion-resistant steel, the goal remains the same: stability and efficiency. If your mount fails or shifts, your entire energy investment is compromised. Don’t let a few dollars saved today turn into a massive repair bill—or a total system failure—next winter. Focus on durable, high-quality components that can actually withstand the elements without breaking your bank.

    I know that transitioning to solar can feel like a massive, overwhelming mountain to climb, especially when you’re trying to keep your living costs low. But remember, every smart choice you make with your hardware is a step toward a home that works for you, not against you. You don’t need a massive solar farm to make a difference; you just need a system that is built to last. By prioritizing efficiency and smart spending now, you’re securing a future where your energy is clean, your bills are predictable, and your footprint is smaller. Let’s stop wasting potential and start building homes that actually make sense for the planet and our wallets.

    Frequently Asked Questions

    How do I know if the mounting hardware I'm buying can actually handle the wind loads in my specific area?

    Don’t just guess on this—getting it wrong means your panels become expensive projectiles. First, look up your local wind speed maps or building codes; you need to know your area’s specific design wind speed. Once you have that number, check the hardware’s spec sheet for its rated wind load capacity. If the manufacturer doesn’t explicitly list those stats, skip them. I always check the load ratings against my local data before I recommend anything.

    Is it worth spending more on aluminum rails, or can I get away with cheaper galvanized steel without risking rust?

    Look, I get the temptation to go with galvanized steel to save a few bucks upfront, but here’s the reality from my audits: it’s a gamble. If you’re in a high-humidity area or near the coast, that “cheap” steel will start fighting you with rust way sooner than you think. I usually recommend aluminum rails. They’re more expensive, yeah, but they’re lightweight and won’t corrode, meaning you won’t be replacing your whole mounting system in five years.

    What's the easiest way to mount panels on an older roof without causing leaks or damaging the shingles?

    If you’re dealing with an older roof, the last thing you want to do is create a dozen new puncture points. Honestly, the safest bet is using a rail-based mounting system with high-quality flashing. Don’t skimp here—use thick, EPDM rubber gaskets under your mounting brackets. It creates a much better seal than just relying on caulk, which eventually dries out and cracks. It’s about protecting your roof’s integrity so you aren’t trading energy savings for expensive leak repairs later.

  • Balancing Ventilation Efficiency and Energy Loss

    Balancing Ventilation Efficiency and Energy Loss

    I still remember sitting in my old rental apartment three years ago, shivering under three layers of blankets while the heater hummed uselessly in the corner. I’d check my infrared thermometer, and the readings were brutal—heat was literally escaping through every tiny gap and poorly placed vent. Most people think you need to gut your house with a massive HVAC overhaul to fix your ventilation efficiency, but that’s a total myth designed to separate you from your paycheck. You don’t need a high-tech, thousand-dollar system to stop the draft; you just need to understand how air actually moves through your specific space.

    I’m not here to sell you on expensive, shiny gadgets that promise the world but deliver nothing. Instead, I’m going to show you how to audit your own airflow using practical, low-cost tweaks that actually work. We’re going to look at the data, find the leaks, and get your home breathing properly without draining your bank account. My goal is simple: to help you master your home’s environment so you can stop wasting money and start living comfortably.

    Table of Contents

    Slash Your Hvac Energy Consumption Without Luxury Upgrades

    Slash Your Hvac Energy Consumption Without Luxury Upgrades

    Most people think the only way to fix a stuffy or inefficient house is to drop five figures on a new smart HVAC system. That’s just not true. I’ve audited enough homes to know that your biggest problem usually isn’t the machine itself, but how the air actually moves through your space. If your vents are blocked by furniture or your filters are caked in dust, your system is working twice as hard to move half the air. Focusing on effective airflow distribution is the easiest win; make sure your supply and return vents are completely unobstructed so the air can actually circulate instead of fighting against itself.

    Another thing I notice constantly is how people ignore the connection between air movement and humidity. If you don’t manage your humidity levels, your HVAC unit will run non-stop just trying to dehumidify the air, which spikes your HVAC energy consumption through the roof. It’s not about buying high-tech gadgets; it’s about smart moisture management. A simple dehumidifier in a damp basement or better control over your bathroom fans can do more for your monthly bill than a luxury thermostat ever will.

    Smart Moisture Management in Buildings to Protect Your Wallet

    Smart Moisture Management in Buildings to Protect Your Wallet

    Most people don’t realize that humidity is a silent killer for their bank account. When your indoor air gets too damp, your HVAC system has to work overtime just to pull moisture out of the air, which spikes your energy bills. I’ve seen it a dozen times during audits: high humidity levels making a room feel “heavy” and warm, even when the thermostat says it’s cool. Proper moisture management in buildings isn’t just about comfort; it’s about preventing that constant, expensive battle between your heater and the dampness in the air.

    To get this right, you need to look beyond just turning on a dehumidifier. It’s about ensuring you have effective airflow distribution so that stagnant, moist pockets don’t settle in corners or behind furniture. If you can manage the moisture levels, you’ll notice your heater doesn’t have to fight against “wet” air, which is much harder to heat than dry air. It’s a small shift in how you view your home’s climate, but it’s one of the most direct ways to stop wasting money on cooling and heating things that shouldn’t be happening in the first place.

    5 Low-Cost Fixes to Stop Wasting Air and Money

    • Seal the gaps around your windows and doors with simple weatherstripping. I’ve used my infrared thermometer more times than I can count to find those tiny, invisible drafts that are basically just throwing your heating budget out into the street.
    • Clean your vent covers and intake grilles regularly. It sounds basic, but a layer of dust acts like a barrier, forcing your system to work twice as hard to move the same amount of air, which is a massive waste of electricity.

    • Time your natural ventilation. Instead of leaving a window cracked all day, open them wide for just fifteen minutes during the coolest part of the morning to flush out stale air, then seal them tight to trap the temperature you actually want.
    • Check your bathroom and kitchen exhaust fans. If they’re running constantly or making a weird grinding noise, they’re likely inefficient and pulling conditioned air out of your house faster than it can be replaced.
    • Use window films during the peak of winter. It’s a cheap, clear plastic layer you apply to the glass that adds an extra insulating barrier, helping to keep the heat inside the room rather than letting it escape through single-pane glass.

    The Bottom Line on Efficient Ventilation

    You don’t need a high-end smart home system to see results; focus on the basics like cleaning your vents and sealing obvious drafts to stop paying for air that’s just escaping.

    Balance is everything—improper ventilation leads to moisture buildup that damages your home, while over-ventilating just drains your wallet through your HVAC system.

    Think of ventilation as a way to manage your environment, not just move air; small, intentional adjustments to airflow can significantly cut your monthly energy bills.

    The Real Cost of "Fresh" Air

    Most people think they’re just letting in a breeze, but when your ventilation is poorly managed, you’re actually just paying to heat the sidewalk or cool the street. Efficiency isn’t about sealing yourself in a plastic box; it’s about making sure the air you pay for actually stays where it belongs.

    Tobias Nkemdirim

    Stop Paying to Heat the Neighborhood

    Stop Paying to Heat the Neighborhood.

    At the end of the day, fixing your ventilation isn’t about installing a high-tech, thousand-dollar smart system that you’ll never learn how to use. It’s about the fundamentals: managing your airflow, keeping your moisture in check, and ensuring your HVAC isn’t working overtime just to fight against a leaky window or a blocked vent. We’ve looked at how small tweaks to your ventilation and smart moisture management can drastically cut down your monthly overhead without needing a massive renovation budget. If you take care of the air moving through your home, your home will take care of your wallet.

    I know it can feel overwhelming when you look at your utility bills and see those numbers climbing, but remember that sustainability isn’t a luxury reserved for the wealthy. It’s a series of practical, intentional choices. Every time you seal a gap or optimize a vent, you’re reclaiming a bit of your hard-earned money and reducing your footprint at the same time. Don’t feel like you have to fix everything by tomorrow morning; just pick one small thing, grab your tools, and start making your space work for you instead of against you.

    Frequently Asked Questions

    I've noticed drafts around my windows, but how do I know if it's a ventilation issue or just a bad seal?

    Here’s how I figure it out: grab that infrared thermometer I always carry. If you point it at the window frame and see a massive temperature drop compared to the glass itself, you’re looking at a bad seal. That’s a localized leak. But if the whole room feels “stale” or the air feels heavy despite the window being shut tight, you’ve likely got a ventilation imbalance. One is a hole; the other is a flow problem.

    Will adding more ventilation actually make my heating bill go up in the winter?

    Short answer: Yes, if you’re just opening windows and letting the heat escape. But that’s not what I mean by “ventilation.” If you’re talking about controlled airflow—like using a heat recovery ventilator (HRV)—you actually save money. It swaps stale, damp air for fresh air while keeping the warmth trapped inside. The goal isn’t to replace your heating with a breeze; it’s to stop your house from “breathing” through expensive cracks in the walls.

    Are there cheap, DIY ways to monitor my indoor air quality without buying expensive smart sensors?

    Look, you don’t need a $300 smart sensor to know if your air is stale. Start with the “window fog test”—if your windows are sweating in the morning, your humidity is too high and you’re risking mold. Next, use your nose; if a room smells musty or stuffy, your air exchange is failing. Even a cheap hygrometer from a hardware store gives you the data you need to act without the tech bloat.

  • The Energy Impact of Air Purifiers

    The Energy Impact of Air Purifiers

    I remember sitting in my old rental apartment, watching the dust motes dance in a sliver of sunlight and feeling completely helpless. I wanted cleaner air, but every time I looked at the specs for those high-end purifiers, I saw nothing but massive wattage numbers that felt like a financial trap. There’s this annoying myth floating around that you need a heavy-duty, power-hungry machine to actually make a difference in your indoor air quality. Honestly, most of the marketing around air purifier energy is designed to make you feel like you need to run a small factory in your living room just to breathe easy.

    I’m not here to sell you on some overpriced, “smart” gadget that drains your bank account through your electric meter. Instead, I’m going to show you how to look past the flashy specs and find the actual efficiency you need. We’ll break down how much these things really cost to run and how to pick a model that cleans your air without spiking your monthly bills. You don’t need a massive budget to breathe better; you just need to stop wasting power on gear that isn’t working for you.

    Table of Contents

    The Real Cost of Running an Air Purifier 247

    The Real Cost of Running an Air Purifier 247.

    When I’m auditing a home, I usually see people running their air purifiers on the highest setting all day, thinking more power equals cleaner air. That’s a mistake. If you’re looking at the cost of running air purifier 24/7, the real number depends on your local utility rates and the device’s wattage. A small, desktop unit might only cost you a few dollars a month, but a heavy-duty model running on “Turbo” mode can start to feel like a phantom appliance on your electric bill.

    To get a realistic idea of your air purifier electricity usage per month, you have to look past the sticker price. I always tell my clients to check the CADR (Clean Air Delivery Rate) in relation to the power draw. You want a high CADR without a massive spike in energy consumption. If you can, look for energy star rated air purifiers; they are specifically designed to maintain air quality without constantly pulling high wattage. It’s about finding that sweet spot where you aren’t paying a premium just to keep the fan spinning.

    Why Cadr vs Energy Consumption Is Your Best Friend

    Why Cadr vs Energy Consumption Is Your Best Friend

    When you’re looking at specs, it’s easy to get tunnel vision on the wattage. But a low-wattage machine is useless if it’s too weak to actually clean your room. This is where the battle of CADR vs energy consumption comes in. CADR (Clean Air Delivery Rate) tells you how much clean air the machine actually pumps out, while the power draw tells you what it’ll cost you at the end of the month. If you buy a tiny, low-power unit thinking you’re saving money, you might end up running it on “Max” mode constantly just to keep up, which actually negates any savings.

    I always tell my clients to look for the sweet spot: a high CADR paired with a low power draw. You want a machine that can scrub a room in minutes and then throttle down to a low-power setting. This is why I always check for energy star rated air purifiers during my audits; they are specifically engineered to balance that heavy-duty filtration with a much smaller footprint on your electric bill. Don’t just chase the lowest number on the sticker—chase the best ratio.

    5 Ways to Keep Your Air Clean Without Tanking Your Electric Bill

    • Stop running it on “Max” all day. Most purifiers have a sleep mode or a low setting that’s plenty for maintaining air quality once the initial heavy lifting is done. Use the high setting to clear out dust or smoke, then dial it back.
    • Clean your filters like your wallet depends on it. When a filter is clogged with dust, the motor has to work twice as hard to pull air through, which spikes your energy use. A quick vacuum or a timely replacement keeps the airflow smooth and the power draw low.
    • Check your placement, not just your settings. If you tuck your purifier in a cramped corner or behind a sofa, it’s fighting against itself to circulate air. Put it in an open area so it doesn’t have to run at high speeds just to move a tiny bit of air.
    • Use a timer or a smart plug. I love using smart plugs because I can set my purifier to run more aggressively when I’m home or cleaning, and then drop it to a whisper-quiet, low-energy mode while I’m sleeping or at work.
    • Size it right from the jump. Don’t buy a tiny unit for a massive living room; it’ll run at full blast 24/7 just to keep up, which is a massive waste of power. Match the unit’s square footage rating to your actual room size so it can cycle off more frequently.

    The Bottom Line on Purifier Efficiency

    Don’t just look at the price tag; check the wattage. A high-end machine that pulls constant high power will bleed your bank account dry long before it pays for itself in air quality.

    Focus on the Clean Air Delivery Rate (CADR) relative to the energy used. You want the most “clean air per watt” possible, not just the loudest or most expensive unit on the shelf.

    Use smart settings instead of leaving it on “Max” all day. Running a purifier on a timer or a sensor-based auto mode is the easiest way to keep your air clean without paying for unnecessary electricity.

    ## Efficiency Over Everything

    “Most people buy an air purifier based on the fancy display or the sleek design, but they forget the most important metric: how much it’s going to bleed their bank account every month. I’d rather see you run a mid-range unit on a smart cycle than watch you pay a premium for a ‘smart’ device that burns through power like it’s free.”

    Tobias Nkemdirim

    The Bottom Line on Clean Air

    The Bottom Line on Clean Air efficiency.

    At the end of the day, running an air purifier doesn’t have to be a constant battle with your electric meter. We’ve looked at how the actual wattage matters far less than the efficiency of the filtration you’re getting for that power. By focusing on the CADR rating and being smart about your run times—using high modes only when the air is visibly heavy and switching to low during sleep—you can maintain a healthy environment without the unnecessary utility spikes. It’s about working smarter with the tech you have, rather than just leaving everything on “max” and hoping for the best.

    I know how it feels to stare at a utility bill and wonder where all that money went, especially when you’re just trying to take care of your health. But living sustainably and breathing clean air shouldn’t be a luxury reserved for people with massive budgets. If you take these small, data-driven steps, you’ll find that you can protect your lungs and your wallet at the same time. Let’s stop treating energy waste as an inevitable part of modern life and start making intentional, efficient choices that actually count.

    Frequently Asked Questions

    Is it actually better to run my purifier on low all day rather than blasting it on high for an hour?

    Think of it like a car: you wouldn’t floor the gas pedal for sixty seconds and then turn the engine off every time you wanted to move. It’s inefficient. Running your purifier on low continuously maintains a steady state of clean air and prevents the motor from constantly cycling between high-draw spikes. It’s easier on the machine, better for your electricity bill, and—most importantly—it keeps the air quality stable instead of letting pollutants build back up.

    Can I use a smart plug or a timer to automate my purifier so it isn't sucking power while I'm at work?

    Absolutely. In fact, I’d recommend it. I’ve audited plenty of homes where appliances sit on “standby” all day, pulling phantom power for no reason. Using a smart plug or a simple mechanical timer is a low-cost win. You can set it to ramp up an hour before you get home and shut down while you’re at work. It’s a small, smart tweak that keeps your air clean without letting your bill bleed out.

    How much of an impact does the type of filter I use—like HEPA versus a cheaper carbon one—have on the motor's energy draw?

    It’s a common misconception that the filter type dictates the power draw, but it’s actually about resistance. A thick, high-grade HEPA filter is denser, meaning your motor has to work harder—and pull more current—to pull air through those tiny fibers. A cheap carbon filter might offer less filtration, but it’s often more “breathable” for the machine. If you’re swapping filters, watch for that slight bump in energy use when moving to denser HEPA models.

  • Effective Sprays for Solar Panel Maintenance

    Effective Sprays for Solar Panel Maintenance

    I was standing on a client’s roof last Tuesday, clicking my infrared thermometer against a set of panels that looked perfectly fine to the naked eye, only to see the efficiency numbers tanking. It’s the same frustration I had growing up in that drafty rental; you think you’re doing everything right, but you’re literally leaking money through things you can’t see. Most people think they need a professional crew or some heavy-duty industrial chemical wash to fix this, but honestly, a lot of that high-end marketing is just noise. You don’t need a massive budget to fix a layer of grime; often, the right solar panel cleaning spray is the difference between a system that actually pays for itself and one that’s just an expensive piece of glass sitting on your roof.

    I’m not here to sell you on some miracle product that costs a fortune. My goal is to cut through the marketing fluff and show you how to maintain your setup without breaking the bank. I’ll be sharing my no-nonsense breakdown of which sprays actually work, how to apply them without damaging your cells, and how to ensure you’re getting every single watt of free energy possible.

    Table of Contents

    Preventing Solar Panel Grime to Keep Bills Low

    Preventing Solar Panel Grime to Keep Bills Low

    The thing about solar panels is that they’re basically giant magnets for whatever is floating in your local air. If you live near a busy road or in an area with high pollen, that thin layer of film builds up faster than you think. I’ve seen it happen during my audits—people think their system is failing because the output is dropping, but really, they’re just looking at a layer of grit. Preventing solar panel grime isn’t just about aesthetics; it’s about ensuring those photons actually reach the cells instead of getting bounced away by a dusty surface.

    To keep things running smoothly, you need to be strategic about how you clean. I always tell people to steer clear of harsh chemicals or stiff brushes that can scratch the glass. Instead, look into non-abrasive solar cleaners that lift the dirt without compromising the surface. If you want to get really proactive, some newer solar panel coating technology can actually help water bead off more effectively, making the self-cleaning process a bit more efficient during rainstorms. It’s all about those small, consistent habits that keep your energy output from dipping.

    Maximize Solar Efficiency Without Breaking the Bank

    Maximize Solar Efficiency Without Breaking the Bank

    When I’m out doing audits, I often see homeowners who think they’ve hit a plateau with their energy savings, only to realize their hardware is just struggling to breathe through a layer of grit. To truly maximize solar efficiency, you have to look beyond just the occasional rinse. It’s about a consistent rhythm of care. I always tell my clients that photovoltaic cell maintenance shouldn’t be a massive, expensive quarterly project; it’s more about small, manageable habits that ensure your investment actually performs the way the manufacturer promised.

    If you’re looking to level up, I’d suggest looking into non-abrasive solar cleaners rather than reaching for whatever harsh chemical is sitting under your sink. Using something too aggressive can actually damage the protective layers on your panels, which is the last thing you want when you’re trying to lower long-term costs. I’ve found that staying on top of the grime is the most cost-effective way of improving energy output without needing to buy more hardware. It’s simple math: cleaner panels mean more juice, which means a faster return on what you’ve already spent.

    5 Ways to Keep Your Panels Working Harder

    • Skip the harsh detergents; most household soaps leave a film that actually traps more dirt, so stick to a dedicated solar spray that rinses clean.
    • Timing is everything—don’t spray your panels in the heat of the midday sun or you’ll deal with water spots that act like tiny magnifying glasses for heat damage.
    • Use a soft-bristled brush or a microfiber cloth with your spray to avoid micro-scratches that can permanently drop your energy output.
    • Check your local water quality first; if you have hard water, use a deionized spray to prevent calcium buildup from blocking the light.
    • Don’t wait for a massive buildup to act; a quick, light spray once a month is way more effective (and cheaper) than a heavy-duty scrub once a year.

    The Bottom Line on Keeping Your Panels Productive

    Don’t let a thin layer of dust or bird droppings act like a tax on your electricity; regular cleaning with a proper spray ensures you’re actually capturing the sunlight you’re paying for.

    Skip the harsh chemicals that can damage the glass; stick to a dedicated solar cleaner to protect your investment and keep your efficiency numbers where they should be.

    Think of cleaning as a maintenance task, not a chore—a quick spray every few months is a small effort that prevents massive energy waste and keeps your utility bills from creeping up.

    ## Don't Let Dirt Tax Your Energy

    “I’ve seen too many people treat solar panels like ‘set and forget’ appliances, but if you let a layer of grime build up, you’re essentially paying a hidden tax on every kilowatt you fail to capture. A decent cleaning spray isn’t a luxury; it’s a tool to make sure the hardware you already invested in actually does its job.”

    Tobias Nkemdirim

    Keeping the Momentum Going

    Keeping the Momentum Going with solar maintenance.

    At the end of the day, maintaining your solar setup doesn’t need to be a massive, expensive undertaking. We’ve looked at how a bit of regular maintenance—specifically using the right cleaning spray—can prevent grime from choking your output and eating into your monthly savings. It’s about moving away from the “set it and forget it” mindset that leads to wasted energy. By choosing a cleaner that actually protects your panels rather than leaving behind harsh residues, you’re ensuring that your investment works as hard as it possibly can. It’s a small, data-backed habit that pays off every time your meter stops spinning quite so fast.

    I know it can feel like one small task won’t change much in the grand scheme of the climate crisis, but that’s where we get it wrong. Sustainability isn’t just about the big, flashy tech; it’s about the smart, intentional ways we manage what we already have. Every bit of sunlight you capture instead of letting it bounce off a layer of dust is a win for your wallet and a win for the planet. Don’t let your hard-earned energy go to waste just because of a little bit of dirt. Keep your panels clean, keep your bills low, and let’s make living sustainably a standard, not a luxury.

    Frequently Asked Questions

    Is it actually worth buying a specialized spray, or can I just use a garden hose and some mild soap?

    Look, I get the temptation to just grab the garden hose and some dish soap—it’s easier and cheaper. But here’s the reality: standard soaps can leave a thin film that actually attracts more dust over time, creating a cycle of grime. If you’re on a tight budget, a soft cloth and plain water are fine, but a dedicated spray is worth it for the long game. It breaks down the buildup without leaving that sticky residue.

    How often do I really need to clean them to see a noticeable difference in my energy savings?

    Honestly, it depends on your environment, but I usually tell people to check them every few months. If you’ve got heavy pollen, dust, or bird droppings building up, you’ll see a drop in efficiency almost immediately. I always say: don’t wait for a massive bill to notice. If you see a visible film of grime, clean them. It’s better to spend twenty minutes cleaning now than losing 10-15% of your power output all month.

    Will using a harsh cleaning chemical actually damage the anti-reflective coating on my panels?

    Short answer: Yes, absolutely. Don’t do it. Most solar panels have a specialized anti-reflective coating designed to catch as much light as possible, and harsh chemicals—especially anything with abrasives or high acidity—can eat right through that layer. Once that coating is compromised, your efficiency takes a massive hit, and you’re basically paying for hardware that’s underperforming. Stick to a soft brush and plain water; it’s safer for your wallet and your panels.

  • How Ground Source Geothermal Heating Functions

    How Ground Source Geothermal Heating Functions

    I still remember sitting in my old rental apartment, shivering under three blankets while watching my utility bill climb higher than the temperature inside. It felt like a scam—paying a fortune just to fight a losing battle against the cold. Most people think you need to be a millionaire or live in a high-tech eco-mansion to access serious efficiency, but that’s a lie. People get so lost in the jargon of geothermal heating mechanics that they miss the actual point: it’s about tapping into a constant, free energy source right under your feet to stop flushing money down the drain.

    I’m not here to sell you a lifestyle brand or some over-engineered fantasy that requires a PhD to operate. My goal is to strip away the complexity and show you how these systems actually function in a real-world setting. I’ll break down the practical realities of how heat moves from the earth into your living room, without the fluff or the sales pitch. You’re going to walk away knowing exactly how this tech works and, more importantly, whether it’s a smart investment for your specific home and budget.

    Table of Contents

    Mastering the Geothermal Energy Exchange Process

    Mastering the Geothermal Energy Exchange Process.

    To understand how this actually works in a real home, you have to look at the geothermal energy exchange process as a continuous loop of moving heat rather than creating it. Unlike a furnace that burns fuel to generate warmth, a geothermal system essentially acts as a heat mover. It relies on the fact that even when the air above ground is freezing, the temperature a few feet below the surface stays relatively constant. By tapping into this stable temperature, the system uses a fluid to pull warmth from the earth during the winter and dump excess heat back into the ground during the summer.

    The efficiency of this movement depends heavily on your specific setup, specifically the choice between closed-loop vs open-loop systems. In a closed-loop setup—which is what I see most often in residential audits—a continuous loop of high-density polyethylene pipe circulates a heat-transfer fluid. The success of this entire operation hinges on the thermal conductivity of soil in your backyard; if your soil doesn’t transfer heat well, your system has to work much harder to achieve the same results. It’s all about optimizing that subsurface connection to ensure you aren’t fighting against your own landscape.

    How the Refrigerant Evaporation Cycle Saves You Money

    How the Refrigerant Evaporation Cycle Saves You Money

    To understand why this tech actually pays off, you have to look at the physics of the refrigerant evaporation cycle. Think of it like a high-tech version of how sweat cools your skin. Inside the unit, a specialized fluid absorbs heat from the ground—even when it’s freezing outside—and turns from a liquid into a gas. This phase change is where the magic happens; it’s the moment the system captures that low-grade warmth from the earth and concentrates it into something usable for your living room.

    Because we aren’t burning fuel to create heat, but rather just moving it, the efficiency is insane. Whether you are looking at closed-loop vs open-loop systems, the core principle remains the same: you’re leveraging the constant temperature of the earth to do the heavy lifting. Instead of your furnace fighting an uphill battle against the winter air, the system just pulls from a steady, reliable source. It’s a smarter way to manage your home’s climate without constantly flushing money down the drain every time the temperature drops.

    5 Ways to Get the Most Out of Your Geothermal Setup

    • Don’t ignore your loop integrity; even a tiny pressure drop in your ground loop means your heat pump is working twice as hard to move half the energy, which is basically just throwing money into the dirt.
    • Size your system for your actual footprint, not your “dream home” plans; an oversized heat pump will cycle too frequently, which kills efficiency and puts unnecessary wear on the compressor.
    • Keep your indoor air filters spotless, because if your airflow is restricted, the entire thermal exchange process stalls out, forcing the system to struggle against its own mechanics.
    • Insulate your heat pump’s distribution lines as heavily as you would your exterior walls; there’s no point in extracting heat from the earth if you’re losing it all through the pipes before it even reaches your living room.
    • Monitor your thermostat’s “deadband”—the temperature gap between heating and cooling—to ensure the system isn’t constantly toggling between modes, which is a massive energy drain.

    The Bottom Line on Geothermal Efficiency

    You aren’t actually “creating” heat; you’re just moving it. By leveraging the constant temperature of the earth, you stop fighting the weather and start using physics to do the heavy lifting.

    The real savings happen in the cycle. The way the refrigerant moves heat from the ground into your home is what prevents you from constantly burning through expensive, traditional fuels.

    It’s a long-term play for your wallet. While the tech sounds complex, the goal is simple: stop flushing money down the drain on inefficient heating and start investing in a system that works with nature, not against it.

    ## Efficiency Isn't About Luxury

    “Most people think sustainable heating is a luxury reserved for the wealthy, but geothermal mechanics prove otherwise; it’s just about stoping the cycle of fighting against your environment and instead, finally working with it to keep your money in your pocket.”

    Tobias Nkemdirim

    Making the Switch Count

    Making the Switch Count with geothermal heating.

    At the end of the day, geothermal heating isn’t just some complex physics experiment; it’s a practical way to stop fighting against the seasons and start working with them. By understanding how the ground-source exchange works and how the refrigerant cycle pulls heat from the earth, you can see that this isn’t just about “going green.” It’s about reclaiming control over your monthly expenses. Instead of paying for inefficient combustion or high-voltage electric resistance, you’re leveraging a constant, natural thermal reservoir to keep your space comfortable. It’s a shift from wasting energy to managing it intelligently through smart mechanics.

    I know the upfront costs can feel intimidating—I’ve stood in drafty apartments myself, staring at utility bills that felt like a punishment. But when you look at the long-term data, the math starts to change. Investing in geothermal is one of the most effective ways to decouple your comfort from the volatility of fossil fuel prices. You don’t need to be a millionaire to start thinking this way; you just need to start prioritizing efficiency over convenience. Let’s stop throwing money into the air and start building homes that actually respect both our wallets and the planet.

    Frequently Asked Questions

    Is the upfront cost of installing a geothermal loop actually worth it if I'm on a tight budget?

    Look, I get it. The sticker shock on a geothermal install is real, and when you’re watching every cent, it feels impossible. If you’re looking for immediate relief next month, this isn’t it. But if you’re playing the long game, it’s a different story. Between the massive drop in monthly utility bills and the available tax credits, the system eventually pays for itself. It’s an investment in stopping the slow leak of cash from your bank account.

    How much maintenance should I expect to do compared to a standard gas or electric furnace?

    Honestly, it’s a relief. If you’re coming from a standard gas or electric furnace, you’re going to love this. Since the heavy lifting happens underground in a sealed loop, there’s far less mechanical wear and tear in your living space. You’ll still need to swap filters and check the heat pump regularly, but you aren’t dealing with constant combustion or messy fuel deliveries. It’s much more “set it and forget it” than a gas furnace.

    Will a geothermal system actually work in my specific climate, or is it only efficient in certain regions?

    I get this question a lot when I’m out on audits. The short answer? Yes, it’ll work almost anywhere. Unlike air-source heat pumps that struggle when the temperature drops below freezing, geothermal taps into the earth’s constant temperature. Whether you’re in a humid coastal area or a place where the ground freezes solid, that subterranean warmth stays stable. You aren’t fighting the weather; you’re bypassing it entirely to keep your costs predictable.

  • Managing Dehumidifier Energy Consumption

    Managing Dehumidifier Energy Consumption

    I still remember the damp, heavy chill of my first rental apartment—the kind of moisture that settles into your bones and makes your clothes feel slightly limp. I spent most of my nights listening to the constant, aggressive hum of a cheap dehumidifier, terrified that every hour it ran was just another dent in my bank account. Most people will tell you that managing humidity is an “all or nothing” game where you either live in a swamp or pay a massive premium on your electric bill. They make it sound like you have to choose between a healthy home and a functional budget, but that’s just not true. The reality of dehumidifier energy use isn’t about buying the most expensive, high-tech unit on the market; it’s about understanding how to run what you have without bleeding money.

    I’m not here to sell you on some “smart” gadget that costs more than your monthly rent. Instead, I’m going to give you the actual, data-driven ways to monitor your dehumidifier energy use and optimize it for real-world living. We’re going to look at the small, practical tweaks that actually move the needle on your utility costs. My goal is to help you keep your air dry and your carbon footprint small without sacrificing your sanity or your savings.

    Table of Contents

    Choosing Energy Star Rated Dehumidifiers to Save Big

    Choosing Energy Star Rated Dehumidifiers to Save Big.

    When I’m auditing a home, I often see people buying the cheapest unit they can find at a big-box store, only to realize later they’re essentially paying a “convenience tax” every single month. If you want to see a real difference in your monthly statement, you need to look for energy star rated dehumidifiers. These units are engineered to pull moisture from the air without pulling massive amounts of current from your socket. It’s a classic case of spending a little more upfront to avoid a massive headache—and a massive bill—down the line.

    It’s also worth noting that not all technology is created equal when it comes to efficiency. You’ll often see a debate about compressor vs desiccant energy consumption; generally, compressor models are much more efficient for standard home use, whereas desiccant types can be power-hungry. I always tell my clients to match the machine to the space. If you try to run a small unit in a massive basement, it’ll run non-stop, spiking your kilowatt hours per day and defeating the whole purpose of owning one. Match the capacity to your room size, and you’ll actually see the savings.

    Understanding Kilowatt Hours Per Day Dehumidifier Realities

    Understanding Kilowatt Hours Per Day Dehumidifier Realities.

    When I’m out on an audit, I often see people staring at their utility bills, wondering why the numbers are spiking. Usually, it’s because they’re treating their dehumidifier like a set-it-and-forget-it appliance without looking at the actual math. To get a real sense of your costs, you have to look at the kilowatt hours per day dehumidifier models actually pull while running. It isn’t just about the wattage on the sticker; it’s about how long that compressor stays engaged to hit your target.

    The math changes drastically depending on whether you’re running a compressor model or a desiccant one. In my experience, the compressor vs desiccant energy consumption debate is huge for your wallet; compressors are generally more efficient for standard home use, whereas desiccants can be real power hogs if you aren’t careful. You also can’t ignore the impact of room size on power usage. If you try to dry out a massive, uninsulated basement with a small unit, it’ll run 24/7, effectively turning your dehumidifier into a very expensive heater that does nothing but drain your bank account.

    5 Ways to Stop Your Dehumidifier from Eating Your Budget

    • Set the humidity target to 45-50%. If you try to dry out your house to 30%, you’re just fighting a losing battle against physics and watching your meter spin for no reason.
    • Keep it in the center of the room, not tucked in a corner. Air needs to circulate around the unit to work efficiently; if it’s choked for space, the motor works twice as hard to pull in the same amount of moisture.
    • Clean those filters weekly. I see this all the time during audits—dusty filters force the machine to struggle, which spikes your energy draw. A quick rinse can actually make a measurable difference in your monthly bill.
    • Use a continuous drain hose if you can. Relying on the internal tank means the machine shuts off and on constantly; a steady drain keeps the cycle more consistent and prevents unnecessary energy spikes from constant restarts.
    • Seal the room you’re treating. There’s no point in running a high-powered machine if you have a drafty window or a gap under the door letting in more humid air. Close the loop so the machine isn’t trying to dehumidify the entire neighborhood.

    The Bottom Line: Keeping it Dry Without Draining Your Wallet

    Don’t just look at the price tag on the box; check the energy label. A slightly more expensive, efficient model will pay for itself in lower monthly bills long before you know it.

    Stop running your unit on max power 24/7. Use a built-in humidistat to set a target level so the machine only kicks in when it actually needs to work.

    Keep the airflow clear. If your dehumidifier is tucked in a cramped corner or covered in dust, it’s working twice as hard for half the result, which is just throwing money away.

    ## The Real Cost of Dampness

    “Most people see a dehumidifier as a way to save their walls from mold, but they forget it’s also a constant drain on their bank account; if you aren’t monitoring the actual draw, you’re basically just paying a monthly tax for inefficient air.”

    Tobias Nkemdirim

    Cutting the Humidity Without Cutting Your Budget

    Cutting the Humidity Without Cutting Your Budget

    At the end of the day, managing moisture in your home doesn’t have to be a constant drain on your wallet. We’ve looked at how much sense it makes to invest in an Energy Star model and how to actually track those kilowatt-hours so you aren’t flying blind. It really comes down to intentionality. Whether you are setting a timer to avoid running the unit during peak pricing or simply ensuring the room is sealed tight so the machine isn’t fighting against a drafty window, these small adjustments add up. You don’t need a massive home automation system to see a difference; you just need to stop letting energy leak through the cracks of your daily routine.

    I know it can feel overwhelming to think that every small appliance is another way to lose money, but I promise you, it isn’t. Living sustainably isn’t about living in deprivation; it’s about being smart with the resources you already have. When you optimize your dehumidifier, you aren’t just lowering a number on a utility bill—you are reclaiming control over your living space and your impact on the planet. Start with one small tweak this week. You’ll find that efficiency is a habit, not a luxury, and once you start seeing those savings, you won’t want to go back.

    Frequently Asked Questions

    Is it actually cheaper to run a dehumidifier on a timer rather than leaving it on 24/7?

    It depends on your home’s moisture baseline, but generally, yes—running it on a timer is cheaper. If you leave it on 24/7, you’re paying to fight humidity that might not even be there. I usually recommend setting it to kick in during the peak humidity hours or when you’re actually home. It prevents that constant, wasteful cycle and keeps your bill from creeping up for no reason. Just don’t let the levels spike too high.

    How much of an impact does the actual room temperature have on my electricity bill when the unit is running?

    Here’s the reality: temperature is a massive factor. Dehumidifiers work by pulling moisture from the air, but they struggle in cold rooms. If your space is chilly, the unit has to work twice as hard to process that air, often causing the coils to frost up. This triggers the defrost cycle, which eats up electricity without actually removing any water. Keeping your room at a steady, moderate temperature is the easiest way to keep those bills from spiking.

    At what point does the cost of running a dehumidifier outweigh the benefits of preventing mold?

    It’s a balancing act, but here’s the reality: if you’re constantly fighting mold with chemicals or expensive repairs, the electricity cost is already a losing battle. The cost only outweighs the benefit when you’re running a massive, inefficient unit in a space that’s actually well-sealed. If your humidity stays high despite the machine running, you don’t have a dehumidifier problem—you have a structural leak or ventilation issue that no amount of power can fix.

  • Ways to Prevent Heat Loss From Water Tanks

    Ways to Prevent Heat Loss From Water Tanks

    I still remember the winter I spent in that drafty rental apartment, shivering every time I stepped into the shower because the water temperature felt like it was dropping by the second. I used to think I just needed a bigger heater or a more expensive boiler, but the truth was much simpler and, frankly, a bit embarrassing. I was literally watching my money vanish into thin air because I hadn’t looked at the basics. Most people think that insulating water tanks requires some high-end, professional retrofit that costs a fortune, but that’s a total myth. You don’t need a massive capital investment to stop your hot water from losing its edge; you just need to stop the heat from escaping through the sides of the tank like it’s looking for an exit.

    I’m not here to sell you on expensive, complicated HVAC systems or “smart” gadgets that do nothing but drain your wallet. My goal is to give you the straightforward, data-backed reality of how to do this yourself. I’ll show you exactly how to tackle the job using low-cost materials that actually work, so you can keep your water hot and your utility bills down to earth.

    Table of Contents

    Lowering Utility Bills With Insulation and Smart Heat Retention

    Lowering Utility Bills With Insulation and Smart Heat Retention

    When I’m auditing a home, the water heater is often the biggest “silent” thief of electricity or gas. Most people assume that once the water is hot, the job is done. But if your tank isn’t wrapped, it’s constantly fighting a losing battle against the ambient air in your utility closet or basement. This is where reducing standby heat loss becomes a game-changer for your wallet. Instead of your heater cycling on and off all night just to maintain temperature, a proper layer of thermal protection keeps that heat locked inside where it belongs.

    I always recommend looking into specific water heater jacket benefits because they are one of the most cost-effective upgrades you can make. You don’t need a massive renovation; you just need high-quality thermal insulation materials for tanks to create a barrier. By installing a simple jacket, you aren’t just being “green”—you are directly lowering utility bills with insulation that pays for itself within a few months. It’s a small, pragmatic step that turns a massive energy drain into a much more controlled, efficient system.

    Reducing Standby Heat Loss Without Breaking the Bank

    Reducing Standby Heat Loss Without Breaking the Bank

    Most people don’t realize that their water heater is essentially a giant, expensive radiator that stays on all day, even when nobody is using it. This constant leakage is what we call standby heat loss, and it’s a massive silent killer for your monthly budget. I’ve seen so many homes where the tank sits in a utility closet, radiating heat into the surrounding air instead of keeping the water hot for your shower. It’s incredibly frustrating to see that much energy just vanish.

    The good news is that reducing standby heat loss doesn’t require a massive renovation or a high-end plumber. If you’re looking for a high-impact, low-cost fix, I always suggest looking into a water heater jacket. These are essentially thermal blankets designed specifically for your unit. By using high-quality thermal insulation materials for tanks, you create a barrier that traps the heat exactly where it belongs. It’s one of those small, pragmatic wins that pays for itself within a few months of seeing your utility statement.

    5 Quick Wins to Stop Your Hot Water from Escaping

    • Grab a high-quality thermal jacket specifically designed for your tank size; it’s a much tighter, more effective fit than trying to DIY something with old blankets.
    • Check your temperature settings—if your thermostat is cranked up way past 60°C (140°F), you’re just fighting a losing battle against heat loss and wasting electricity.
    • Don’t forget the pipes; wrapping the first meter of pipe coming out of the tank in foam lagging can stop a massive amount of heat from bleeding out before it even reaches your tap.
    • Use my favorite tool—an infrared thermometer—to scan your tank and pipes; if you see a sudden temperature drop, you’ve found a leak or a spot that needs more insulation.
    • If you’re dealing with an older, uninsulated tank, even a basic reflective wrap can act as a decent barrier to keep that stored energy where it belongs.

    The Bottom Line on Tank Insulation

    Stop letting heat bleed out of your water tank; a simple, inexpensive insulation jacket is one of the fastest ways to see a drop in your monthly energy spend.

    Focus on the “low-hanging fruit” first—insulating your pipes and tank provides immediate thermal retention without needing a massive upfront investment.

    Efficiency isn’t about buying expensive tech; it’s about plugging the leaks in your current system so you aren’t paying to heat air that’s just escaping into the room.

    The Invisible Leak

    “Most people focus on drafty windows, but they completely ignore the massive heat sink sitting in their utility closet. An uninsulated water tank is basically just a slow leak for your bank account; wrapping it isn’t just about being ‘green,’ it’s about stopping your money from evaporating into thin air.”

    Tobias Nkemdirim

    The Bottom Line on Heat Retention

    The Bottom Line on Heat Retention.

    At the end of the day, insulating your water tank isn’t some complex engineering project; it’s just common sense. We’ve looked at how a simple thermal jacket can stop heat from bleeding into the air and how managing standby loss can keep your utility bills from spiking for no reason. I’ve seen too many people pay for energy they never actually use, simply because they ignored the hardware sitting in their utility closet. By focusing on these small, high-impact adjustments, you aren’t just saving a few cents on your monthly statement—you are actively plugging the leaks in your home’s thermal envelope.

    I know that when you’re staring at a rising energy bill, it feels like the system is rigged against you. But sustainability shouldn’t be a luxury reserved for people with massive budgets and solar arrays. It starts with these practical, low-cost wins that anyone can implement. Every bit of heat you trap is a win for your wallet and a win for the planet. Don’t let your hard-earned money evaporate through a preventable mistake; take a moment to check your setup, grab some insulation, and start taking control of your energy footprint today.

    Frequently Asked Questions

    Do I need to worry about the insulation affecting the temperature settings on my water heater?

    Short answer: No, you don’t need to worry about the thermostat itself. The insulation sits on the outside of the tank, so it won’t mess with the internal sensors or your temperature settings. Think of it like wearing a puffer jacket; your body heat stays the same, you’re just not losing it to the air. Just make sure you don’t wrap the actual heating elements or any pressure relief valves. Keep the sensors clear, and you’re good.

    Is it worth buying a pre-made jacket, or can I just use leftover materials I have around the house?

    Look, if you’re trying to save money, DIY is tempting, but it’s a gamble. Using leftover scraps for a makeshift jacket wrap or insulation can work for small, specific gaps, but it’s rarely as effective as a purpose-built solution. If you’re repurposing materials, focus on high-density stuff. Otherwise, invest in a decent, pre-made thermal jacket for your tank. It’s a small upfront cost that pays for itself much faster than a patchwork job.

    How often should I check the insulation to make sure it hasn't degraded or become damp?

    I’d recommend a quick visual check every six months—ideally when you switch from heating to cooling or vice versa. Grab your thermometer and run it along the tank; if you see sudden temperature drops, the insulation is failing. Most importantly, feel for dampness. If the jacket feels soggy or looks discolored, moisture has likely seeped in, which actually destroys its effectiveness. Don’t wait for a massive bill to realize your insulation is compromised.

  • How Geothermal Heating Systems Work

    How Geothermal Heating Systems Work

    I still remember sitting in my old rental apartment, shivering under three blankets while watching the utility meter spin like it was possessed. It was a losing battle; I was paying a premium just to fight a drafty house that couldn’t hold onto a single degree of warmth. Most people hear about geothermal heating systems and immediately think they need a massive inheritance or a literal estate to make it work. They get sold this idea that sustainable living is a luxury reserved for the ultra-wealthy, which is a complete load of rubbish.

    I’m not here to sell you on some high-concept, shiny green dream that costs more than your car. My goal is to strip away the marketing fluff and look at the actual data. I’ll show you how geothermal heating systems actually function in a real-world budget and whether the upfront cost truly pays off in long-term savings. We’re going to look at the practical reality of the installation, the efficiency gains, and how you can stop bleeding money through your floorboards without going broke.

    Table of Contents

    Understanding Geothermal Heat Pump Efficiency for Your Wallet

    Understanding Geothermal Heat Pump Efficiency for Your Wallet

    When I’m auditing a home, I’m usually looking for where the money is leaking out—literally. Most people think of heating as a constant battle against the air temperature, but that’s where the inefficiency lies. Geothermal heat pump efficiency works because it stops fighting the weather. Instead of trying to create heat from scratch using expensive electricity or gas, these systems tap into the ground temperature stability found just a few feet below the surface. Because the earth stays at a relatively constant temperature year-round, your unit isn’t working overtime to fight a sub-zero wind chill; it’s just moving existing warmth from the soil into your living room.

    Of course, the math gets a bit more complex depending on your property. You’ll likely run into the debate between closed loop vs open loop systems. A closed loop is generally the standard for residential setups, using a sealed pipe network to circulate fluid, while open loop systems pull directly from groundwater. While the upfront geothermal installation costs can feel like a gut punch compared to a standard furnace, you have to look at the long-term math. You aren’t just buying a heater; you’re investing in a system that treats your home like a thermal battery.

    Why Ground Temperature Stability Changes Everything

    Why Ground Temperature Stability Changes Everything.

    The reason this works so much better than a standard furnace comes down to one thing: the earth doesn’t care what the weather is doing above the surface. While your neighbor is struggling with a heat pump that’s fighting a sub-zero wind chill, your system is tapping into a constant, reliable source. Because of ground temperature stability, the earth stays at a relatively consistent temperature just a few feet down, regardless of whether it’s a heatwave or a blizzard.

    I usually explain it like this: why try to pull heat from freezing air when you can pull it from a steady, lukewarm underground reservoir? This consistency is what drives high geothermal heat pump efficiency. Instead of your HVAC system working overtime to combat extreme temperature swings, it’s just performing a steady exchange. It’s a much more predictable and stable way to manage your home’s climate. Whether you end up with closed loop vs open loop systems, the core advantage remains the same—you’re leveraging the planet’s own thermal inertia to keep your living room warm without the massive energy spikes.

    How to Make Geothermal Actually Work for Your Budget

    • Get a professional site assessment before you buy anything. I’ve seen people try to DIY the loop layout, but if your soil conductivity isn’t right, you’re just burying money in the backyard.
    • Don’t ignore your home’s insulation while installing the system. A geothermal heat pump is efficient, but it’s still fighting a losing battle if your heat is leaking out through old, drafty windows.
    • Size the system correctly for your specific square footage. Oversizing a unit is a common mistake that leads to “short-cycling,” which wears out the components and kills your energy savings.
    • Look into local government rebates and tax credits immediately. Since I started auditing homes, I’ve realized that these incentives are often the only reason the upfront cost becomes manageable for a regular person.
    • Pair your system with smart thermostats. You’ve invested in high-end tech; don’t manage it with a manual dial. Using data to automate your heating cycles is the easiest way to squeeze every bit of efficiency out of the system.

    The Bottom Line on Geothermal

    Don’t let the upfront cost scare you off; while the installation is more expensive than a standard furnace, the massive drop in your monthly utility bills means the system eventually pays for itself.

    Unlike air-source pumps that struggle when it’s freezing outside, geothermal relies on the constant temperature of the earth, making it a much more reliable way to keep your home steady without cranking the thermostat.

    Think of it as a long-term investment in your home’s efficiency rather than just a repair; you’re essentially trading high, unpredictable energy costs for a stable, low-impact system that lasts.

    ## The Real Math of Geothermal

    “Look, I’ve spent way too many winters shivering in drafty rentals because heating felt like a luxury I couldn’t afford. Geothermal isn’t just some high-tech flex for eco-conscious billionaires; it’s a practical, data-backed way to stop throwing your hard-earned money into the air every time the temperature drops.”

    Tobias Nkemdirim

    The Bottom Line on Going Geothermal

    The Bottom Line on Going Geothermal.

    Look, I know the upfront cost of a geothermal installation can feel like a gut punch when you’re looking at your bank balance. But after auditing enough homes, the math becomes pretty clear: you aren’t just buying a heating system; you’re investing in long-term energy independence. By leveraging that constant ground temperature we talked about, you’re moving away from the volatile, expensive cycle of fossil fuels and toward a system that actually works with the planet instead of against it. It’s about moving from a mindset of constant, expensive repairs to one of predictable, low-cost efficiency that pays for itself over time.

    At the end of the day, my goal has always been to prove that sustainability isn’t a luxury reserved for people with massive estates. Whether you start with a full geothermal overhaul or just focus on smaller efficiency upgrades first, the principle remains the same: stop letting your hard-earned money leak out of your windows and into the atmosphere. We have the tech to live comfortably without draining our wallets or the environment. It’s time to stop settling for inefficient, expensive “convenience” and start making smart, data-driven choices for our homes and our future.

    Frequently Asked Questions

    How much is this actually going to cost me upfront compared to a standard heat pump?

    Let’s be real: the upfront cost is the biggest hurdle. You’re looking at a much steeper initial investment compared to a standard air-source heat pump—often double or even triple the price. That’s because you’re paying for the ground loops and the specialized excavation. It’s a heavy lift for your bank account right now, but I always look at the long game. If you can stomach the entry cost, the efficiency payoff eventually balances the scales.

    Do I need a massive backyard to install the ground loops, or can this work for smaller properties?

    That’s a common concern, and honestly, it’s the first thing I check when I’m auditing a site. You don’t necessarily need a massive estate. If you have a standard suburban lot, we can often look into horizontal loops in a smaller, concentrated area, or even vertical boreholes if space is tight. Vertical systems take up way less surface area, though they can be a bit more of an upfront investment. It’s all about the layout.

    How long does the system actually last before I’m looking at expensive repairs or a full replacement?

    Look, I know the “upfront cost” anxiety is real, but here’s the data: you’re playing the long game here. The indoor heat pump unit usually lasts about 20 to 25 years. The real MVP, though, is the ground loop—that underground piping can easily last 50 years or more. If you keep up with basic filter changes and don’t neglect maintenance, you aren’t looking at a replacement anytime soon. It’s an investment, not a quick fix.

  • The Cost of Using Electric Blankets

    The Cost of Using Electric Blankets

    I still remember shivering in my first rental apartment, watching the thermostat climb while my bank account drained. I’d spent more on central heating than I did on groceries, trying to warm up rooms I wasn’t even using. It’s a massive waste, and honestly, the way people talk about heating solutions can be so misleading. You’ll see ads suggesting you need a high-tech, smart-home overhaul to stay warm, but when you’re just trying to survive a cold Tuesday, you really just need to know the actual electric blanket cost and whether it’s going to bite you in the long run.

    I’m not here to sell you on some luxury heated duvet that costs a month’s rent. My goal is to strip away the marketing fluff and give you the raw data on what you’re actually paying for—both at the checkout and on your monthly utility bill. I’ll break down the upfront price versus the long-term running costs so you can decide if this is a smart efficiency move or just another way to throw money at the wind. Let’s get into the numbers.

    Table of Contents

    Calculating the Real Cost of Running a Heated Blanket Overnight

    Calculating the Real Cost of Running a Heated Blanket Overnight

    To figure out if this is actually a budget-friendly move, we have to move past the sticker price and look at the math. I usually grab my thermometer and a meter to see how much juice a device is actually pulling, but you can do the math on a napkin. Most standard heated throws pull between 60 and 100 watts. If you’re running one for eight hours while you sleep, you’re looking at roughly 0.5 to 0.8 kWh per night.

    When I calculate the cost of running a heated blanket overnight, I don’t just look at the immediate electricity bill; I look at the offset. If that blanket allows you to drop your thermostat by just two degrees, you’re likely saving more on your central heating than you’re spending on the blanket itself. It’s all about that net energy gain. When doing an electric blanket price comparison, don’t just hunt for the cheapest unit at a big-box store. A slightly higher upfront investment in a model with precise digital controls often means less wasted energy, which is the real win for your wallet in the long run.

    Finding the Best Value Electric Blankets Without Breaking the Bank

    Finding the Best Value Electric Blankets Without Breaking the Bank.

    When you’re looking for the best value electric blankets, it’s easy to get distracted by the shiny, high-tech models with ten different heat settings and built-in massage features. But from an efficiency standpoint, those extra bells and whistles usually just drive up the initial price without actually lowering your monthly bills. I always tell my clients to look past the marketing fluff and focus on the build quality and the safety certifications. A cheap, unbranded blanket from a random discount site might save you twenty bucks today, but if the internal wiring is shoddy, you’re looking at a potential fire hazard or a unit that fails after one season.

    Instead, I recommend doing a quick electric blanket price comparison that looks at both the upfront cost and the energy rating. Look for models that use microfibre or high-quality fleece; these materials retain heat better, meaning you won’t have to crank the thermostat up as high to feel comfortable. My rule of thumb is to find a middle-ground brand—something reliable that offers a decent warranty. You want a blanket that is built to last, not one that ends up in a landfill because the heating element burnt out by February.

    How to Keep Your Blanket Costs (and Carbon Footprint) Low

    • Don’t just look at the price tag; check the wattage. A blanket that uses 60W is going to be significantly cheaper to run over a winter than a heavy-duty model pulling 150W, even if the initial cost is slightly higher.
    • Use a timer if your model allows it. Most of us fall asleep with the blanket on, but you don’t need it running at full blast at 4:00 AM when your body temperature has already stabilized.
    • Layer up with a standard duvet. If you use a thick topper over your electric blanket, it traps the heat much more effectively, meaning you can turn the setting down to “low” and still stay warm.
    • Check the safety ratings before you buy. Cheap, unbranded blankets from random marketplaces might seem like a steal, but they often have poor thermal regulation, which wastes energy and—more importantly—is a fire risk.
    • Inspect your cables regularly. If you notice any fraying or weird hot spots, ditch it. A damaged heating element isn’t just inefficient; it’s a way of literally throwing money (and safety) out the window.

    The Bottom Line on Electric Blankets

    Don’t just look at the price tag on the box; the real win is in the daily running cost, which is usually just pennies compared to cranking up your central heating.

    Prioritize safety and efficiency by looking for models with auto-shutoff features and low wattage—it’s a small upfront investment that prevents wasted energy and potential hazards.

    Use a heated blanket as a targeted tool rather than a supplement; if you use it to pre-warm your bed and then turn your thermostat down a degree or two, you’ll see the actual savings on your monthly bill.

    ## The Real Math Behind the Warmth

    “When I’m auditing a home, I see people cranking the thermostat just to feel a bit of warmth in bed, and that’s where the money vanishes. An electric blanket isn’t just a comfort item; it’s a precision tool. If you use one correctly, you’re essentially heating a human-sized space instead of an entire room, which is the smartest way to slash your heating bill without actually freezing.”

    Tobias Nkemdirim

    The Bottom Line on Staying Warm

    The Bottom Line on Staying Warm.

    When you look at the numbers, an electric blanket isn’t just a comfort item; it’s a strategic tool for managing your energy budget. We’ve looked at how the initial purchase price compares to the long-term savings on your heating bill, and the math usually favors the blanket. By focusing on targeted heating—warming your body instead of an entire, drafty room—you’re effectively cutting down on wasted kilowatt-hours. Just remember to keep an eye on the quality of the controller and the safety ratings when you’re shopping. Investing in a decent model might cost a few extra dollars upfront, but it’s a small price to pay for peace of mind and lower monthly utility statements.

    At the end of the day, living sustainably shouldn’t feel like a luxury reserved for people with massive bank accounts. It’s about making intentional choices with the resources we have. Whether it’s sealing a window draft or switching to a heated blanket, these small, data-driven adjustments add up to a massive difference in both your wallet and your carbon footprint. We don’t need to overhaul our entire lives to make an impact; we just need to stop wasting energy simply because it’s the easiest option. Stay warm, stay smart, and keep those bills low.

    Frequently Asked Questions

    How much longer will my electric blanket actually last before it becomes an inefficient waste of money?

    Most decent electric blankets should last about five to ten years, but it’s not just about time; it’s about the integrity of the wiring. If you notice any hot spots, frayed cords, or if it takes way longer to warm up than it used to, that’s your sign. From an efficiency standpoint, an aging blanket with uneven heating is just a drain on your meter. If it’s acting up, replace it—it’s safer and cheaper in the long run.

    Are there specific safety features I should look for that won't drive the upfront price way up?

    Don’t get distracted by fancy “smart” features that just add cost. For safety, focus on the basics: an auto-shutoff timer is non-negotiable—it’s your best defense against forgetting it’s on. You also want to ensure it has Overheat Protection (OHP). If you’re on a budget, skip the app-controlled versions and stick to models with high ETL or UL certification ratings. Those marks mean the electrical components have actually been tested for safety.

    Is it cheaper to invest in a high-quality heated throw or just stick to a standard electric blanket?

    It really depends on how you use it. If you’re just looking to warm up your feet while watching TV, a standard electric blanket is your best bet for low upfront costs. But if you’re someone who spends every evening curled up on the sofa, I’d argue for the high-quality heated throw. They’re more durable and often have better temperature controls, meaning you won’t be replacing a cheap one every single season.