Author: Tobias Nkemdirim

  • How to Read Energy Efficiency Ratings

    How to Read Energy Efficiency Ratings

    I still remember sitting in my old rental apartment, shivering under three blankets while staring at a utility bill that looked more like a mortgage payment. I used to think that if I just bought the newest, flashiest appliances, I’d magically solve my problem. But I was wrong. The truth is, most manufacturers make understanding energy ratings feel like you need a PhD in physics just to buy a toaster. They hide the real data behind confusing scales and marketing jargon, leaving you to guess whether that “green” sticker actually translates to real savings in your bank account or if it’s just expensive window dressing.

    I’m not here to sell you on high-end, eco-luxury gadgets that cost a fortune. My goal is to strip away the fluff and give you the practical, data-driven truth about what those labels actually mean for your wallet. I’ll show you how to cut through the noise so you can make smart, budget-friendly choices that shrink your bills and lower your footprint. We’re going to focus on the numbers that actually matter, ensuring you stop paying for wasted power and start investing in efficiency that works for your real life.

    Table of Contents

    Decoding the Labels to Master Interpreting Appliance Efficiency Labels

    Decoding the Labels to Master Interpreting Appliance Efficiency Labels.

    When you’re standing in a showroom, those colorful stickers can feel like a different language. Most people just glance at the letter and move on, but interpreting appliance efficiency labels requires a bit more nuance than just looking for an ‘A’. You need to look past the color scale and dive into the specific data points, like kilowatt-hours per year. That’s where the real math happens. If you’re comparing two similar washing machines, one might have a slightly lower rating but a much higher annual usage than the other.

    I always tell my clients to look for the granular details. It’s not just about the letter; it’s about comparing appliance power consumption based on how you actually live. A high-capacity fridge might have a decent rating, but if it’s constantly cycling because of poor airflow, your actual bills won’t reflect that sticker. By focusing on the specific energy usage numbers rather than just the grade, you can ensure long-term cost savings from energy efficiency that actually show up in your bank account every month.

    How Standardized Energy Rating Systems Protect Your Hard Earned Cash

    How Standardized Energy Rating Systems Protect Your Hard Earned Cash

    Think of standardized energy rating systems as your personal defense against “greenwashing” and sneaky marketing. When I’m out on an audit, I see it all the time: brands using vague terms like “eco-friendly” or “smart-saving” to justify a premium price tag. Without a universal scale, you’re basically playing a guessing game with your bank account. These labels strip away the fluff and give you hard data, making comparing appliance power consumption actually possible. It turns a confusing sales pitch into a clear math problem that you can solve before you even reach the checkout counter.

    Ultimately, this transparency is what drives real cost savings from energy efficiency. When every manufacturer is forced to play by the same rules, it levels the playing field for the consumer. You aren’t just buying a fridge; you’re buying a predictable monthly utility bill. By relying on these standardized metrics rather than a salesperson’s promises, you can make informed choices that protect your wallet and ensure you aren’t paying for wasted electricity. It’s about taking control of your overhead instead of just hoping for the best.

    5 Quick Wins for Navigating Energy Labels Without Losing Your Mind

    • Don’t just chase the letter; look at the numbers. A ‘B’ rating on a high-use appliance like a fridge can actually be cheaper in the long run than an ‘A’ on something you only use once a week.
    • Check the annual estimated cost on the label. Most modern ratings now include a rough dollar amount for yearly usage—use that as your baseline to compare two different models side-by-side.
    • Watch out for the “re-scaling” trap. Many regions recently updated their rating systems to make them tougher. An old ‘A+++’ might only be a ‘C’ on the new scale, so always check if you’re looking at the latest version.
    • Size matters more than you think. Buying a massive, high-efficiency dishwasher is still a waste of energy if you’re only running it half-full. Match the capacity to your actual household needs.
    • Look for the fine print on seasonal usage. For things like AC units or heaters, the rating can change based on how extreme your local climate is, so don’t assume a high rating means it’ll be cheap in a heatwave.

    The Bottom Line: What You Actually Need to Know

    Don’t just look at the letter; do the math. A ‘B’ rated appliance might actually be cheaper over three years than an ‘A’ rated one if the upfront cost is double. Always weigh the sticker price against the projected energy savings.

    Labels are your best defense against “greenwashing.” Use the standardized data to compare apples to apples so companies can’t trick you into paying a premium for efficiency that isn’t actually there.

    Small wins add up to big savings. You don’t need to overhaul your entire kitchen overnight—start by replacing your most power-hungry old tech with something better rated, and you’ll see the difference in your next utility bill.

    ## Why the Label Matters More Than the Price Tag

    “An energy rating isn’t just a sticker on a fridge; it’s a roadmap for your bank account. I’ve seen too many people grab the cheapest model upfront, only to realize a year later they’re paying a ‘convenience tax’ every single month through massive utility bills.”

    Tobias Nkemdirim

    The Bottom Line on Your Bills

    The Bottom Line on Your Bills.

    At the end of the day, decoding these labels isn’t about becoming an expert in electrical engineering; it’s about making sure you aren’t accidentally subsidizing an inefficient manufacturer. We’ve covered how to read those color-coded scales and why standardized systems are actually your best defense against hidden costs. Whether you’re eyeing a new fridge or replacing an old washing machine, remember that the sticker on the door is your roadmap to long-term savings. Don’t let the upfront price tag distract you from the math—a slightly more expensive appliance with a better rating often pays for itself through lower monthly utility bills before you know it.

    I know that living sustainably can sometimes feel like a luxury reserved for people with massive budgets, but that couldn’t be further from the truth. Every time you choose a more efficient model, you are making a deliberate choice to stop wasting resources just because it’s the path of least resistance. It’s about taking control of your space and your finances, one appliance at a time. We don’t need massive, overnight overhauls to make a difference; we just need to stop letting energy leak out of our pockets. Start small, look at the labels, and let’s build homes that are actually built to last.

    Frequently Asked Questions

    If I find a high-rated appliance that's much more expensive upfront, how long will it actually take for the energy savings to pay for the difference?

    It’s the classic dilemma: the “green premium.” To figure this out, don’t just look at the price tag; look at the projected annual running costs usually listed on the label. Subtract the cheaper model’s yearly cost from the efficient one’s, then divide the upfront price difference by that number. It’s called the payback period. If it takes ten years to break even on a washing machine, it might not be worth it. If it’s two years? Grab it.

    Are these energy labels actually accurate for older appliances, or do they only apply to the newest models on the market?

    Short answer: No, they aren’t. Those labels are designed for the current standards of new models hitting the shelves right now. If you’re looking at an older fridge or washing machine, that sticker doesn’t tell the whole story because the testing benchmarks have shifted. This is exactly why I always carry my infrared thermometer—you can’t trust a label from ten years ago to tell you how much heat or power a device is actually leaking today.

    Does a higher rating always mean the machine will last longer, or am I just paying for better efficiency?

    Short answer: No. A higher rating is strictly about how much power the machine gulps while it’s running, not how many years it’ll survive in your kitchen. You’re paying for better efficiency—meaning lower utility bills—not necessarily a more robust build. I’ve seen high-rated appliances die early and cheap, inefficient ones last decades. Don’t mistake “green” for “indestructible”; check the build quality and warranty separately so you aren’t just buying efficiency that fails prematurely.

  • The Importance of Attic Ventilation for Energy Efficiency

    The Importance of Attic Ventilation for Energy Efficiency

    I still remember the winter I spent in my first rental, huddled under three blankets because the ceiling felt like a sheet of ice. I spent hours tracking the temperature with my infrared thermometer, convinced my heater was just broken, only to realize the real culprit wasn’t the furnace—it was my nonexistent attic ventilation. Most people will try to sell you on massive, expensive HVAC overhauls or high-tech smart systems to fix a stuffy, inefficient home, but they’re often just ignoring the fundamental physics happening right above your head.

    I’m not here to pitch you a luxury renovation or some complicated engineering jargon you can’t use. My goal is to show you how to audit your own airflow and implement small, smart fixes that actually move the needle on your utility bills. I’ll walk you through the practical ways to optimize your attic ventilation so you can stop literally throwing money out of your roof and start living in a home that stays comfortable year-round without breaking the bank.

    Table of Contents

    Mastering Soffit and Ridge Vent Balance for Lower Bills

    Mastering Soffit and Ridge Vent Balance for Lower Bills

    Think of your attic like a living organism; it needs to breathe, but only in a specific pattern. Most people think just adding more vents is the answer, but that’s a mistake. You need a proper soffit and ridge vent balance to actually move air. If you have ridge vents but your soffits are blocked by insulation, you’re basically trying to breathe through a straw. You need that intake at the eaves to feed the exhaust at the peak, creating steady convection currents in roofing that pull stale, hot air out naturally.

    When this balance is off, you aren’t just wasting money; you’re inviting structural damage. Without a continuous flow of air, moisture gets trapped, which is the fastest way to start preventing mold growth in attic spaces—except you’re doing the exact opposite. I’ve seen too many homes where stagnant air leads to dampness and rot. Getting this airflow right is one of those energy efficiency home improvement steps that feels invisible until you see your utility bills drop and your air quality improve.

    Using Convection Currents in Roofing to Save Energy

    Using Convection Currents in Roofing to Save Energy

    Think of your attic like a living, breathing system rather than just a hollow space under your roof. When you set up proper airflow, you aren’t just moving air; you’re harnessing convection currents in roofing to do the heavy lifting for you. As warm air rises, it naturally escapes through your upper vents, pulling cooler, denser air in from below. If this cycle is broken, you end up with stagnant pockets of heat that fight against your air conditioner all summer, or worse, trap moisture that leads to preventing mold growth in attic spaces becomes an uphill battle.

    I’ve seen too many homes where the air just sits there, heavy and damp. By optimizing these natural thermal loops, you’re essentially using physics to regulate your home’s temperature for free. This isn’t just about comfort; it’s a vital part of energy efficiency home improvement that keeps your internal environment stable. When the air moves correctly, it manages attic humidity levels automatically, ensuring your insulation stays dry and effective. It’s a simple, passive way to stop fighting your own house and start working with it.

    5 Quick Wins to Audit Your Attic Ventilation

    • Check your soffit vents for blockage; I’ve seen so many homes where insulation has been shoved right over the vents, essentially suffocating the airflow and trapping heat where it doesn’t belong.
    • Use your infrared thermometer to spot “hot spots” in the attic; if you see temperature spikes in specific corners, it’s a dead giveaway that your ventilation isn’t reaching those dead zones.
    • Don’t overlook the importance of baffles; installing them ensures your insulation stays clear of the eaves, allowing air to actually move from your soffits up to the ridge instead of just swirling around in a corner.
    • Inspect your roof penetrations for leaks or gaps; even a tiny gap around a vent pipe can act like a vacuum, sucking expensive conditioned air out of your living space and into the attic.
    • Look for signs of moisture or condensation on the underside of your roof deck; if you see dampness, your ventilation is failing to exhaust humidity, which is a massive red flag for both energy loss and structural damage.

    Quick Wins for Your Attic Ventilation

    Stop treating your attic like a sealed box; you need a clear path from your soffit vents up to the ridge vent to keep air moving and heat from getting trapped.

    Check your insulation levels alongside your airflow, because even the best ventilation won’t save you money if your heat is still bleeding through thin, uneven layers.

    Use a simple visual check—if you see moisture buildup or dark spots on your roof timbers, your ventilation is failing and you’re literally letting money evaporate.

    ## The Invisible Leak

    “I’ve spent enough time pointing an infrared thermometer at ceilings to know that a poorly ventilated attic isn’t just a construction flaw—it’s a hole in your wallet where your heating and cooling money literally escapes every single day.”

    Tobias Nkemdirim

    Cutting the Losses for Good

    Cutting the Losses for Good: attic ventilation.

    At the end of the day, managing your attic ventilation isn’t about some complex engineering feat; it’s about basic physics and protecting your wallet. By balancing your soffit and ridge vents to create that necessary airflow, and understanding how convection currents move heat, you stop treating your attic like a giant heat trap. I’ve seen too many people pour money into heating or cooling their living spaces while ignoring the massive energy leaks happening just inches above their heads. Fixing these airflow issues is one of the most practical, high-impact moves you can make to stabilize your utility bills and protect your roof’s lifespan.

    I know that home maintenance can feel overwhelming, especially when you’re working with a tight budget. But sustainability shouldn’t be a luxury reserved for people with massive renovation funds. It’s about being observant, using the tools you have, and making these small, intentional adjustments that add up over time. You don’t need a complete overhaul to start seeing a difference; you just need to stop letting your hard-earned money escape through the roof. Let’s stop wasting energy just because it’s convenient and start building homes that actually work for us.

    Frequently Asked Questions

    Will adding more vents actually make my house colder in the winter, or is that just a myth?

    It’s a common worry, but it’s mostly a myth—provided your ventilation is balanced. If you just poke random holes in your roof, you’ll definitely lose heat. But when you have a proper system, like intake vents at the soffits and exhaust vents at the ridge, you aren’t just letting heat escape; you’re managing airflow. Proper ventilation actually prevents moisture buildup that can ruin your insulation, which is a much bigger threat to your warmth and your wallet.

    How can I tell if my current ventilation setup is actually working without spending a fortune on a professional audit?

    You don’t need a high-priced specialist to spot a failing system. Grab a flashlight and head into your attic on a breezy day. If you can feel a steady, gentle airflow moving from your soffits toward the ridge, you’re on the right track. If the air feels stagnant or you see localized moisture buildup near the eaves, your circulation is choked. It’s a simple, free way to see if your money is just sitting still.

    Are there specific DIY fixes for airflow issues that won't void my roof warranty?

    Look, I’m all for DIY, but don’t go slicing into your roof decking just to fix airflow; that’s an instant warranty nightmare. Stick to the low-risk stuff: cleaning out your soffit vents to clear debris or installing smart attic fans that trigger based on temperature. If you’re sealing gaps, use high-quality caulk around penetrations rather than structural changes. Keep it surface-level and non-invasive to stay safe and keep your coverage intact.

  • Types of Solar Panel Mounting

    Types of Solar Panel Mounting

    I remember standing on a client’s roof last November, clicking my infrared thermometer against a poorly installed array, and feeling that familiar surge of frustration. The homeowner had spent a fortune on a high-end system, but because they skimped on the solar panel mounting setup, the wind was literally peeling the panels away from the structure. It’s the same old story: people get so caught up in the shiny tech and the “green” hype that they completely ignore the unsexy, structural stuff that actually keeps the system running for twenty years.

    I’m not here to sell you on some overpriced, proprietary mounting kit that promises the moon. My goal is to cut through the marketing noise and show you how to choose a setup that is actually durable without draining your savings. I’ll walk you through the real-world mechanics of different mounting styles, the common mistakes that lead to energy leaks, and how to ensure your investment stays put through every storm. Let’s get your setup right the first time so you can actually start seeing those lower utility bills.

    Table of Contents

    Mastering Roof Attachment Methods Without Breaking the Bank

    Mastering Roof Attachment Methods Without Breaking the Bank

    When I’m auditing a home, I often see people getting overwhelmed by the sheer variety of roof attachment methods available. They think they need a custom-engineered, high-end setup to make it work, but that’s usually where the budget goes to die. If you’re working with standard asphalt shingles, you really just need a reliable rail system that secures firmly to your rafters. The goal is to find a balance between structural integrity and cost. You want something that handles the local solar panel wind load requirements without requiring a specialized crew that charges triple for a weekend job.

    I always tell my clients to prioritize the quality of the small stuff. It’s easy to get distracted by the panels themselves, but if you skimp on the hardware, you’re just asking for trouble down the line. Investing a little extra in corrosion resistant mounting hardware is a non-negotiable for me. It’s much cheaper to buy decent stainless steel bolts now than it is to replace a whole array because of rust streaks or hardware failure in five years. Keep it simple, keep it sturdy, and don’t overcomplicate the physics.

    Choosing Corrosion Resistant Mounting Hardware for Longevity

    Choosing Corrosion Resistant Mounting Hardware for Longevity

    If you’re anything like me, you hate the idea of buying something once only to have it fail three years later because of poor quality. When it comes to your setup, the hardware is the unsung hero. I’ve seen too many DIY installs where the brackets start pitting and rusting within a couple of seasons, which is a massive waste of both money and effort. To avoid this, you need to prioritize corrosion resistant mounting hardware, specifically looking for Grade 304 or 316 stainless steel. Anything less is just asking for trouble, especially if you live in a coastal area or a place with high humidity.

    It isn’t just about the metal itself, though; it’s about how those components interact with your specific photovoltaic mounting systems. If you’re using a ground mount, the soil chemistry can be even more aggressive toward your gear. I always tell my clients to check the spec sheets for salt spray resistance ratings. Investing a little more upfront in high-quality fasteners ensures your system stays structurally sound for decades, rather than becoming a high-maintenance headache that costs more to repair than it ever saved you in energy.

    5 Practical Ways to Get Your Mounting Right the First Time

    • Don’t just eyeball the angle; use a clinometer or a simple level to ensure your mounting system is pitched correctly for your specific latitude, or you’re just leaving free energy on the table.
    • Check your roof’s structural integrity before you even buy a single bracket; there’s no point in a high-efficiency setup if your rafters can’t handle the extra load during a heavy storm.
    • Prioritize tilt-adjustability in your mounting hardware so you can tweak the angle as the seasons change, maximizing your harvest without needing a whole new system.
    • Keep an eye on the “gap”—ensure there’s enough space between your panels and the roof surface to allow for airflow, which prevents overheating and keeps your efficiency levels from dipping.
    • Avoid the temptation of the cheapest generic clamps; invest in high-quality, rated mounting rails that won’t warp or loosen, because fixing a failed mount is way more expensive than buying the right one upfront.

    Quick Wins for Your Solar Setup

    Don’t skimp on the hardware; spending a little extra on corrosion-resistant mounts now prevents a massive, expensive repair job five years down the line.

    Match your mounting method to your specific roof type to avoid structural damage and ensure your panels actually stay secure during a storm.

    Focus on long-term efficiency over the cheapest upfront cost—the goal is to save money on your bills, not just spend less on the initial installation.

    The Real Cost of Cutting Corners

    “I’ve seen too many people treat mounting hardware like an afterthought to save a few bucks upfront, only to watch their efficiency tank when a cheap bracket fails or rusts through. If your mounting system isn’t solid, your entire investment is just sitting there waiting to leak money.”

    Tobias Nkemdirim

    Making It Stick

    Solar panel mounting hardware Making It Stick

    At the end of the day, getting your solar setup right comes down to the details you usually can’t see once the panels are up. We’ve looked at how the right attachment method can save you a massive headache during a storm, and why investing in high-quality, corrosion-resistant hardware is the only way to ensure you aren’t replacing parts in five years just to keep the lights on. It’s about doing the job once and doing it right. If you pick the wrong mounting system, you aren’t just risking your hardware; you’re essentially throwing money directly into the wind by compromising the efficiency of your entire energy system.

    I know that looking at all these technical specs can feel overwhelming, especially when you’re trying to balance a tight budget. But remember, every smart choice you make with your mounting hardware is a step toward a home that works for you, not against you. You don’t need a professional-grade laboratory to build a sustainable life; you just need to be intentional about the small things. Stop settling for “good enough” when it comes to your energy infrastructure. By focusing on these foundational elements now, you’re building a resilient, low-cost future that stays efficient for decades to come.

    Frequently Asked Questions

    How do I know if my roof structure can actually handle the extra weight of the panels and the mounting hardware?

    Before you go buying hardware, you need to look at your rafters. I always tell clients: don’t guess. If you aren’t comfortable climbing up there with a flashlight, hire a structural engineer for a quick assessment. You’re looking for the spacing and the wood’s condition. If your rafters are spaced too far apart or show signs of rot, that extra load could cause real damage. It’s better to spend a little on a pro now than fix a sagging roof later.

    If I'm renting, are there any mounting options that won't cause permanent damage to the roof?

    Look, I get it. I spent years in rentals where I couldn’t even hang a picture without losing my deposit, let alone drill into the roof. If you’re renting, you’ll want to avoid traditional roof penetrations. Look into ground-mounted racks or portable solar folding kits instead. If you must use the roof, some lightweight, non-penetrating ballasted systems exist, but they’re heavy. Stick to balcony rails or ground setups to keep your landlord happy.

    Is it worth spending more on high-end mounting rails, or can I get away with cheaper alternatives and still maintain efficiency?

    Look, I get the urge to cut corners to save cash, but don’t skimp on the rails. I’ve seen too many DIY setups fail because cheap aluminum warped under heavy snow or high winds. If your mounting system shifts, your panel alignment goes sideways, and that kills your efficiency. Buy mid-range, sturdy rails. You don’t need the most expensive luxury brand, but you do need hardware that won’t bend when the weather gets real.

  • Using Thermal Curtains to Regulate Temperature

    Using Thermal Curtains to Regulate Temperature

    I still remember sitting in my old rental apartment three years ago, shivering under three layers of blankets while the radiator hissed uselessly in the corner. I’d pull my infrared thermometer out just to see the truth: the glass in my windows was basically a conduit for losing money. People love to tell you that you need a full-scale retrofit or expensive double-glazing to fix a drafty room, but that’s a lie designed to empty your pockets. Most of the time, you’re just fighting a losing battle against heat escaping through your window frames, and that’s where thermal curtains actually come into play.

    I’m not here to sell you on some lifestyle aesthetic or overpriced home decor. My goal is to give you the straight-up data on what actually works to keep your living space warm without spiking your utility bill. I’ll walk you through how to spot the real heat leaks, what material density you actually need to look for, and how to install them so they aren’t just expensive fabric hanging in front of a draft. Let’s stop paying to heat the outdoors and start making your home work for you.

    Table of Contents

    How Insulating Fabric for Windows Keeps Your Comfort High

    How Insulating Fabric for Windows Keeps Your Comfort High

    When I’m doing a home audit, the first thing I look at isn’t the HVAC system—it’s the windows. Glass is basically a massive hole in your home’s thermal envelope. Even if you have double glazing, standard fabric does almost nothing to stop the radiant heat from escaping. This is where insulating fabric for windows becomes a game-changer. These materials are engineered with dense weaves or specialized linings that create a literal barrier between your living space and the cold pane. It’s about creating a stagnant layer of air that acts as a buffer, preventing that annoying draft from settling right at your feet.

    Beyond just temperature, there is a massive secondary win: soundproofing with heavy drapes. Because these fabrics are significantly more substantial than your average linen or cotton sheer, they absorb much of the external noise pollution from street traffic or neighbors. It’s a dual-purpose upgrade. You aren’t just investing in energy efficient window treatments to save a few bucks on your monthly bill; you’re actually upgrading the acoustic quality of your room. It turns a noisy, drafty corner into a quiet, controlled environment without needing to replace the entire window unit.

    Slash Your Energy Bills Without Breaking the Bank

    Slash Your Energy Bills Without Breaking the Bank

    The reality is that most people think energy retrofitting requires a massive upfront investment, like replacing every window in the house. But that’s just not true. I’ve seen firsthand during my audits that you can make a massive dent in your monthly costs just by addressing the “leaks” in your living space. One of the easiest ways to reduce heating bills with curtains is to treat your windows as the primary defense against the cold. Instead of cranking up the thermostat to fight the chill coming off the glass, you’re creating a thermal barrier that keeps the warmth where it actually belongs—inside your room.

    You don’t need to hire a contractor to see results. Even something as simple as choosing high-quality energy efficient window treatments can change the entire feel of a room. I always tell my clients to look for denser weaves; the heavier the material, the better it performs. It’s about making smart, incremental shifts that pay for themselves within a few months. It’s not about being perfect; it’s about stopping the literal drain of cash through your window frames.

    5 Ways to Get the Most Out of Your Thermal Curtains

    • Don’t just hang them; seal them. I always check the edges of my windows with my infrared thermometer. If there’s a gap between the curtain and the wall, you’re basically letting the heat leak right around the sides. Try to get them as close to the window frame as possible to create a proper air pocket.
    • Size matters more than you think. If you buy curtains that barely cover the window, they won’t do much. Go for “floor-to-ceiling” or at least wider than the window itself. You want enough overlap on the walls to trap that warm air inside the room rather than letting it circulate out.
    • Timing is everything. It’s a simple habit, but you need to close them the second the sun goes down. Keeping them open at night is just letting your hard-earned heat escape into the night air. Conversely, in the summer, keep them closed during the hottest part of the day to block out that solar gain.
    • Check the weight and density. Not all “thermal” curtains are created equal. When I’m auditing a home, I look for heavy, multi-layered fabrics. If the material feels thin or flimsy, it’s probably not doing much more than a standard decorative curtain. Look for high-density weaves or blackout linings for the best results.
    • Combine them with other low-cost fixes. Thermal curtains aren’t a magic wand, but they work way better when paired with other small tweaks. If you’ve already used some weatherstripping on your window frames, these curtains become your second line of defense, making the whole setup much more efficient.

    The Bottom Line on Thermal Curtains

    Think of thermal curtains as a low-cost barrier, not a magic fix; they work best when they’re heavy enough to actually block drafts and hold heat inside your living space.

    You don’t need a full home renovation to see a difference—just adding these to your most problematic, drafty windows can stop immediate energy waste.

    It’s a simple math game: the small upfront cost of the fabric pays for itself the moment you see your next heating bill drop.

    The Real Cost of Thin Windows

    “I’ve spent too many audits pointing my infrared thermometer at windows only to see the heat bleeding out like it was nothing; thermal curtains aren’t just a decor choice, they’re a practical barrier that stops you from literally paying to heat the street.”

    Tobias Nkemdirim

    The Bottom Line on Window Insulation

    The Bottom Line on Window Insulation.

    At the end of the day, thermal curtains aren’t some high-tech, expensive miracle, but they are one of the most practical tools in my kit for a reason. We’ve looked at how they act as a literal barrier against the cold, how they stop that annoying draft from creeping in, and most importantly, how they can drastically lower your monthly utility costs without requiring a contractor or a massive renovation. If you’re tired of feeling like you’re fighting a losing battle against your thermostat, switching to a heavier, insulating fabric is a low-effort, high-reward move that pays for itself faster than most people realize.

    I know it can feel overwhelming to try and make a home more sustainable, especially when it feels like you need a massive budget to make any real dent. But my experience has taught me that sustainability isn’t about buying the most expensive solar array on the market; it’s about stopping the waste that’s already happening in your living room. Every bit of heat you keep inside is money back in your pocket and less strain on the grid. Start small, grab some decent curtains, and realize that living better doesn’t have to cost more.

    Frequently Asked Questions

    Do thermal curtains actually work if I have large, drafty windows?

    Short answer: Yes, but they aren’t a magic fix for massive drafts. If your windows are huge and letting in a constant stream of cold air, thermal curtains will act as a much-needed buffer, creating a pocket of dead air that slows down the heat loss. They won’t turn a drafty room into a vacuum seal, but they’ll definitely take the edge off. Just make sure they’re heavy enough to actually block that airflow.

    Is it worth getting heavy blackout curtains, or are standard thermal ones enough?

    It really depends on your specific setup. If you’re dealing with a drafty, single-pane window in a room you use for sleeping, go for the heavy blackout ones; they offer that extra layer of density that acts like a buffer against the cold. But if you’re just trying to stop heat from escaping a living room during the day, standard thermal curtains do the job perfectly well without the extra bulk.

    How do I know if my curtains are installed correctly enough to actually stop the heat from escaping?

    I usually pull out my infrared thermometer for this. If you see a massive temperature spike right at the edges of your curtains, you’ve got a leak. To fix it, make sure your rod is wider than the window frame to prevent “convection loops”—that’s when cold air rolls in from the sides. Ideally, the fabric should touch the floor and overlap the walls slightly. If there’s a gap, you’re just heating the room through the fabric.

  • Selecting Energy Efficient Heating Systems

    Selecting Energy Efficient Heating Systems

    I still remember sitting in my old rental apartment three years ago, wrapped in two blankets and staring at a radiator that felt more like a piece of cold metal than a heat source. I’d be cranking the thermostat up just to feel a hint of warmth, only to watch my bank account drain every single month. It’s infuriating how the industry tries to sell you on these massive, high-tech overhauls when the real problem is often just poorly managed heat. Most people think achieving energy efficient heating requires a massive renovation or a tech-heavy smart home setup, but that’s a total myth. You don’t need to be wealthy to stop your money from literally going up in smoke.

    In this guide, I’m stripping away the marketing fluff and the expensive, unnecessary gadgets. I’m going to show you the practical, data-driven tweaks I use in my professional audits to keep rooms warm without skyrocketing your utility bills. We’re focusing on small, smart changes that actually work—the kind of stuff that makes a difference to your wallet and your carbon footprint immediately. No hype, just real solutions.

    Table of Contents

    Small Changes to Start Reducing Home Heating Bills Now

    Small Changes to Start Reducing Home Heating Bills Now

    You don’t need to gut your house or install a massive solar array to see a difference in your monthly statements. Most of the heat I find escaping during my audits isn’t coming from a faulty furnace, but from the tiny, overlooked gaps in your living space. Start with the basics: draft stoppers under doors and heavy curtains over windows. It sounds old-school, but understanding thermal insulation importance is the fastest way to stop your hard-earned money from leaking through the cracks. Even something as simple as sealing a window frame can keep a room significantly warmer for longer.

    If you’re looking for a tech-driven approach, I always suggest looking at your control systems. Upgrading to a programmable model can lead to massive smart thermostat energy savings because it stops heating an empty house. I’ve seen people waste hundreds of dollars a year simply because they forgot to turn the dial down before heading to work. It’s about being intentional with how you use your space. Small, data-backed adjustments are much more effective—and much cheaper—than waiting for a total system failure to take action.

    Why Thermal Insulation Importance Is Your Best Financial Friend

    Why Thermal Insulation Importance Is Your Best Financial Friend

    I’ve spent countless hours pointing my infrared thermometer at walls, and the data never lies: you can buy the most expensive heater on the market, but if your walls are basically sieves, you’re just throwing cash into the wind. This is where the thermal insulation importance really hits home. Think of insulation as the thermal jacket for your house. Without it, your heating system is working overtime just to fight a losing battle against the cold creeping through your attic or floorboards.

    Investing in proper insulation is arguably the most effective way of reducing home heating bills because it addresses the root cause of energy loss rather than just treating the symptoms. While everyone talks about flashy new gadgets, a well-insulated home creates a stable environment that requires far less mechanical intervention. It’s the difference between constantly cranking the heat and simply maintaining a steady, comfortable temperature. If you’re planning to eventually upgrade to more advanced systems, getting your insulation right first is the smartest financial move you can make.

    5 Practical Ways to Stop Losing Heat and Start Saving Cash

    • Check your radiator’s “breathing” room. If your furniture is pushed right up against a heater, you’re just heating the back of a sofa instead of the room. Pull them back a few inches to let the warmth actually circulate.
    • Get a handle on your thermostat settings. Even a one-degree difference can shift your monthly bill significantly. I always suggest a programmable one so you aren’t heating an empty house while you’re at work.
    • Don’t ignore the drafts around your windows and doors. I usually grab my infrared thermometer to find those exact spots where the cold is leaking in. A simple weatherstrip or even a heavy curtain can make a massive difference.
    • Bleed your radiators. If they feel cold at the top but hot at the bottom, you’ve got trapped air. It’s a five-minute job that makes your system work way more efficiently without costing a dime.
    • Use your curtains strategically. Close them as soon as the sun goes down to add an extra layer of insulation over your glass, and open them during the day to let the natural solar heat do the heavy lifting for free.

    The Bottom Line on Heating Smarter

    Stop chasing high-tech gadgets and start fixing the leaks; sealing gaps and improving insulation is the fastest way to stop your money from escaping through the walls.

    Energy efficiency isn’t a luxury for the wealthy—it’s about making small, data-backed swaps that prioritize long-term savings over immediate convenience.

    Every degree you lower your thermostat and every draft you plug is a direct win for both your bank account and your carbon footprint.

    The Real Cost of Comfort

    “Heating a home shouldn’t feel like a choice between being warm and being able to afford groceries; if you’re just cranking up the thermostat to fight a drafty window, you’re not actually heating your house—you’re just paying to heat the street.”

    Tobias Nkemdirim

    The Bottom Line on Staying Warm

    The Bottom Line on Staying Warm.

    Look, we’ve covered a lot of ground, from the immediate wins of sealing those pesky drafts to the long-term financial heavy lifting that proper insulation provides. The takeaway is simple: energy efficiency isn’t some luxury reserved for people with massive solar arrays and smart-home budgets. It’s about being intentional with the space you already have. Whether you’re just starting with some heavy curtains or you’re finally investing in better loft insulation, every step you take is a step toward reclaiming your hard-earned money from the utility companies. It’s about closing the gaps—both in your walls and in your monthly budget.

    At the end of the day, I don’t want you to feel overwhelmed by the scale of the climate crisis or the rising cost of living. I want you to feel empowered. You don’t need to overhaul your entire life overnight to make a difference. Start small, use the data, and keep an eye on where your heat is actually going. When we stop treating energy waste as an unavoidable cost of living, we start building a future that is actually sustainable for everyone, not just the wealthy. Small, smart changes add up, and honestly, your bank account—and the planet—will thank you for it.

    Frequently Asked Questions

    I've checked my windows for drafts, but how do I know if my actual wall insulation is failing without tearing everything down?

    You don’t need a sledgehammer to check your walls. Grab your infrared thermometer—mine’s always in my pocket—and scan the interior surface during a cold snap. If you see significant “cold spots” or dark patches on the thermal reading, that’s a red flag for missing or settled insulation. You can also check your energy bills; if your heating usage spikes disproportionately to the outside temperature, your walls are likely leaking heat.

    Is it actually worth investing in a smart thermostat, or is that just another expensive gadget that doesn't move the needle on my bills?

    Look, I get the skepticism. Most “smart” tech is just a way to drain your wallet, but a smart thermostat actually makes sense if you use it right. It’s not magic, but it stops the “set it and forget it” mistake where you’re heating an empty house for eight hours. If you’re the type to forget to turn the heat down before bed, it’ll pay for itself. Otherwise, it’s just a fancy gadget.

    If I'm renting, what are some low-cost heating hacks that won't get me in trouble with my landlord?

    I get it—when you’re renting, you can’t exactly go tearing down walls to add insulation. But you don’t need permission to stop drafts. Grab some heavy thermal curtains to block window heat loss, or use adhesive weather stripping on door frames; it’s cheap and peels right off when you move. I also swear by draft excluders at the base of doors. These small, non-permanent tweaks keep the heat in without risking your security deposit.

  • Practical Ways to Reduce Electricity Usage

    Practical Ways to Reduce Electricity Usage

    I still remember sitting in my old rental apartment, shivering under three blankets while staring at a utility bill that felt like a personal insult. I wasn’t heating a home; I was essentially paying to heat the outdoors because of every draft and inefficient bulb in the place. Most “green” experts will tell you that the only way to save is to drop thousands on solar panels or smart home ecosystems you don’t actually need. That’s a lie. Real efficiency isn’t about buying your way into sustainability; it’s about reducing electricity usage by actually understanding how your space breathes and where your money is leaking through the cracks.

    I’m not here to sell you on expensive gadgets or lifestyle overhauls that feel impossible to maintain. My goal is to give you the practical, data-driven tactics I use during my professional audits to find the hidden culprits in a household. We’re going to skip the fluff and focus on low-cost, high-impact changes that actually move the needle on your monthly costs. You don’t need a massive budget to live smarter—you just need to stop wasting energy simply because it’s convenient.

    Table of Contents

    Hunting Down Phantom Power Consumption in Your Living Room

    Hunting Down Phantom Power Consumption in Your Living Room

    I walked into a client’s living room last week, pulled out my infrared thermometer, and noticed the temperature near the media console was slightly higher than the rest of the room. It sounds minor, but that’s a textbook sign of phantom power consumption. Even when your TV or gaming console is “off,” it’s often sitting in standby mode, sipping electricity like a slow leak in a water pipe. If you have a stack of devices plugged into a single power strip, you’re essentially paying a “vampire tax” every single month for gear you aren’t even using.

    The fix isn’t about buying expensive new tech; it’s about smarter habits. I always tell people to look for devices with glowing standby lights or digital clocks. If it’s plugged in, it’s likely drawing some level of current. One of my favorite home energy audit tips is to use a smart power strip that cuts juice to peripherals when the main device is off. It’s a low-cost way of lowering utility bills without having to live in the dark, and it stops that invisible drain from eating your budget.

    Low Cost Home Energy Audit Tips for Every Budget

    Low Cost Home Energy Audit Tips for Every Budget

    You don’t need to hire a professional with a thermal imaging camera to start seeing where your money is disappearing. For most of the homes I audit, the biggest culprits are things you can fix with a few bucks and some common sense. Start by doing a manual walkthrough during the coldest part of the day. I always keep my infrared thermometer handy, but even just running your hand along window frames or door jambs can reveal drafts that are killing your heating efficiency. These little gaps are essentially holes in your wallet, letting expensive conditioned air escape right onto the sidewalk.

    If you have a bit more breathing room in your budget, look toward smart home energy management tools. A simple programmable thermostat can do more for your wallet than almost any other upgrade. It prevents you from heating or cooling an empty house, which is one of the most effective home energy audit tips I can give you. You don’t need to jump straight into expensive solar arrays or high-end tech; start with the low-hanging fruit. Seal the leaks, manage your thermostat, and stop paying for air you aren’t even using.

    Five Low-Hanging Fruits to Cut Your Power Bill

    • Check your fridge seals. I always grab my infrared thermometer for this; if the seal is shot, your compressor is working overtime just to keep your milk cold. If the rubber feels brittle or doesn’t snap back, replace it before it eats your budget.
    • Switch to LED bulbs, but don’t just buy the cheapest ones. Look for high-lumen, low-wattage options that actually light a room well. It’s a tiny upfront cost that pays for itself in a few months of lower wattage.
    • Stop treating your water heater like a furnace. If you aren’t using scalding hot water for everything, dial that temperature down to about 120°F (49°C). It prevents unnecessary standby heat loss and keeps you from overpaying for heat you don’t need.
    • Master your thermostat’s “setback” periods. You don’t need to heat or cool an empty house. Even a 3-degree adjustment when you’re sleeping or at work makes a massive difference in your monthly consumption.
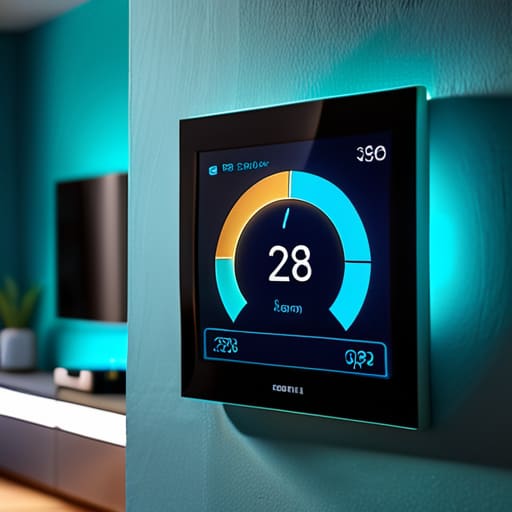
    • Clean your AC and heater filters monthly. A clogged filter forces your system to struggle against air resistance, which spikes your electricity usage. It’s a five-minute task that keeps your hardware efficient and your bills predictable.

    The Bottom Line: Stop Leaking Money

    Energy efficiency isn’t about buying expensive solar panels; it’s about identifying where you’re losing power through small, preventable gaps.

    Treat your home like a system—plugging phantom loads and sealing drafts are the fastest ways to see a difference in your next utility bill.

    Start small and use data; even a cheap infrared thermometer or a simple awareness of your habits can help you stop paying for energy you aren’t actually using.

    The Real Cost of Convenience

    We’ve been conditioned to think that leaving everything on is just part of modern life, but every watt you waste is basically just throwing money out of an unsealed window. Efficiency isn’t about living in the dark; it’s about being smart enough to stop paying for energy you aren’t even using.

    Tobias Nkemdirim

    Cutting the Waste for Good

    Cutting the Waste for Good: energy audits.

    At the end of the day, reducing your electricity usage isn’t about some massive, expensive overhaul of your entire house. It’s about the small, tactical wins we talked about: hunting down those phantom loads in your living room, performing your own budget-friendly audits, and finally addressing those invisible heat leaks that are driving your costs through the roof. I’ve seen it time and again during my audits—people are literally throwing money out of their windows simply because they haven’t taken the time to look closer. By tightening up these gaps and being more intentional with your devices, you aren’t just saving a few bucks; you’re reclaiming control over your monthly budget.
    I know it can feel overwhelming to think about “going green” when you’re just trying to keep the lights on and stay warm. But remember, sustainability shouldn’t be a luxury reserved for people with huge bank accounts. It’s about being smart with the resources you already have. Every time you unplug a charger or seal a drafty corner, you’re making a choice to stop wasting energy just because it’s convenient. Start small, stay observant, and watch how those tiny adjustments add up to a massive difference in your bills and your footprint.

    Frequently Asked Questions

    I've switched to LED bulbs, but my bill is still high—what else could be causing these spikes?

    Switching to LEDs is a great first step, but it’s rarely a silver bullet. If your bill is still spiking, you’re likely dealing with “invisible” heavy hitters. I’d start by checking your water heater settings—if it’s cranked too high, you’re paying to boil water you don’t need. Also, look at your old appliances. A struggling fridge or an ancient dryer can pull massive amounts of power just trying to stay functional. Check those heat leaks next.

    Is it actually worth the money to invest in smart plugs, or am I just adding more tech to the pile?

    Honestly? It depends on what you’re plugging in. If you’re using them for a lamp, you’re just adding clutter. But if you’re targeting your media center or that old coffee machine that stays on standby, they pay for themselves. I use them to automate my entire home office setup so nothing draws power overnight. Don’t buy them for the “tech” factor; buy them to kill the vampire loads you’re too lazy to unplug manually.

    How can I tell if my old appliances are actually wasting energy or if they're just performing normally?

    The easiest way to tell is to stop guessing and start measuring. If you don’t want to buy a dedicated energy monitor, grab a cheap plug-in kilowatt meter. Plug your fridge or washing machine into it for a few cycles. If that old appliance is pulling way more than its rated wattage or running constantly to maintain temperature, it’s not just “old”—it’s a leak in your wallet. Data doesn’t lie; your intuition might.

  • Effective Techniques for Draft Proofing Your Home

    Effective Techniques for Draft Proofing Your Home

    I still remember sitting in my old rental apartment three years ago, wrapped in two blankets and shivering, while my heating bill climbed higher every single month. I’d check the thermostat, but it felt like I was trying to heat the entire neighborhood instead of just my living room. I even pulled out my infrared thermometer—a habit I can’t seem to break—and watched in frustration as the temperature readings plummeted near the window frames. It’s incredibly annoying how people try to sell you massive, expensive renovations when the real culprits are just tiny, invisible gaps. You don’t need a contractor to fix this; most effective draft proofing techniques are actually about finding those small leaks and sealing them before your money literally flies out the window.

    I’m not here to sell you on high-tech gadgets that don’t work or expensive “green” lifestyle hacks that require a massive upfront investment. My goal is to give you the straightforward, data-backed truth about which methods actually keep the heat in. I’ll walk you through the most practical, low-cost ways to seal your space so you can stop overpaying for warmth. We’re going to focus on smart, budget-friendly fixes that make a measurable difference in your comfort and your wallet.

    Table of Contents

    Smart Caulking Window Frames to End Unnecessary Energy Waste

    Smart Caulking Window Frames to End Unnecessary Energy Waste

    If you’ve ever sat near a window in January and felt that sudden, sharp chill, you’re likely looking at a failed seal. I usually pull out my infrared thermometer for this; seeing those cold spots around the perimeter of a frame is a wake-up call. Caulking window frames is one of the most effective, low-cost ways to stop that air from migrating into your living space. Unlike more complex energy efficiency home improvements that require a contractor, a few tubes of high-quality sealant can make a massive difference in how your room holds temperature.

    The trick is to be methodical. Before you start, make sure the surface is bone-dry and free of old, crumbling debris. I always recommend a slow, steady bead of caulk to ensure there are no gaps. It’s not just about aesthetics; it’s about preventing air leaks that force your heater to work twice as hard. If you do this right, you aren’t just sealing a gap—you’re effectively reducing heating bills by creating a much tighter thermal envelope around your home.

    Simple Weatherstripping Installation Tips That Actually Work

    Simple Weatherstripping Installation Tips That Actually Work

    If caulking handles the gaps you can’t see, weatherstripping is for the ones you can. I usually grab my infrared thermometer before starting this; it’s a game-changer for finding exactly where the cold air is slicing through your door or window seals. For most people, the easiest entry point is using adhesive-backed foam or V-seal strips. The trick isn’t just sticking them on; it’s about cleaning the surface with rubbing alcohol first. If there’s any dust or old residue, that expensive strip is going to peel off in a week, and you’ll be right back to square one.

    When you’re looking at preventing air leaks around doors, don’t overlook the bottom gap. A heavy-duty door sweep is one of those small, low-cost energy efficiency home improvements that pays for itself almost immediately. I always tell my clients to check the alignment too—if the door doesn’t sit flush against the frame, even the best weatherstripping won’t do much. It’s all about creating a continuous airtight barrier so your heater isn’t fighting a losing battle against the outdoors.

    5 Low-Cost Fixes to Stop the Drafts You’re Currently Ignoring

    • Check your door sweeps. If you can see light coming through the gap at the bottom of your front or back door, you’re basically throwing money out onto the sidewalk. Replacing a worn-out rubber sweep is a ten-minute job that makes a massive difference in how a room actually feels.
    • Don’t forget the electrical outlets. It sounds weird, but if your home is older, cold air can actually seep through the gaps around your wall sockets. Installing those cheap foam gaskets behind the faceplates is a tiny, almost invisible way to cut down on those sneaky micro-drafts.
    • Tackle the “chimney effect.” If you have a fireplace you aren’t using, it acts like a giant vacuum sucking warm air out of your living room. Get a chimney balloon or a heavy-duty cover to seal it off when it’s not in use.
    • Inspect your ceiling fixtures. In many older rentals, the holes cut for light fixtures aren’t airtight, allowing warm air to escape into the attic or crawlspace. Using a bit of fire-rated caulk or specialized gaskets around the base of the fixture can keep that heat where it belongs—down in your living space.
    • Use heavy curtains as a thermal barrier. This isn’t just about aesthetics; thick, insulated curtains act as an extra layer of insulation for your windows. Close them as soon as the sun goes down to create a pocket of dead air that helps buffer the cold coming off the glass.

    The Bottom Line on Sealing Your Space

    You don’t need a professional contractor to see results; most energy leaks are hiding in plain sight around windows and doors, and you can fix them yourself for a few bucks.

    Think of draft proofing as an investment rather than a chore—the money you spend on caulk or weatherstripping today is money you won’t be handing over to your utility company next month.

    Consistency is everything; even the best weatherstripping won’t matter if you ignore the small gaps under doors or around aging window frames that let your expensive heated air escape.

    ## The Real Cost of a Draft

    “Most people think they need a massive solar array or a full-scale retrofit to be sustainable, but the truth is much simpler: you can’t heat a house that’s essentially acting like a sieve. Before you spend a dime on high-tech gadgets, find where the air is escaping; sealing a single drafty window frame is often more effective for your wallet than any expensive smart thermostat.”

    Tobias Nkemdirim

    Small Changes, Big Impact

    Small Changes, Big Impact: home draft proofing.

    At the end of the day, draft proofing isn’t about some massive, expensive overhaul of your entire house. It’s about the details—the gaps in your window frames you fixed with a bit of caulk or the door sweeps you installed to stop that annoying breeze under the hallway door. By tackling these small leaks, you’re essentially plugging the holes in your wallet. We’ve covered how to identify the culprits and how to apply the fixes, from weatherstripping to sealing those stubborn cracks. It’s all about being intentional with your home’s envelope so you aren’t just paying to heat the street outside.

    I still remember sitting in my old rental, shivering under three blankets because the heat just couldn’t stay put. It felt like a losing battle against my utility bills. But I’ve learned through my audits that you don’t need a massive budget to take control of your environment. Every seal you make and every draft you stop is a win for your bank account and a win for the planet. Sustainability shouldn’t be a luxury reserved for people with huge renovation budgets; it should be accessible to everyone. Start small, stay observant, and stop letting your hard-earned money leak out through the cracks.

    Frequently Asked Questions

    How do I know if the draft is coming from a window frame or if it's actually a gap in the wall itself?

    I always keep my infrared thermometer handy for exactly this reason. If you want to be precise, aim it at the window frame first. If the temperature drops sharply right at the edge where the frame meets the wall, it’s a caulking issue. But if you see a temperature dip spreading across the drywall itself, you’re looking at a structural gap or poor insulation behind the surface. Don’t guess—follow the cold.

    Is it worth spending money on professional-grade sealant, or will the cheap stuff from the hardware store do the job?

    Look, I’ve used both, and here’s the reality: don’t go overboard on the “professional-grade” stuff if you’re just doing a quick fix on a single window. The standard stuff from the hardware store is fine for most gaps. However, if you’re sealing a major exterior crack that’s exposed to constant rain or extreme temperature swings, spend the extra few bucks on the high-quality sealant. It lasts longer, meaning you won’t be re-doing the job in six months.

    Can draft proofing actually cause moisture or mold issues if I seal the house up too tightly?

    It’s a valid concern, and honestly, it’s one I see a lot during my audits. If you seal every single microscopic crack without thinking about airflow, you risk trapping moisture inside. That’s how you end up with mold behind furniture or in corners. The trick isn’t to make your house airtight like a submarine; it’s about targeted sealing. Just ensure you maintain some ventilation—like using exhaust fans or slightly cracking a window—to let the house breathe.

  • How Insulating Water Pipes Saves Energy

    How Insulating Water Pipes Saves Energy

    I remember standing in my old rental apartment three years ago, shivering in a room that felt more like a walk-in freezer than a living space. I had the heater cranked up to the max, but my hands were still numb, and my bank account was taking a massive hit every month. I pulled out my infrared thermometer, scanned the floorboards, and realized I wasn’t just losing heat through the windows—I was losing it through the very veins of the house. Most people think you need a massive, expensive renovation to fix a drafty home, but they completely overlook the silent energy thief: insulating water pipes. If your pipes are bare, you’re essentially paying your utility company to heat up your walls instead of your water.

    I’m not here to sell you some high-tech, overpriced thermal system that requires a degree in engineering to install. My goal is to show you how practical, low-cost fixes can stop that thermal leakage immediately. I’m going to walk you through the exact, no-nonsense steps for insulating water pipes so you can keep your hot water hot and your monthly bills predictably low. No fluff, no marketing hype—just straightforward data and methods that actually work for real people on a budget.

    Table of Contents

    Reducing Hot Water Temperature Drop Without Breaking the Bank

    Reducing Hot Water Temperature Drop Without Breaking the Bank

    One of the biggest culprits in a high utility bill is the heat lost while water is literally traveling from your heater to your tap. If you notice your shower starts lukewarm and then gets scorching hot, you’re likely dealing with a significant temperature drop. Instead of upgrading your entire water heater—which is expensive and overkill—focus on reducing hot water temperature drop by addressing the transit. When water sits in uninsulated pipes, it loses thermal energy to the surrounding air, forcing your heater to work overtime to compensate.

    I usually recommend a simple foam pipe insulation installation for most residential setups. It’s a low-cost, high-impact move. When I’m doing audits, I look for those long stretches of exposed copper or PEX in basements or crawlspaces. Using pre-slit foam sleeves is a DIY job you can finish in an afternoon for the price of a few pizzas. It’s one of those energy saving plumbing tips that actually pays for itself within a single season by keeping that heat exactly where it belongs: in the water.

    Comparing Pipe Insulation Materials to Find Your Best Value

    Comparing Pipe Insulation Materials to Find Your Best Value

    When you’re looking at a pipe insulation materials comparison, it’s easy to get overwhelmed by the sheer number of options at the hardware store. Most people default to those black foam tubes because they’re cheap and easy to find, and honestly, for a quick DIY project, they do the job. Foam pipe insulation installation is probably the lowest barrier to entry if you’re on a tight budget. Just slit them open, slide them over the pipes, and secure them with tape. They’re decent for basic temperature retention, but they aren’t the heavy-duty solution for every scenario.

    If you’re dealing with more extreme conditions, like an unheated basement or an exterior wall, you might want to step up to elastomeric rubber or even fiberglass sleeves. While they cost a bit more upfront, they offer much better thermal resistance. This is especially crucial when it comes to preventing frozen pipes in winter, where a cheap foam sleeve might fail you when the temperature really drops. I usually tell my clients to look at the R-value; it’s the only metric that actually tells you how much work the material is doing to keep your heat where it belongs.

    Five Quick Wins to Stop Heat Loss in Your Plumbing

    • Focus on the “hot zones” first; start by insulating the pipes that run through unheated areas like crawlspaces, attics, or garages where the temperature drop is most aggressive.
    • Don’t skip the joints and elbows; heat loves to escape from bends in the pipe, so make sure your insulation wraps tightly around every turn rather than just the straight runs.
    • Grab a roll of foam tape for the gaps; even the best foam sleeves can leave tiny cracks at the connections, so use a bit of adhesive tape to seal those seams and keep the thermal barrier airtight.
    • Check your water heater’s proximity; if your heater is far from your taps, prioritize insulating the longest stretches of pipe to ensure the water stays hot by the time it actually hits your shower.
    • Measure twice, cut once; if your insulation is too loose or oversized, it won’t hug the pipe properly, creating air pockets that actually work against you and let the heat leak out.

    The Bottom Line: Quick Wins for Your Pipes

    Don’t overthink the materials; for most standard homes, foam sleeves are the most cost-effective way to stop heat loss without a massive upfront investment.

    Focus your efforts on the “danger zones”—the sections of pipe that run through unheated areas like crawlspaces, attics, or garages where temperature drops are most extreme.

    Treat insulation as a long-term savings tool, not just a DIY project; the small amount you spend now on lagging will pay for itself by lowering your monthly water heating costs.

    ## The Cost of Neglect

    “Every time you turn on the tap and wait for the water to get warm, you’re literally watching your money leak out of your walls. Insulating your pipes isn’t some high-tech luxury; it’s just basic common sense to stop paying for heat that never even reaches your shower.”

    Tobias Nkemdirim

    Wrapping It All Up

    Wrapping It All Up with pipe insulation.

    At the end of the day, insulating your pipes isn’t about some massive, expensive renovation; it’s about stopping the small, invisible leaks in your budget. We’ve looked at how adjusting your water heater temperature can save you a surprising amount, and how picking the right material—whether it’s foam sleeves or more heavy-duty options—makes all the difference in how long that heat actually lasts. If you take the time to walk through your utility room with a bit of insulation in hand, you’re essentially plugging the holes where your money is escaping. It’s a practical, low-effort win that pays for itself faster than almost any other home hack I’ve audited.

    I know it can feel overwhelming to tackle home efficiency, especially when it feels like you need a massive bank account to make a real dent in your carbon footprint. But I promise you, sustainability is built on these small, intentional decisions. You don’t need to live in a high-tech, solar-powered mansion to make an impact; you just need to stop wasting what you already have. Every pipe you wrap and every degree you optimize is a step toward a home that works for you, rather than against your wallet. Let’s stop letting our energy go to waste just because it’s easier to leave it alone.

    Frequently Asked Questions

    Do I really need to insulate the cold water pipes, or is it just for the hot ones?

    It’s a common question, and honestly, most people think it’s just about keeping the hot water hot. But if you’re looking at the data, insulating your cold water pipes is a smart move too. In colder months, those pipes can lose heat to the surrounding air or even freeze, which is a nightmare for your plumbing. Keeping them insulated stabilizes the temperature and protects your setup from unnecessary thermal stress. It’s just more efficient overall.

    How do I handle insulation if my pipes are tucked away in tight, awkward spots or behind walls?

    I get it—not every pipe is sitting pretty in an open basement. When they’re tucked behind walls or in tight crawlspaces, it’s tempting to just skip them. Don’t. If you can reach them, use flexible foam sleeves; they’re easier to maneuver than rigid stuff. For those truly inaccessible spots, focus on the “ends” of the runs where they exit the wall. It’s about sealing the leaks you can reach to protect the whole system.

    Is it worth the effort to insulate pipes in a basement or an unheated crawlspace compared to the rest of the house?

    If you’re asking if you should prioritize the basement or crawlspace, the answer is a massive yes. In fact, that’s where the real battle is won. While insulating pipes in a conditioned room helps, it’s nothing compared to stopping heat loss in a freezing crawlspace. If your pipes are sitting in unheated air, they’re basically radiators working in reverse—bleeding energy into the ground. Focus your effort there first; that’s where you’ll see the biggest dent in your bills.

  • How Geothermal Heating Works in a Home

    How Geothermal Heating Works in a Home

    I remember sitting in my old rental apartment, shivering under three blankets while staring at a utility bill that looked more like a mortgage payment. It’s a special kind of frustration when you realize you’re essentially paying to heat the outdoors because your home is a sieve. Most people hear about geothermal heating and immediately think it’s some futuristic, billionaire-only luxury that’s way out of reach for a regular person. They get sold this idea that sustainable living has to be incredibly expensive to actually work, and honestly, that myth is exactly what keeps people stuck in a cycle of wasting money and energy.

    I’m not here to sell you on a lifestyle you can’t afford or bury you in academic jargon. My goal is to break down the actual mechanics and real-world costs of geothermal heating so you can decide if it makes sense for your specific setup. I’ll give you the straight-up truth about the upfront investment versus the long-term savings, focusing on what actually moves the needle for your wallet and your carbon footprint. No hype, no fluff—just the data you need to stop throwing money away.

    Table of Contents

    Unlocking Massive Geothermal Heat Pump Efficiency

    Unlocking Massive Geothermal Heat Pump Efficiency.

    When we talk about maximizing your return, we have to look at the mechanics. The real magic happens because you aren’t fighting against the freezing air outside; you’re tapping into the constant, stable temperature of the earth. This is why geothermal heat pump efficiency is leagues ahead of any traditional furnace. Instead of burning fuel to create heat, you’re simply moving existing thermal energy from the ground into your living space. It’s a massive shift in how we think about resource management.

    The logistics of your setup will ultimately dictate your long-term savings. Most people I consult with get hung up on the initial layout, specifically the choice between vertical vs horizontal loop systems. Horizontal loops are generally more affordable if you have a sprawling backyard to work with, but vertical loops are the way to go if you’re working with a tighter footprint. It’s a bit of a trade-off between upfront capital and available land, but once that loop is in the ground, you’ve essentially created a permanent, low-maintenance battery for your home’s climate control.

    A Real Geothermal Heating Cost Benefit Analysis

    A Real Geothermal Heating Cost Benefit Analysis

    Let’s get real about the numbers, because I know most people see the upfront price tag and immediately run the other way. When I’m doing an audit, I always tell clients that a ground source heat pump installation isn’t a quick fix for a tight monthly budget, but it is a long-term play. You’re looking at a significant initial investment compared to a standard furnace, but you have to weigh that against the massive drop in monthly utility bills. I’ve seen homes where the system pays for itself through energy savings in just a few years, which is a huge win for anyone trying to stop overpaying for basic comfort.

    The math also changes depending on your yard. If you have a massive lot, a horizontal loop is much cheaper to set up, but if you’re in a tighter space, you’ll likely need to go with vertical vs horizontal loop systems to make it work. It’s a trade-off between land availability and installation cost. Ultimately, a proper geothermal heating cost-benefit analysis isn’t just about the cash; it’s about the peace of mind that comes from knowing your home is finally working with the environment rather than against it.

    How to Actually Make Geothermal Work for Your Home

    • Don’t skip the site assessment. Before you drop a single cent, get a professional to check your soil composition and thermal conductivity; if your ground can’t move heat effectively, you’re just burying expensive hardware that won’t perform.
    • Size your system correctly or suffer the consequences. It’s tempting to go bigger “just in case,” but an oversized heat pump will cycle on and off too frequently, which kills efficiency and wears out the components way faster than necessary.
    • Pair it with smart thermostats. A geothermal system is a precision tool, not a blunt instrument; using a smart controller allows you to manage the thermal mass of your home and avoid heating empty rooms, maximizing every bit of energy you pull from the ground.
    • Look into local and federal tax credits immediately. Since the upfront cost is the biggest hurdle, you need to stack every available rebate and incentive to bring that “payback period” down from a decade to something much more manageable.
    • Maintain your indoor air quality alongside the heat. Since geothermal systems are incredibly efficient at maintaining steady temperatures, they can sometimes lead to different humidity levels; keep an eye on your ventilation so you aren’t trading a low energy bill for a damp house.

    The Bottom Line on Going Geothermal

    Don’t let the upfront cost scare you off; while the installation is a bigger lift than a standard heat pump, the long-term savings on your monthly bills are what actually make it pay for itself.

    It’s not just about the heat—geothermal is a dual-threat system that handles cooling just as efficiently, meaning you’re optimizing your entire home’s climate control with one smart move.

    Efficiency isn’t a luxury. Switching to geothermal is one of the most effective ways to decouple your comfort from fluctuating energy prices while significantly shrinking your household’s carbon footprint.

    The Bottom Line on Geothermal

    The Bottom Line on Geothermal efficiency.

    “I’ve spent enough time pointing an infrared thermometer at drafty windows to know that we can’t just patch the leaks forever; geothermal is about finally stopping the cycle of fighting against your own home’s temperature and starting to work with the earth instead.”

    Tobias Nkemdirim

    The Bottom Line on Geothermal

    Look, I know the upfront math for geothermal can feel a bit heavy when you first see it. Between the drilling and the initial installation, it’s a significant chunk of change. But when you strip away the jargon and look at the actual data, the picture changes. We’ve looked at how these systems leverage the earth’s constant temperature to provide incredible efficiency, and more importantly, how they eventually pay for themselves by slashing your monthly utility bills. It isn’t just about having a fancy new HVAC setup; it’s about moving away from the cycle of wasting money on inefficient, fossil-fuel-dependent heating that fails the moment a cold snap hits.

    At the end of the day, my goal is to help you build a home that works for you, not against your wallet. Switching to geothermal is a move toward long-term energy independence. It’s a way to stop being at the mercy of fluctuating energy prices while simultaneously shrinking your carbon footprint. You don’t have to do everything at once, but choosing systems that prioritize efficiency is a massive step in the right direction. Let’s stop settling for “good enough” heating and start investing in smart, sustainable solutions that actually make sense for our lives and our planet.

    Frequently Asked Questions

    Is it actually worth the upfront cost if I'm only planning to live in my current house for a few years?

    Honestly? If you’re moving in two years, probably not. The upfront installation is a heavy lift, and you likely won’t recoup that initial investment through monthly savings in such a short window. Unless you’re buying the house specifically to flip it with high-end green upgrades, you’re better off sticking to smaller, low-cost efficiency wins—like better insulation or sealing drafts. Don’t sink massive capital into a home you don’t plan to keep long-term.

    How much maintenance am I looking at once the system is actually installed in my yard?

    Honestly, the maintenance is surprisingly low, which is one of the best parts. Since the heavy lifting happens underground, you aren’t dealing with the same grit and wear as a traditional furnace. Just keep your air filters clean and check your indoor unit once a year—think of it like a basic wellness check. As long as your pump is running smoothly, you’re mostly just preventing small issues from becoming expensive leaks.

    Can I actually integrate geothermal into an existing home, or do I have to tear everything up to make it work?

    The short answer is: yes, you can, but it’s not a “plug and play” situation. You won’t need to tear down your walls, but your yard is going to take a hit. Depending on your lot size, we’re talking about drilling boreholes or digging trenches for the ground loops. It’s more about landscape disruption than structural demolition. It’s a bit of a project, but it’s worth it to stop heating the outdoors.

  • Understanding How Solar Inverters Work

    Understanding How Solar Inverters Work

    I remember standing in my old rental apartment, shivering in a room that felt more like a walk-in freezer than a living space, staring at a utility bill that made absolutely no sense. I knew I needed to go solar, but every time I searched for solar inverters explained, I was met with a wall of technical jargon and salespeople trying to upsell me on systems that cost more than my entire annual rent. It’s frustrating because most of the “experts” out there talk like they’re reading a textbook, completely ignoring the fact that most people just want to stop bleeding money to the grid without needing a PhD in electrical engineering.

    I’m not here to sell you a premium, over-engineered setup that you don’t actually need. Instead, I’m going to strip away the fluff and give you the practical reality of how these devices actually work in a real home. My goal is to provide a breakdown of solar inverters explained through the lens of efficiency and actual cost-savings. We’ll look at what matters—reliability, compatibility, and ROI—so you can make a smart decision that keeps your footprint small and your bank account intact.

    Table of Contents

    The Magic of the Dc to Ac Conversion Process

    The Magic of the Dc to Ac Conversion Process

    To understand why this piece of hardware is the heart of your setup, you have to look at the physics of what’s actually happening. Your solar panels are essentially collecting raw, “wild” energy in the form of Direct Current (DC). While that’s great for a battery, your fridge, laptop, and lights all run on Alternating Current (AC). This is where the dc to ac conversion process comes into play. The inverter acts as a translator, taking that steady stream of DC and flipping it back and forth rapidly to create the rhythmic wave of AC that your home appliances crave.

    It isn’t just about flipping a switch, though; it’s about precision. A high-quality unit uses something called Maximum Power Point Tracking (MPPT) to ensure it’s squeezing every possible drop of energy out of your panels, even when a cloud drifts by. If the conversion is sloppy, you’re essentially leaking money through your roof. When I’m auditing a home, I always look at the solar inverter efficiency ratings because even a 2% difference in how well that conversion happens can mean a noticeable dent in your monthly utility bill over the course of a year.

    Mastering Solar Inverter Efficiency Ratings to Save Money

    Mastering Solar Inverter Efficiency Ratings to Save Money

    When you’re looking at spec sheets, it’s easy to get lost in a sea of percentages, but here is the reality: not all conversion is created equal. Most people see a 95% efficiency rating and think they’re golden, but they forget that energy loss happens at every single stage of the dc to ac conversion process. If your hardware is subpar, you’re essentially paying for sunlight that never actually reaches your appliances. I always tell my clients to look past the headline number and check the efficiency curve—how well the unit performs when the sun isn’t at its absolute peak.

    You also need to consider how different setups handle energy loss. For instance, if you have a complex roofline with partial shading, the debate between string inverter vs microinverter becomes a financial one, not just a technical one. A string inverter might be cheaper upfront, but if one panel gets shaded, the whole system’s efficiency tanks. Choosing the right hardware isn’t about buying the most expensive gear; it’s about minimizing the gap between what your panels produce and what your home actually consumes.

    5 Ways to Make Sure Your Inverter Actually Pays for Itself

    • Don’t get blinded by the sticker price. A cheap inverter might save you a few bucks today, but if it has a low efficiency rating, it’s literally bleeding money every time the sun is out. Look for high conversion efficiency so you’re getting the most bang for your buck from your panels.
    • Match your inverter to your actual load. I see people all the time buying massive, high-capacity inverters for a tiny apartment setup. It’s overkill and inefficient. Size it to what you actually need to run—fridge, lights, laptop—so you aren’t wasting energy just keeping the system idling.
    • Check for smart monitoring features. If you can’t see what’s happening with your power in real-time on your phone, you’re flying blind. I use data to find leaks, and you should too. Being able to see exactly how much energy is being converted helps you spot issues before they wreck your monthly budget.
    • Think about your future expansion. If you’re planning to add more panels or a battery later, don’t buy a “closed” system. Get an inverter that’s modular or expandable. It’s way cheaper to buy a slightly better unit now than to rip out the whole setup and start over in two years.
    • Keep it cool and ventilated. This isn’t just about hardware longevity; heat is the enemy of efficiency. If your inverter is tucked away in a cramped, unventilated cupboard, it’s going to struggle, get hot, and lose more energy to heat dissipation. Give it some breathing room so it can work smarter, not harder.

    The Bottom Line on Your Inverter

    The Bottom Line on Your Inverter.

    Don’t just look at the price tag; check the efficiency rating. A cheaper inverter that wastes more energy as heat is actually costing you more in the long run through higher utility bills.

    Think of the inverter as the brain of your entire solar setup. If it’s not converting DC to AC smoothly, all that sunlight hitting your roof is basically being wasted.

    Investing in a quality inverter is a way to future-proof your home. It’s the difference between a system that barely keeps the lights on and one that actually helps you slash your energy footprint.

    ## The Real Cost of Cheap Hardware

    “Most people focus on the price tag of a solar kit, but if you’re buying a low-quality inverter just to save a few bucks upfront, you’re basically pouring money down a leak. A smart inverter isn’t just a box that converts power; it’s the gatekeeper that ensures the energy you’re paying for actually makes it to your appliances instead of bleeding out as wasted heat.”

    Tobias Nkemdirim

    The Bottom Line on Your Inverter

    At the end of the day, choosing a solar inverter isn’t just about picking a piece of hardware; it’s about understanding how that device dictates the efficiency of your entire system. We’ve looked at how the conversion from DC to AC works and why obsessing over those efficiency ratings is the difference between a system that pays for itself and one that just sits there wasting potential. If you ignore the quality of your inverter, you’re essentially leaving money on the table every time the sun comes up. Remember, a high-quality unit is the bridge between raw sunlight and actual savings in your bank account.

    I know that transitioning to solar can feel like a massive, expensive hurdle, but it doesn’t have to be overwhelming. You don’t need a million-dollar setup to make a dent in your carbon footprint or your monthly utility bills. It starts with making smart, data-driven decisions about the components that run your home. My goal has always been to prove that sustainability shouldn’t be a luxury reserved for the wealthy. By picking the right tech and refusing to settle for inefficiency, you’re taking a massive step toward a home that is both kind to the planet and kind to your wallet.

    Frequently Asked Questions

    Do I actually need a battery backup, or can I just run my appliances directly from the inverter?

    It depends on your lifestyle, but here’s the reality: if you go without a battery, you’re basically a slave to the sun. You can run appliances directly from the inverter while the panels are cranking, but the second a cloud passes over or the sun dips, your power vanishes. If you want to keep your fridge running and your lights on after dark without breaking the bank on massive upgrades, you’re going to need that battery buffer.

    How much extra will it cost to upgrade to a hybrid inverter compared to a standard string inverter?

    On average, expect to pay anywhere from $500 to $1,500 more upfront for a hybrid inverter compared to a standard string setup. It’s a steeper initial investment, but I look at it through the lens of long-term efficiency. A standard inverter is a one-way street, while a hybrid acts like a smart hub, managing both your panels and a battery bank. If you want energy independence, that extra cost is your ticket to actually using your power when the sun isn’t out.

    Can a cheap, low-efficiency inverter actually mess up my other home appliances?

    Short answer: Yes, absolutely. I’ve seen it happen during audits. A cheap, low-quality inverter often produces “dirty” power—meaning the sine wave is jagged rather than smooth. This creates electrical noise and voltage fluctuations. If you plug sensitive gear like your laptop or a high-end fridge into a bad inverter, those spikes can fry delicate circuitry or cause motors to run hot and die prematurely. Don’t gamble your expensive appliances just to save a few bucks upfront.