Author: Tobias Nkemdirim

  • Maintaining Refrigerator Energy Efficiency

    Maintaining Refrigerator Energy Efficiency

    I remember standing in my old rental kitchen, shivering in a room that felt like a meat locker, only to realize my fridge was humming like a jet engine while doing nothing to keep my food actually cold. Most people think improving refrigerator efficiency means dropping two grand on some “smart” high-tech model with a touchscreen, but that’s just marketing fluff designed to empty your pockets. In reality, your fridge is likely working twice as hard as it needs to simply because of a few tiny, overlooked habits or a layer of dust you haven’t bothered to wipe away.

    I’m not here to sell you a new appliance or push some complicated lifestyle overhaul that doesn’t work. My goal is to give you the actual, data-backed tweaks that I use during my professional audits to stop energy from leaking out of your electric bill. We’re going to look at the practical, low-cost fixes—from coil maintenance to temperature calibration—that make a measurable difference in your monthly costs. You don’t need a massive budget to live sustainably; you just need to stop wasting the power you’re already paying for.

    Table of Contents

    Smart Thermostat Settings for Lower Bills

    Smart Thermostat Settings for Lower Bills.

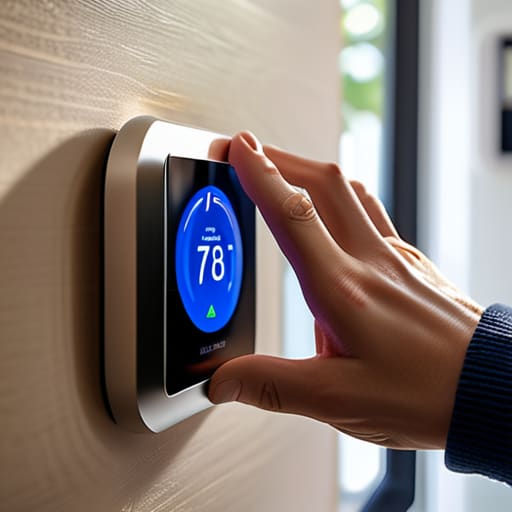
    Most people treat their fridge settings like a “set it and forget it” situation, but that’s a mistake. I’ve seen too many units working overtime just because the internal temperature is dialed down way lower than it needs to be. You aren’t trying to turn your kitchen into a walk-in freezer; you just need to keep things safe. Aiming for an optimal food storage temperature of around 37°F (3°C) for the fridge and 0°F (-18°C) for the freezer is the sweet spot. Anything colder than that is just forcing your motor to work harder for no reason, which kills your compressor’s lifespan.

    I also recommend checking your refrigerator thermostat settings every time you move seasons. If your kitchen gets significantly warmer in the summer, you might need a slight adjustment, but don’t overcompensate. A common mistake I see during audits is people cranking the dial to “Max” during a heatwave. This actually forces the unit into a constant cooling cycle, which is a massive drain on your wallet. Keeping those settings precise is one of the easiest ways to see a real difference in your monthly costs.

    Finding the Optimal Food Storage Temperature

    Finding the Optimal Food Storage Temperature.

    Most people treat their fridge settings like a “set it and forget it” situation, but that’s usually where you’re losing money. If your fridge is running colder than it needs to be, you’re essentially paying to freeze things that don’t need it. I always tell my clients that finding the optimal food storage temperature is a balancing act between food safety and your wallet. You want your fridge between 37°F and 40°F (3°C to 4°C) and your freezer at 0°F (-18°C). Anything lower is just unnecessary strain on the motor.

    I’ve seen so many units working overtime because the settings are dialed way too low. When you’re constantly fighting a sub-zero fridge, you’re killing your compressor efficiency tips—or rather, you’re ignoring them. By dialing back those refrigerator thermostat settings to the actual recommended levels, you stop the motor from cycling constantly. It’s one of those small, data-backed tweaks that makes a massive difference in reducing electricity bills in the kitchen without you having to lift a finger once the dial is set.

    5 Quick Fixes to Stop Your Fridge from Bleeding Cash

    • Check your door seals with a simple paper test; if you can pull a piece of paper out easily while the door is shut, you’re literally letting cold air escape into your kitchen.
    • Stop overcrowding the shelves—your fridge needs actual airflow to circulate the cold, and if it’s packed tight, the compressor has to work overtime just to keep things cool.
    • Give those condenser coils a vacuum; if they’re covered in a layer of dust, your fridge can’t shed heat efficiently, which spikes your power usage instantly.
    • Don’t put hot leftovers straight in the fridge; let them hit room temperature first so your appliance doesn’t have to go into an emergency cooling overdrive.
    • Keep it away from the heat—if your fridge is sitting right next to an oven or in direct sunlight, it’s fighting a losing battle that’s costing you extra every single month.

    The Bottom Line for Your Fridge

    Stop letting your money leak through dirty coils; a quick vacuum once or twice a year keeps the motor from working overtime and spiking your bill.

    Check your seals with a simple paper test—if a dollar bill slides out easily when you close the door, you’re literally paying to cool your kitchen.

    Don’t crowd the shelves; air needs to circulate to keep things efficient, so leave some breathing room instead of packing it tight.

    The Hidden Cost of a Cold Box

    “Most people think a fridge is just a set-it-and-forget-it appliance, but if you aren’t checking your seals or cleaning those coils, you’re basically just paying a monthly tax to keep your kitchen inefficient.”

    Tobias Nkemdirim

    Making It Count

    Making It Count with fridge efficiency.

    At the end of the day, making your fridge more efficient isn’t about buying a brand-new, high-tech model that costs a fortune. It’s about the small, practical shifts we talked about: keeping those coils clean, managing your temperature settings, and making sure you aren’t just letting cold air escape every time you open the door. I’ve seen firsthand how much of a difference these tiny adjustments make when I’m running audits on older apartments. When you optimize how your fridge operates, you aren’t just slashing your monthly utility bill; you’re actually making sure your most essential appliance isn’t working twice as hard as it needs to.

    I know it can feel overwhelming to think about “saving the planet” while you’re just trying to manage your own budget, but that’s exactly where the power lies. Sustainability shouldn’t be a luxury reserved for people with massive bank accounts. By taking ten minutes to check your seals or vacuum your coils, you are proving that small, smart changes are the most effective way to build a better future. We don’t need perfection; we just need to stop being wasteful simply because it’s convenient. Start with your kitchen, and the rest will follow.

    Frequently Asked Questions

    Is it actually better to keep my fridge full or empty if I'm trying to save on electricity?

    It’s actually better to keep it full. Think of your food as thermal mass; once those items are cold, they act like little ice packs that help maintain the temperature. An empty fridge is just a big box of air that loses its chill every single time you open the door. If your fridge is looking sparse, just toss in a few jugs of water. It’s a cheap way to keep the compressor from working overtime.

    How often should I really be cleaning the coils in the back to see a difference in my bill?

    Honestly, if you have pets or a dusty apartment, I’d say once every six months is the sweet spot. If you’re in a cleaner environment, you can probably stretch it to once a year. I usually pull my vacuum out and check mine every few months just to be safe. If those coils are caked in dust, your compressor is working double time just to fight the heat, and that’s exactly where your money is disappearing.

    Can old, worn-out door seals actually cause a noticeable spike in my monthly energy costs?

    Absolutely. I’ve seen this happen more times than I can count during audits. If those rubber gaskets are cracked or brittle, they aren’t doing their job. Instead of keeping the cold in, they’re letting it leak straight into your kitchen. Your fridge then has to work overtime, running its compressor constantly just to stay cool. It’s essentially like leaving a window cracked in the middle of winter—it’s a massive, invisible drain on your wallet.

  • How Heat Recovery Ventilation Works

    How Heat Recovery Ventilation Works

    I still remember standing in my old rental apartment three years ago, shivering in a room that felt more like a walk-in freezer than a living space. I had the heater cranked up to max, yet every time I cracked a window to get some fresh air, I could practically feel my money escaping into the night sky. It’s a frustrating cycle: you either live in stale, stuffy air or you pay a premium to heat the outdoors. Most people think you need a massive, high-tech renovation to fix this, but that’s just marketing fluff. The truth is, heat recovery ventilation isn’t some luxury gadget for the ultra-rich; it’s a practical tool that stops you from literally throwing your hard-earned cash out the window every time you need to breathe.

    I’m not here to sell you on expensive, over-engineered systems that require a PhD to operate. Instead, I’m going to give you the straightforward truth about how these systems actually work in a real home. I’ll break down what you actually need to look for, how much it’s worth the investment, and how to make sure you aren’t overpaying for efficiency. My goal is simple: to help you build a home that stays warm, stays fresh, and keeps your bills low.

    Table of Contents

    Maximizing Mvhr System Efficiency Without Breaking the Bank

    Maximizing Mvhr System Efficiency Without Breaking the Bank

    The biggest mistake I see people make is treating their MVHR system like a “set it and forget it” appliance. If you let the filters clog up with dust and debris, you’re essentially forcing your fans to work twice as hard to move half the air. That’s just burning money for no reason. I always tell my clients that regular filter maintenance is the single most effective way to boost your MVHR system efficiency without spending a dime on new hardware. Check them every few months; it keeps the airflow smooth and the motor running lean.

    Another way to optimize your setup is by paying attention to how you’re controlling indoor humidity levels. If your home is too damp, your system is working overtime to manage moisture; if it’s too dry, you might be losing heat faster than you realize. Instead of buying expensive smart sensors right away, start by observing your windows for condensation. Fine-tuning your ventilation rates based on the actual seasons—rather than keeping it on max year-round—is a practical way of reducing heating costs with ventilation while keeping your air fresh and your energy bills predictable.

    Reducing Heating Costs With Ventilation You Can Actually Afford

    Reducing Heating Costs With Ventilation You Can Actually Afford

    Most people think that bringing fresh air into a house means opening a window and letting all the expensive warmth escape into the street. I used to think the same thing until I started auditing homes and seeing just how much money literally drifts out of a cracked window. If you’re looking at reducing heating costs with ventilation, you don’t necessarily need a full-scale architectural overhaul. Start by looking at your existing airflow. Even small adjustments to how you manage your vents can prevent the “drafty house” syndrome that forces your heater to work overtime.

    If you have a bit more to invest, looking into mechanical ventilation with heat recovery is the smartest move for long-term savings. Instead of just swapping stale air for cold air, these systems capture the thermal energy from the air you’re exhausting and use it to pre-heat the incoming stream. It’s essentially recycling your warmth. It’s not about being fancy; it’s about stopping the cycle of heating the same air twice. By focusing on these practical upgrades, you can maintain a steady temperature without watching your utility meter spin out of control.

    5 Low-Effort Ways to Keep Your HRV Running Lean

    • Clean your filters every three months. I can’t stress this enough—clogged filters force your fans to work twice as hard, which spikes your electricity usage and kills the system’s ability to swap heat effectively.
    • Check your vent covers for dust buildup. If the air can’t flow freely into the room, your system is basically fighting an uphill battle against physics, wasting energy just to move air that’s stuck.
    • Don’t bypass the heat exchanger during shoulder seasons. It’s tempting to turn the recovery off when it’s not freezing, but keeping it active helps maintain a steady indoor temperature without your heater kicking in prematurely.

    • Seal up the gaps around your unit. I’ve used my infrared thermometer more than once to find heat leaks around the installation point; if the warm air is escaping through the wall cavity instead of the vent, you’re just heating the outdoors.
    • Use the “boost” mode sparingly. It’s great for clearing out cooking smells, but leaving it on all day is a massive energy drain. Use it when you actually need it, then let the system settle back into its efficient baseline.

    The Bottom Line on Smart Ventilation

    You don’t need a high-end, automated system to see results; focusing on maintenance and simple airflow management is the fastest way to stop wasting the heat you’ve already paid for.

    Efficiency isn’t just about the tech you install, but how you use it—treat your ventilation as a tool to balance air quality with your monthly utility budget.

    Small, consistent adjustments to your ventilation habits can prevent the massive energy leaks that turn a comfortable home into a money pit.

    The Real Cost of "Fresh" Air

    Most people think they have to choose between stuffy, stale air and a massive heating bill, but that’s just bad engineering. A decent heat recovery system isn’t a luxury—it’s about finally stopping the cycle of paying to heat the outdoors just because you wanted to breathe.

    Tobias Nkemdirim

    The Bottom Line on Better Air

    The Bottom Line on Better Air.

    At the end of the day, upgrading your ventilation doesn’t have to be an all-or-nothing gamble with your savings. We’ve looked at how maximizing your MVHR efficiency and choosing affordable, smart ventilation options can fundamentally change how your home breathes. It’s about moving away from that old habit of just cranking up the thermostat to fight stuffy, cold air, and instead focusing on reclaiming the heat you’ve already paid for. Whether you’re fine-tuning an existing system or looking for a budget-friendly way to stop the drafts, the goal remains the same: stop wasting energy just to maintain basic comfort.

    I know it can feel overwhelming when you look at the technical specs or the price tags, but remember that sustainability isn’t a luxury club for the wealthy. It’s a series of practical, data-backed decisions that add up over time. Every bit of heat you recover is a win for your bank account and a small victory for the planet. You don’t need a perfect, high-tech mansion to make a difference; you just need to be intentional about how you use your resources. Start small, keep an eye on those thermal leaks, and build a home that actually works for you.

    Frequently Asked Questions

    Is it actually worth the upfront cost if I'm living in a smaller, older rental?

    Honestly, if you’re in a small, older rental, a full MVHR installation is probably overkill and likely something you can’t even do without landlord permission. For most renters, the upfront cost and complexity just don’t make sense. Instead of chasing a massive system, focus on “micro-efficiency”—think trickle vents or even just better window sealing. You want to stop the drafts without needing a massive renovation budget you don’t have.

    How much maintenance do these systems really need before they start costing me more in repairs than they save in energy?

    If you ignore them, they’ll definitely cost you more. I’ve seen systems where dust buildup in the filters makes the fans work twice as hard, spiking your energy bills. The sweet spot is simple: swap your filters every six months and check the heat exchanger once a year. It’s cheap, takes twenty minutes, and prevents that massive repair bill. Don’t let a little dust turn your efficiency tool into a money pit.

    Will installing an MVHR system actually fix the damp and mold issues in my house, or is it just for temperature control?

    It’s definitely not just for temperature control. In fact, tackling damp and mold is where an MVHR system really earns its keep. When you cook, shower, or even just breathe, you’re pumping moisture into the air. Without proper ventilation, that moisture settles on cold surfaces and turns into mold. An MVHR system constantly pulls that excess humidity out before it can settle, keeping your air fresh and your walls dry without losing all your heat.

  • What to Expect During Solar Installation

    What to Expect During Solar Installation

    I remember sitting in my old rental apartment, shivering under three blankets while staring at a utility bill that felt like a personal attack. Back then, I thought going solar was some elite luxury reserved for people with massive estates and endless budgets. Most people will tell you that the solar panel installation process is this high-tech, intimidating mountain of paperwork and massive upfront costs that you just can’t afford. They make it sound like you need a degree in engineering just to get started, but honestly? That’s just marketing noise designed to keep you paying your grid provider forever.

    I’m not here to sell you on a lifestyle you can’t afford or drown you in technical jargon. Instead, I want to walk you through the actual, boots-on-the-ground reality of how this works. I’ll break down the solar panel installation process into manageable, logical steps so you can see exactly where your money goes and how to avoid the common pitfalls. My goal is to give you the straightforward truth about what to expect, from the initial site audit to the moment you finally flip the switch, without any of the typical industry hype.

    Table of Contents

    Smart Choices Essential Solar Energy System Components

    Smart Choices Essential Solar Energy System Components

    When you’re looking at a quote for a new setup, don’t let the jargon trip you up. At its core, a functional photovoltaic system setup relies on a few heavy hitters working in harmony. First, you have the panels themselves, which obviously catch the light, but the real magic happens with the solar inverter configuration. The inverter is the brain of the operation; it takes that raw DC power from your roof and converts it into the AC electricity your fridge and laptop actually use. If you skimp on the inverter quality, you’re essentially bottlenecking your entire system’s potential.

    Next, let’s talk about the stuff that usually gets ignored until something breaks: the solar mounting hardware. I’ve seen too many cheap installs where the brackets weren’t rated for local wind loads, which is a massive headache waiting to happen. You need hardware that is built to last as long as the panels themselves. Finally, keep an eye on your net metering interconnection setup. This is what allows you to actually get credit for the extra power you send back to the grid, turning your roof into a genuine little revenue stream rather than just a decorative feature.

    The Solar Installer Checklist for Budget Conscious Homes

    The Solar Installer Checklist for Budget Conscious Homes

    When you start vetting companies, don’t just go with the first quote that lands in your inbox. I’ve seen too many people get burned by “low-cost” providers who cut corners on the actual hardware. My personal solar installer checklist always starts with the technical specifics: ask them exactly what kind of solar mounting hardware they use and if it’s rated for your specific roof type and local wind loads. You don’t want to realize six months later that your panels are rattling because they used cheap brackets to save a few bucks.

    Beyond the physical gear, you need to grill them on the logistics of the photovoltaic system setup. A pro should be able to explain how they handle the net metering interconnection with your local utility provider without you having to chase them down for paperwork. If they can’t give you a straight answer about how your excess energy actually turns into credits on your bill, walk away. You aren’t just buying hardware; you’re investing in a long-term financial tool, and you need to make sure the person installing it actually understands the math.

    5 Reality Checks Before You Sign the Contract

    • Don’t just look at the sticker price; calculate your payback period. I always look at how many years it’ll take for the energy savings to actually cover the initial cost of the installation. If it’s longer than a decade, you might want to rethink the math.
    • Get a professional shading analysis done. I’ve seen too many people install panels only to realize a neighbor’s oak tree or a chimney is killing their efficiency. If you don’t account for shade, your ROI is going to tank.
    • Check your roof’s health before the crew arrives. There is zero point in installing a high-tech solar array if your shingles are about to fail in two years. It’s much cheaper to fix the roof now than to pay a crew to tear up your new solar setup later.
    • Prioritize the inverter quality. Everyone obsesses over the panels, but the inverter is the brain of the whole system. A cheap, low-quality inverter is a recipe for a headache and a system that stops working right when you need it most.
    • Verify the permit and interconnection paperwork. It sounds dry, but if your installer isn’t handling the local utility paperwork properly, you could be stuck with a beautiful system that isn’t legally allowed to feed power back into the grid.

    The Bottom Line on Going Solar

    The Bottom Line on Going Solar.

    Don’t let the upfront cost scare you; focus on the long-term math and look for ways to make the system pay for itself through lower monthly bills.

    Quality matters more than a low quote—skimping on components like the inverter or panels will just lead to more expensive repairs and wasted energy later.

    Solar isn’t a “set it and forget it” miracle; you need to vet your installer thoroughly to ensure they aren’t just selling you a shiny product, but a system that actually fits your home’s specific energy needs.

    ## The Real Cost of Cutting Corners

    “People get so caught up in the upfront price tag of solar panels that they forget the real cost is in a bad installation; if you don’t get the setup right from day one, you aren’t investing in energy independence, you’re just paying for a very expensive way to leak power.”

    Tobias Nkemdirim

    The Bottom Line on Going Solar

    At the end of the day, getting solar installed isn’t just about checking off a list of components or finding the cheapest contractor. It’s about understanding how the pieces—from the panels themselves to the inverter and the mounting hardware—work together to stop your money from leaking out of your roof. I know the technical jargon can feel overwhelming, but if you stick to the checklist and focus on quality over the lowest bid, you’ll avoid the expensive mistakes that plague so many first-time adopters. It’s a process that requires some upfront legwork, but once you’ve audited your needs and vetted your installer, you’re essentially future-proofing your home’s finances.

    I still remember those freezing winters in my old rental, feeling like I was throwing cash into a furnace just to stay warm. Switching to solar changed that perspective for me; it turned my home from a passive consumer into an active producer. You don’t need a massive inheritance to make this move, and you definitely don’t need to be an engineer. You just need the willingness to take that first step toward energy independence. Stop letting your utility company dictate your monthly budget and start taking control of your own power. It’s one of the most practical things you can do for both your wallet and the planet.

    Frequently Asked Questions

    How long will it actually take from the day I sign the contract until I see my first drop in my electricity bill?

    Realistically? You’re looking at a gap of anywhere from two to six months. The actual installation usually takes just a couple of days, but the paperwork—permits, utility inspections, and grid connection approvals—is where the lag happens. Even once the panels are live, your utility company might not update your billing cycle immediately. Don’t panic if your first bill looks high; just track your meter closely to see the real-time difference.

    Do I need to upgrade my home's electrical panel before the solar panels can even be hooked up?

    It’s a common question, and honestly, it’s one of those “hidden” costs that catches people off guard. The short answer? Maybe. I usually pull out my thermometer to check for heat leaks, but for this, I look at your load capacity. If your current panel is old or already maxed out by heavy appliances, it won’t handle the extra input from solar. You don’t want to strain your system; an upgrade ensures everything runs safely and efficiently.

    What happens to my solar setup if I decide to rent my home or move to a different place in a few years?

    Look, I get the hesitation. I spent years in rentals where I couldn’t touch the thermostat, so I know the “what if I move?” anxiety is real. If you own the home, the solar system is a massive asset that usually boosts your property value. If you’re renting, you’re stuck—unless you look into portable setups or community solar. Treat your solar investment like a home upgrade, not just a gadget; it stays with the house.

  • Understanding Embodied Carbon in Home Building Materials

    Understanding Embodied Carbon in Home Building Materials

    I was standing in a drafty, half-finished renovation last week, clicking my infrared thermometer against a brand-new concrete wall, when it hit me: we are obsessed with the wrong things. Everyone wants to talk about solar panels and smart thermostats to save a few bucks on monthly bills, but they’re completely ignoring the massive carbon debt we rack up before the lights even turn on. We spend all this energy talking about “green living” while ignoring the massive environmental toll of embodied carbon construction. It’s a massive blind spot in the industry, and frankly, it’s a bit of a scam to call a building “sustainable” if the very materials used to build it already wrecked the planet.

    I’m not here to bore you with academic jargon or expensive, high-end architectural theories that only billionaires can afford. I want to show you how we can actually start looking at the real footprint of our buildings. I’m going to break down what this stuff actually means for your wallet and the environment, offering practical, data-driven ways to choose materials that don’t cost the earth. My goal is to give you the no-nonsense truth about building smarter, not just more expensive.

    Table of Contents

    Stop Ignoring the Gap Between Embodied vs Operational Carbon

    Stop Ignoring the Gap Between Embodied vs Operational Carbon.

    Most people I talk to are obsessed with their monthly utility bills—and honestly, I get it. I spent years shivering in a rental because the heating was inefficient, so I naturally focus on how a house performs once people move in. But here’s the problem: we’re so focused on how much energy a building uses daily that we completely ignore the massive carbon debt it carries before the keys are even handed over. This is the fundamental tension between embodied vs operational carbon. You can install the most high-tech, solar-powered smart home on the planet, but if the concrete and steel used to build it required a massive amount of fossil fuels, you’ve already lost the battle.

    We need to stop treating these as two separate issues. If we only optimize for the “operational” side—the lights, the heat, the appliances—we’re just putting a band-aid on a much deeper wound. To truly succeed in decarbonizing the built environment, we have to look at the entire lifecycle of a structure. It’s not enough to just run a house efficiently; we have to stop building homes that are “carbon-heavy” from day one.

    Smart Choices Finding Low Carbon Building Materials Without Breaking the Ba

    Smart Choices Finding Low Carbon Building Materials Without Breaking the Ba

    The problem is that most people think “green” means “expensive,” and honestly, that’s a barrier that keeps sustainability out of reach for most of us. But you don’t need a massive budget to start decarbonizing the built environment. Instead of chasing high-end, boutique eco-products, look at what’s already available locally. Reclaimed wood or even repurposed brick might not come with a fancy certificate, but they carry almost zero new carbon footprint. It’s about shifting our mindset toward a circular economy in construction, where we treat existing materials as resources rather than waste.

    If you are looking at new materials, focus on things that actually work with nature. For example, I’m a huge advocate for timber because of its ability to facilitate carbon sequestration in timber—basically locking carbon away inside the structure itself. Just make sure you’re looking at the whole picture. Don’t just grab the first “eco” label you see; do a quick mental check of where it came from and how it was processed. Making smart, intentional choices doesn’t require a PhD, just a bit of practical scrutiny.

    5 Ways to Cut Carbon Before the First Brick is Laid

    • Stop obsessed with the “shiny and new.” The most sustainable material is often the one that already exists. Before you order a shipment of new timber or steel, look into reclaimed materials or salvaged components. It’s cheaper, looks unique, and skips the massive carbon hit of manufacturing and shipping something from scratch.
    • Prioritize “Low-Embodied” over “High-Tech.” We often get distracted by fancy, smart-home gadgets that promise efficiency, but if those gadgets are made of carbon-intensive materials, you’re just trading one problem for another. Focus on the basics first: stone, earth, or sustainably sourced wood.
    • Think about the lifecycle, not just the purchase price. I see people choosing cheap, synthetic insulation because it saves them money today, but that stuff is often a carbon nightmare to produce and a disaster to dispose of later. Invest in materials that can actually be repurposed or composted when the building’s life is over.
    • Size down to scale up your efficiency. Every extra square foot you build requires more concrete, more steel, and more energy to maintain. If you can achieve your lifestyle goals in a smaller, more intentional footprint, you’re automatically slashing the embodied carbon of the entire project.
    • Demand transparency from your suppliers. Don’t just take a “green” label at face value. Ask for the Environmental Product Declarations (EPDs). If a supplier can’t give you the actual data on how much carbon went into making that product, they’re probably just greenwashing, and you shouldn’t be paying for it.

    The Bottom Line on Embodied Carbon

    Don’t get so obsessed with your monthly energy bills that you forget the massive carbon debt you’re taking on the moment you pick your building materials.

    Real sustainability isn’t just about how much power a house uses; it’s about choosing materials that don’t wreck the planet before you even turn the lights on.

    You don’t need a massive budget to make better choices—start by looking at the lifecycle of what you’re buying rather than just picking whatever is easiest or cheapest at the shop.

    ## The Hidden Debt of Your Home

    We spend so much time obsessing over the monthly electricity bill that we completely ignore the massive carbon debt we’ve already racked up before we even turn the lights on. If the materials used to build your walls are destroying the planet, it doesn’t matter how many LED bulbs you swap in—you’re still starting in the red.

    Tobias Nkemdirim

    The Bottom Line on Building Better

    The Bottom Line on Building Better.

    At the end of the day, we can’t keep treating embodied carbon like it’s some invisible problem that doesn’t matter. If we focus entirely on making a house energy-efficient to run while ignoring the massive carbon debt created by the steel, concrete, and insulation used to build it, we’re just moving the goalposts. We’ve talked about why the gap between embodied and operational carbon is so dangerous, and how we can hunt for smarter, more affordable materials that don’t wreck the planet before the keys are even handed over. It’s about looking at the entire lifecycle of a building, not just the monthly utility bill.

    I know that for most of us, the idea of changing how we build feels massive and expensive, but it doesn’t have to be. Real sustainability isn’t about luxury eco-mansions; it’s about making the intentional choice to value what goes into our walls as much as what comes out of our sockets. Every time we push for better materials or reuse what we already have, we’re chipping away at a system that prioritizes convenience over the climate. Let’s stop building for the sake of it and start building for the long haul.

    Frequently Asked Questions

    If I'm on a tight budget, is it actually worth paying the premium for low-carbon materials, or should I just focus on making my insulation better?

    Look, if your wallet is tight, prioritize the insulation. Period. You can use the most eco-friendly timber in the world, but if your thermal envelope is leaky, you’re just wasting low-carbon materials by heating the outdoors. Focus on the “low-hanging fruit” first—seal those drafts and get high-quality insulation in. Once your operational energy is dialed in and your bills are low, you’ll actually have the breathing room to invest in premium, low-carbon materials later.

    How do I know if a "green" material is actually helping, or if it's just clever marketing to charge me more?

    Don’t just take their word for it; look for the data. If a company says a material is “eco-friendly” but won’t provide an Environmental Product Declaration (EPD), they’re likely just greenwashing. I always check the lifecycle assessment. You want to see the actual numbers on carbon sequestration and manufacturing impact. If they can’t prove the math, they’re just selling you a premium price tag wrapped in a green leaf logo.

    Can I still make my home energy efficient if I'm stuck living in an older building that was built with high-carbon materials?

    Absolutely. You don’t need to tear down the walls to make a difference. I’ve audited plenty of old rentals where the bones are high-carbon, but the energy leaks are even worse. Focus on the “low-hanging fruit” first: draft excluders, heavy curtains, and sealing window gaps. It’s about managing the energy you do use. You can’t change the bricks, but you can definitely stop the heat from escaping through them.

  • Choosing Energy Efficient Lighting for Your Home

    Choosing Energy Efficient Lighting for Your Home

    I still remember sitting in my old rental apartment, shivering in a room that felt more like a walk-in freezer than a living space. I’d turn on every lamp I owned just to feel a sense of warmth, only to realize I was essentially paying a premium to heat the air with old, inefficient bulbs. Most people think that upgrading to energy efficient lighting requires a massive upfront investment or a complete home renovation, but that’s a total myth. You don’t need a designer budget to stop bleeding money through your light fixtures; you just need to stop letting outdated tech dictate your monthly utility bills.

    I’m not here to sell you on some high-end, “smart” ecosystem that costs more than your monthly rent. My goal is to give you the actual, data-backed reality of what works for a normal household. I’ll show you exactly which swaps offer the highest return on investment and how to pick the right lumens without turning your bedroom into a sterile hospital ward. This is about practical, low-cost changes that keep your bills down and your footprint small, no fluff included.

    Table of Contents

    The Truth About Led vs Incandescent Comparison

    The Truth About Led vs Incandescent Comparison

    I’ve spent way too many hours with my infrared thermometer pointed at old-school light fixtures, and the data doesn’t lie: incandescent bulbs are essentially tiny space heaters that happen to produce a little bit of light. When you run an LED vs incandescent comparison, the gap isn’t just about the electricity used; it’s about wasted thermal energy. An incandescent bulb converts about 90% of its energy into heat rather than light, which is a massive drain on your wallet and your home’s climate control.

    Switching to LEDs is the most straightforward way of reducing household energy consumption without needing a degree in engineering. While the upfront cost might be a few cents more per bulb, the math works out in your favor almost immediately. You aren’t just buying a bulb; you’re investing in a cost-effective bulb replacement that lasts years longer. I always tell my clients to stop looking at the sticker price and start looking at the lifespan. If you’re still using those old, warm-to-the-touch bulbs, you’re essentially paying a “waste tax” every single month.

    Smart Cost Effective Bulb Replacement for Every Room

    Smart Cost Effective Bulb Replacement for Every Room

    When I’m auditing a space, I don’t just look at the wattage; I look at how the light actually functions in the room. You shouldn’t treat every bulb the same way. For instance, your living room needs a warm, inviting glow, whereas a home office demands crisp, clear light to keep you focused. Instead of grabbing the cheapest pack of bulbs at the grocery store, look for sustainable lighting solutions that match the specific task. If you’re upgrading a kitchen, aim for higher lumens to ensure you aren’t squinting over a cutting board, but keep the bedroom bulbs dim and warm to help your circadian rhythm.

    A cost-effective bulb replacement strategy is all about prioritizing high-use areas. If you have a hallway light that stays on for hours, that’s your first target. I always tell my clients to invest a little more upfront in high-quality LEDs for those central zones. If you want to take it a step further, look into smart lighting automation. Setting timers or motion sensors in bathrooms or laundry rooms ensures you aren’t paying to light an empty room, which is one of the fastest ways to see a real difference in your monthly statement.

    5 Quick Wins to Stop Draining Your Bank Account Through Your Light Fixtures

    • Stop over-lighting your spaces. I see this all the time during audits: people have high-wattage bulbs in every corner of a room when they only really need task lighting over a desk or a reading nook. Use localized lamps instead of blasting the whole ceiling.
    • Get a grip on your lumens, not just your watts. When you’re shopping, stop looking at how much power a bulb pulls and start looking at the brightness (lumens). You can get the same light output with a fraction of the energy if you know what number to look for on the box.
    • Layer your lighting to save. Instead of turning on the “big light” in the living room, use a mix of dimmable LEDs and small accent lights. It creates a better vibe and lets you control exactly how much energy you’re actually pulling from the grid.
    • Don’t ignore the “vampire” draw of smart bulbs. While I love tech, some smart bulbs have a tiny constant draw even when they’re “off.” If you’re going smart, pick reputable brands that are actually rated for low standby power so you aren’t losing money while you sleep.
    • Clean your fixtures regularly. It sounds basic, but dust buildup on bulbs and shades can block a significant amount of light. If your room feels dim, don’t immediately reach for a higher-wattage bulb; just wipe the dust off and see if you can actually see better.

    The Bottom Line on Your Lighting Bill

    Stop thinking of LEDs as an expense; they’re a long-term investment that pays for itself in energy savings within months, not years.

    Don’t just swap bulbs blindly—match the color temperature to the room’s purpose so you aren’t wasting energy on harsh, unnecessary light.

    Focus on the high-traffic areas first; upgrading the bulbs in your kitchen and living room offers the fastest ROI on your utility bill.

    The Cost of Convenience

    “I’ve walked into too many homes where people are literally burning money through their ceiling fixtures just because they haven’t bothered to check the wattage. Upgrading your lighting isn’t some luxury lifestyle hack; it’s basic math that keeps more cash in your pocket and less waste in the grid.”

    Tobias Nkemdirim

    The Bottom Line on Your Lighting

    The Bottom Line on Your Lighting.

    At the end of the day, upgrading your lighting isn’t about some massive, expensive overhaul of your entire house; it’s about making intentional choices where they actually count. We’ve looked at why ditching those old incandescent bulbs for LEDs is a no-brainer for your wallet, and how tailoring your bulb types to specific rooms—like using warm tones for the bedroom and bright, crisp light for your workspace—can change the whole vibe of your home. It really comes down to stopping the bleed of energy that happens every time you flip a switch in a room filled with inefficient tech.

    I know that when you’re staring at a mounting utility bill, these small changes can feel insignificant, but they aren’t. Every time you swap a bulb or dim a light you don’t need, you are reclaiming a tiny bit of your hard-earned money and reducing your footprint. Sustainability shouldn’t be a luxury reserved for people with huge budgets; it’s a series of smart, practical habits that anyone can adopt. Start small, keep track of your savings, and remember that efficiency is a mindset, not just a checklist.

    Frequently Asked Questions

    Are LED bulbs actually better for the environment when you consider how much waste they create if they burn out too quickly?

    It’s a fair question. I’ve seen plenty of cheap, low-quality LEDs die after just a few months, and that’s a massive waste. But even with a shorter lifespan, the math still favors LEDs. The energy they save during their life far outweighs the carbon footprint of manufacturing them. My advice? Don’t buy the cheapest generic ones. Invest in a mid-range, reputable brand. You’ll get the efficiency without the constant cycle of landfill waste.

    If I switch to smart bulbs to save energy, am I actually increasing my electricity usage because of the "vampire power" they draw while plugged in?

    It’s a fair question, and I get why you’re skeptical. Here’s the data: yes, smart bulbs have a tiny “vampire draw” because they need to stay connected to your Wi-Fi. But even with that standby power, the energy you save by using efficient LED technology far outweighs the cost of the idle draw. You’re essentially trading a few cents of standby power for significant savings on your main lighting bill. It’s a net win.

    How do I find the right color temperature so my home doesn't end up feeling like a cold, sterile hospital ward?

    Look, I’ve seen too many people swap to LEDs only to turn their living rooms into a sterile hospital ward. It’s a common mistake. To keep things cozy, look for the Kelvin (K) rating on the box. For living areas and bedrooms, aim for “Warm White” (around 2700K to 3000K). If you’re in a kitchen or workspace where you actually need to see what you’re doing, “Cool White” (around 4000K) works better.

  • How Often Should You Clean Solar Panels

    How Often Should You Clean Solar Panels

    I was auditing a client’s small bungalow last Tuesday when I pulled out my infrared thermometer and realized their output was tanking, not because of a faulty inverter, but because of a thick, stubborn layer of grime. It’s frustrating how many “experts” try to sell you expensive, monthly professional washing services like it’s some mandatory subscription. The truth is, there is no one-size-fits-all answer to solar panel cleaning frequency, and following a rigid, pre-set schedule is often just a way to drain your bank account for no reason.

    I’m not here to sell you a cleaning kit or a service contract; I’m here to help you reclaim your margins. In this guide, I’m stripping away the marketing fluff to give you a practical, data-driven approach to knowing exactly when your panels need attention. You’ll learn how to monitor your own system’s performance and determine the ideal solar panel cleaning frequency based on your specific environment. My goal is to make sure you’re getting every single watt you paid for without wasting a dime on unnecessary maintenance.

    Table of Contents

    The Hidden Cost of Photovoltaic Cell Debris Removal

    The Hidden Cost of Photovoltaic Cell Debris Removal

    When I’m out on a site audit, I often see people treating solar panels like they’re “set it and forget it” appliances. That’s a mistake. The real issue isn’t just the dirt you can see; it’s the cumulative solar panel efficiency loss that happens when you ignore the buildup. If you let a layer of grime settle, you aren’t just looking at a dirty roof—you’re looking at a direct hit to your ROI. Every bit of debris acts like a tiny shroud, preventing photons from actually hitting the cells, which means you’re paying for hardware that isn’t performing at its peak.

    It’s also about the specific types of mess. I’ve seen cases where bird droppings on solar panels caused localized “hot spots.” This isn’t just about a drop in output; it can actually cause physical damage to the cells due to uneven heating. Whether it’s fine silt from a dry summer or pollen in the spring, the impact of dust on solar output is a silent thief. You might not notice a 2% dip in your monthly generation, but over a year, those small losses add up to a significant amount of wasted money.

    How Dust on Solar Output Drains Your Wallet

    How Dust on Solar Output Drains Your Wallet

    I’ve seen this play out during my audits more times than I’d like: a homeowner is frustrated that their system isn’t hitting the promised numbers, only for me to point my infrared thermometer at a layer of grime they didn’t even notice. It’s not just about aesthetics; it’s about the math. When dust accumulates, it creates a physical barrier that prevents photons from reaching the silicon. This solar panel efficiency loss isn’t a sudden drop, but a slow, agonizing leak in your potential savings. Every millimeter of grit acts like a tiny shade, forcing your inverter to work harder for less juice.

    Think of it like trying to breathe through a thick cloth—you’re still getting air, but it’s nowhere near optimal. The impact of dust on solar output can vary wildly depending on your local environment, but the financial drain is constant. If you live in a dry, windy area, that buildup happens fast. If you ignore it, you’re essentially paying a “dirt tax” every single month through higher utility bills and diminished ROI. It’s a simple, preventable drain on your wallet.

    My Practical Checklist for Staying on Top of the Grime

    • Check your output after heavy pollen seasons; if you live near trees, that yellow dust settles like a blanket and can tank your efficiency overnight.
    • Don’t just guess—keep a simple log of your energy production versus the weather, because a sudden dip on a sunny day is a dead giveaway that your panels are dirty.
    • Use my favorite trick and grab a soft squeegee or a microfiber cloth; avoid high-pressure washers at all costs, as they can crack the glass or ruin the seals.
    • Timing is everything; always clean your panels in the early morning or late evening when they are cool to prevent the glass from thermal shock and cracking.
    • Watch out for “bird bomb” zones; if you have a lot of local wildlife, you’ll need to spot-clean those specific acidic spots immediately before they etch into the surface.

    Quick Wins for Your Solar Maintenance

    Don’t wait for a massive drop in power to act; a quick rinse every few weeks can prevent a slow, expensive leak in your energy production.

    Think of cleaning as a direct investment in your utility bills rather than a chore—less grime means more kilowatt-hours for the same amount of sunlight.

    Keep it simple and safe; you don’t need fancy equipment to stop dust from stealing your savings, just a bit of consistency and a bit of water.

    The Real Cost of Neglect

    “I’ve seen too many people treat solar panels like ‘set it and forget it’ tech, but if you’re ignoring the grime buildup, you’re basically paying a monthly tax to the dust sitting on your roof.”

    Tobias Nkemdirim

    Don't Leave Your Savings to Chance

    Don't Leave Your Savings to Chance.

    At the end of the day, keeping your solar panels clean isn’t just about aesthetics; it’s about protecting your investment and ensuring every photon counts. We’ve looked at how dust, bird droppings, and even pollen act like a physical barrier between your panels and the energy they’re meant to harvest. If you wait until the output visibly drops, you’ve likely already lost money. By establishing a consistent cleaning schedule—whether that’s a quick rinse every few months or a deep clean after a particularly dusty season—you prevent that slow, invisible drain on your wallet. It’s a small, proactive step that keeps your efficiency high and your utility costs predictably low.

    I know that managing a home can feel like a constant battle against rising costs and environmental guilt, but this is one area where you actually have total control. You don’t need a massive budget or high-tech equipment to make a difference; you just need to be observant. When we stop treating energy as an infinite, free resource and start treating it as something precious that needs to be captured correctly, everything changes. Let’s stop letting preventable grime dictate our carbon footprint. Take care of your tech, and your tech will take care of you.

    Frequently Asked Questions

    Is it actually worth the effort to clean them if I live in an area where it rains frequently?

    It’s a fair question, and honestly, it’s one I get asked a lot during audits. If you live in a rainy climate, you might think nature is doing the heavy lifting for you, but it’s rarely a perfect rinse. Rain often just moves the grime around, creating a thin, stubborn film of “mud” or pollen that actually traps more dirt. I’d still recommend a quick check every few months. Don’t let a little rain give you a false sense of security.

    Can I just use a garden hose, or am I going to risk cracking the glass or damaging the cells if I do it myself?

    Look, you can use a garden hose, but don’t just blast them blindly. The biggest risk isn’t the water; it’s thermal shock. If you spray ice-cold water on panels that have been baking in the midday sun, you could actually crack the tempered glass. Wait until the morning or evening when they’re cool. Also, skip the high-pressure nozzles—too much force can damage the seals. A gentle rinse and a soft brush are all you need.

    How do I know if the drop in my energy production is actually due to dirt or if my inverter is starting to fail?

    Before you go calling a technician and paying a hefty call-out fee, grab your phone and check your monitoring app. Look for patterns: if your output is dipping across all strings simultaneously, it’s likely just grime or shading. However, if one specific string or panel shows a sudden, sharp drop while others are fine, that’s a red flag for an inverter or wiring issue. I always check for uniform “dirt patterns” first—it’s the cheapest diagnostic tool you have.

  • Essential Solar Panel Maintenance

    Essential Solar Panel Maintenance

    I was auditing a small bungalow last month when the homeowner pointed proudly at his pristine, high-end solar array, yet his energy production numbers were absolutely tanking. He’d been told that solar is “set it and forget it,” a convenient lie sold by people who don’t care about your monthly overhead. The truth is, neglecting basic solar panel maintenance is basically like leaving a window cracked open in mid-winter; you’re literally watching your hard-earned investment leak money right through the roof. Most people think they need a specialized technician and a massive service contract to keep things running, but that’s just expensive fluff designed to pad someone else’s pocket.

    I’m not here to sell you on complex engineering or high-priced maintenance packages that you don’t actually need. My goal is to give you the straight, data-driven reality of what it takes to keep your system performing at its peak without breaking the bank. I’ll show you the few, high-impact tasks that actually move the needle, so you can stop wasting power and start seeing the real savings you were promised when you first went solar.

    Table of Contents

    Simple Solar Panel Debris Removal to Protect Your Savings

    Simple Solar Panel Debris Removal to Protect Your Savings

    I’ve seen it too many times during my audits: a homeowner thinks their system is failing, but it’s actually just buried under a layer of grit. Whether it’s fallen leaves from a nearby oak or a buildup of pollen, even a thin film can cause significant solar panel shading issues. When light can’t hit the cells directly, your production drops, and you end up paying the utility company for power you should have been generating for free.

    Performing regular solar panel debris removal doesn’t require a degree in engineering, but it does require a bit of discipline. I usually recommend a gentle rinse with a garden hose—never a high-pressure washer, as you’ll crack the glass—once or twice a year. If you notice stubborn spots, a soft brush and some water usually do the trick. It’s one of those small, low-cost habits that goes a long way toward maximizing solar energy output and ensuring you actually get the return on investment you were promised when you first installed the system.

    Maximizing Solar Energy Output Without Breaking the Bank

    Maximizing Solar Energy Output Without Breaking the Bank

    You don’t need a massive budget or a degree in electrical engineering to make sure your setup is actually pulling its weight. Most of the time, the drop in performance people complain about isn’t a broken system; it’s just neglect. I always tell my clients to keep a close eye on solar panel shading issues. A single overgrown branch or even a persistent buildup of grime in one corner can cast a shadow that drags down the efficiency of your entire array. It’s a common trap—you think because they’re up on the roof, they’re “set and forget,” but that’s exactly when you start losing money.

    If you want to get serious about maximizing solar energy output, you should schedule an annual solar system checkup. Think of it like an oil change for your house; it’s a small upfront effort that prevents much more expensive repairs down the line. While you’re up there, take a quick look at your inverter. If the lights are flashing weirdly or the display looks off, don’t ignore it—a bit of proactive troubleshooting now can save you from a total system failure during the peak of summer.

    Small Checks to Keep Your System From Slacking

    • Grab a soft brush or a microfiber cloth to wipe away any stubborn grime; you don’t want a layer of dirt acting like a shade over your investment.
    • Keep an eye on your inverter’s display regularly; if the numbers look lower than they should be for a sunny day, something is definitely off.
    • Check your mounting hardware once or twice a year to make sure nothing has rattled loose or started to corrode, especially after a bad storm.
    • Watch for any shading from overgrown trees or new neighbors’ structures; even a small shadow can tank your entire system’s efficiency.
    • Inspect your wiring for any signs of wear or animal damage; a single frayed wire can be the difference between a productive day and a total loss.

    The Bottom Line: Keep Your System Efficient

    Don’t treat your panels like “set and forget” tech; a little regular cleaning and debris checks are the easiest ways to prevent your energy output from dipping.

    Keep a close eye on your monitoring app—if you see a sudden drop in production, it’s usually a sign of a physical issue like dust buildup or a shade problem rather than a hardware failure.

    Prioritize low-cost maintenance like sweeping and inspecting connections over expensive professional services to keep your ROI high without draining your bank account.

    The Real Cost of Neglect

    “I’ve seen too many people treat solar panels like ‘set it and forget it’ tech, but ignoring a little grime is basically just handing money back to the utility companies. A bit of maintenance isn’t just about the gear; it’s about making sure your investment actually pays you back.”

    Tobias Nkemdirim

    Don't Let Your Investment Go to Waste

    Don't Let Your Investment Go to Waste.

    At the end of the day, maintaining your solar setup isn’t about being a perfectionist; it’s about protecting your wallet. We’ve looked at how a little bit of debris removal and some smart, low-cost optimization can keep your energy output from dipping unnecessarily. You don’t need an expensive technician to come out every month to tell you what you can see with your own eyes. By staying on top of the basics—keeping those panels clear and checking for shade—you ensure that your system is actually doing the heavy lifting it was designed to do. It’s about making sure every photon counts toward lowering those monthly utility bills.

    I know that sometimes these small maintenance tasks feel like just another thing on an endless to-do list, but I promise you, it’s worth the effort. Transitioning to solar is a massive step toward independence, and keeping it running efficiently is how you actually reclaim control over your energy costs. You don’t need a massive budget to live sustainably; you just need to be intentional with what you already have. Stop letting dust and neglect eat away at your savings. Take a moment this weekend to check your arrays, and let’s keep making smart, efficient choices together.

    Frequently Asked Questions

    How often do I actually need to clean my panels if I live in an area with low dust or frequent rain?

    Honestly, if you’re lucky enough to live somewhere where the rain does the heavy lifting, you don’t need to be out there every week. I’ve found that for low-dust areas, a quick visual check once a quarter is usually plenty. Just grab your infrared thermometer or a camera to see if there’s any actual buildup. If the rain is frequent, nature is basically your free maintenance crew—just don’t get complacent.

    Is it safe for me to clean the panels myself, or am I going to risk damaging the cells or voiding my warranty?

    Look, I get the hesitation. You don’t want to trade a small cleaning task for a massive repair bill. Generally, yes, you can do this yourself, but there are rules. Avoid high-pressure washers—they can crack the cells or compromise the seals. Stick to a soft brush and water. Most importantly, check your installer’s manual first. If they explicitly say “professional cleaning only,” listen to them so you don’t accidentally void that warranty.

    Can I tell just by looking at my energy bills if my panels are underperforming due to dirt or technical issues?

    You can’t know for sure with just one glance, but you can definitely spot the red flags. If you notice a sudden, unexplained dip in your energy production—especially when the weather is clear—that’s a huge warning sign. I always check the daily yield data on my monitoring app against the historical averages for that same month. If the numbers are tanking while the sun is shining, you’re likely looking at either heavy grime buildup or a technical glitch.

  • Selecting an Energy Efficient Dishwasher

    Selecting an Energy Efficient Dishwasher

    I remember standing in my old rental kitchen, staring at a mountain of crusty plates and a utility bill that looked more like a phone number. I used to think that “going green” meant spending thousands on high-end, designer appliances that promised the world but delivered nothing but debt. There is this massive, annoying myth that you need a massive bank account to afford energy efficient dishwashers, when in reality, most people are just being sold expensive marketing fluff instead of actual performance. You don’t need a luxury showroom model to stop bleeding money every time you run a cycle; you just need to know what actually works.

    I’m not here to sell you on some shiny, overpriced gadget that’s going to break in three years. Instead, I’m going to give you the data-driven truth about how to pick energy efficient dishwashers that actually pay for themselves in utility savings. I’ll cut through the jargon and show you exactly what specs to look for, how to spot real efficiency versus clever labeling, and how to make a smart choice that protects both your wallet and the planet.

    Table of Contents

    The Hidden Cost of Dishwasher Electricity Consumption

    The Hidden Cost of Dishwasher Electricity Consumption

    Most people think the real cost of a dishwasher is just the sticker price at the store, but that’s a rookie mistake. When I’m auditing a home, I’m not just looking at the machine; I’m looking at the cumulative drain on the grid. A standard, older model can pull a surprising amount of power every single cycle, especially when it’s busy heating up water from scratch. This constant drain is a major contributor to rising dishwasher electricity consumption in modern households, and it’s a silent killer for your monthly budget.

    The real kicker is the “convenience tax” we pay by ignoring how these machines actually function. If you’re running an inefficient unit, you aren’t just wasting kilowatt-hours; you’re essentially paying a premium for every plate you clean. I’ve seen firsthand how switching to low water consumption dishwashers can fundamentally shift a household’s energy profile. It isn’t just about being “green”—it’s about realizing that every inefficient cycle is literally money leaking out of your wallet and into the utility company’s pocket.

    Why Energy Star Certified Appliances Are Non Negotiable

    Why Energy Star Certified Appliances Are Non Negotiable

    Look, I get the temptation to just grab the cheapest model on the showroom floor. When you’re trying to balance a budget, a lower upfront price looks like a win. But in my experience auditing homes, that’s where the math starts to fail you. When I see people struggling with high monthly costs, it’s often because they ignored the long-term efficiency of their hardware. This is why I view Energy Star certified appliances as a baseline requirement, not a luxury. These machines aren’t just marketing fluff; they are held to strict performance standards that ensure they aren’t just burning through power for no reason.

    Choosing a certified model is one of the most reliable ways of reducing utility bills with appliances without having to overhaul your entire lifestyle. These units are specifically engineered to optimize the cycle, meaning they use significantly less power and fewer liters of water per load. If you’re looking for low water consumption dishwashers, that certification is your best shortcut to finding something that actually performs. It takes the guesswork out of the equation and ensures you aren’t accidentally subsidizing a manufacturer’s poor design with your own monthly earnings.

    Five Practical Ways to Stop Wasting Power Every Time You Run a Cycle

    • Stop the pre-rinse habit. I see people rinsing every single plate under a running tap before putting them in the machine, and it’s a massive waste of both water and energy. Modern, efficient dishwashers are designed to handle food particles; just scrape the solids into the bin and let the machine do its job.
    • Only run full loads. It’s tempting to toss in a few mugs and a single plate just to clear the sink, but running a half-empty machine is basically throwing money down the drain. Wait until you have a full load, or use the “eco” setting if your model has one to optimize the water usage.
    • Skip the heated drying cycle. Most people use the high-heat drying function because it’s convenient, but that’s one of the biggest energy hogs in the appliance. Instead, try opening the door slightly once the cycle finishes to let the steam escape and use residual heat to dry your dishes naturally.
    • Check your water temperature settings. If you have control over your machine’s settings, don’t default to the highest temperature unless you’re dealing with heavy grease. Using a lower temperature setting for standard loads can significantly cut down on the electricity needed to heat the water.
    • Clean your filters regularly. This is a simple maintenance task that most people ignore, but a clogged filter makes the pump work harder and reduces the efficiency of the entire cleaning cycle. If your machine is struggling to clean properly, it’s likely wasting energy trying to compensate for the blockage.

    Quick Wins for Your Energy Bill

    Don’t just look at the price tag; calculate the long-term savings by checking the annual energy consumption rating before you buy.

    Prioritize Energy Star certification to ensure you aren’t paying a “convenience tax” in the form of inflated monthly utility bills.

    Maximize your investment by only running full loads and using eco-modes, turning a good appliance into a truly efficient system.

    ## Efficiency Isn't a Luxury

    “I’ve spent enough time pointing an infrared thermometer at drafty windows to know that energy waste isn’t just an environmental issue—it’s a leak in your bank account. Upgrading to an efficient dishwasher isn’t about buying a fancy new gadget; it’s about plugging one of those leaks so you can stop paying a ‘convenience tax’ every single month.”

    Tobias Nkemdirim

    Making the Switch

    Making the Switch to energy-efficient dishwashers.

    At the end of the day, choosing an energy-efficient dishwasher isn’t just about reading spec sheets or chasing the latest tech; it’s about recognizing that your daily habits have a direct impact on your bank account. We’ve looked at how much power a standard, outdated machine can pull and why that Energy Star label is actually your best defense against unnecessary utility spikes. By prioritizing efficiency, you’re essentially cutting out the “convenience tax” that older, inefficient models force you to pay every single month. It’s a simple, data-backed way to ensure your kitchen isn’t a silent drain on your resources.

    I know that making upgrades can feel daunting when you’re working with a tight budget, but I promise you that sustainability doesn’t require a lifestyle overhaul or a massive windfall. It starts with these small, intentional decisions—like picking a machine that does the job right without wasting a kilowatt of power. Every time you press “start” on an efficient appliance, you’re proving that living a low-impact life is possible for everyone, not just the wealthy. Let’s stop settling for wasteful defaults and start building homes that are actually built to last without breaking the bank.

    Frequently Asked Questions

    How much money can I actually save on my monthly utility bill by switching from an old model to an efficient one?

    Look, I can’t give you an exact figure without seeing your utility rates and your current machine’s age, but the math usually leans heavily in your favor. If you’re running a decade-old clunker, you’re likely bleeding money. Moving to a modern, high-efficiency model can shave anywhere from $20 to $50 off your monthly energy and water bills. It sounds small, but over a year, that’s a significant chunk of change back in your pocket.

    Do energy-efficient dishwashers actually clean as well as the high-power ones, or am I sacrificing hygiene to save a few cents?

    I get this question a lot during my audits. The short answer? No, you aren’t sacrificing hygiene. In fact, modern high-efficiency models are often better at cleaning because they use precision sensors to adjust water pressure and temperature based on the load. High-power, older machines often just blast water blindly, wasting energy. You’re not trading clean plates for lower bills; you’re just trading brute force for smarter engineering.

    Is it worth spending more upfront on a high-efficiency machine, or should I just stick with a cheaper, standard model?

    Look, I get the temptation to grab the cheapest model on the shelf—it’s a smaller hit to your bank account right now. But as someone who audits energy waste for a living, I see the math clearly. If you buy the budget model, you’re essentially signing a contract to overpay for electricity every single month. Pay more upfront for a high-efficiency machine; it’s an investment that pays itself back through lower bills.

  • Integrating Energy Storage Systems Into Your Home

    Integrating Energy Storage Systems Into Your Home

    I remember sitting in my old rental apartment three years ago, shivering under three layers of blankets because the heating bill was suddenly astronomical. I spent that entire winter staring at my meter, watching the numbers spin like a slot machine, feeling like I was being robbed by my own walls. Most people think you need a massive solar farm or a massive bank account to gain control over your power, but the truth is that energy storage systems have become way too gatekept by hype and ridiculous price tags. You don’t need a futuristic, high-tech mansion to stop being a slave to the grid; you just need a strategy that actually works for your wallet.

    I’m not here to sell you on some overpriced, shiny gadget that looks good in a brochure but fails when the lights actually go out. My goal is to strip away the marketing fluff and give you the straight-up data on what these setups actually do for your monthly costs. I’ll be walking you through the practical side of choosing a system that fits a real budget, focusing on efficiency rather than just empty promises. We’re going to find a way to keep your home powered and your carbon footprint small without breaking the bank.

    Table of Contents

    Solar Energy Storage Solutions That Actually Pay for Themselves

    Solar Energy Storage Solutions That Actually Pay for Themselves

    When I first started auditing homes, I noticed a pattern: people were installing solar panels but still getting hammered by peak-rate electricity prices in the evening. This is where solar energy storage solutions actually move from being a “nice-to-have” gadget to a serious financial tool. Instead of dumping excess power back into the grid for pennies, you store it to run your heavy appliances when rates are highest. It’s about shifting your usage to match your production, which is the smartest way to ensure your setup isn’t just a vanity project.

    To figure out if a specific setup makes sense for your wallet, you really need to run a quick cost-benefit analysis of battery storage against your local utility rates. It’s not just about the upfront hardware cost; it’s about calculating how much you save over five to ten years by avoiding those expensive peak windows. I’ve seen setups where the battery pays for itself in under six years simply by optimizing when you pull from the grid versus when you use your own stored juice. It’s practical, data-backed math that turns a sustainable choice into a smart financial move.

    A Real Cost Benefit Analysis of Battery Storage for Your Home

    A Real Cost Benefit Analysis of Battery Storage for Your Home

    When I’m out on a site audit, I always see the same hesitation: “Is a battery actually worth the upfront hit to my wallet?” To be blunt, a simple cost-benefit analysis of battery storage shows it’s not just about the sticker price; it’s about how much you’re currently bleeding through peak-hour rates. If your utility company spikes prices when everyone turns their AC on at 6 PM, a battery lets you bypass those predatory rates by using your own stored juice. You aren’t just buying hardware; you’re buying independence from the grid’s pricing whims.

    However, you have to look at the math over a five-to-ten-year horizon. While the initial investment in battery energy storage systems technology can feel steep, the real value lies in the integration with your existing setup. When you pair a battery with smart energy management systems efficiency, you’re automating the process of saving money. You stop being a passive consumer and start actively managing your load. It’s about moving away from the “set it and forget it” mentality that keeps our bills unnecessarily high.

    5 Ways to Make Energy Storage Work for Your Wallet (Not Just Your Ego)

    • Don’t buy for “what if”—buy for what you actually use. Most people overspend on massive battery banks they’ll never fully cycle. Check your smart meter data for a week first; if your peak usage is low, a smaller, more efficient system will give you a much faster return on investment.
    • Prioritize “Time-of-Use” arbitrage. If your utility provider charges more during evening peaks, your battery shouldn’t just be a backup for outages; it should be a tool to soak up cheap midday solar and dump it back into your home when rates spike. That’s where the real savings live.
    • Watch the depth of discharge (DoD). It’s tempting to drain every last percent to save a few cents, but pulling a battery to zero too often kills its lifespan. Aim for a cycle strategy that preserves the chemistry; a battery that lasts ten years is infinitely cheaper than one you have to replace in four.
    • Check your inverter efficiency, not just the battery capacity. I’ve seen plenty of setups where the battery is top-tier, but the inverter loses a huge chunk of energy as heat during the conversion process. If you’re losing 15% of your power just moving it from DC to AC, you’re basically burning cash.
    • Start with modular systems. Instead of dropping five grand on a massive, fixed installation, look for systems that let you add extra modules later. It keeps your upfront costs low and lets you scale your storage as your budget—or your solar array—grows.

    The Bottom Line on Energy Storage

    Don’t buy a system just because it’s trendy; focus on a setup that offsets your peak usage hours to see a real dent in your monthly bills.

    The best ROI comes from combining storage with solar, turning your roof into a personal power plant that keeps you running when grid prices spike.

    Small, scalable battery setups are often better than massive, expensive ones—start with what you can afford and expand as your efficiency improves.

    ## The Reality of Modern Energy

    “A battery isn’t just a piece of hardware you bolt onto a wall; it’s your way of reclaiming control from the utility companies and making sure you aren’t paying a premium just to keep the lights on when the sun goes down.”

    Tobias Nkemdirim

    The Bottom Line on Battery Storage

    The Bottom Line on Battery Storage.

    At the end of the day, choosing an energy storage system isn’t about chasing the latest tech gadget; it’s about taking control of your own utility bills and your home’s resilience. We’ve looked at how solar-integrated batteries can pay for themselves over time and why a realistic cost-benefit analysis is the only way to avoid expensive mistakes. Whether you’re looking at small-scale lithium setups or more robust home backup systems, the goal remains the same: stop letting expensive, grid-dependent energy dictate your monthly budget. It comes down to investing in efficiency rather than just paying for waste.

    I know that the upfront costs can feel daunting, especially when you’re already juggling rent or a mortgage. But I’ve seen firsthand how these small, smart shifts in how we manage power can change the entire math of a household. You don’t need to overhaul your entire life overnight to make a difference. Start where you can, do the math, and focus on the upgrades that actually move the needle for your wallet and the planet. We don’t have to choose between being sustainable and being financially stable; smart energy management allows us to do both.

    Frequently Asked Questions

    How long will these batteries actually last before I have to spend money replacing them?

    It really depends on the chemistry you’re looking at. Most modern lithium-ion setups—the kind I usually recommend for home efficiency—will give you anywhere from 10 to 15 years of solid service. If you’re looking at Lithium Iron Phosphate (LiFePO4), you might even see closer to 20 years. Just keep an eye on your cycle count; how often you drain them deeply matters more than just the calendar years.

    Can I integrate a battery system into my current setup without having to overhaul my entire electrical panel?

    The short answer is yes, but it depends on what you’re currently running. Most modern “plug-and-play” or AC-coupled battery systems are designed to sit alongside your existing setup without a total panel overhaul. I usually check the breaker capacity first with my thermometer and a multimeter to see if there’s enough headroom. You might need a small sub-panel or a smart gateway, but you definitely don’t need to rewire your entire life.

    Is it worth the upfront cost to get a larger capacity, or should I just start small and scale up later?

    Look, I’ve seen both sides of this. If you have the budget now, go larger. It’s much cheaper to buy one big unit than to buy two small ones later because of the “entry cost” of installation and hardware. However, if money is tight, don’t let “perfect” be the enemy of “good.” Start small to stabilize your base load, then scale up as your savings from lower bills start to add up.

  • Installing Underfloor Heating Systems

    Installing Underfloor Heating Systems

    I still remember my first apartment—a drafty studio where the radiator hissed like a dying animal, but the floor stayed ice-cold no matter how high I turned the dial. I spent half my winters walking on my tiptoes in thick wool socks just to avoid that bone-chilling sensation. Most people think that installing floor heating is some luxury reserved for high-end, eco-conscious mansions, but that’s a total myth. You don’t need a massive renovation budget or a designer architect to stop your feet from freezing; you just need to understand how heat actually moves through a room.

    In this guide, I’m cutting through the marketing fluff to show you how to approach this technology without wasting your money. I’ll walk you through the actual efficiency of different systems and help you figure out which setup makes sense for your specific space and budget. My goal isn’t to sell you a high-tech gadget, but to give you the practical data you need to stay warm while keeping your monthly energy bills as low as possible.

    Table of Contents

    Stop Wasting Energy the Real Value of Floor Heating

    Stop Wasting Energy the Real Value of Floor Heating

    When I’m auditing a home, I usually see the same mistake: people trying to fight the cold by cranking up a central furnace that blasts hot air at the ceiling, leaving the floor—where you actually feel the chill—completely freezing. That’s where the real value of radiant systems comes in. Instead of fighting physics, you’re working with them. By heating the surfaces of the room directly, you get a much more consistent temperature. The radiant heating benefits aren’t just about comfort; it’s about the fact that you aren’t wasting energy heating empty air space above your head.

    I often get asked about the upfront math, specifically regarding the cost of installing heated floors versus traditional radiators. While the initial setup might feel steeper, you have to look at the long-term efficiency. When you pair a well-insulated setup with a smart thermostat for floor heating, you gain a level of granular control that a standard boiler just can’t match. You aren’t just heating a house; you’re managing a thermal environment that responds to your actual presence, cutting down on those massive, unnecessary spikes in your utility bill.

    Electric vs Hydronic Heating Comparison Choosing Smarter

    When you’re looking at your options, it usually comes down to electric mats versus hydronic systems. Electric is the “quick fix”—it’s easy to install in a retrofit and works great for small spaces like a bathroom. But if you’re looking at a whole-house project, the running costs can get pretty heavy. I’ve seen too many people opt for electric because the upfront price is lower, only to realize they’re bleeding money every month on their utility bills.

    Hydronic heating, which uses warm water piped through the floor, is a different beast entirely. The initial setup is more complex and definitely more expensive, but the efficiency is hard to beat. For anyone serious about long-term energy savings and a lower carbon footprint, hydronic is the smarter investment. It holds heat much more consistently, meaning your boiler isn’t constantly cycling on and off to fight the chill.

    Uncovering the Radiant Heating Benefits for Your Wallet

    When I’m auditing a home, I usually see people fighting a losing battle against drafty radiators that heat the air, not the people. That’s where radiant floor heating changes the math. Instead of forcing your HVAC system to work overtime to warm up a massive volume of air, floor heating targets the surfaces you actually touch. Because heat rises, you’re essentially creating a warm zone exactly where you live, rather than wasting energy heating the ceiling. It’s a much more efficient way to manage thermal comfort without the constant cycling of a loud, power-hungry furnace.

    From a purely financial standpoint, the long-term math is what matters most. While the upfront installation might feel like a hurdle, the reduction in monthly utility spikes is real. You aren’t just paying for heat; you’re paying for targeted temperature control that doesn’t leak out through windows as easily as hot air does. It’s about working smarter, not harder, with the energy you’ve already paid for.

    Smart Upgrades That Wont Break Your Bank Account

    Smart Upgrades That Wont Break Your Bank Account

    If you’re worried about the upfront cost, don’t let that stop you from looking at partial upgrades. You don’t have to rip up every square inch of your house at once. I often tell my clients to start with high-traffic zones—like the kitchen or the bathroom—where you spend the most time. When looking at the cost of installing heated floors, focusing on these specific “micro-zones” makes the investment much more manageable. It’s about being strategic with where you direct your energy and your money.

    Choosing the right surface is another way to keep things efficient. Not all materials play nice with thermal transfer; for instance, thick carpets act like a heavy blanket that traps heat, forcing your system to work twice as hard. If you want to get the most out of your setup, picking the best flooring for underfloor heating—like tile, stone, or even certain hardwoods—ensures that the warmth actually reaches your feet instead of getting lost in the material. Pair this with a smart thermostat for floor heating, and you’ve essentially built a system that works for you, not against your wallet.

    Calculating the True Cost of Installing Heated Floors

    When I’m auditing a home, I always tell people to look past the initial sticker price. It’s easy to get sticker shock when you see the upfront cost of materials and labor for floor heating, but that’s only half the story. You have to factor in the long-term energy savings that come from the efficiency of radiant heat. If you’re just looking at the invoice from the contractor, you’re missing the bigger picture of how much less you’ll be spending on monthly utility bills over the next decade.

    To get a real number, I recommend running a simple comparison: take your current heating costs and project them against the estimated efficiency gains of a heated floor system. Don’t forget to include the cost of any necessary electrical upgrades or plumbing adjustments. Calculating your return on investment is the only way to know if this upgrade actually makes sense for your budget.

    Finding the Best Flooring for Underfloor Heating Efficiency

    Once you’ve decided on a heating system, you can’t just pick any flooring and expect it to work efficiently. I see this mistake all the time during my audits: people install thick, heavy carpets over their heating elements, and then they wonder why their energy bills are spiking. You need materials with high thermal conductivity to ensure the heat actually moves from the floor into the room. Thin, dense materials like tile, stone, or even certain hardwoods are your best friends here. They act like a thermal battery, absorbing the heat and spreading it evenly across the surface.

    If you’re looking for something more budget-friendly, luxury vinyl plank (LVP) is a solid middle ground. It’s much thinner than traditional wood, meaning it doesn’t act as a thermal barrier that blocks the warmth from reaching your feet. Just make sure you check the manufacturer’s specs to ensure it’s rated for underfloor use.

    5 Practical Ways to Get the Most Out of Your Heated Floors

    • Don’t fight your thermostat; once you set your floor heating to a consistent, lower temperature, it’s much more efficient than constantly cranking it up and down to compensate for a cold room.
    • Watch your rugs. While a soft rug feels great, thick, heavy carpets act like insulation that traps the heat under the rug instead of letting it radiate into the room, making your system work twice as hard.
    • Use a smart thermostat to automate the process. If you can program your heating to dial back while you’re at work or sleeping, you’re cutting out all that wasted energy that usually just heats an empty house.
    • Check your seals while you’re at it. There’s no point in having efficient floor heating if you’re losing all that warmth through a drafty window or a gap under the door—I always grab my infrared thermometer to check for those leaks.
    • Pair your heating with thermal curtains. Closing heavy, insulating curtains at night helps trap the radiant heat inside the living space, keeping the warmth where you actually need it.

    The Bottom Line on Underfloor Heating

    Don’t just look at the installation price; focus on the long-term efficiency gains from radiant heat to ensure your monthly utility bills actually drop.

    Choosing the right flooring material is just as important as the heating system itself—pick materials that conduct heat well to avoid wasting energy.

    Whether you go electric or hydronic depends on your specific setup, but the goal is always the same: smart, targeted warmth that doesn’t require heating empty air.

    ## The Efficiency Reality Check

    “I’ve spent enough time pointing an infrared thermometer at drafty baseboards to know that heating the air is a losing game. Floor heating isn’t just a luxury; it’s about moving the warmth to where you actually feel it, instead of wasting energy heating empty space toward a ceiling.”

    Tobias Nkemdirim

    Making the Switch Count

    Making the Switch Count with floor heating.

    At the end of the day, choosing floor heating isn’t just about luxury; it’s about making a calculated move toward a more efficient home. We’ve looked at how the right system—whether you go with the quick install of electric mats or the long-term thermal stability of hydronic lines—can fundamentally change how your space holds heat. By pairing your setup with the right flooring materials and doing the math on your initial investment versus long-term utility savings, you move away from the “heat and pray” method of staying warm. It’s about stopping the energy leaks and ensuring that every kilowatt you pay for actually stays where you need it: at your feet.

    I know that looking at installation costs can feel overwhelming, especially when you’re trying to balance a budget. But I’ve seen enough thermal scans to know that small, intentional upgrades are what actually move the needle on your carbon footprint and your bank statement. You don’t need to gut your entire house to start living more sustainably. Start with a single room, do the research, and build from there. Living efficiently shouldn’t feel like a sacrifice; it should feel like you’re finally in control of your environment and your wallet.

    Frequently Asked Questions

    Is it actually possible to retrofit underfloor heating into an existing home without tearing up every single floorboard?

    Honestly, I get the anxiety—the thought of ripping up every floorboard in your house sounds like a nightmare. But you don’t always have to go full demolition. If you’re looking at electric heating mats, they’re incredibly thin and can often be installed right over your existing subfloor. For hydronic systems, it’s a bigger job, but some low-profile options exist. It’s all about checking your floor height and budget before you start swinging a hammer.

    How much of a difference does the specific flooring material actually make to my monthly electricity or gas bill?

    It makes a massive difference. Think of your flooring as the thermal blanket for your house. If you install underfloor heating under thick, heavy carpet, you’re basically trying to heat a room through a duvet—you’ll waste a ton of energy just trying to penetrate that barrier. I always tell my clients to stick to tile, stone, or engineered wood. These materials have high thermal conductivity, meaning they soak up the heat and radiate it back efficiently without forcing your system to work overtime.

    Can I control different zones in my house separately, or am I stuck heating the whole floor even if I'm only using one room?

    You definitely aren’t stuck heating the whole house. If you set up your system with zoning, you can control different areas independently. I always tell my clients to look into smart thermostats or zone controllers; they let you crank the heat in your home office while keeping the guest room at a baseline temperature. It’s one of the best ways to stop wasting energy on rooms you aren’t even using.