Blog

  • Efficiency of Radiant Floor Heating Systems

    Efficiency of Radiant Floor Heating Systems

    I still remember standing in my old rental apartment, shivering in thick wool socks while staring at a utility bill that made absolutely no sense. I’d spent a small fortune trying to keep the place habitable, only to realize I was basically throwing cash into a thermal void. Most people think that if their underfloor heating isn’t working, they need to rip everything out and install a high-end, smart-integrated system that costs a mortgage payment. That’s a lie. Improving your floor heating efficiency isn’t about buying your way into a “smart home”; it’s about identifying where the heat is actually escaping and stopping that expensive leakage before it happens.

    I’m not here to sell you on overpriced gadgets or complex architectural overhauls. My goal is to give you the same practical, data-driven tactics I use during my professional audits to make sure every watt actually counts. We’re going to look at the small, smart tweaks—from floor coverings to thermostat calibration—that will keep your toes warm without draining your bank account. I promise to keep this straightforward: no hype, just real ways to make your heating work for you, not against your wallet.

    Table of Contents

    Comparing Hydronic vs Electric Floor Heating Efficiency Without Breaking Th

    Comparing Hydronic vs Electric Floor Heating Efficiency Without Breaking Th

    When you’re looking at the numbers, the debate between hydronic and electric systems usually comes down to your upfront budget versus your long-term utility bills. Electric mats are incredibly easy to install—you can practically DIY them—but the energy consumption of electric floor heating tends to climb quickly if you’re running them constantly. On the flip side, hydronic systems use water circulated through pipes, which is much more efficient at moving heat, but the initial setup cost can feel like a gut punch if you’re on a tight budget.

    If you’re trying to decide which route to take, I always tell my clients to look at the total lifecycle cost. For a small space or a quick renovation, electric might be your best bet for a cost-effective floor heating solution in the short term. However, if you’re looking at a larger area, investing in a hydronic setup pays for itself through much lower monthly running costs. To make either system work harder for you, don’t skip the basics: ensure you have high-quality insulation benefits for underfloor systems to prevent that expensive heat from simply bleeding into the ground below.

    The Insulation Benefits for Underfloor Systems You Cant Ignore

    The Insulation Benefits for Underfloor Systems You Cant Ignore

    If you’re looking at underfloor systems, you can’t just focus on the heating element itself; you have to look at what’s happening underneath it. I’ve seen too many people install expensive radiant systems only to realize they’re essentially heating the ground beneath their house. This is where the insulation benefits for underfloor systems become the real game-changer. By placing a high-quality thermal break beneath your heating loops or electric mats, you force that heat upward into your living space rather than letting it bleed into the subfloor or concrete slab.

    It’s a simple concept, but the math is hard to argue with. When I’m auditing a home, a lack of proper subfloor insulation is usually the biggest culprit behind high bills. Investing in decent insulation is one of the most cost-effective floor heating solutions available because it drastically lowers the workload on your system. Instead of your heater running constantly to compensate for heat loss, a well-insulated floor holds onto that warmth, making your entire setup much more efficient without needing a massive upgrade to your hardware.

    5 Quick Wins to Stop Wasting Heat Under Your Feet

    • Stop the thermal bleed by using a programmable thermostat; there’s no point heating up your floor at 3 AM when you’re fast asleep and the house is empty.
    • Don’t let heavy rugs act as insulators; if you place a thick, dense rug directly over your heating elements, you’re essentially trapping the heat under the carpet instead of letting it radiate into the room.
    • Keep your furniture light and airy; shoving a heavy, solid-back sofa directly against a heated floor section creates a dead zone where heat gets trapped and wasted.
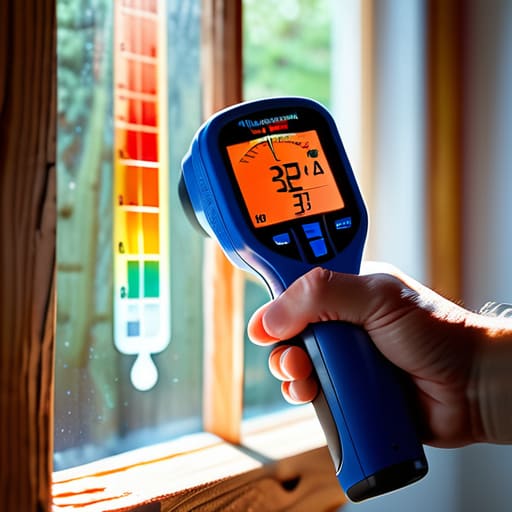
    • Check your seals regularly; I always grab my infrared thermometer to check if cold air is creeping in from the baseboards, because even the best floor heating can’t compete with a drafty room.
    • Time your heating cycles to match the thermal mass of your floor; instead of constant low-level heating, try pulsing the system so the floor stays warm without running the heater 24/7.

    The Bottom Line on Floor Heating Efficiency

    Stop treating floor heating as a standalone system; if you don’t invest in high-quality underfloor insulation first, you’re basically just heating the ground beneath your house instead of the room you’re standing in.

    Choose your heating type based on your long-term budget—electric is easier to install for a quick fix, but hydronic systems are the real winner for keeping monthly utility bills from spiraling out of control.

    Small, data-backed adjustments like precise thermostat scheduling and sealing thermal leaks can make a massive difference in how much energy your system actually uses to maintain comfort.

    The Real Cost of Hidden Leaks

    “Most people think they have a heating problem, but when I pull out my infrared thermometer, I usually find they just have a leakage problem. If you aren’t investing in the insulation underneath your floor heating, you’re essentially just trying to heat the ground beneath your house instead of the room you’re standing in.”

    Tobias Nkemdirim

    Making the Most of Your Warm Floors

    Making the Most of Your Warm Floors

    At the end of the day, optimizing your floor heating isn’t about buying the most expensive smart system on the market; it’s about understanding how heat actually moves through your space. We’ve looked at how choosing between hydronic and electric systems can shift your long-term costs, and why skipping out on proper underfloor insulation is basically like trying to fill a bucket with holes in it. Whether you are upgrading a whole room or just fine-tuning your current setup, the goal is the same: stop letting your hard-earned money escape through the floorboards. When you combine the right heating method with a solid thermal barrier, you aren’t just staying warm—you are drastically cutting down on wasted energy.

    I know it can feel overwhelming to tackle home efficiency, especially when it feels like every “green” solution comes with a massive price tag. But I’ve seen firsthand through my audits that the most impactful changes often come from the smallest, most intentional decisions. You don’t need to overhaul your entire house overnight to make a difference. Start with what you can manage, focus on the leaks, and keep your eyes on the data. Living sustainably shouldn’t be a luxury reserved for the wealthy; it should be a practical standard for everyone. Let’s stop paying for heat we aren’t even feeling.

    Frequently Asked Questions

    Is it actually worth the upfront cost to upgrade my insulation if I'm just planning to rent this place for a couple of years?

    Look, I get it. If you’re on a two-year lease, you don’t want to sink cash into a place you don’t own. But here’s the thing: if you can’t change the insulation, focus on the “quick wins” that actually move the needle. Grab some heavy thermal curtains or draft stoppers. It’s not a permanent fix, but it stops your money from leaking out the window while you’re still living there.

    How much of a difference does a smart thermostat actually make when I'm trying to manage an electric floor heating system?

    It makes a massive difference. If you’re running electric floor heating, you’re essentially paying for heat that’s warming an empty room. I’ve seen too many people leave their mats on all day just because it’s “easier.” A smart thermostat stops that waste by learning your schedule and cutting power when you’re out. It turns a constant drain into a targeted tool, saving you serious cash without you having to manually fiddle with the dial.

    If I have an older hydronic system, are there ways to boost its efficiency without having to rip up my entire floor?

    Honestly, you don’t need a full renovation to see a difference. If your hydronic pipes are already there, stop letting the heat escape into the subfloor. I usually recommend checking your pump efficiency first—an old, power-hungry pump is a silent budget killer. Also, look into smart thermostatic radiator valves (TRVs) or zone controllers. It’s about precision: only heating the rooms you’re actually using, rather than blasting the whole house.

  • Strategies for Minimizing Energy Loss

    Strategies for Minimizing Energy Loss

    I still remember sitting in my old rental apartment during a January freeze, shivering under three layers of blankets while watching my bank account drain from a heating bill that made no sense. I’d point my infrared thermometer at the window frames, watching the temperature drop like a stone where the air was whistling through the cracks. It’s infuriating how most “green” advice tells you that minimizing energy loss requires a massive solar array or a complete home renovation you can’t afford. The truth is, most of that heat isn’t being lost because your house is “bad”—it’s being lost because of tiny, preventable leaks that are essentially throwing cash directly into the wind.

    I’m not here to sell you on expensive, high-tech gadgets that promise the world but deliver nothing. Instead, I’m going to show you the practical, data-backed ways to plug those leaks without breaking the bank. We’re going to focus on small, smart adjustments that actually move the needle on your utility bills. My goal is to give you a no-nonsense roadmap to a more efficient home, focusing on high-impact fixes that keep you warm and your carbon footprint actually small.

    Table of Contents

    Strengthening Your Building Envelope Integrity on a Budget

    Strengthening Your Building Envelope Integrity on a Budget

    When I’m doing an audit, the first thing I do is pull out my infrared thermometer. I’m usually looking for those telltale cold spots around window sills or baseboards that scream “air leak.” Improving your building envelope integrity doesn’t always require a massive renovation budget; often, it’s just about stopping the drafts you can actually feel. I always tell my clients that if you can feel a breeze indoors, you’re essentially paying to heat the neighborhood.

    Start with the low-hanging fruit: sealing window and door frames. A few rolls of weatherstripping or some high-quality caulk from the hardware store can make a massive difference in how much heat stays trapped inside. It’s all about managing conduction and convection in homes to ensure the air you’ve paid to warm stays exactly where it belongs. You don’t need to strip your walls to the studs to see results; you just need to be methodical about plugging the holes where your money is escaping.

    Smart Air Leakage Prevention for Every Room

    Smart Air Leakage Prevention for Every Room

    I’ve spent more hours than I’d like to admit walking through drafty rentals with my infrared thermometer, and I can tell you: the leaks aren’t always where you think they are. While everyone focuses on the big stuff, it’s often the tiny gaps around baseboards or electrical outlets that do the most damage. Effective air leakage prevention isn’t just about plugging a hole you can see; it’s about addressing the invisible drafts that disrupt the airflow in your living space.

    When I’m auditing a room, I look specifically at the transition points where different surfaces meet. Sealing window and door frames with high-quality weatherstripping is a great start, but don’t overlook the “hidden” culprits like recessed lighting or gaps behind heavy furniture. It’s a battle against conduction and convection in homes, where heat escapes through cracks and cold air settles in low spots. By tackling these small, localized leaks room by room, you’re essentially creating a much more stable thermal environment without needing a massive renovation budget.

    5 Low-Cost Wins to Stop Your Heat from Escaping

    • Master your thermostat settings; it’s not just about the temperature, but the timing. Setting it back just 2 or 3 degrees while you’re sleeping or out of the house can shave a noticeable chunk off your monthly bill without making you miserable.
    • Use heavy curtains as thermal barriers. I always check the window frames with my infrared thermometer, but even if the seals are okay, thick, floor-to-ceiling drapes can act like a second layer of insulation against the glass.
    • Don’t forget your radiator efficiency. If you have radiators sitting against cold exterior walls, you’re losing heat directly into the brickwork. Slapping a simple piece of reflective foil behind them can bounce that warmth back into the room instead.
    • Manage your internal airflow. It sounds counterintuitive, but closing the doors to unused rooms prevents your heating system from trying to warm up space you aren’t even occupying. Keep the heat where you actually live.
    • Check your water heater temperature. Most people have their tanks set way higher than necessary. Dialing it down to around 120°F (49°C) is usually plenty for a hot shower and stops you from paying to heat water you’ll never use.

    The Bottom Line: Stop the Leaks, Save the Cash

    You don’t need a massive renovation budget to see results; focusing on air sealing and insulation gaps is the fastest way to stop paying for heat you aren’t actually using.

    Prioritize your “problem zones” by using an infrared thermometer or even just your hands to find where the cold is actually getting in before you spend a dime.

    Small, consistent fixes—like weatherstripping or caulking—are more effective for your wallet in the long run than waiting for a major, expensive system upgrade.

    The Real Cost of Convenience

    “Every time I point my thermometer at a drafty window or a poorly sealed door, I don’t just see a temperature drop; I see money literally escaping into the street. We’ve been conditioned to think that massive, expensive renovations are the only way to be sustainable, but the truth is, efficiency is found in the gaps we usually ignore.”

    Tobias Nkemdirim

    The Bottom Line

    The Bottom Line: fixing energy leaks.

    At the end of the day, minimizing energy loss isn’t about installing a million-dollar smart home system or ripping out your walls for new insulation. It’s about the basics: tightening up your building envelope, sealing those sneaky air leaks around windows, and actually paying attention to where your heat is escaping. I’ve spent enough time with my infrared thermometer to know that most of your money is literally leaking through the cracks you haven’t noticed yet. By focusing on these low-cost, high-impact fixes, you aren’t just saving a few bucks on your monthly utility bill; you’re fundamentally changing how your home breathes. It’s about being intentional with the space you inhabit rather than just letting energy vanish into thin air.

    I know it can feel overwhelming to think about sustainability when everything feels so expensive right now. But remember, you don’t need a massive bank account to make a difference. Every draft you seal and every thermal leak you plug is a win for both your wallet and the planet. We have to stop accepting inefficiency just because it’s the status quo. Start small, stay observant, and realize that small, smart changes are exactly what lead to lasting impact. You’ve got this, and your future self—the one with the lower bills and a much smaller carbon footprint—will definitely thank you.

    Frequently Asked Questions

    I’ve noticed drafts around my windows, but how do I know if the leak is in the glass itself or just the frame?

    Grab your infrared thermometer—that’s my go-to for this. Aim it at the glass, then the frame. If the glass temperature is significantly lower than the surrounding wall, you’ve likely got failed seals in a double-pane window. But if the frame is the cold spot, it’s an air leak. You can also do the “incense test”: pass a lit stick near the edges. If the smoke dances, the air is escaping through the frame.

    Are there specific materials you recommend for sealing gaps that won't permanently damage old window frames or rental property?

    If you’re in a rental or dealing with old wood frames, avoid anything permanent like spray foam or heavy caulking. I usually recommend removable weatherstripping or V-seal strips; they stick well but peel off without ruining the finish. For window gaps, tension rods with heavy thermal curtains are a lifesaver. If you need something more direct, even a bit of removable “draft stopper” fabric at the sill works wonders without leaving a trace.

    Since I'm on a tight budget, which of these fixes actually provides the biggest "bang for my buck" in terms of immediate bill reduction?

    If you’re looking for the biggest immediate impact without breaking the bank, focus on your windows and doors. Grab some weatherstripping or even just heavy thermal curtains. I’ve used my infrared thermometer on countless audits, and the heat loss around poorly sealed door frames is usually massive. It’s cheap, you can do it yourself in an afternoon, and you’ll actually feel the difference in your utility bill almost immediately.
  • How Solar Panels Withstand Extreme Weather

    How Solar Panels Withstand Extreme Weather

    I remember standing on a client’s roof last October, clicking my infrared thermometer against a solar array that looked brand new on paper but was already showing massive thermal hotspots. It’s infuriating. Most sales reps will try to sell you on “cutting-edge technology” while glossing over the reality of how these systems actually hold up against hail, heatwaves, and years of grime. They talk about theoretical lifespans, but they rarely talk about the actual solar panel durability you can expect when your hard-earned money is literally sitting on your roof. You aren’t just buying glass and silicon; you’re buying a decade or two of energy independence, and getting it wrong means you’re just subsidizing a manufacturer’s marketing budget instead of lowering your bills.

    I’m not here to give you a glossy brochure or a list of technical specs that don’t mean anything in the real world. My goal is to strip away the hype and show you exactly what to look for so you don’t end up with a system that fails just when you need it most. We’re going to look at the real-world stressors that actually break panels and how you can pick gear that stays tough without breaking your bank account.

    Table of Contents

    How Solar Panel Degradation Rates Impact Your Long Term Savings

    How Solar Panel Degradation Rates Impact Your Long Term Savings

    When I’m auditing a home, I’m not just looking at where the heat escapes; I’m looking at the math behind the investment. Most people assume their panels will pump out the same amount of juice for twenty-five years, but that’s not how physics works. You have to account for solar panel degradation rates, which is basically the slow, inevitable decline in how much electricity your system can actually pull from the sun. If you don’t factor this in, your projected savings are going to look a lot rosier on paper than they actually are in your bank account.

    This isn’t just about old age, though. I’ve seen how the impact of extreme temperatures can accelerate the wear and tear on a system. If you live somewhere with massive temperature swings, your panels are under constant physical stress. It’s why I always tell my clients to look closely at the photovoltaic cell longevity specs. You aren’t just buying hardware; you’re buying a predictable stream of energy. If the degradation is too steep, that “green” investment starts feeling like a drain on your finances rather than a way to save them.

    Why Photovoltaic Cell Longevity Matters for Your Monthly Bills

    Why Photovoltaic Cell Longevity Matters for Your Monthly Bills

    When I’m auditing a home, I’m not just looking at the insulation; I’m looking at the long-term math. If you’re installing solar to cut down your monthly overhead, you have to look at the photovoltaic cell longevity as the foundation of that math. It’s easy to get caught up in the upfront cost of a kit, but if those cells start losing efficiency too quickly, your “savings” are basically an illusion. You aren’t just buying hardware; you’re buying a predictable stream of energy that keeps your utility bills from spiking every summer.

    The reality is that your panels are constantly fighting a losing battle against the elements. I often see how the impact of extreme temperatures can accelerate wear and tear, especially if the modules aren’t built to handle local weather shifts. If the cells degrade faster than the manufacturer promised, you’ll find yourself back in the position of paying the utility company for power you thought you’d already covered. To make this work for your wallet, you need gear that maintains its output throughout its entire solar module lifecycle.

    5 Ways to Make Sure Your Solar Setup Doesn't Become a Paperweight

    • Don’t just chase the lowest price tag; look for panels with a high temperature coefficient. If you live somewhere where the sun actually beats down hard, cheap panels will lose efficiency the second they get hot, effectively wasting the energy you’re paying to capture.
    • Check the warranty, but look deeper than the “product” coverage. You want to see a clear degradation guarantee—meaning the manufacturer promises the panels will still produce a specific percentage of power (usually 80% or more) after 25 years. If they can’t put a number on it, walk away.
    • Keep an eye on your mounting hardware. I’ve seen too many setups where the panels are fine, but the rails and clamps are corroding or loosening. If your mounting system isn’t built for your local wind or snow loads, you’re looking at a massive repair bill down the road.
    • Set up a routine to check for micro-cracks. You don’t need a lab, but a quick visual inspection after a heavy storm or a particularly rough season can catch physical damage early. Once those cells crack, your energy output drops, and you’re essentially throwing money into the wind.
    • Invest in a quality microinverter or optimizer setup. If one panel gets shaded or damaged, a cheap string system can cause the whole array to tank. Using better tech ensures that one bad apple doesn’t ruin the efficiency of your entire investment.

    The Bottom Line on Solar Longevity

    Don’t get blinded by a low upfront price; if the panels degrade too fast, you’ll end up paying more per kilowatt-hour in the long run than if you’d just stuck with the grid.

    Check the manufacturer’s degradation rate—you want gear that stays efficient for decades, not something that starts losing its punch after just five years.

    Think of durability as an insurance policy for your wallet; high-quality, weather-resistant panels are what actually turn a sustainable choice into a genuine financial win.

    ## The Real Cost of Cheap Hardware

    “I’ve seen too many people get excited about a low upfront price tag, only to realize two years later that their ‘affordable’ system is already losing its edge. If your panels can’t survive a decade of heavy weather without their efficiency tanking, you aren’t saving money—you’re just subsidizing a waste of energy.”

    Tobias Nkemdirim

    Making the Call on Longevity

    Making the Call on Longevity with solar.

    At the end of the day, choosing solar isn’t just about the upfront cost or how sleek the panels look on your roof. It’s about the math. We’ve looked at how degradation rates can quietly eat away at your savings and why the physical longevity of your cells is the only way to ensure your monthly utility bills actually stay low. If you invest in gear that can’t handle the weather or loses efficiency too fast, you aren’t just wasting sunlight; you’re wasting your hard-earned money. You need to prioritize quality over quick wins to make sure your system is still working hard for you a decade from now.

    I know that transitioning to renewable energy can feel like a massive, intimidating leap, especially when you’re trying to balance a budget. But remember, sustainability shouldn’t be a luxury reserved for the wealthy. By focusing on durability and smart, long-term planning, you’re doing more than just cutting a bill; you’re building a home that is resilient and efficient. Don’t settle for the cheapest option just because it’s convenient. Invest in something that lasts, because true energy independence is built on the foundation of equipment that refuses to quit.

    Frequently Asked Questions

    How can I tell if my panels are actually degrading just by looking at them, or do I need professional gear to spot the drop in efficiency?

    Look, you can spot some obvious red flags with your own eyes—like visible cracks in the glass, discoloration (that weird brownish tint), or even bird droppings caked on. But honestly? You can’t “see” efficiency dropping. A panel can look perfectly fine while quietly underperforming. If your bills are creeping up despite sunny days, that’s when you need a pro with a multimeter or thermal camera to see what’s actually happening under the hood.

    Is it worth paying the extra upfront for high-end panels, or will the cheaper ones eventually pay for themselves through better durability?

    Look, I get the temptation to go cheap, but I’ve seen too many people get burned by “budget” setups that die right when they start paying off. If you buy low-tier panels, you’re essentially betting that they’ll outlast your mortgage. I usually tell my clients: pay the premium for high-efficiency, durable gear. It’s not about being fancy; it’s about ensuring those panels actually keep delivering power ten years from now instead of becoming expensive roof scrap.

    What kind of weather or environmental stuff in my specific area is actually going to kill my panels faster?

    It really depends on where you’re living, but I always look for the “silent killers.” If you’re in a coastal area, salt spray is a nightmare—it eats away at the frame and connections. In high-heat zones, extreme temperature swings cause thermal expansion that cracks cells over time. Also, don’t overlook heavy hail or even intense wind; if your mounting isn’t solid, the environment will find a way to shake your investment loose.

  • Tips for Energy Efficient Laundry

    Tips for Energy Efficient Laundry

    I still remember sitting on the floor of my old rental apartment, staring at a utility bill that felt like a personal insult. It wasn’t just the heating; it was the realization that every time I ran a load of clothes, I was essentially burning cash just to get the stains out. Most people think that achieving energy efficient laundry requires some massive, expensive investment in a top-of-the-line smart machine that costs more than my monthly rent. That’s a total myth. The truth is, we’ve been conditioned to think that “clean” has to mean “high heat” and “heavy power,” but that’s just a convenient way for utility companies to keep their margins high while we pay the price.

    I’m not here to sell you on some high-tech gadget you don’t need. Instead, I want to share the practical, data-backed shifts I’ve learned from auditing homes and living on a budget myself. I’m going to show you how to optimize your current setup to master energy efficient laundry without breaking the bank. We’re going to focus on small, smart adjustments—from temperature tweaks to timing—that actually move the needle on your monthly costs and your carbon footprint.

    Table of Contents

    Low Energy Washing Machine Settings That Actually Work

    Low Energy Washing Machine Settings That Actually Work

    Most people default to the “Heavy Duty” or “Hot” settings because they think it’s the only way to get clothes truly clean. I see this mistake constantly during my audits. In reality, modern detergents are chemically engineered to work perfectly in cold water. By switching to low energy washing machine settings, specifically the “Eco” or “Cold” cycles, you’re cutting out the part of the process that consumes the most power: heating the water. It’s a massive win for reducing utility bills without actually sacrificing hygiene.

    If your machine has a “Quick Wash” option, use it—but with a caveat. These cycles are great for lightly soiled loads, but don’t overstuff the drum to compensate. For a machine to work efficiently, the clothes need room to move. If you’re cramming it full, you’re just spinning your wheels and wasting electricity. I always tell my clients that sustainable fabric care is just as much about how you load the machine as it is about the temperature you choose. Keeping the load size manageable ensures the mechanical action does the heavy lifting, not the heater.

    Eco Friendly Laundry Habits for a Smaller Footprint

    Eco Friendly Laundry Habits for a Smaller Footprint

    Beyond just tweaking your machine’s settings, true efficiency comes down to how you manage your clothes between washes. One of the best eco-friendly laundry habits I’ve seen is simply extending the time between loads. I used to wash everything as soon as it hit the hamper, but I realized that waiting for a full load doesn’t just save water—it significantly cuts down on the total cycles you run per week. It’s a small discipline, but it’s one of the most effective ways of reducing utility bills laundry costs without spending a dime on new gear.

    I also can’t stress enough the importance of sustainable fabric care when it comes to longevity. If you treat your clothes well—like air-drying delicate knits or using mesh bags—they last longer, which means you aren’t constantly replacing items and contributing to textile waste. When you do have to use the machine, try to avoid using excessive detergent. Too much soap actually creates more suds that the machine has to work harder to rinse away, forcing it into longer, more power-hungry cycles.

    Small Tweaks to Stop Wasting Power in the Laundry Room

    • Stop washing everything on hot. Most modern detergents are literally designed to work just as well in cold water, and since heating the water is what eats up the bulk of your machine’s energy, switching to a cold cycle is an instant win for your wallet.
    • Only run the machine when it’s actually full. I see it all the time during my audits—people running half-loads because they have a few items to clean. It’s a massive waste of water and electricity; wait until you have a full load to maximize the efficiency of every single cycle.
    • Ditch the dryer whenever you possibly can. Dryers are absolute energy hogs. If your living space allows for it, air-drying your clothes on a rack or a line is the single best way to slash your utility bill and make your clothes last longer.
    • Clean your lint filter every single time. It sounds basic, but a clogged filter forces your dryer to work much harder and run longer to get the job done. Keeping it clear ensures the airflow stays efficient so you aren’t paying for extra minutes of heat.
    • Use the right amount of detergent. It’s tempting to think more soap equals cleaner clothes, but excess suds actually make your machine work harder to rinse everything out. Stick to the recommended dose to keep the cycle efficient and prevent buildup in your machine.

    The Bottom Line on Smarter Laundry

    Stop defaulting to hot water; most modern detergents are designed for cold cycles, and you’ll save a massive amount of energy by skipping the heating element.

    Efficiency is about volume, so wait for a full load to maximize every kilowatt-hour, but don’t overstuff to the point where your machine struggles and wastes power.

    Small habits, like air-drying when possible and cleaning your lint filter every single time, are the easiest ways to keep your bills low and your impact minimal.

    The Real Cost of a Hot Wash

    “We’ve been conditioned to think that higher heat equals cleaner clothes, but in reality, you’re mostly just paying to heat water that’s going straight down the drain. Efficiency isn’t about doing less; it’s about doing things smarter so your bank account and the planet both get a break.”

    Tobias Nkemdirim

    Cutting Costs, One Load at a Time

    Cutting Costs, One Load at a Time.

    At the end of the day, making your laundry routine more efficient isn’t about buying a brand-new, high-tech appliance that costs a fortune. It’s about the small, intentional shifts: opting for cold water cycles, waiting for a full load before hitting start, and actually air-drying when the weather permits. I’ve seen firsthand through my audits how much energy is bled away by simple habits, like using the heavy-duty setting for lightly soiled clothes. By focusing on these low-cost, high-impact adjustments, you’re effectively stopping the constant drain on your bank account and your local power grid.

    I know it can feel like the climate crisis is too massive for one person to tackle, but I promise you, it isn’t. Every time you choose a more efficient setting or skip the heated dryer, you are proving that sustainability doesn’t have to be a luxury. We don’t need a handful of people doing zero-waste living perfectly; we need millions of us making these small, pragmatic changes every single day. Start with your next load of laundry. It’s a simple way to take control of your expenses and build a more resilient, low-impact home one wash at a time.

    Frequently Asked Questions

    Is it actually safe for my clothes to wash everything in cold water, or will it ruin the fabric over time?

    Honestly, it’s actually safer for most fabrics. High heat is what causes fibers to break down, shrink, or lose their shape. By switching to cold, you’re essentially extending the life of your clothes. The only real exception? Heavy grease or certain biological stains might need a warm cycle to fully lift. For everything else, cold water is your best friend—it saves energy and keeps your wardrobe looking newer for longer.

    How much of a difference does it really make to switch to eco-friendly detergents versus the cheaper, standard brands?

    Honestly, it’s not just about the chemicals; it’s about the efficiency. Standard, cheap detergents often rely on harsh surfactants that require higher water temperatures to actually break down stains. I’ve seen it firsthand: if you’re using budget brands, you’re likely compensating with more heat and longer cycles. Switching to a concentrated, eco-friendly option usually means you can stick to cold washes, which saves a massive amount of energy over a year. It’s a small upfront cost for a big long-term win.

    If I'm air-drying my clothes to save power, what's the best way to prevent that damp smell from setting in?

    That damp, musty smell is usually just trapped moisture and bacteria from clothes staying wet for too long. To avoid it, focus on airflow. If you’re drying indoors, keep a window cracked or use a small fan to move the air around the rack. Also, don’t overstuff your machine; if the clothes come out too saturated, they’ll take forever to dry, which is when that smell kicks in. Speed is your friend here.

  • Tracking Your Home Energy Usage With Monitors

    Tracking Your Home Energy Usage With Monitors

    I remember sitting in my old rental apartment, shivering through a February freeze, staring at a utility bill that felt like a personal insult. I knew I was wasting money, but I had no idea where it was leaking out. Most people think you need a massive budget or a PhD in electrical engineering to get a handle on your usage, but that’s a lie. You don’t need a high-tech smart home overhaul to understand your consumption; you just need reliable home energy monitoring that actually tells you the truth. Most of the expensive “smart” gadgets on the market are just flashy toys designed to make you feel tech-savvy while doing very little to actually lower your costs.

    I’m not here to sell you on a lifestyle of expensive gadgets you don’t need. My goal is to show you how to use data to stop the bleeding, whether you’re using a simple plug-in sensor or a more integrated system. I’ll walk you through the practical ways to track your watts so you can finally stop guessing and start saving. We’re going to look at the real-world tools that help you find the energy vampires in your house and kill them for good.

    Table of Contents

    Master Real Time Energy Consumption Tracking Without Breaking the Bank

    Master Real Time Energy Consumption Tracking Without Breaking the Bank

    You don’t need a high-end, integrated smart home setup to start seeing where your money is leaking. I’ve audited plenty of houses where the owners were blindsided by their bills, simply because they had no idea which devices were the culprits. The most cost-effective way to start is by using simple plug-in monitors for your heavy hitters—like your fridge or old space heater. By monitoring appliance power consumption individually, you get immediate, hard data on exactly what those “vampire loads” are costing you every month.

    If you want to go deeper without spending a fortune, look into basic clamps that attach to your breaker box. These allow for more comprehensive real-time energy consumption tracking across your entire circuit. Instead of guessing why your bill spiked on a Tuesday, you can actually see the surge. Once you start looking at these energy usage patterns, you’ll realize that small, consistent adjustments—like shifting laundry times or unplugging idle tech—can significantly slash your monthly overhead. It’s about being observant, not expensive.

    How Smart Home Energy Efficiency Saves Your Hard Earned Cash

    How Smart Home Energy Efficiency Saves Your Hard Earned Cash

    Look, I’ve seen it too many times: people staring at a massive utility bill at the end of the month, completely baffled by where the money actually went. It feels like throwing cash into a black hole. The reality is that most of us are bleeding money through “vampire loads” or inefficient appliances that we don’t even realize are running. By focusing on smart home energy efficiency, you stop guessing and start knowing. It’s the difference between wondering why your bill is high and actually seeing that your old fridge is pulling double the power it should.

    When you start monitoring appliance power consumption, the math changes instantly. You begin to notice those small, expensive habits—like leaving the space heater on in an empty room or running the dishwasher during peak rate hours. It’s not about living in the dark; it’s about eliminating the waste that doesn’t serve you. Once you identify these leaks, you can make surgical adjustments that directly impact your wallet. Every watt you save is money that stays in your pocket instead of being sent straight to the power company.

    5 Ways to Get Real Data Without the Headache

    • Stop guessing and start measuring with a simple plug-in monitor for your heavy hitters like the fridge or space heater; it’s the fastest way to see if an old appliance is secretly bleeding your bank account dry.
    • Use your smartphone to check your utility provider’s app daily—most people don’t realize they have access to granular usage data that can show you exactly when your “vampire loads” are spiking.
    • Map your “energy peaks” by cross-referencing your usage data with your daily habits, so you can stop running the dishwasher or dryer right when electricity rates are at their highest.
    • Keep an eye on your baseline—that’s the steady hum of power your house uses while you’re sleeping—to catch any phantom devices or faulty electronics that are draining power for no reason.
    • Don’t just collect data; act on it by setting “usage alerts” on your smart plugs to notify you if a device stays on longer than it should, turning your monitoring from a passive hobby into an active saving tool.

    The Bottom Line: Why Monitoring Actually Matters

    Stop guessing where your money is going; real-time data turns invisible energy leaks into actionable fixes you can actually afford.

    Efficiency isn’t just about buying expensive new appliances—it’s about using smart monitoring to squeeze every bit of value out of the tech you already own.

    Small, consistent adjustments based on your usage patterns will save you more in the long run than any single “green” gadget ever could.

    The Visibility Gap

    You can’t fix what you can’t see. Most people are just throwing money at their utility bills and hoping for the best, but once you actually see where those watts are leaking, you stop guessing and start saving.

    Tobias Nkemdirim

    Cutting the Cord on Wasted Energy

    Cutting the Cord on Wasted Energy.

    At the end of the day, monitoring your energy isn’t about obsessing over every single kilowatt; it’s about gaining control over your overhead. We’ve looked at how affordable real-time tracking can pull back the curtain on your usage, and how integrating smart tech can turn a passive, expensive house into an active, efficient home. Whether you’re using a simple plug-in monitor or a more integrated smart hub, the goal is the same: stop guessing where your money is going. When you stop treating your utility bill like a mystery box that arrives once a month, you start making decisions based on actual data rather than just habit.

    I know it can feel overwhelming, especially when you’re staring at a rising cost of living, but remember that sustainability isn’t an all-or-nothing game. You don’t need a massive solar array or a high-tech smart mansion to make a dent. Small, intentional shifts—like catching a vampire appliance or adjusting your heating schedule based on real numbers—add up to a massive difference over time. We have to stop accepting energy waste just because it’s the convenient way to live. Start small, track your progress, and take your power back, one watt at a time.

    Frequently Asked Questions

    Is it actually worth the upfront cost of a monitoring system if I'm just living in a small rental?

    Look, I get it. When you’re renting, you don’t want to sink money into a place you don’t own. But here’s the reality: if your utility bills are eating your budget, a monitoring system pays for itself. Even in a small apartment, you’re likely losing money to “vampire loads” or inefficient appliances. Think of it as a portable investment. You can take the tech with you when you move, turning a rental into a high-efficiency space.

    How much time am I really going to have to spend looking at data and apps every week?

    Look, I get it. You don’t want a second job as a data analyst just to save a few bucks on your electric bill. The reality? If you set it up right, you shouldn’t be staring at graphs for hours. Spend maybe ten minutes a week checking for weird spikes or “vampire” loads. It’s about spotting patterns, not obsessing over every single watt. Once you see the trends, you can step back and just let the savings roll in.

    Can these monitors catch those "phantom" energy drains from old appliances, or do I still need to unplug things manually?

    That’s a great question, and honestly, it’s one of the main reasons I carry my thermal scanner around. Most monitors can absolutely catch those “phantom” loads. When you see a steady, unexplained baseline of power usage while everything should be off, you’ve found your culprit. You don’t necessarily need to unplug everything manually, but identifying which old fridge or TV is sucking power 24/7 helps you decide if it’s time to upgrade or just use a smart strip.

  • Managing Outdoor Water Usage With Smart Controllers

    Managing Outdoor Water Usage With Smart Controllers

    I was walking through a client’s backyard last Tuesday when I noticed something that made me reach for my infrared thermometer out of habit: the soil was practically a swamp, yet the lawn looked parched. I checked the timer, and sure enough, the old-school system was blasting water in the middle of a downpour. It’s a classic, expensive mistake, and honestly, it’s why so many people are skeptical of the “tech” side of gardening. They think smart irrigation controllers are just another overpriced gadget designed to make your life more complicated, but that’s a total myth. You don’t need a PhD in coding or a massive budget to stop wasting water; you just need a system that actually thinks for once.

    I’m not here to sell you on some flashy, high-tech lifestyle that drains your bank account. My goal is to show you how to use smart irrigation controllers to cut your water waste and stop overpaying for a utility you don’t even need to use that much. I’ll be giving you the straight, data-driven truth on which setups actually work for real homes, without all the marketing fluff.

    Table of Contents

    Stop Overpaying for Water With Automated Watering Schedules

    Stop Overpaying for Water With Automated Watering Schedules

    I remember checking my utility bill last summer and seeing a spike in water costs that felt almost personal. It wasn’t because I was watering more; it was because I was watering wrong. Most of us default to a timer that runs at the same time every day, regardless of whether it rained two hours ago or if the sun is beating down at noon. That’s just throwing money down the drain. By switching to automated watering schedules, you stop treating your garden like a chore and start treating it like a managed system.

    The real magic happens when you move beyond basic timers and look into weather-based irrigation systems. These devices actually look at local forecasts and adjust your run times accordingly. If a storm is rolling in, the system skips the cycle. It’s a simple way to integrate smart garden automation into your routine without needing a degree in horticulture. You aren’t just saving a few gallons; you’re ensuring that every drop you pay for is actually doing its job instead of just evaporating off the pavement.

    How Water Conservation Technology Protects Your Wallet

    How Water Conservation Technology Protects Your Wallet

    When I’m auditing a property, I usually look at insulation or HVAC first, but the water bill is often where people are bleeding money without even realizing it. Traditional timers are “dumb”—they run on a set clock regardless of whether it’s been pouring rain for three days straight. That’s essentially throwing money down the drain. By switching to weather-based irrigation systems, you’re finally letting real-time data dictate your usage. These systems pull local weather data to skip cycles when the ground is already saturated, ensuring you only pay for the water your plants actually need.

    It’s not just about the big picture, though; it’s about the precision of soil moisture monitoring. Instead of guessing if your flower beds are parched, these sensors tell you exactly how much hydration is left in the dirt. This level of smart garden automation removes the human error of overwatering, which is one of the most common ways homeowners inflate their monthly utility costs. If you want to stop the leak in your finances, you have to stop treating water like an infinite resource.

    5 Ways to Stop Wasting Water and Start Saving

    • Connect your controller to a local weather feed. There is zero point in running a cycle if it rained two hours ago; a smart system knows this and skips the soak automatically.
    • Zone your garden by need. Don’t spray your thirsty shrubs with the same amount of water you give your drought-tolerant succulents; it’s an inefficient use of resources and a waste of money.
    • Check your hardware for leaks regularly. Even the smartest controller can’t fix a cracked pipe or a stuck valve, so keep an eye out for those damp patches that shouldn’t be there.
    • Use soil moisture sensors to get real data. Instead of guessing if the ground is dry, let a sensor tell the controller exactly when the roots actually need a drink.
    • Set a “drip-only” schedule for heatwaves. During peak summer, use targeted drip irrigation rather than overhead sprinklers to minimize evaporation loss and keep the water where it actually matters.

    The Bottom Line on Smart Irrigation

    You don’t need a high-tech overhaul to see results; switching to a smart controller is a practical way to stop wasting water and start seeing lower utility bills immediately.

    Automation isn’t just about convenience; it’s about using data to ensure you’re only watering when your soil actually needs it, preventing expensive runoff.

    Investing in smart irrigation is a small, smart change that balances a lower carbon footprint with a much more manageable monthly budget.

    Efficiency Beyond the Walls

    “We spend so much time obsessing over the insulation in our living rooms, but we completely ignore the massive amount of energy and money leaking out through our garden hoses. A smart controller isn’t just a gadget; it’s about stopping the mindless waste of a resource we can’t afford to lose.”

    Tobias Nkemdirim

    The Bottom Line on Smart Watering

    The Bottom Line on Smart Watering.

    At the end of the day, switching to a smart irrigation controller isn’t just about buying a new gadget; it’s about ending the era of mindless waste. We’ve looked at how automated schedules prevent overwatering and how these systems act as a buffer for your bank account by slashing monthly utility bills. Whether it’s adjusting for a sudden rainstorm or preventing evaporation during a heatwave, the data shows that precision beats guesswork every single time. You don’t need to overhaul your entire yard to see a difference; you just need to stop letting your money run down the drain through outdated, timer-based systems that don’t account for the actual weather.

    I know that sometimes making “sustainable” changes feels like a luxury reserved for people with massive budgets and endless free time. But my experience auditing homes has taught me that true efficiency is found in these small, intentional shifts. Investing in a smart controller is a practical, low-effort way to align your lifestyle with your values without breaking the bank. It’s about taking control of your resources rather than letting them control you. Let’s stop wasting energy and water just because it’s the easy way out—small, smart changes are how we actually build a future that makes sense for everyone.

    Frequently Asked Questions

    Will a smart controller actually work with my existing sprinkler system, or do I need to rip everything out and start over?

    The short answer is: no, you don’t need to rip everything out. I see this concern a lot during audits. Most smart controllers are designed to be “plug-and-play” with your existing wiring and sprinkler heads. You’re essentially just replacing the “brain” of the system, not the hardware in the ground. As long as your current setup uses standard valves, a new controller should slot right in and start saving you money immediately.

    Is the initial cost of a smart controller worth it if I'm already fairly careful about when I turn the water on?

    Look, I get it. If you’re already disciplined about manual watering, the upfront cost feels like a hurdle. But here’s the thing: human error is a heat leak for your wallet. Even the most careful person forgets a rainy day or a sudden heatwave. A smart controller reacts to real-time weather data in ways we can’t. It’s not just about being “careful”; it’s about precision. For me, that automation is the ultimate way to stop wasting resources.

    How much maintenance do these devices actually need—are they going to be another piece of tech I have to constantly troubleshoot?

    Honestly, I get the hesitation. The last thing you need is more “smart” tech that breaks and adds to your mental load. The good news? Once a controller is set up, it’s mostly low-maintenance. You might need to clear some debris from the sensors or check your Wi-Fi connection occasionally, but it’s not like restoring vintage gear. It’s a “set it and forget it” tool designed to work in the background, not demand your constant attention.

  • How to Identify and Fix Thermal Bridging

    How to Identify and Fix Thermal Bridging

    I still remember sitting in my old rental apartment three years ago, wrapped in two blankets and watching my breath mist in the living room, even though the heater was cranked to the max. I’d pull out my infrared thermometer, and the reading would tell the whole story: these massive, invisible cold spots bleeding heat straight through the wall studs. Most people think you need to gut your entire house or spend a fortune on high-end construction to fix this, but that’s a total myth. You don’t need a massive renovation budget to tackle thermal bridging solutions; you just need to understand where the heat is actually escaping.

    In this guide, I’m cutting through the architectural jargon to give you the real-world tactics I use during my energy audits. I’m not here to sell you on expensive, unnecessary upgrades that only contractors love. Instead, I’ll show you how to identify these thermal leaks and apply practical, low-cost thermal bridging solutions that actually work. My goal is to help you stop paying for heat that just vanishes into thin air, ensuring your home stays efficient and affordable without breaking the bank.

    Table of Contents

    Smart Continuous Insulation Methods to Lower Your Monthly Bills

    Smart Continuous Insulation Methods to Lower Your Monthly Bills

    When I’m out on an audit, the biggest culprit I see isn’t usually a lack of insulation, but rather the gaps where it stops. If your insulation is just tucked into the cavities of your walls, you’re still losing heat through the studs themselves. This is where continuous insulation methods become a game-changer. By adding a layer of rigid foam or mineral wool boards directly to the exterior of your sheathing, you essentially wrap the house in a thermal blanket. This breaks the path that heat tries to take through the structural members, which is one of the most effective thermal bridge mitigation techniques available for anyone serious about their energy bills.

    It’s not just about the warmth, though; it’s about the physics of moisture. When a structural element stays significantly colder than the air inside your home, you run a high risk of preventing condensation through thermal bridges by ensuring those cold spots don’t exist in the first place. If you can stabilize the temperature of your building envelope, you stop the cycle of dampness and mold that often follows a drafty winter. It’s a smarter way to approach energy efficient building design without needing to tear your house down to the studs.

    Protecting Building Envelope Integrity Without Breaking the Bank

    Protecting Building Envelope Integrity Without Breaking the Bank

    When I’m out on an audit, I often see people focus so much on thick insulation that they completely overlook the gaps where the real damage happens. Maintaining your building envelope integrity isn’t just about adding more material; it’s about ensuring there are no “weak links” in your home’s defense. If your exterior walls are solid but your window frames or floor joists are acting like heat highways, you’re essentially trying to fill a bucket with a hole in the bottom.

    One of the biggest headaches I encounter is moisture. If you don’t address these temperature gaps, you’re looking at a serious risk of preventing condensation through thermal bridges becomes an uphill battle. When warm, moist indoor air hits a freezing cold spot on a structural element, you get mold. It’s a messy, expensive problem that most people don’t realize is caused by a simple lack of continuity. You can protect your home by focusing on these junctions—sealing the gaps around penetrations and ensuring your insulation layers actually meet—without needing to tear down your walls.

    5 Quick Wins to Cut Down on Heat Leaks

    • Seal your electrical outlets. Most people forget that the gaps around your socket plates are literal highways for cold air to travel from your walls into your living space. I always carry my thermometer to find these; a simple foam gasket behind the plate makes a massive difference.
    • Don’t ignore the window frames. Even if you have double glazing, the point where the frame meets the wall is a prime spot for thermal bridging. Using a high-quality, flexible sealant around those edges can stop that annoying draft without needing to replace the whole window.
    • Mind the floor-to-wall junction. This is where a lot of heat just vanishes. If you’re on a budget, adding a thick, insulated rug over areas where the floor meets the exterior wall can act as a decent temporary buffer to keep the warmth from escaping through the structure.
    • Address your balcony connections. If you have a concrete balcony attached to your building, it’s basically acting like a giant radiator in reverse, pulling heat out of your room. While a full structural fix is expensive, ensuring your interior walls near the balcony are well-insulated can help mitigate the chill.
    • Check your door sweeps. A door that doesn’t sit flush against the threshold is a major thermal bridge. Installing a heavy-duty sweep or even a simple weighted draft excluder is a low-cost, high-impact way to keep the conditioned air inside where it belongs.

    The Bottom Line: Small Fixes, Big Savings

    You don’t need a massive renovation budget to fight thermal bridging; focus on sealing the gaps in your building envelope first to see the fastest return on your investment.

    Prioritize continuous insulation over just adding more bulk; it’s about creating an unbroken barrier that prevents heat from finding a shortcut through your walls.

    Think of energy efficiency as a long game—addressing these small leaks now stops the slow drain on your bank account and reduces your carbon footprint every single month.

    ## The Hidden Leak in Your Wallet

    “Thermal bridging is basically like leaving a window cracked open in the middle of winter; you can crank up the heat all you want, but you’re just paying to heat the neighborhood through those invisible gaps in your walls.”

    Tobias Nkemdirim

    Cutting the Leaks for Good

    Cutting the Leaks for Good via insulation.

    At the end of the day, fixing thermal bridges isn’t about performing a complete structural overhaul or buying the most expensive insulation on the market. It’s about being observant. Whether you’re focusing on continuous insulation to smooth out those temperature gaps or simply taking steps to protect your building envelope from the elements, the goal is the same: stop the bleed. By targeting those specific points where heat escapes, you aren’t just making your home more comfortable; you are actively plugging the holes in your wallet. Every small tweak to your home’s thermal integrity pays dividends in lower utility bills and a much more stable indoor climate.

    I know that looking at a list of energy inefficiencies can feel overwhelming, especially when you’re working with a tight budget. But remember, sustainability shouldn’t be a luxury reserved for people with massive renovation funds. You don’t have to fix everything overnight to see a difference. Start with the low-hanging fruit, use the data to guide your next move, and keep an eye on those heat leaks. If we all take these small, intentional steps to stop wasting energy just because it’s convenient, we can collectively build homes that are both affordable and planet-friendly. Let’s get to work.

    Frequently Asked Questions

    I'm renting an apartment and can't tear into the walls; are there any ways to mitigate thermal bridging without making permanent structural changes?

    I get it—as a renter, you’re stuck with the walls you’ve got. Since you can’t rip into the drywall, focus on “surface-level” fixes. I always suggest heavy, thermal-lined curtains to block drafts from window frames, or even temporary foam insulation boards tucked behind furniture against cold exterior walls. It’s not a permanent structural fix, but it breaks that direct heat path and stops your money from literally leaking through the masonry.

    How much of an actual impact will fixing these bridges have on my monthly utility bills compared to just upgrading my thermostat?

    Look, a smart thermostat is a great tool for managing when you use energy, but it can’t stop energy from escaping. If you have thermal bridges, you’re basically heating the outdoors. It’s like trying to cool a room with the window cracked open—no matter how high-tech your thermostat is, the heat is still leaking out. Fixing those bridges provides a permanent reduction in heat loss, which usually yields much bigger, more consistent savings.

    If I'm looking at DIY insulation, how do I identify where the most critical thermal bridges are located in my specific home layout?

    Grab your infrared thermometer—it’s the best tool for this. On a cold day, run it along your walls, especially where the ceiling meets the wall or around window frames. You’re looking for “cold spots” where the temperature drops sharply; those are your bridges. Don’t forget to check corners, floor joists, and where plumbing penetrates walls. If a spot feels significantly colder than the rest of the surface, that’s where your money is leaking out.

  • Understanding Solar Panel Warranty Terms

    Understanding Solar Panel Warranty Terms

    I was auditing a client’s small cottage last month when I saw it: a beautiful, high-end solar array that was effectively dead in the water because of a single cracked cell. When they called the manufacturer, they were met with a mountain of fine print that basically turned their solar panel warranty into a useless piece of paper. It’s infuriating. We’re told that going solar is this ultimate path to energy independence, but too many companies hide behind predatory legal jargon that leaves you footing the bill for their faulty hardware.

    I’m not here to sell you on the “dream” of endless free energy; I’m here to make sure you don’t get ripped off while trying to build it. In this guide, I’m stripping away the marketing fluff to show you exactly what a real, functional warranty looks like. We’ll look at the math behind the coverage and identify the red flags that mean a company is just protecting their bottom line instead of yours. My goal is simple: to help you choose gear that actually keeps your bills low for the long haul.

    Table of Contents

    Decoding the Fine Print Product vs Performance Warranty Explained

    Decoding the Fine Print Product vs Performance Warranty Explained

    Here is where most people get tripped up. When you’re looking at a quote, you’ll see two very different numbers, and if you don’t distinguish between them, you might end up with a system that technically “works” but performs like a relic. First, you have the product warranty, which is basically your safety net against manufacturing defects. If a panel arrives with a cracked cell or a faulty internal connection, this is what covers the cost of the hardware itself. It’s about the physical integrity of the unit.

    The second part is the performance warranty, which is arguably more important for your long-term wallet. This isn’t about whether the panel is broken; it’s about how much juice it actually produces over time. All panels experience solar panel degradation rates—they naturally lose a tiny bit of efficiency every year. A good performance guarantee ensures that even after twenty years, your system is still pumping out a significant percentage of its original capacity. Understanding solar warranty fine print means realizing that a high product warranty is useless if the performance guarantee allows your energy output to tank after just a decade.

    Stopping the Leak Why Solar Installation Workmanship Warranty Matters

    Stopping the Leak Why Solar Installation Workmanship Warranty Matters

    Most people get so caught up in the specs of the panels themselves that they completely overlook the actual humans doing the mounting. You can buy the highest-rated hardware on the market, but if the installer leaves a gap in your flashing or fails to secure a mounting bracket properly, that expensive gear becomes a liability. A solar installation workmanship warranty is your only safety net against human error. It’s the difference between a system that sits tight for twenty years and one that starts leaking water into your attic after the first heavy storm.

    I’ve seen too many homeowners realize this only after they’re staring at a water stain on their ceiling. While you’re busy understanding solar warranty fine print regarding how much power the cells will produce, don’t forget to check who is on the hook if the roof penetrations fail. A solid workmanship guarantee ensures that if the installation itself is flawed, the contractor—not your bank account—is responsible for the fix. It’s about protecting the integrity of your home, not just the efficiency of your energy production.

    Don't Get Burned: 5 Ways to Make Sure Your Warranty Actually Works

    • Check the “pro-rata” clause. Some companies promise a 25-year warranty, but that doesn’t mean you get a brand-new panel if yours dies in year 10; it often means they only pay you a tiny fraction of the original cost.
    • Look for a “labor warranty” that isn’t just a footnote. A panel warranty covers the hardware, but if a faulty connection causes a leak or a roof issue, you don’t want to be stuck paying a contractor hundreds just to swap the part out.
    • Verify the manufacturer’s reputation, not just the installer’s. If your local installer goes out of business in three years, you need to know that the panel manufacturer still stands behind their tech so you aren’t left with expensive glass bricks on your roof.
    • Read the “void” conditions like they’re a contract for your life. Some warranties are incredibly picky—if you have a specific type of mounting system or if a certain amount of hail hits, they might try to claim the warranty is void. Know those triggers before you sign.
    • Keep a digital folder of every single document. I’ve seen people lose thousands because they couldn’t find the specific serial number or the original installation date when they filed a claim. Don’t rely on the installer to keep your records safe.

    The Bottom Line: Don't Get Burned by the Fine Print

    Separate the gear from the work; a great panel warranty won’t save you if the installer’s workmanship warranty is non-existent.

    Look past the “25-year” headline and check the actual performance math to ensure your savings don’t evaporate as the panels age.

    Treat your warranty like an insurance policy—read the exclusion clauses now so you aren’t left footing the bill for a repair later.

    ## Don't Let the Fine Print Burn Your Budget

    “A solar warranty isn’t just a piece of paper to tuck away in a drawer; it’s your financial safety net. I’ve seen too many people get excited about low upfront costs, only to realize years later that their ‘guarantee’ doesn’t actually cover the one thing they need most: consistent, reliable power that keeps their bills down.”

    Tobias Nkemdirim

    Don't Leave Your Savings to Chance

    Don't Leave Your Savings to Chance.

    At the end of the day, getting solar isn’t just about the upfront excitement of going green; it’s a long-term financial commitment. I’ve seen too many people overlook the details, only to realize years later that their “savings” are being eaten up by repair costs that aren’t covered. Remember, you need to distinguish between the hardware itself and the person who actually installed it. A high-quality product warranty is useless if the workmanship warranty doesn’t protect you from a leaky roof or faulty wiring. Make sure you understand the difference between a panel that simply exists and a panel that actually performs at the level you were promised.

    Transitioning to renewable energy shouldn’t feel like a gamble. I know it can feel overwhelming to navigate all this technical jargon, but taking an extra hour now to scrutinize those warranty terms is what separates a smart investment from a massive headache. You are doing this to gain independence and lower your bills, not to become a full-time maintenance technician. Protect your wallet and your peace of mind by being a bit of a skeptic during the sales process. If you do the homework now, you can finally sit back, enjoy the lower utility bills, and know that your sustainable future is actually built on a solid foundation.

    Frequently Asked Questions

    If a panel stops producing as much power as promised, how do I actually prove it and trigger the warranty?

    You can’t just point at a bill and say, “It feels lower.” You need data. Start by checking your inverter’s monitoring app—most modern systems log daily kilowatt-hour production. If you see a sudden, unexplained dip that doesn’t align with cloudy weather, grab your records. I always recommend keeping a simple log of your monthly yields. Once you have that digital paper trail, you can present it to your installer to prove the performance drop and trigger that claim.

    Does the warranty cover the cost of me having to hire a technician to come out and fix it, or am I stuck paying for the labor?

    This is where most people get blindsided. In my experience auditing systems, I’ve seen plenty of “comprehensive” warranties that cover the hardware but leave you holding the bill for the guy with the ladder. Usually, the manufacturer covers the replacement panel, but the labor and the technician’s call-out fee are on you. Always check if your installer offers a separate workmanship warranty that includes labor; otherwise, a “free” part might still cost you hundreds.

    What happens to my coverage if I decide to move house or sell my place before the 25-year mark?

    This is a common concern, especially for renters or people who don’t plan on staying in one spot forever. Usually, the hardware warranty stays with the panels themselves, meaning it transfers to the new homeowner. However, the workmanship warranty is a different story—that often stays tied to the original installer and the person who signed the contract. Always check the fine print to see if the coverage is “transferable” so you don’t accidentally strip value from your home.

  • Improving Airflow for Better Energy Efficiency

    Improving Airflow for Better Energy Efficiency

    I still remember sitting in my old rental apartment, shivering under three blankets while my heater ran on full blast, only to realize the warm air was just escaping through a drafty window frame. It felt like I was literally throwing money into the wind. Most people think you need to tear down walls or install a high-tech HVAC system to fix this, but that’s just expensive nonsense. Real efficient airflow management isn’t about buying your way out of a problem; it’s about understanding how air actually moves through your specific space so you can stop the leaks before they hit your wallet.

    I’m not here to sell you on some complicated, overpriced smart-home gadget that requires a degree to operate. Instead, I’m going to show you the practical, low-cost tweaks I use in my professional audits to keep heat where it belongs. We’re going to look at how to direct air more effectively and seal the gaps that are draining your bank account. My goal is to give you a straightforward toolkit to take control of your home’s climate without breaking the bank.

    Table of Contents

    Optimizing Hvac Efficiency Without the High Price Tag

    Optimizing Hvac Efficiency Without the High Price Tag

    Most people think the only way to fix a stuffy or unevenly heated house is to shell out thousands for a new HVAC system, but that’s just not true. I’ve spent plenty of time in drafty rentals where the thermostat says 72, but my feet are freezing because the air isn’t actually moving. Instead of replacing everything, start by looking at your air circulation patterns. If your vents are blocked by furniture or heavy curtains, you’re essentially forcing your heater to work twice as hard to push air into dead zones. I always tell my clients to clear those paths; it’s a zero-cost move that makes a massive difference in how the unit performs.

    Another thing I notice during audits is how people ignore the natural movement of air. You can actually use passive cooling strategies to take the load off your AC during the warmer months. By strategically opening windows on opposite sides of a room, you leverage cross-ventilation to flush out hot air without touching the thermostat. It’s about working with the physics of your home rather than fighting against it.

    Using Cross Ventilation Techniques to Cool Your Home for Free

    Using Cross Ventilation Techniques to Cool Your Home for Free

    When the sun starts baking your walls, the last thing you want to do is crank the AC and watch your meter spin. Instead, I like to look at my house like a series of channels. By opening windows on opposite sides of a room or a floor, you’re essentially creating a natural wind tunnel. This is one of the most effective passive cooling strategies because it uses the pressure difference between the windward and leeward sides of your home to force old, hot air out. If you time it right—usually in the early morning or late evening—you can flush out the heat without spending a single cent.

    To do this properly, you have to understand how air actually moves through your space. It’s not just about opening a window; it’s about managing air circulation patterns to ensure you aren’t just swirling hot air around in circles. I often use my infrared thermometer to find those stagnant, overheated zones—what I call “heat traps”—and position my windows to specifically target those areas. By strategically opening doors and windows, you can trigger a flow that pulls cool air in and pushes the warmth out, effectively reducing thermal pockets that keep your rooms feeling stuffy.

    Small Tweaks to Stop Your Money from Blowing Out the Window

    • Check your vents before you blame the HVAC. I’ve seen so many people crank the heat only to realize a heavy rug or a misplaced sofa is blocking the airflow. Make sure your registers are clear so the air actually goes where you’re paying for it to go.
    • Use your window treatments like a shield. During the day, close those blinds to block the sun’s heat, and at night, pull them shut to add a thin layer of insulation. It’s a low-tech way to manage how much thermal energy enters or leaves your space.
    • Don’t ignore the “invisible” leaks. Grab a candle or even just your hand and run it along window frames and door sweeps. If you feel a draft, you’re literally throwing money outside. A cheap roll of weatherstripping can fix this in twenty minutes.
    • Keep your ceiling fans spinning the right way. Most people forget this, but in the winter, your fan should run clockwise at a low speed to push the warm air that’s trapped at the ceiling back down to you. It’s free heat redistribution.
    • Manage your internal doors wisely. If you’re trying to heat a specific room, close the doors to the ones you aren’t using. It sounds simple, but limiting the volume of air your system has to move makes a massive difference in how hard your heater has to work.

    The Bottom Line on Airflow

    Stop fighting your HVAC; instead, focus on cleaning filters and clearing vents so your system isn’t working twice as hard for half the result.

    Use natural cross-ventilation to your advantage—timing your window openings with the breeze can save you more than any expensive gadget.

    Treat airflow like a budget; if you aren’t directing it precisely where you need it, you’re essentially just throwing money out the window.

    The Real Cost of Poor Airflow

    “I’ve spent way too many hours pointing an infrared thermometer at drafty window frames only to realize that most people aren’t just losing heat—they’re literally throwing cash out the window because they haven’t mastered how air moves through their space.”

    Tobias Nkemdirim

    Getting the Air Right

    Getting the Air Right for home efficiency.

    At the end of the day, managing your home’s airflow isn’t about installing a smart system that costs three months’ rent. It’s about the small, intentional moves we talked about: tweaking your HVAC settings, sealing those sneaky gaps around windows, and actually using cross-ventilation when the breeze is on your side. I’ve spent enough time walking through drafty apartments with my infrared thermometer to know that energy doesn’t just disappear—it leaks out through poor management. By taking control of how air moves through your space, you aren’t just lowering your monthly utility bill; you are reclaiming control over your living environment and making sure every watt you pay for actually does its job.

    I know it can feel overwhelming to think about “going green” or “saving energy” when everything feels so expensive right now. But sustainability shouldn’t be a luxury reserved for people with massive renovation budgets. It starts with being observant and making the most of what you already have. When you stop letting your conditioned air escape through a poorly placed vent or an unsealed door, you’re proving that efficiency is a mindset, not just a bank balance. Let’s stop letting our hard-earned money blow out the window and start building homes that actually work for us.

    Frequently Asked Questions

    I've tried sealing my windows, but how do I actually find the specific spots where the air is leaking out?

    Honestly, stop guessing. If you want to be precise, grab a handheld infrared thermometer—it’s my go-to. Just run it along your window frames and baseboards; a sudden temperature drop is a dead giveaway for a leak. If you don’t have one, try the old incense trick. Light a stick and move it slowly around the edges. Where the smoke dances wildly, you’ve found your culprit. Don’t just patch everything; find the actual holes.

    Is it actually worth it to use ceiling fans all day, or am I just wasting electricity to move hot air around?

    It’s a common misconception, but no, you aren’t just moving hot air around. A ceiling fan doesn’t actually lower the room temperature—it creates a wind-chill effect on your skin. The trick is to use them strategically: turn them on when you’re in the room to feel cooler, then shut them off when you leave. If you leave them running in an empty room, you’re essentially just paying to spin air for no reason.

    How can I manage airflow in a small apartment where I don't have control over the main HVAC system?

    Since you can’t mess with the building’s central unit, you have to focus on “micro-management.” Start by controlling your individual space. Use window film or heavy thermal curtains to block drafts, and if you have a window AC or a portable unit, make sure it’s sealed tight. I always carry my infrared thermometer to find those sneaky leaks around door frames. Even a simple draft stopper at the base of your door can make a massive difference.

  • Using Smart Home Technology for Energy Management

    Using Smart Home Technology for Energy Management

    I still remember sitting in my old rental apartment, shivering under three blankets because the heating bill was more intimidating than the actual winter chill. I’d watch the thermostat climb, only to feel that same drafty cold creeping in ten minutes later. Most people think that transitioning to smart home energy systems requires a massive tech budget or a house full of expensive, interconnected gadgets that you’ll eventually stop using. They sell you this dream of a “seamless automated lifestyle,” but they rarely mention that most of these high-end setups are just expensive distractions from the real problem: basic energy waste.

    I’m not here to sell you on a lifestyle of shiny, overpriced sensors that do nothing but ping your phone. My goal is to cut through the marketing fluff and show you how to actually use technology to stop bleeding money through your walls and outlets. I’ll be sharing practical, data-backed ways to integrate smart tech that actually moves the needle on your utility bills. We’re going to focus on low-cost, high-impact shifts that make your home efficient without making you go broke.

    Table of Contents

    Reducing Electricity Bills With Iot Without the High Price Tag

    Reducing Electricity Bills With Iot Without the High Price Tag

    Most people hear “smart home” and immediately think of expensive, integrated systems that cost more than a month’s rent. But you don’t need a massive budget to start reducing electricity bills with IoT. I always tell my clients to start small—think of it as an incremental audit rather than a total overhaul. A simple smart plug is often the best entry point. By plugging your coffee maker or that old lamp into a smart plug, you can set schedules that ensure they aren’t drawing “phantom power” while you’re asleep or at work.

    If you want to see the real impact, I recommend looking into real-time power consumption tracking. There are some incredibly affordable sensors you can clip onto your breaker box or plug into outlets that show you exactly where your money is leaking. It’s one thing to guess that your old fridge is a power hog; it’s another thing entirely to see the data on your phone. Once you see the numbers, the motivation to make changes becomes dead simple. You aren’t just saving money; you’re reclaiming control over your own space.

    Real Time Power Consumption Tracking to Stop Hidden Waste

    Real Time Power Consumption Tracking to Stop Hidden Waste

    Most people I audit are shocked when I point my infrared thermometer at a wall and show them exactly where the heat is escaping, but the real “ghosts” in your home are electrical. You might think you’re being careful by turning off the lights, but you’re likely still bleeding money through phantom loads. This is where real-time power consumption tracking becomes a game-changer. Instead of guessing which appliance is driving your costs up, you can see the exact wattage being pulled in the moment it happens. It turns invisible waste into hard data you can actually act on.

    I always suggest starting small with smart plug energy management to tackle those sneaky culprits like old gaming consoles, coffee makers, or desktop setups that stay in standby mode all night. When you can see the live spikes on your phone, you stop treating your utility bill like a mystery and start treating it like a budget. It’s not about buying every gadget on the market; it’s about using data to eliminate the waste you didn’t even know was there.

    5 Low-Cost Moves to Tighten Up Your Energy Profile

    • Stop the drafts with smart weather stripping. I’ve used my infrared thermometer more times than I can count to find tiny gaps around window frames; sealing these with simple, smart-fit weather stripping is the cheapest way to stop your heat from literally escaping into the street.
    • Get smart plugs for your “vampire” electronics. Most of us have devices—like gaming consoles or old coffee makers—that pull power even when they’re turned off; plugging them into a cheap smart plug allows you to cut the connection entirely via your phone so they aren’t sipping electricity 24/7.
    • Automate your lighting based on actual presence. You don’t need an expensive whole-home system; just installing a few motion-sensor smart bulbs in hallways or bathrooms ensures you aren’t paying to light up an empty room just because you forgot to flick a switch.
    • Optimize your thermostat’s “learning” phase. If you use a smart thermostat, don’t just set it and forget it; spend a week feeding it accurate data about when you’re actually home so it can aggressively drop the temperature when you’re out, rather than heating an empty house.
    • Use smart blinds to manage thermal gain. In the summer, I always suggest smart blinds that close automatically when the sun hits a certain intensity; it uses a tiny bit of power to run the motor, but it saves a massive amount of energy by preventing your living room from turning into a greenhouse.

    The Bottom Line on Smart Efficiency

    You don’t need a fully automated, high-tech mansion to see results; start with small, targeted IoT devices that tackle your biggest energy drains first.

    Data is your best friend—if you aren’t tracking your real-time usage, you’re essentially just guessing where your money is leaking out.

    Sustainability shouldn’t be a luxury, so focus on smart upgrades that pay for themselves through lower utility bills in the long run.

    The Real Cost of Convenience

    We’ve been conditioned to think that “smart” means buying every shiny new gadget on the market, but true energy intelligence is actually about visibility. It’s about finally seeing exactly where your money is leaking through the walls so you can stop paying for energy you aren’t even using.

    Tobias Nkemdirim

    The Bottom Line on Smart Energy

    The Bottom Line on Smart Energy.

    At the end of the day, transitioning to a smarter home doesn’t require a complete overhaul of your lifestyle or a massive upfront investment. We’ve looked at how low-cost IoT devices can automate your savings and how real-time tracking pulls the curtain back on those invisible energy drains that quietly inflate your monthly statements. By focusing on data rather than guesswork, you stop paying for power you aren’t actually using. It’s about moving away from the “set it and forget it” mentality and instead using simple technology to take back control of your utility costs and your environmental footprint.

    I know it can feel overwhelming to think about sustainability when you’re just trying to make ends meet, but remember that every small tweak matters. You don’t need a solar-powered mansion to make a difference; you just need to be intentional about how you inhabit your space. Whether it’s a smart plug or a simple monitoring app, these tools are your allies in the fight against waste. Let’s stop treating energy efficiency like a luxury reserved for the wealthy and start treating it like the essential survival skill it actually is. Your wallet—and the planet—will thank you.

    Frequently Asked Questions

    Are these smart devices actually going to save me more money than they cost to buy in the first place?

    It’s the million-dollar question, right? Honestly, if you just buy gadgets for the sake of having a “smart home,” you’ll lose money. But if you use them to target specific leaks—like a smart thermostat that actually learns your schedule or plugs that kill vampire power—they pay for themselves. I always look at the ROI. If a $30 sensor stops a $10-a-month waste, you’ve broken even in three months. That’s a win.

    Will adding all these IoT gadgets to my home make my network less secure or more complicated to manage?

    It’s a valid concern. Adding more devices definitely increases your “attack surface,” and if you aren’t careful, your Wi-Fi can get cluttered. I always tell my clients: don’t just buy every gadget on sale. Stick to reputable brands and, if you can, set up a separate guest network just for your IoT gear. It keeps your main computers isolated and makes managing the traffic much simpler. Keep it intentional, not just cluttered.

    Can I integrate these energy-saving tools into an older home that wasn't originally built for smart tech?

    Absolutely. In fact, older homes are exactly where I see the most potential for impact. You don’t need to rip out your walls or rewire the whole place to see results. Most smart tech—like smart plugs, wireless sensors, or even just a smart thermostat—is designed to sit on top of your existing setup. I’ve audited plenty of drafty, old builds where a few simple, non-invasive gadgets did more for efficiency than a full renovation ever could.