Blog

  • How to Choose an Energy Efficient Refrigerator

    How to Choose an Energy Efficient Refrigerator

    I still remember the summer I spent in that drafty rental apartment, watching my electricity bill climb every single month while my food sat in a fridge that sounded like a jet engine taking off. I used to think that going green meant dropping five figures on some high-tech, designer appliance that looked more like a piece of art than a tool. But here’s the truth: most of the marketing hype around energy efficient refrigerators is designed to make you feel like you need a massive bank account just to be sustainable. You don’t need a smart-fridge with a built-in touchscreen to save power; you just need to understand how the mechanics actually work.

    I’m not here to sell you on expensive gadgets or lifestyle trends that don’t actually move the needle. My goal is to give you the straightforward, data-driven reality of what to look for when you’re shopping. I’ll show you how to spot the real efficiency ratings, avoid the “greenwashed” traps, and pick a model that actually respects your budget and the planet. Let’s cut through the noise and find a fridge that works for your life, not just your aesthetic.

    Table of Contents

    Why Energy Star Certified Appliances Actually Save You Cash

    Why Energy Star Certified Appliances Actually Save You Cash

    I used to think the “Energy Star” sticker was just more marketing fluff designed to make us pay a premium upfront. But after auditing enough homes and seeing the data, I’ve realized it’s actually a roadmap for long-term savings. When you look at energy star certified appliances, you aren’t just buying a brand; you’re buying a guarantee that the machine meets strict performance standards. These units are engineered to optimize compressor efficiency ratings, meaning they don’t just run non-stop to keep things cold—they cycle intelligently, drawing power only when absolutely necessary.

    It’s a math problem, really. A standard, older model might be cheap today, but the way it drags down your monthly budget through high refrigerator electricity consumption is a slow leak in your wallet. By investing in a model with better thermal management and smarter components, you’re effectively capping your future expenses. For me, it’s about that peace of mind—knowing that your kitchen isn’t secretly bleeding money every time the compressor kicks in.

    Decoding Compressor Efficiency Ratings Without Breaking the Bank

    Decoding Compressor Efficiency Ratings Without Breaking the Bank

    When you’re looking at the spec sheet, you’ll see a bunch of jargon about compressor efficiency ratings, and honestly, it can feel like a trap designed to confuse you. Most people just look for the lowest price tag, but that’s a mistake. The compressor is essentially the heart of your fridge; it’s what does the heavy lifting to keep your food cold. If you end up with a cheap, outdated model, that compressor is going to run constantly, spiking your refrigerator electricity consumption and eating your savings through your monthly utility bill.

    I always tell my clients to look for models featuring inverter compressors. Unlike the old-school versions that simply kick on and off at full blast—which is incredibly wasteful—inverter tech adjusts its speed based on how much cooling you actually need. It’s a bit more sophisticated, but it’s a massive win for reducing kitchen utility bills in the long run. You aren’t just buying a box to hold milk; you’re investing in a piece of tech that manages its own workload so you don’t have to pay for wasted momentum.

    5 Low-Effort Hacks to Stop Your Fridge From Bleeding Cash

    • Check your seals with the flashlight trick. I always carry my infrared thermometer to find heat leaks, but you can do this for free: grab a flashlight, put it inside the fridge at night, and close the door. If you see light leaking out around the edges, your gaskets are shot, and your compressor is working overtime to compensate for that lost cold air.
    • Stop the “overstuffing” habit. It’s tempting to cram every leftover into every available inch, but air needs to circulate to maintain a consistent temperature. If you block the vents, the fridge struggles, uses more power, and leaves some food warmer than others. Think of it as breathing room for your groceries.
    • Mind the gap between the fridge and the wall. I see this constantly in small rental kitchens—people push their appliances flush against the wall to save space. If there’s no airflow behind the unit, the heat generated by the condenser coils gets trapped, making the whole system run way less efficiently. Give it at least a couple of inches of breathing room.
    • Don’t put hot leftovers straight in. It feels convenient, but dumping a steaming bowl of pasta into a cold fridge forces the appliance to work in overdrive to bring the temperature back down. Let your food cool on the counter for a bit first; it saves the motor and keeps your electricity usage steady.
    • Clean your condenser coils every six months. Dust and pet hair act like a thermal blanket on those coils, preventing them from shedding heat properly. If you haven’t cleaned them in a year, you’re essentially paying a “dust tax” every single month in the form of higher utility bills. A quick vacuum is all it takes.

    The Bottom Line: What to Look for Before You Buy

    Don’t just look at the price tag on the showroom floor; calculate the “total cost of ownership” by factoring in how much that fridge will suck electricity out of your wallet every single month for the next decade.

    Prioritize Energy Star certification as your baseline, but don’t stop there—check the specific kilowatt-hour (kWh) rating to see which model actually offers the best efficiency for your specific usage.

    Size matters more than you think; buying a massive, oversized fridge just because it “might be useful” is a quick way to waste energy cooling empty space you don’t need.

    The Real Cost of a Cheap Fridge

    “I’ve seen too many people buy the cheapest fridge on the floor just to save fifty bucks upfront, only to watch their utility bills bleed them dry every single month. A fridge is a marathon runner, not a sprinter; if it isn’t efficient, you’re just paying for it twice—once at the store and once through your power meter.”

    Tobias Nkemdirim

    Making the Smart Call

    Making the Smart Call on fridge efficiency.

    At the end of the day, picking a new fridge isn’t just about finding something that looks good in your kitchen; it’s a calculated move for your wallet. We’ve looked at why Energy Star ratings aren’t just marketing fluff and how understanding compressor efficiency can prevent you from overpaying for a machine that works harder than it needs to. It comes down to doing a bit of homework upfront so you aren’t constantly bleeding money through your power outlet every single month. If you focus on the specs that actually impact your daily usage, you’ll find that efficiency is the ultimate long-term investment.

    I know it can feel overwhelming to navigate all these technical terms and price tags, especially when you’re trying to stick to a tight budget. But remember, sustainability shouldn’t be a luxury reserved for people with massive bank accounts. Every time you choose a smarter, more efficient appliance, you’re making a choice to stop wasting energy just because it’s the easy path. It’s about taking control of your space and your spending. Small, intentional decisions like this are exactly how we build homes that are both affordable to run and kind to the planet.

    Frequently Asked Questions

    Is it actually worth paying the extra upfront cost for a high-efficiency model, or do the monthly savings take too long to break even?

    Look, I get the hesitation. Staring at a higher price tag at the store feels like a setback. But I’ve run the numbers on enough audits to know that the “break-even” point usually hits much faster than people think. If you’re looking at a fridge you’ll use for a decade, that upfront premium isn’t a cost—it’s an investment. You aren’t just buying a kitchen appliance; you’re pre-paying your future utility bills at a discount.

    How much of a difference does the placement of my fridge make—does keeping it away from the oven really impact my electricity bill?

    It makes a massive difference. I’ve seen it firsthand with my infrared thermometer: if your fridge is jammed right next to a hot oven, it’s working overtime just to fight that ambient heat. It’s like trying to keep a drink cold while standing next to a radiator. By giving your fridge some breathing room and keeping it away from heat sources, you reduce the strain on the compressor and keep those monthly bills from creeping up.

    Are there specific features, like smart sensors or dual cooling, that actually improve efficiency, or are they just marketing gimmicks to hike up the price?

    Look, I’ve seen enough spec sheets to know when a brand is just selling you a shiny gadget. Most “smart” features are just fluff. However, dual cooling is different—it keeps humidity stable, which actually prevents food waste and keeps the compressor from working overtime. Smart sensors can be useful for tracking usage, but if they’re just there to send you a notification that the door is open, you’re paying a premium for a gimmick.

  • How to Find a Reliable Solar Installer

    How to Find a Reliable Solar Installer

    I still remember standing in my old rental apartment, shivering through a February freeze while staring at a utility bill that felt like a personal insult. I knew then that energy shouldn’t be a luxury, but the jump from “wasting power” to “going solar” feels like a minefield of predatory sales tactics. Most people think you need a massive inheritance to make the switch, but the truth is that most solar panel installation companies are just better at marketing than they are at actually helping you save. They hide the real math behind glossy brochures and complex jargon, leaving you wondering if you’re actually investing in the planet or just funding someone else’s commission.

    I’m not here to sell you a dream or a high-interest loan you can’t afford. My goal is to cut through the noise and show you how to vet these providers based on hard data and real-world efficiency, not just their flashy websites. I’ll help you identify which companies actually prioritize long-term energy savings and which ones are just looking for a quick buck. We’re going to find you a setup that actually lowers your bills without breaking your bank account.

    Table of Contents

    Checking Solar Energy Company Credentials Without Breaking the Bank

    Checking Solar Energy Company Credentials Without Breaking the Bank

    When I’m auditing a home, I don’t just look at the insulation; I look at who is actually doing the work. You can’t just hire the first crew that rolls up in a shiny truck. To avoid a massive headache later, you need to verify their solar energy company credentials before a single bolt is tightened. I always check if they are NABCEP certified—that’s the gold standard. You want to ensure you’re dealing with certified solar technicians who actually understand the physics of a photovoltaic system setup, not just some guys who watched a YouTube tutorial last week.

    Don’t let a salesperson gloss over the fine print. A legitimate provider will give you a transparent solar panel installation cost breakdown rather than just a single, intimidating lump sum. If they can’t explain where your money is going—from the mounting hardware to the inverter specs—walk away. I’ve seen too many people get stuck with subpar equipment because they were chasing the lowest quote. Real renewable energy installation experts will be happy to walk you through the technical details because they know their stuff.

    Why You Need Certified Solar Technicians Not Just Cheap Labor

    Why You Need Certified Solar Technicians Not Just Cheap Labor

    Look, I get the temptation. When you’re staring at a massive quote, your first instinct is to find the guy with the lowest price tag. But in my experience auditing energy systems, I’ve seen how “cheap” ends up being the most expensive mistake you can make. A botched photovoltaic system setup isn’t just a minor inconvenience; it’s a massive fire hazard and a total drain on your ROI. If the wiring is sloppy or the mounting is off, you aren’t just losing efficiency—you’re potentially compromising the structural integrity of your roof.

    This is where the value of certified solar technicians really hits home. These pros aren’t just following a manual; they understand the physics of energy flow and local building codes. When you hire renewable energy installation experts, you aren’t just paying for labor; you’re paying for the peace of mind that your system won’t fail after two seasons. I’d much rather see a slightly higher initial investment than deal with the nightmare of a faulty system that refuses to hit its projected output. Don’t let a “bargain” turn your sustainable dream into a costly repair job.

    5 Things I Look For Before I Trust an Installer With My Roof

    • Don’t just settle for the lowest quote; ask for a detailed breakdown of what’s actually included. I’ve seen too many “budget” companies slash costs by using low-grade mounting hardware that fails after two seasons of heavy wind.
    • Demand to see their local project list. A company might have a flashy website, but I want to know if they’ve actually handled the specific roofing types or weather conditions in our neighborhood.
    • Check their warranty on labor, not just the hardware. The panels themselves might be covered for 25 years, but if the installer disappears next year, you’re stuck paying a premium to fix a single leaking seal.
    • Verify they handle the permitting and grid interconnection paperwork. You don’t want to be stuck playing middleman between a contractor and the local utility company just to get your system turned on.
    • Ask about their post-install support. A good company shouldn’t ghost you once the final check clears; they should have a clear process for troubleshooting if your production numbers suddenly dip.

    The Bottom Line on Choosing a Solar Partner

    Don’t get blinded by a low quote; a “cheap” installer who lacks proper certification will end up costing you more in repairs and wasted energy in the long run.

    Treat your solar installation like any other home audit—verify their credentials and track record to ensure they actually deliver the efficiency they promise.

    Sustainability shouldn’t be a luxury, so prioritize companies that offer transparent pricing and proven technical expertise to make your transition both affordable and effective.

    ## The True Cost of a "Cheap" Install

    “I’ve seen too many people try to save a few hundred bucks upfront by hiring an uncertified crew, only to end up with a system that leaks energy—or worse, leaks money—through poor installation. A solar company shouldn’t just be selling you hardware; they should be selling you a long-term reduction in your cost of living.”

    Tobias Nkemdirim

    Making the Right Call for Your Wallet and the Planet

    Making the Right Call for Your Wallet and the Planet

    Look, I know the whole process of vetting solar companies feels overwhelming, especially when you’re trying to balance a tight budget with the need for high-quality tech. But remember what we discussed: don’t let a low price tag fool you into hiring uncertified labor that might end up costing you more in repairs down the line. By verifying credentials and focusing on companies that prioritize long-term efficiency over a quick sale, you’re protecting your investment. It’s about doing the legwork now to ensure your home actually delivers on those lower utility bills you’re counting on.

    At the end of the day, transitioning to solar isn’t just about some high-tech gadget on your roof; it’s a practical move toward independence. I grew up in a home where energy was a constant, expensive headache, and I promise you, the feeling of watching your meter slow down is worth every bit of the research. You don’t need a massive windfall to make a difference or to live more sustainably. Start small, stay smart, and remember that every kilowatt you save is a win for both your bank account and the world we’re trying to protect.

    Frequently Asked Questions

    How do I know if a solar company is actually offering a real discount or just inflating their initial quote?

    Look, I’ve seen this play out too many times: a salesperson walks in with a “limited-time 40% discount” that feels a bit too convenient. To spot the bluff, ask for a line-item breakdown. If they can’t show you the exact cost of the hardware versus the labor, they’re likely padding the initial quote just to “discount” it later. Compare their quote against the local average for similar kW systems. If the math doesn’t add up, walk away.

    Is it worth paying a premium for a local installer versus going with a massive national corporation?

    Look, I get the temptation to go with a massive national corp—their marketing is everywhere and they look “safe.” But in my experience, you’re often paying for their massive overhead, not better service. I usually lean toward local installers. They actually know your local climate and building codes, and if something goes sideways with your array, you aren’t stuck in a phone queue with a call center halfway across the country. Local accountability beats scale every time.

    What specific warranties should I be looking for so I'm not stuck paying for repairs in three years?

    Don’t get blinded by a low upfront quote if the warranty is garbage. You need to look for three specific things: a product warranty on the panels (aim for 25 years), an inverter warranty (these fail more often, so look for at least 10-12 years), and a workmanship warranty. The workmanship part is huge—it covers the actual installation. If a company won’t guarantee their labor for at least 5 to 10 years, walk away.

  • Benefits of Installing Double Glazing

    Benefits of Installing Double Glazing

    I still remember sitting in my old rental apartment, wrapped in three layers of wool, watching my breath mist in the living room because the single-pane windows were basically just expensive holes in the wall. I used to think you needed a massive renovation budget to fix a drafty house, but the truth is much simpler. People often get bogged down in complex technical specs when they should just be looking at the actual double glazing benefits that matter for a real person’s wallet. You don’t need a luxury retrofit to stop heating the street; you just need to stop letting your hard-earned money leak out through your window frames.

    I’m not here to sell you on some high-end, overpriced glass system that promises the moon. My goal is to give you the straight-up facts based on what I see during my home audits and what actually works for small-scale budgets. We’re going to break down how this upgrade actually impacts your monthly bills and your carbon footprint, without the marketing fluff. I’ll show you how to spot the difference between a genuine thermal upgrade and a total waste of cash so you can invest smart and finally stay warm.

    Table of Contents

    Reducing Heating Bills Through Smarter Energy Efficiency Savings

    Reducing Heating Bills Through Smarter Energy Efficiency Savings

    When I’m auditing a home, the most frustrating thing isn’t a broken boiler; it’s watching expensive heat escape through thin, single-pane glass. Most people think they need to crank the thermostat to fight the chill, but you’re really just heating the outdoors. By upgrading, you aren’t just adding a layer of glass; you’re fundamentally reducing heating bills by creating a thermal barrier that actually holds onto the warmth you’ve paid for.

    If you want to get technical, it comes down to the u-value explained—basically, the lower that number is, the better the window is at resisting heat loss. When I use my infrared thermometer on older windows, the temperature drop between the inside and outside is staggering. Switching to double glazing plugs those thermal leaks, meaning your heating system doesn’t have to work overtime just to maintain a baseline temperature. It’s one of those rare scenarios where the energy efficiency savings actually pay for the upgrade over time. It’s not about being fancy; it’s about making sure your money stays inside your house, not drifting out the window.

    The Double vs Single Glazing Comparison You Need to See

    The Double vs Single Glazing Comparison You Need to See

    If you look at a single pane of glass, you’re basically looking at a hole in your wall where heat escapes. I’ve spent countless hours with my infrared thermometer pointing at old, single-glazed windows, and the readings are always the same: a massive temperature drop. In a simple double vs single glazing comparison, the difference isn’t just theoretical; it’s physical. Single glazing offers almost zero thermal resistance, meaning your heater works overtime just to fight the chill coming through the glass.

    When we talk about u-value explained, we’re essentially looking at how much heat is lost through the window. A lower u-value is what you want—it means better insulation. Double glazing uses a layer of inert gas, like argon, trapped between two panes to act as a buffer. This doesn’t just help with reducing heating bills; it also significantly improves the acoustic insulation properties of your home. You aren’t just saving money; you’re actually creating a quieter, more stable environment. It’s one of those rare upgrades that fixes both your wallet and your peace of mind.

    Small Upgrades, Big Wins: How to Get the Most Out of Your Windows

    • Check the seals, not just the glass. I’ve walked into plenty of homes where the double glazing is fine, but the rubber seals around the frame are perished. If air is whistling through, you’re basically paying to heat the outdoors.
    • Don’t ignore the “U-value.” When you’re looking at options, don’t just go for the prettiest frame. Look for the lowest U-value possible—that’s the data-driven way to ensure you’re actually stopping heat from escaping.
    • Consider your orientation. If you have large windows facing south, double glazing can help trap that solar gain during the day, acting like a natural heater, but make sure you have decent blinds to manage it when it gets too intense.
    • Look for Low-E coatings. It sounds like tech jargon, but it’s just a thin layer that reflects infrared heat back into your room. It’s one of those “set it and forget it” upgrades that pays for itself in energy savings.
    • Match the glass to your specific problem. If your main issue is street noise or a loud neighbor, look for acoustic laminated glass. It’s a double win: you get better thermal insulation and a much quieter, more peaceful living space.

    The Bottom Line on Upgrading Your Windows

    Think of double glazing as an insulation layer for your wallet; it stops the heat you’ve already paid for from escaping straight through the glass.

    You aren’t just buying better windows; you’re investing in a more consistent indoor temperature that removes the need to constantly fiddle with your thermostat.

    While the upfront cost is a factor, the long-term math works out because the reduction in monthly energy waste eventually pays for the upgrade itself.

    ## The Real Math of Thermal Comfort

    “I’ve spent too many afternoons pointing an infrared thermometer at drafty single-pane windows only to watch the temperature drop like a stone. Double glazing isn’t just a luxury upgrade; it’s about finally stopping your hard-earned money from leaking right out through the glass.”

    Tobias Nkemdirim

    Making the Move

    Making the Move to double glazing.

    At the end of the day, upgrading to double glazing isn’t just about fancy home improvements or aesthetic upgrades; it’s about closing the gaps where your money is literally escaping into the atmosphere. We’ve looked at how the thermal barrier of a second pane of glass stops you from heating the street and how the massive difference between single and double glazing can fundamentally change your monthly overheads. Whether you are looking to cut down on noise pollution or simply want to stop feeling that unexplained chill coming off your windows during a frost, the data is clear. Investing in better glazing is one of the most effective ways to stop the constant cycle of wasting energy just because your current setup is inefficient.

    I know that making changes to your home can feel like a massive, intimidating financial hurdle, but I promise you it’s worth it. Living sustainably shouldn’t be a luxury reserved for people with huge bank accounts; it should be the standard for everyone. Every time you seal a leak or improve your insulation, you are taking a stand against both rising utility costs and unnecessary carbon emissions. Don’t let the convenience of an old, drafty window keep you stuck in a cycle of high bills. Take that first step toward a smarter, more efficient home and start enjoying a space that actually works for you, not against you.

    Frequently Asked Questions

    Is it actually worth the upfront cost if I'm renting and can't replace the windows myself?

    Look, if you’re renting, you shouldn’t be dropping thousands on permanent fixtures. That’s a losing game. Instead of fighting your landlord, focus on “tactical” efficiency. Grab some heavy thermal curtains or even window insulation film—it’s cheap, removable, and actually works to stop drafts. It won’t match the performance of true double glazing, but it stops the heat from escaping without costing you a security deposit. Focus on what you can control.

    How much of a difference will I actually see in my monthly heating bills once they're installed?

    Look, I can’t give you an exact number without seeing your insulation levels or running a thermal audit, but the impact is usually pretty dramatic. Most of my clients see a drop of about 15% to 25% on their heating costs. If you’ve been living with single glazing, you’re basically paying to heat the sidewalk. Once that thermal barrier is in place, your thermostat actually does its job instead of fighting a losing battle against the glass.

    Are there specific types of double glazing that are better for blocking out street noise as well as heat?

    If you’re dealing with heavy traffic or loud neighbors, look for “acoustic glazing.” It uses laminated glass—essentially a layer of PVB (polyvinyl butyral) sandwiched between panes. That interlayer acts like a shock absorber for sound waves. For the best results, I’d recommend a thicker pane configuration with varying glass thicknesses; it breaks up the vibration patterns more effectively. It’s a smart way to kill the noise and keep the heat trapped inside.

  • Practical Home Energy Conservation Techniques

    Practical Home Energy Conservation Techniques

    I still remember sitting in my old rental apartment, wrapped in three layers of wool, watching the thermostat climb while my bank account plummeted. It was freezing, and no matter how much I cranked the heat, the warmth seemed to vanish into thin air. Most people will tell you that home energy conservation requires a massive investment in solar panels or high-end smart systems you can’t actually afford. They make it sound like a luxury hobby for the wealthy, but that’s a total myth. In reality, most of your money is just leaking out of cracks you haven’t even noticed yet.

    I’m not here to sell you on expensive gadgets or complicated lifestyle overhauls that don’t actually move the needle. My goal is to give you the straightforward, data-backed truth about where your power is actually going. I’ll be sharing the exact, low-cost tweaks I use in my professional audits to stop the bleed. We’re going to focus on practical shifts that respect your budget and your time, proving that you don’t need to be rich to run a sustainable, efficient home.

    Table of Contents

    Lowering Utility Bills Without Breaking the Bank

    Lowering Utility Bills Without Breaking the Bank

    Most people think “going green” requires a massive solar array or a complete house renovation, but that’s just not true. When I’m auditing a space, I usually find that the biggest drains aren’t the big-ticket items, but the small, invisible leaks. One of the most effective ways to start lowering utility bills without a huge upfront investment is focusing on air sealing. I always carry my infrared thermometer to these jobs because it’s eye-opening to see how much heat escapes through a single poorly fitted window frame or an unsealed door. Using simple weatherstripping or even just heavy curtains can make a noticeable difference in how much work your heater has to do.

    Beyond just blocking drafts, you should look at how you manage the tech you already own. You don’t need to replace everything at once, but when your old fridge finally dies, prioritize energy efficient appliances next time. In the meantime, small shifts—like washing clothes in cold water or unplugging “vampire” electronics—can chip away at your monthly costs. It’s about being intentional rather than just letting energy bleed out of your wallet.

    Smart Home Energy Management on a Budget

    Smart Home Energy Management on a Budget.

    When people hear “smart home,” they usually picture expensive, voice-activated gadgets that cost a fortune. But for me, smart home energy management isn’t about buying the latest tech just for the sake of it; it’s about using basic automation to stop energy bleeding. If you can swing a basic smart plug or a programmable thermostat, you’re already ahead of the curve. These tools allow you to cut power to “vampire” devices that sit in standby mode, ensuring you aren’t paying for electricity you aren’t actually using.

    I’ve found that even the simplest automation can make a massive dent in your monthly costs. Instead of leaving your lights or heater running all day, setting a schedule ensures everything shuts down when you’re at work. It’s a low-effort way of reducing your carbon footprint at home without having to manually flip every switch. You don’t need a fully integrated ecosystem to see results; you just need to be intentional about when your devices are drawing power. Small, automated shifts are often much more effective than trying to remember to unplug everything yourself every night.

    The Low-Hanging Fruit: Where Your Heat is Actually Escaping

    • Grab some weatherstripping and a tube of caulk. I’ve used my infrared thermometer on dozens of apartments, and most of the heat loss isn’t from the windows themselves, but from the tiny, invisible gaps around the frames and door sweeps. Sealing those cracks is the cheapest way to stop heating the neighborhood.
    • Stop letting your water heater act like a space heater. If you aren’t using it at full blast, dial that temperature down to about 120°F (49°C). Most factory settings are way too high, and you’re basically paying to boil water you don’t even need.
    • Switch to LED bulbs, but do it strategically. Don’t just swap them all at once if you’re on a tight budget; start with the lights in the rooms you use most—the kitchen and living area. It’s a tiny upfront cost that pays for itself in a few months of lower wattage.
    • Master the art of “thermal curtains.” In the winter, keep heavy curtains closed as soon as the sun goes down to trap the warmth inside. In the summer, do the opposite—keep them closed during the heat of the day to block solar gain. It sounds basic, but it’s pure physics and costs zero dollars.
    • Unplug your “vampire” electronics. Even when they’re off, things like gaming consoles, coffee makers, and old chargers pull a trickle of power. If you aren’t using it, pull the plug or use a cheap power strip to kill the connection entirely. It’s not much individually, but it adds up over a billing cycle.

    The Bottom Line for Your Bills and the Planet

    You don’t need a massive solar array or high-end smart tech to see results; most of the wins come from spotting and sealing the small, invisible leaks in your daily routine.

    Efficiency isn’t a luxury reserved for homeowners with deep pockets—it’s about using data and simple, practical shifts to stop paying for energy you aren’t actually using.

    Small, consistent changes in how you manage your space are more effective for your wallet and the environment than waiting for a “perfect” sustainable setup that you can’t afford.

    The Real Cost of Convenience

    “Energy efficiency isn’t a luxury reserved for people with massive renovation budgets; it’s about closing the gaps—literally and figuratively—so you stop paying for heat that’s just leaking out into the street.”

    Tobias Nkemdirim

    Cutting the Waste for Good

    Cutting the Waste for Good with efficiency.

    At the end of the day, saving energy isn’t about some massive, expensive overhaul of your entire living space. It’s about the cumulative effect of the small stuff—the smart plugs that kill phantom loads, the weatherstripping that stops your heat from escaping through the cracks, and the simple habit of being mindful of how we use our tech. I’ve seen firsthand through my audits that you don’t need a massive solar array to see a difference; you just need to stop the leaks, both literal and metaphorical. By focusing on these budget-friendly shifts, you’re effectively plugging the holes in your wallet while simultaneously reducing your environmental load.

    I know it can feel overwhelming when you look at the global climate crisis, but I want you to remember that sustainability shouldn’t be a luxury reserved for the wealthy. We have to move away from the idea that convenience is worth the massive waste it generates. Every time you choose a more efficient way to heat a room or optimize a device, you’re making a choice to live more intentionally. It’s about taking control of your own space and your own costs. Let’s stop letting energy slip through our fingers just because it’s easy, and instead, start building homes that are actually built to last.

    Frequently Asked Questions

    If I'm renting, what are some low-cost ways to improve efficiency without making permanent changes to the property?

    Since you can’t go tearing out walls or swapping windows, you have to focus on “non-invasive” fixes. I always tell my rental clients to start with heavy thermal curtains—they’re a game changer for blocking drafts. Grab some adhesive weatherstripping for door frames and window gaps; it’s cheap and peels right off when you move. Also, use draft stoppers at the base of doors. It’s not high-tech, but it stops the heat from literally leaking out.

    How can I tell if my energy is actually being wasted through heat leaks versus just having an inefficient appliance?

    It’s a common point of confusion, but the distinction is actually pretty easy once you know what to look for. Heat leaks are about your building’s “envelope”—think drafts around windows or gaps in floorboards. I usually grab my infrared thermometer to spot these; if I see a sudden temperature drop near a wall or frame, that’s a leak. Inefficient appliances, however, are about consumption. If a fridge is running constantly or a heater feels weak despite being on high, that’s a hardware issue, not a leak.

    Which smart home devices actually provide a decent return on investment, and which ones are just expensive gimmicks?

    Look, I’ve seen too many people drop hundreds on “smart” gadgets that do nothing but look cool on a phone app. If you want a real ROI, stick to smart thermostats and smart plugs for your heavy hitters—like space heaters or old fridges. They actually track usage and cut waste. Avoid the flashy ambient lighting or smart appliances that don’t offer granular data. If it doesn’t help you see where the power is leaking, it’s just a gimmick.

  • Comparing Triple Glazing and Double Glazing Performance

    Comparing Triple Glazing and Double Glazing Performance

    I still remember sitting in my old rental apartment three years ago, wrapped in two blankets and a heavy coat, watching the heat from my radiator vanish into the drafty window frames like it was nothing. I’d point my infrared thermometer at the glass, and the reading would be so low it felt like looking at a freezer door. Most people will try to sell you on the idea that triple glazing is some kind of luxury magic trick, but I see it differently. When you actually look at the data, the real triple glazing benefits aren’t about prestige or fancy aesthetics; they are about finally stopping that constant, expensive leak of thermal energy that keeps your bills climbing every single winter.

    I’m not here to give you a sales pitch or a list of marketing buzzwords that leave your wallet lighter and your house just as cold. Instead, I’m going to break down the actual, measurable impact this upgrade has on your home’s thermal envelope and your monthly spending. I’ll show you when it’s a smart investment and when it’s just unnecessary hype, so you can make a decision based on real efficiency rather than empty promises.

    Table of Contents

    Reducing Heating Bills With Windows via Argon Gas Filled Windows

    Reducing Heating Bills With Windows via Argon Gas Filled Windows

    When I’m running an audit, I often see people focusing on their thermostat settings while ignoring the massive thermal leaks happening right at their window frames. If you’re looking into reducing heating bills with windows, you need to look past just the number of glass layers and look at what’s actually inside them. Standard windows often have nothing but air between the panes, which is a terrible insulator because air moves and loses heat easily.

    This is where argon gas filled windows change the game. Argon is much denser than air, meaning it moves more slowly and provides a much more effective thermal barrier. By slowing down that heat transfer, you’re essentially trapping the warmth inside your living space instead of letting it bleed out into the street. It’s one of those small, technical details that makes a massive difference in your monthly utility costs. For me, seeing the data on how much heat a standard air-filled pane loses compared to an argon-filled one is the clearest argument for making the upgrade. It’s not just about comfort; it’s about stopping the waste.

    Triple Pane vs Double Glazing a Smarter Way to Save

    Triple Pane vs Double Glazing a Smarter Way to Save

    When I’m auditing a home, the most common debate I run into is triple pane vs double glazing. Most people think double glazing is “good enough,” and for a basic budget, it usually is. But if you’re looking at long-term energy efficiency window upgrades, there is a massive difference in how these two handle thermal transfer. Double glazing uses two panes of glass with a gap to slow down heat loss, but triple glazing adds a third layer and an extra insulating chamber. This extra barrier is what really makes the difference in keeping your indoor temperature stable when the wind starts howling outside.

    It isn’t just about the heat, though. One thing I always notice when I walk into a house with triple-pane setups is how much quieter it feels. Because you have more physical layers and more gas-filled cavities, you get much better window insulation for noise reduction. If you live near a busy road or a noisy neighborhood, that extra pane is a game-changer for your peace of mind. It’s an upfront investment, sure, but if your goal is to stop bleeding money through your walls, it’s a much smarter play.

    Small Upgrades, Big Impact: 5 Ways Triple Glazing Actually Changes Your Daily Life

    • Cutting the noise: Beyond just the heat, the extra layer of glass acts as a serious sound buffer, which is a lifesaver if you live on a busy street or near a noisy neighbor.
    • Eliminating those annoying cold spots: I’ve used my infrared thermometer on countless homes where single or even double glazing leaves a “chill zone” near the window; triple glazing keeps the glass surface temperature much closer to the room temp.
    • Reducing your reliance on heaters: When your windows aren’t acting like giant radiators in reverse, your thermostat doesn’t have to work nearly as hard to maintain a steady temperature.
    • Stopping the condensation cycle: One of the biggest headaches I see in audits is moisture buildup on window panes; the improved thermal barrier of triple glazing helps prevent that damp, mold-prone environment.
    • Long-term value over quick fixes: While the upfront cost is higher than double glazing, you have to look at it as an investment in your home’s envelope that pays dividends through lower monthly utility bills for years.

    The Bottom Line: Is Triple Glazing Worth It?

    Don’t view triple glazing as a luxury expense; see it as a long-term hedge against rising energy costs that pays for itself by cutting down the heat you’re currently leaking through your walls and windows.

    The real win isn’t just a lower utility bill—it’s the thermal stability. You’re moving from a house that’s constantly fighting drafts to a space that actually holds its temperature, making your heating system work much less.

    If you’re looking for the most bang for your buck, prioritize high-quality seals and gas fills alongside the extra pane; a triple-glazed window with poor installation is just another way to waste money.

    The Real Math of Thermal Comfort

    “I’ve spent too many nights in drafty rentals watching the thermostat climb while the heat just vanishes through the glass. Triple glazing isn’t some luxury splurge; it’s a practical way to stop paying for energy that’s literally escaping into the street.”

    Tobias Nkemdirim

    The Bottom Line on Your Windows

    The Bottom Line on Your Windows.

    At the end of the day, upgrading to triple glazing isn’t just about adding another layer of glass; it’s about plugging the leaks that are draining your bank account every single month. We’ve looked at how the argon gas acts as a thermal buffer and why the extra pane is often the deciding factor in keeping a room stable when the temperature drops outside. While the upfront cost might seem a bit higher than standard double glazing, the data shows it’s a long-term play. By reducing your reliance on constant heating, you aren’t just fixing a window; you are optimizing your entire home’s thermal envelope to work for you, not against you.

    I know that making changes to your home can feel overwhelming, especially when you’re trying to balance a budget. But I truly believe that sustainability shouldn’t be a luxury reserved for people with massive estates. Every smart, efficient choice we make—even something as fundamental as the windows we look through—is a step toward a more intentional way of living. Don’t look at this as just another home improvement expense. Look at it as an investment in a more comfortable, more affordable future where you aren’t constantly fighting against the elements just to stay warm.

    Frequently Asked Questions

    Is the upfront cost of triple glazing actually worth it if I'm not planning on living in this house for more than five years?

    Honestly? If you’re definitely moving in five years, the math gets tricky. Triple glazing is a long-term play. You’re essentially pre-paying for energy savings you might never see. Unless you’re in a particularly brutal climate where the immediate comfort and lower monthly bills are massive, you might be better off investing that upfront cash into something else. But, if you’re looking to boost the home’s resale value, it’s a strong selling point.

    Will adding the extra pane of glass make my windows significantly heavier or harder to open?

    That’s a fair concern, and honestly, it’s one I hear a lot during my audits. Physically, yes, the units are heavier, but that shouldn’t affect your daily life. Modern triple glazing uses high-quality hardware and reinforced frames designed specifically to handle the extra weight. If your installer does their job right, the window should glide open just as smoothly as your old ones. Don’t let the weight scare you off; the thermal payoff is worth it.

    How much of a difference will triple glazing actually make if my house already has decent insulation in the walls and roof?

    Even with great wall and roof insulation, your windows are likely your biggest thermal weak point. I’ve seen plenty of houses where the shell is airtight, but heat just pours straight out of the glass. It’s like wearing a heavy parka but leaving your jacket unzipped. Triple glazing plugs that specific gap, ensuring the warmth you’re paying for actually stays inside the room instead of escaping through the panes.

  • Principles of Designing Low Energy Homes

    Principles of Designing Low Energy Homes

    I still remember sitting in my old rental apartment, shivering under three blankets because the heating bill was more intimidating than the actual cold. I’d watch the thermostat climb, only to feel that same draft hitting my ankles five minutes later. Most people think low energy home design is some exclusive club for people with massive bank accounts and architectural degrees, but that’s a total myth. You don’t need a solar farm or a million-dollar renovation to stop bleeding money through your walls; you just need to stop wasting energy simply because it’s the easy way out.

    I’m not here to sell you on expensive, high-tech gadgets that look good in a brochure but don’t actually move the needle. My goal is to give you the straight talk—the kind of practical, data-driven advice I use when I’m out on an audit with my infrared thermometer in hand. I’m going to show you how to approach low energy home design through smart, low-cost tweaks that actually work. We’re going to focus on keeping your bills low and your footprint small, without breaking the bank to do it.

    Table of Contents

    Smart Thermal Envelope Optimization for Every Budget

    Smart Thermal Envelope Optimization for Every Budget

    When I’m auditing a house, the first thing I do is pull out my infrared thermometer. I’m looking for those telltale cold spots where heat is literally escaping through the walls or window frames. This is the core of thermal envelope optimization. If your home’s “shell” is leaky, it doesn’t matter how much money you spend on high-tech heating; you’re just paying to heat the outdoors. For those on a tight budget, you don’t need to strip the house to the studs. Start with the easy wins: weatherstripping door frames and using heavy, thermal curtains to seal off windows at night. It’s about creating a continuous barrier that keeps the warmth where it belongs.

    If you have a bit more to invest, you can look into upgrading your attic insulation or swapping out old, single-pane windows for something more substantial. This moves you closer to actual building insulation standards that prioritize long-term savings over quick fixes. I always tell my clients that investing in the envelope first is the most logical move. It’s much easier to keep heat inside a well-sealed room than it is to try and fight a losing battle against a drafty house with a more expensive furnace.

    Using Solar Gain Strategies to Lower Your Bills

    Using Solar Gain Strategies to Lower Your Bills

    Most people think of solar power as just panels on a roof, but you can actually start using the sun to heat your home for free long before you ever look at a battery. I call this passive heating, and it’s one of the most effective solar gain strategies available. If you have south-facing windows, you’re sitting on a goldmine of free thermal energy. During the winter, you want that sunlight hitting your floors and walls to soak up heat. I always tell my clients to keep those blinds up during the day to let the sun do the heavy lifting, then close them as soon as dusk hits to trap that warmth inside.

    However, it’s a delicate balance. If you don’t manage it right, you’ll end up with a greenhouse effect that spikes your cooling costs in the summer. This is where strategic shading becomes essential. Adding simple external shutters or even well-placed deciduous trees can block the high summer sun while allowing the lower winter sun to penetrate. It’s about working with the seasons, not against them, to keep your environment stable without constantly cranking the thermostat.

    5 Low-Cost Moves to Cut Your Energy Waste

    • Stop the drafts at the source. I’ve spent way too many hours with my infrared thermometer pointing at door frames and window sills; most of the heat you pay for is literally leaking out through tiny gaps. Grab some weatherstripping or even just a heavy draft stopper for the bottom of your doors—it’s a cheap fix that makes a massive difference in how long your heater actually has to run.
    • Master your lighting without the expensive smart-home setup. You don’t need a fully automated house to save money. Just swap out every single old incandescent bulb for high-quality LEDs. They draw a fraction of the power and last years longer, which means less money spent on replacements and less energy wasted as heat.
    • Rethink your appliance standby habits. We often talk about “vampire power,” and for good reason. Even when they’re “off,” things like coffee makers, gaming consoles, and chargers are still pulling current. Using a simple power strip that you can flick off when you head to bed or leave for work is one of the easiest ways to stop bleeding money.
    • Optimize your thermostat settings for real life, not just theory. Instead of cranking the heat when you get home, try to find a steady, moderate temperature that works for your routine. If you can, invest in a basic programmable thermostat. It’s a one-time cost that pays for itself by ensuring you aren’t heating an empty house while you’re at work.
    • Manage your airflow like a pro. It sounds simple, but being intentional about where air moves in your home matters. In the summer, keep those blinds closed during the hottest part of the day to block out the sun, and in the winter, keep them open to let that natural warmth in. It’s about working with the environment you have, not fighting against it.

    The Bottom Line on Low-Energy Living

    Efficiency isn’t about expensive gadgets; it’s about sealing your thermal envelope and managing solar gain to stop paying for heat you’re literally leaking into the street.

    Prioritize high-impact, low-cost fixes like weatherstripping and window treatments before you even think about upgrading major appliances.

    A sustainable home is built on data, not guesswork—use tools like an infrared thermometer to find exactly where your money is escaping.

    ## The Reality of Sustainable Living

    “Low energy design isn’t about buying the most expensive smart-home gadgets or living in a glass box; it’s about being smart enough to stop paying for heat that’s just leaking through your walls.”

    Tobias Nkemdirim

    Making It Stick

    Making It Stick: optimizing home energy efficiency.

    At the end of the day, designing a low-energy home isn’t about buying the most expensive smart tech on the market. It’s about understanding how your space actually breathes and moves heat. We’ve looked at how optimizing your thermal envelope keeps the warmth where it belongs and how leveraging solar gain can do the heavy lifting for your heating system for free. Whether you are sealing a drafty window or strategically placing furniture to catch the sun, these small, data-backed adjustments add up. When you stop letting energy leak through the cracks—literally and figuratively—you aren’t just lowering your monthly utility bills; you are optimizing your entire living environment for long-term comfort.

    I know it can feel overwhelming to think about sustainability, especially when it feels like a luxury reserved for people with massive renovation budgets. But my experience auditing homes has taught me that efficiency is a mindset, not a price tag. You don’t need to rebuild your entire house to make a difference. Start where you are, use what you have, and focus on the low-hanging fruit first. Every kilowatt you don’t waste is a win for your wallet and a win for the planet. Let’s stop settling for inefficient, expensive living and start building homes that actually work with nature instead of against it.

    Frequently Asked Questions

    I've looked into insulation and solar gain, but what are the most effective low-cost ways to tackle drafts around windows and doors without a full renovation?

    Honestly, you don’t need to rip out your frames to stop feeling that chill. I usually grab my infrared thermometer, find the cold spots, and start with the easy stuff. Grab some heavy-duty weatherstripping for the door jambs and adhesive foam tape for the window tracks—it’s cheap and works wonders. For the bottom of doors, a simple weighted draft stopper is a lifesaver. It’s not fancy, but it stops the money from literally blowing out of your house.

    How do I balance adding more insulation with the risk of trapping moisture and causing mold issues in older homes?

    This is the classic “tight house” dilemma. When I audit older homes, I see this all the time: people seal everything up to save on heating, but they accidentally turn their walls into a petri dish. To avoid mold, you can’t just add insulation; you have to manage airflow. Focus on breathable materials and ensure you aren’t blocking existing ventilation points. It’s about finding that sweet spot where heat stays in, but moisture can actually escape.

    Are there specific smart home technologies that actually deliver a real ROI on energy savings, or is most of it just marketing hype?

    Look, most “smart” gadgets are just overpriced toys, but a few actually pay for themselves. If you want real ROI, skip the smart lightbulbs and focus on smart thermostats and automated radiator valves. They actually manage your thermal load based on real-time data rather than just following a timer. I’ve seen people slash heating costs by 15% just by letting a smart system handle the heavy lifting. If it doesn’t actively reduce consumption, it’s just hype.

  • A Guide to Understanding Kilowatt Hours

    A Guide to Understanding Kilowatt Hours

    I still remember sitting in my old rental apartment, shivering under three blankets while staring at a utility bill that made absolutely no sense. I felt like the power company was speaking a different language, using math to hide the fact that I was essentially paying for air. Most people treat their electricity bill like a mysterious tax they just have to accept, but that’s a lie. Understanding kilowatt hours shouldn’t require a degree in physics or a massive bank account; it should be about seeing exactly where your hard-earned money is leaking out of your walls.

    I’m not here to give you a textbook lecture or drown you in complex formulas that don’t actually help your bottom line. Instead, I’m going to show you how to decode your meter using the same practical, data-driven approach I use during my professional audits. My goal is to strip away the jargon and give you the tools to spot the energy hogs in your home. By the end of this, you’ll stop guessing and start making smart, intentional changes that actually keep your bills low and your footprint small.

    Table of Contents

    The Real Difference Between Kw and Kwh Explained

    The Real Difference Between Kw and Kwh Explained

    Most people treat these terms like they’re interchangeable, but that’s a mistake that makes calculating electricity costs a total guessing game. Think of it this way: kW is about power, while kWh is about energy. If you’re looking at a kettle, the kW tells you how much “muscle” it has to heat water instantly. It’s a snapshot of demand at a single moment.

    The kWh, however, is where the actual billing happens. It’s the measure of that power used over a specific period of time. To make it simple, imagine a garden hose. The kW is how fast the water is rushing out of the nozzle (the flow rate), but the kWh is the total amount of water that actually ends up in your bucket after an hour.

    When I’m auditing a home, I look for appliances with high kW ratings that run for long stretches. That’s the sweet spot for waste. Understanding the difference between kW and kWh helps you realize that a high-power device isn’t always the villain; it’s how long you leave it running that usually drains your bank account.

    How to Read an Electric Meter Like a Pro

    How to Read an Electric Meter Like a Pro

    Most people treat their electric meter like a black box—something that just sits in the garage or basement, ticking away while they ignore it. But if you want to master calculating electricity costs, you have to stop guessing. If you have an older analog meter, it’s basically a series of spinning dials. You read them from left to right, just like a book. The trick is that if the needle on a dial is sitting between two numbers, you always round down to the lower number. It feels counterintuitive, but that’s the standard for an accurate reading.

    If you’ve upgraded to a digital smart meter, it’s even easier, though it can feel a bit more intimidating with all the flashing symbols. You’re looking for the specific display labeled “kWh.” This is the number that represents your cumulative electrical energy consumption explained in real-time. I usually pull out my notebook and jot down this number at the same time every week. By tracking this number weekly rather than waiting for the monthly bill, you can actually spot household energy usage patterns before they turn into a massive financial headache.

    5 Ways to Stop Guessing and Start Tracking Your Energy

    • Stop looking at your total bill and start looking at your daily usage. Most utility apps show a day-by-day breakdown; find the spikes. If your kWh jumps every Tuesday at 7 PM, you’ve just found your most expensive habit.
    • Calculate your “phantom load” by checking what your devices pull while they’re supposedly off. I use my infrared thermometer to see if electronics are running warm even when they aren’t in use—that heat is literally money escaping into the air.
    • Match your appliances to their kWh impact. A space heater might use 1,500 watts, but if you run it for five hours, that’s 7.5 kWh. Knowing the math helps you decide if it’s cheaper to buy a better blanket or keep cranking the heat.
    • Use a plug-in energy monitor for your “guilty” appliances. Don’t guess if that old fridge is a power hog; plug a cheap monitor into it for 24 hours. The data doesn’t lie, and it’ll tell you exactly when it’s time to upgrade.
    • Watch the weather, not just the clock. Your kWh consumption shouldn’t just spike because it’s dark outside; it spikes when your home’s insulation fails. If your usage climbs every time the temperature drops, you’re paying to heat the outdoors.

    The Bottom Line: What You Actually Need to Know

    Stop mixing up power and energy; kW is the speed your appliances draw power, but kWh is the actual volume of electricity you’re paying for over time.

    Your electric meter isn’t just a number on a screen—it’s a real-time tracker of your household habits and where your money is leaking.

    Once you can accurately read your kWh, you move from guessing why your bill is high to actually knowing which devices are draining your wallet.

    ## The Real Cost of Ignorance

    “A kilowatt is just a measurement of power, but a kilowatt-hour is a measurement of your habits; if you don’t understand the difference, you’re essentially letting your utility company charge you a ‘convenience tax’ for energy you didn’t even need to use.”

    Tobias Nkemdirim

    Stop Guessing and Start Saving

    Stop Guessing and Start Saving energy.

    At the end of the day, understanding the difference between power demand (kW) and actual consumption (kWh) is the foundation of any decent energy audit. You now know how to look at your meter without feeling overwhelmed, and more importantly, you understand that those numbers aren’t just abstract digits—they are a direct measurement of your home’s efficiency. Once you start tracking how much energy your appliances actually pull over time, you move from being a passive consumer to an active manager of your own space. It’s about moving away from that feeling of helplessness when the bill arrives and toward a mindset of intentional energy use.

    I know it can feel like fighting a losing battle against rising utility rates, but I promise you, it isn’t. Every single kilowatt-hour you save by sealing a drafty window or switching to a more efficient lightbulb is a win for your wallet and a win for the planet. We don’t need massive, expensive overhauls to make a difference; we just need to stop letting energy leak out of our lives simply because it’s convenient to ignore it. Start small, keep your data close, and remember that true sustainability is built one smart habit at a time.

    Frequently Asked Questions

    Does my energy provider charge me more for using power during certain times of the day, even if the total kWh stays the same?

    The short answer is yes. This is what we call “Time-of-Use” (TOU) pricing. Even if your total kWh consumption remains identical, your bill can fluctuate wildly depending on when you pull that power. Most providers charge a premium during “peak hours”—usually weekday evenings when everyone’s home and running appliances—and offer lower rates during “off-peak” times, like late at night. If you’re on one of these plans, timing your laundry or dishwasher becomes a financial strategy.

    Can I track my daily kWh usage through an app, or do I have to manually check my meter to see if my changes are working?

    You definitely don’t need to be standing in your hallway staring at a meter every night. Most modern utility providers have apps that let you track usage in near real-time, which is a game changer for seeing if that new LED setup or smart thermostat is actually paying off. If your provider is old-school, look into a smart plug with energy monitoring; it’s a cheap way to get that data without the manual legwork.

    If I switch to LED bulbs or more efficient appliances, how much of a visible drop in my kWh reading should I actually expect to see?

    Honestly? It depends on your current setup, but don’t expect a miracle overnight. Switching to LEDs is a massive win for lighting, but since lights usually only account for a small slice of the pie, the drop might look modest on your bill. The real heavy lifting comes from appliances. Swapping an old, energy-hungry fridge for an efficient model? That’s where you’ll actually see those kWh numbers plummet. Focus on the big eaters first.

  • Improving Home Ventilation Systems

    Improving Home Ventilation Systems

    I still remember sitting in my old rental apartment, shivering under three blankets while the air felt heavy, damp, and completely stale. I’d try to crack a window for a bit of fresh air, but the moment I did, the heat would vanish, leaving me even colder. Most people think the only way to fix this is to drop thousands on high-tech, over-engineered home ventilation systems that require a specialized contractor just to turn a dial. Honestly? That’s a massive waste of money. We’ve been sold this idea that you need a complex, expensive machine to breathe properly, when most of the time, you’re just fighting against your own house.

    I’m not here to sell you on some shiny, overpriced gadget that promises to revolutionize your life. My goal is to give you the actual, data-backed reality of how to move air through your space without bleeding money through your windows. I’ll show you how to audit your airflow, identify the dead zones, and implement smart, low-cost tweaks that keep your air fresh and your heating bills predictable. We’re going to focus on practical solutions that work for real people with real budgets.

    Table of Contents

    Mechanical Ventilation Solutions That Wont Drain Your Wallet

    Mechanical Ventilation Solutions That Wont Drain Your Wallet

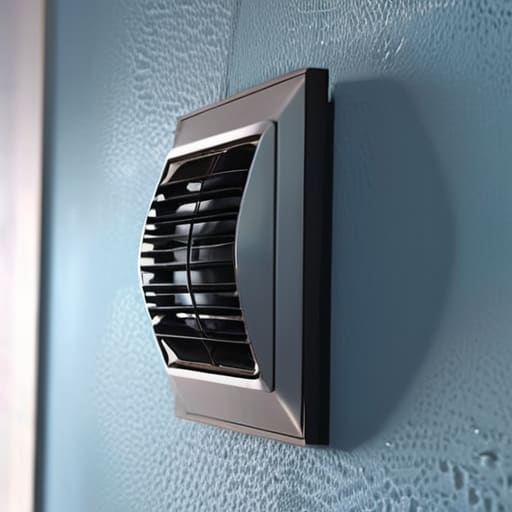
    When people hear “mechanical ventilation,” they usually picture a massive, expensive overhaul of their entire ductwork. But that’s not always the case. If you’re looking for ways to keep the air moving without a massive upfront cost, I usually suggest looking at localized units. For example, high-quality bathroom or kitchen extractor fans are actually your first line of defense in preventing mold growth by pulling moisture out before it settles in your walls. It’s a small, targeted way to manage humidity that pays for itself in avoided repairs.

    If you have a bit more room in the budget, you might want to look into Heat Recovery Ventilation. This is where the real magic happens for your wallet. I often get asked about ERVs vs HRVs explained in simple terms: HRVs focus on recovering heat from outgoing air, while ERVs also manage humidity levels. Choosing the right one depends on your climate, but both are game-changers for keeping your home fresh without constantly heating up the “new” air coming from outside. It’s about being smart with your airflow, not just throwing money at a bigger furnace.

    Whole House Ventilation Benefits You Can Actually Afford

    Whole House Ventilation Benefits You Can Actually Afford

    When I’m auditing a house, I often see people focusing solely on sealing every crack to save on heating. While that helps the bill, it often traps moisture inside, leading to the exact problem I hate seeing: preventing mold growth becomes impossible when you’ve essentially turned your home into a plastic bag. This is where the real value of whole house ventilation benefits kicks in. It isn’t just about moving air; it’s about managing the humidity and pollutants that settle in your living spaces.

    By implementing a system that handles stale air removal effectively, you aren’t just chasing comfort—you’re protecting your property. I’ve seen how much money homeowners waste on repairing water damage caused by poor airflow. If you invest in a setup that balances fresh air intake with moisture control, you’re essentially performing preventative maintenance on your entire house. It might feel like an extra expense upfront, but when you factor in the longevity of your walls and the health of your lungs, it’s one of the most cost-effective upgrades you can make.

    Quick Wins: Small Ventilation Tweaks That Save Real Money

    • Stop the “open window” gamble. If you’re opening windows to clear out stale air in the middle of winter, you’re basically throwing money out the window. Instead, try “cross-ventilation” for just ten minutes—open two windows on opposite sides of the room to flush the air, then shut them tight to keep the heat in.
    • Check your extractor fans. I’ve audited so many kitchens where the fan is just caked in grease and dust. If it’s struggling to pull air, it’s working twice as hard and wasting electricity. A quick clean of the vent covers can make a massive difference in how efficiently they move air.
    • Don’t ignore the trickle vents. Most people think those little slits in the window frames are just for show, but they’re actually designed to provide a controlled amount of fresh air without causing a massive temperature drop. Make sure they aren’t blocked by grime or paint.
    • Watch your humidity levels. If you see condensation pooling on your windows, your ventilation is failing. High humidity makes your heater work harder to keep the room feeling warm. Using a small, energy-efficient dehumidifier can sometimes be cheaper than cranking up the thermostat to fight dampness.
    • Seal the gaps around your vents. If you have older ventilation points, air might be leaking in from the wall cavity rather than through the vent itself. A bit of sealant around the perimeter of the vent housing can stop “unintended” drafts that drive up your heating bills.

    The Bottom Line on Breathing Easy and Saving Money

    You don’t need a high-end, automated smart system to see results; even basic, well-placed mechanical ventilation can stop you from heating the outdoors.

    Prioritize airflow that actually works with your home’s layout to prevent moisture buildup, which protects your walls and keeps your energy bills from spiking.

    Think of ventilation as a long-term investment in your wallet, not just an extra utility cost—better air circulation means less reliance on heavy heating and cooling.

    The Cost of "Sealing It All In"

    “We spend so much time trying to seal our homes tight to keep the heat in, but if you aren’t managing your airflow, you’re just trapping stale air and humidity inside. A good ventilation strategy isn’t an extra expense; it’s the only way to make sure the energy you’re paying for actually does its job without making your living space feel suffocating.”

    Tobias Nkemdirim

    Final Thoughts on Breathing Easier

    Final Thoughts on Breathing Easier.

    At the end of the day, managing your home’s ventilation isn’t about installing the most expensive, high-tech system on the market. It’s about understanding how air moves through your specific space and making intentional choices that balance air quality with energy savings. Whether you decide to invest in a more efficient mechanical fan or simply start being more mindful of how you manage your existing airflow, the goal remains the same: stop letting your expensive heated or cooled air escape through the cracks. By focusing on these manageable, cost-effective upgrades, you’re effectively plugging the leaks in your budget while ensuring your home stays healthy and comfortable.

    I know it can feel overwhelming when you look at your utility bills and realize how much energy is being wasted, but please don’t let that stop you from starting small. You don’t need a massive renovation budget to make a measurable difference in your carbon footprint or your monthly expenses. Every small tweak you make to your ventilation is a step toward a home that works for you, rather than against your wallet. Let’s stop accepting inefficiency as the status quo and start building homes that are actually sustainable for the long haul.

    Frequently Asked Questions

    How do I know if my current ventilation is actually working, or if I'm just throwing money away on heating stale air?

    The quickest way to tell? Grab my handheld infrared thermometer. If you see massive temperature drops near windows or vents while your heater is cranking, you’ve got a leak, not ventilation. Also, look for “stale air” signs: condensation on windows or that musty smell in corners. If you’re heating rooms that feel damp or drafty, you aren’t circulating air—you’re just paying to exhaust your expensive heat into the street.

    Is it worth investing in a heat recovery system, or is that overkill for a smaller, older home?

    Honestly, for a smaller, older home, a full-scale MVHR system can feel like overkill—and the upfront cost usually is. If your priority is stopping heat loss, I’d suggest starting with a decentralized heat recovery unit. They’re much cheaper, easier to install in tight spaces, and still grab that warmth from your stale air before it exits. Don’t go broke trying to fix everything at once; target the biggest leaks first.

    Can I improve my airflow without having to tear open my walls or hire an expensive contractor?

    Absolutely. You don’t need a sledgehammer and a massive contractor budget to see a difference. I see this all the time during audits: people think they need a full HVAC overhaul, but usually, it’s just bad circulation. Start with the basics—clear your vent obstructions, optimize your window opening patterns, and maybe grab a few smart ceiling fans to move air more effectively. Small, strategic tweaks to how air moves through your existing space can do wonders.

  • Essential Tools for Cleaning Solar Panels

    Essential Tools for Cleaning Solar Panels

    I was standing on a client’s roof last Tuesday, clicking my infrared thermometer against a solar array that looked perfectly fine to the naked eye, only to see the temperature readings plummet where dust had settled. It’s frustrating because most people think you need some high-tech, industrial-grade robot to keep things running, but that’s just a way to bleed your savings dry. You don’t need a massive budget to maintain your setup; you just need the right solar panel cleaning tools that actually do the job without scratching the glass or breaking the bank.

    I’m not here to sell you on expensive, flashy gadgets that promise the moon but deliver nothing. My goal is to give you a straightforward toolkit based on what actually works in the real world, from basic telescopic brushes to the right kind of soft-bristle mops. I’ll show you how to pick gear that protects your investment and keeps your energy output high, ensuring you get every single cent of value out of your system. Let’s get into the practical gear you actually need.

    Table of Contents

    Affordable Photovoltaic Panel Cleaning Kits for Every Budget

    Affordable Photovoltaic Panel Cleaning Kits for Every Budget

    You don’t need a professional cleaning crew to keep your system running at peak efficiency. If you’re on a tight budget, I usually recommend starting with a basic set of soft bristle solar brushes paired with a standard garden hose. The key here is avoiding anything abrasive; you want to sweep away the grit without scratching the glass, as preventing solar cell abrasion is vital for long-term energy output. A simple telescopic pole can extend your reach, saving you from the danger of climbing onto a roof just to clear off some bird droppings.

    For those who are a bit more serious about their DIY setup, investing in water-fed pole systems is a game changer. These allow you to clean much larger surface areas from the ground, which is safer and more effective for medium-sized residential arrays. If you live in an area with hard water, you might eventually want to look into using deionized water for solar cleaning to prevent those annoying white mineral spots from forming. It sounds fancy, but it’s really just about making sure your investment stays clear and productive without breaking the bank.

    Why Soft Bristle Solar Brushes Protect Your Investment

    Why Soft Bristle Solar Brushes Protect Your Investment

    Look, I’ve seen too many people try to save a few bucks by using a stiff-bristled broom or, even worse, a high-pressure washer on their arrays. It might feel like you’re getting them clean, but you’re actually playing a dangerous game with your ROI. The silicon cells underneath are surprisingly delicate. If you use something too abrasive, you risk preventing solar cell abrasion by accidentally doing the exact opposite—scratching the anti-reflective coating that makes the panels work in the first place. Once those micro-scratches set in, your efficiency takes a permanent hit.

    That’s exactly why I always recommend investing in dedicated soft bristle solar brushes. These tools are specifically engineered to lift grime, pollen, and bird droppings without digging into the glass surface. If you’re serious about long-term upkeep, pairing these brushes with water-fed pole systems is the pro move. It allows you to reach the center of the array safely while maintaining a gentle touch. It’s not about being fancy; it’s about making sure the hardware you paid for actually lasts as long as the manufacturer promised.

    My Field Guide: How to Clean Without Making a Mess (or Breaking Your Panels)

    • Ditch the pressure washer. I’ve seen too many people blast their arrays with high-pressure hoses, only to crack the glass or force water into the seals. Stick to a low-pressure garden sprayer or a gentle hose to keep the integrity of the cells intact.
    • Timing is everything. Never try to clean your panels in the middle of a scorching afternoon. If the glass is hot, the cold water will cause thermal shock, which can lead to micro-cracks. Wait for a cloudy morning or late evening when the panels are cool to the touch.
    • Use deionized or distilled water if you can manage it. I know, it sounds extra, but tap water is often loaded with minerals that leave behind stubborn white spots once they dry. Those spots act like tiny shields, blocking sunlight and killing your efficiency.
    • Invest in an extension pole with a soft brush head. You don’t want to be climbing on your roof—it’s dangerous and unnecessary. A high-quality telescopic pole lets you reach the center of the array from the ground, keeping your feet safe and your cleaning even.
    • Check your tools for debris before you start. I always run my hand (carefully!) or a soft cloth over the surface first. If there’s a stray piece of grit or a pebble stuck in your brush bristles, you’ll end up scratching the anti-reflective coating, which is a nightmare to fix.

    Quick Wins for Your Solar Maintenance

    Don’t go overboard with expensive gear; a decent soft-bristle brush and some clean water are usually all you need to keep your efficiency up without breaking the bank.

    Treat your panels like a delicate investment—avoid abrasive scrubbers that create micro-scratches, as those tiny defects will end up costing you more in lost energy long-term.

    Make cleaning a routine rather than a reaction; catching dust and grime early prevents the kind of heavy buildup that really starts eating into your monthly savings.

    The Real Cost of Neglect

    “I’ve seen too many people invest thousands into solar arrays only to lose a chunk of that ROI to a layer of grime. You don’t need a professional cleaning crew on retainer, but you do need the right brush; using the wrong tool is just as bad as doing nothing at all.”

    Tobias Nkemdirim

    Don't Let Your Savings Go to Waste

    Don't Let Your Savings Go to Waste.

    At the end of the day, keeping your solar setup running at peak performance doesn’t require a massive industrial budget or a professional cleaning crew on speed dial. It really comes down to being proactive with the right gear. Whether you’re investing in a dedicated, affordable cleaning kit or just making sure you’re using soft-bristle brushes to avoid scratching those delicate cells, the goal is the same: maximizing every photon that hits your roof. Remember, even a thin layer of grime or dust acts like a thermal blanket, trapping heat and choking off your energy production. If you take the time to maintain your panels now, you’re essentially protecting the long-term ROI of your entire system.

    I know that sometimes these small maintenance tasks feel like just another chore on an endless to-do list, but I look at it differently. Every time you clear away the debris and ensure those panels are soaking up the sun, you are making a deliberate choice to stop wasting energy. Living sustainably shouldn’t be a luxury reserved for the wealthy; it’s about being smart with what we already have. By taking care of your tech, you’re not just lowering your monthly utility bills—you’re actively shrinking your carbon footprint one clean panel at a time. Let’s stop letting convenience dictate our efficiency.

    Frequently Asked Questions

    Is it actually worth buying a specialized solar brush, or can I just use a garden hose and a squeegee?

    Look, I get the temptation to just grab the garden hose and a squeegee. It’s faster and cheaper. But here’s the reality from someone who’s seen too many damaged setups: if you’re using a standard squeegee or a stiff brush, you’re risking micro-scratches on the glass. Those tiny abrasions trap even more dirt and kill your efficiency over time. If you can swing it, get a specialized soft brush. It’s an investment in your long-term savings.

    How often do I really need to clean them to see a difference in my utility bills?

    Honestly, it depends on your local environment, but I usually tell clients to aim for a quarterly check. If you live somewhere dusty or near heavy pollen, you might need to step it up. I always tell people: don’t wait for a massive drop in output. Grab your infrared thermometer, check the panel temps, and if they’re running hotter than they should, they’re likely covered in grime. A quick clean can save you more than you think.

    Can I use tap water to clean my panels, or am I going to end up with mineral buildup that makes things worse?

    It’s a fair question, and honestly, it’s one I see people trip up on constantly. If you have “hard” water—meaning it’s high in calcium or magnesium—using your tap can be a disaster. As the water evaporates, it leaves behind mineral deposits that create a cloudy film on the glass. That film blocks sunlight, kills your efficiency, and is a nightmare to scrub off. If your water is soft, you’re fine; if not, stick to rainwater or deionized water.

  • Identifying and Sealing Air Leaks in Your Home

    Identifying and Sealing Air Leaks in Your Home

    I still remember sitting in my old rental apartment three winters ago, huddled under two heavy blankets while the radiator hissed uselessly in the corner. I could literally feel the cold air whistling through the gaps in the window frames, a constant, biting reminder that I was paying to heat the entire neighborhood instead of just my living room. It wasn’t until I pulled out my infrared thermometer and saw those massive temperature drops around the baseboards that I realized how much money I was losing. Sealing air leaks shouldn’t feel like a luxury reserved for people with massive renovation budgets; it’s just basic physics that most of us are being ignored about.

    I’m not here to sell you on expensive, high-tech insulation systems that require a contractor and a second mortgage. My goal is to give you the straightforward, data-driven truth about how to find and fix the drafts actually draining your bank account. I’ll show you the exact, low-cost tools I use in my audits to identify problem areas and how to tackle them yourself. We’re going to focus on practical, high-impact fixes that stop the waste without breaking your budget.

    Table of Contents

    Smart Draft Detection Methods That Cost You Nothing

    Smart Draft Detection Methods That Cost You Nothing

    You don’t need a professional thermal imaging camera to figure out where your money is escaping. I usually pull out my handheld infrared thermometer during audits, but you can get pretty far with just your senses. Start with the “incense test.” Light a stick of incense or even a candle and slowly move it along window frames, door jambs, and baseboards. If the smoke dances or the flame flickers wildly, you’ve found a culprit. This is one of the most reliable draft detection methods because it visualizes the invisible airflow that’s currently eating your budget.

    Another low-tech trick I swear by is the “feel test” on a windy day. Walk around your perimeter with a damp hand; the moisture makes your skin hypersensitive to even the smallest movements of air. Pay close attention to electrical outlets on exterior walls and where plumbing pipes enter the floor. These are often overlooked gaps that compromise your building envelope integrity. Finding these tiny breaches now is the first step toward reducing heating and cooling costs without spending a dime on fancy equipment.

    Mastering Weatherstripping Techniques on a Budget

    Mastering Weatherstripping Techniques on a Budget.

    Once you’ve identified where the air is escaping, it’s time to actually stop it. You don’t need to hire a contractor to start improving home insulation at the entry points. For most of my clients, I recommend starting with door sweeps and adhesive foam tapes. They are incredibly cheap and easy to install yourself. When I’m auditing a space, I always look at the gaps around the door frame; if you can see light, you’re losing money. Applying a simple V-seal or a thick rubber gasket can make a massive difference in reducing heating and cooling costs almost immediately.

    Don’t overlook your windows, either. If you have older frames, even a basic strip of silicone weatherstripping can stabilize the temperature of a room. It’s all about maintaining the building envelope integrity without spending a fortune on new glazing. I usually suggest a “test and apply” approach: apply a small section, check it with my infrared thermometer, and see if the temperature holds. It’s a small, tactical way to ensure you aren’t just throwing cash into the wind every time the seasons change.

    Low-Cost Fixes That Actually Make a Difference

    • Don’t ignore the outlets. If you feel a chill coming from your electrical sockets, grab some inexpensive foam gaskets to fit behind the faceplates; it stops that sneaky air exchange from inside your walls.
    • Tackle the “big gap” under your doors with a simple door sweep or even a DIY draft stopper made from an old fabric tube filled with rice. It’s a five-minute fix that stops your heated air from just sliding right out into the hallway.
    • Check your window frames for cracks. A quick bead of clear caulk around the edges can seal up those tiny gaps where air sneaks in, and it’s way cheaper than replacing an entire window unit.
    • Look up at your ceiling fans. If you have them, make sure they are spinning counter-clockwise in the winter to push the warm air that’s trapped at the top back down to where you actually feel it.
    • Seal your service penetrations. That’s just a fancy way of saying “check where pipes or wires enter your home.” Use some expandable spray foam or even just some heavy-duty sealant to plug those holes around your plumbing.

    The Bottom Line on Sealing Your Space

    The Bottom Line on Sealing Your Space.

    You don’t need a professional contractor to see results; most of the biggest energy drains can be fixed with a few cheap rolls of weatherstripping and some basic caulk.

    Stop guessing where the heat is escaping—use a simple incense stick or my favorite handheld infrared thermometer to find the actual leaks before you spend a dime on supplies.

    Efficiency isn’t an all-or-nothing game; focus on the high-traffic areas like windows and door frames first to get the fastest return on your investment.

    The Real Cost of a Draft

    “Every time I walk into a room and feel a sudden chill, I don’t just see a draft—I see money literally escaping through the cracks. Sealing your home isn’t about expensive renovations; it’s about stopping the bleeding so your heater actually does its job instead of fighting a losing battle against the outdoors.”

    Tobias Nkemdirim

    The Bottom Line on Sealing Your Space

    At the end of the day, sealing your home isn’t about a massive, expensive overhaul; it’s about being intentional with the small things. We’ve looked at how to spot those invisible drafts using nothing but your senses (or my favorite infrared thermometer), and how to apply budget-friendly weatherstripping to keep the heat where it belongs. Whether you’re just plugging a gap around a window or tackling the bigger leaks around your electrical outlets, every single bit of effort translates directly into lower utility bills and a more comfortable living environment. You don’t need to be an expert to start seeing the difference; you just need to stop letting your hard-earned money leak out through the cracks.

    I know it can feel overwhelming when you look at the sheer amount of energy we waste just because it’s “easier” to let the heater run on overdrive. But remember, sustainability shouldn’t be a luxury reserved for people with massive renovation budgets. Every draft you seal and every window you weatherstrip is a small victory for both your wallet and the planet. It’s about taking control of your own space and refusing to settle for inefficiency. Start small, stay consistent, and I promise you’ll feel the impact—both in your bank account and in the warmth of your home.

    Frequently Asked Questions

    If I seal everything up too tightly, am I going to end up with moisture or mold problems inside my house?

    That’s a valid concern, and honestly, it’s one I see a lot during audits. You don’t want to turn your home into a plastic bag. If you seal every single crack without thinking about airflow, you’ll trap humidity, which is a recipe for mold. The trick is balance: seal the drafts where air escapes uncontrollably, but ensure you still have intentional ventilation—like bathroom fans or trickle vents—to let the house breathe.

    Which specific spots should I check first if I don't have a professional infrared thermometer like I do?

    If you don’t have my infrared thermometer, don’t sweat it. Start with the “hand test”—run your hand along window frames and door jambs; if you feel a sudden chill, you’ve found a culprit. Check around electrical outlets on exterior walls and where plumbing pipes enter the floor. Also, look at the base of your doors and the tops of windows. If you see light peeking through, air is definitely getting through too.

    Is it actually worth spending money on weatherstripping for older, single-pane windows, or should I just save up for a full replacement?

    Look, I get the temptation to just skip straight to new windows, but for most people, that’s a massive upfront cost that takes years to recoup. If your single-pane windows are the main culprit, spend the few bucks on high-quality weatherstripping or even some temporary window film first. It’s a low-stakes test. If you seal the drafts and still feel the chill, then start saving for the upgrade. Don’t overspend before you’ve tried the basics.