Blog

  • Importance of Regular Heating System Maintenance

    Importance of Regular Heating System Maintenance

    I still remember sitting in my old rental apartment three years ago, shivering under three layers of wool blankets while the radiator hissed like a dying animal. I was staring at a utility bill that looked more like a mortgage payment, realizing that my heat wasn’t even reaching the corners of the room. It wasn’t a lack of fuel; it was a total failure of heating system maintenance. Most people think they need to drop a thousand dollars on a high-tech smart thermostat or a brand-new furnace to stay warm, but that’s just a expensive distraction from the actual problem.

    I’m not here to sell you on complicated gadgets or overpriced contractor contracts that do nothing for your actual footprint. Instead, I’m going to give you the straightforward, data-backed reality of how to keep your system running lean. We’re going to look at the small, practical steps you can take right now to stop wasting energy and start lowering your bills. This is about smart, low-impact upkeep that actually works, without requiring a massive bank account to execute.

    Table of Contents

    Your Low Cost Preventative Heating Maintenance Checklist

    Your Low Cost Preventative Heating Maintenance Checklist

    I don’t expect you to hire a technician every time a radiator feels slightly lukewarm, but you do need a basic preventative heating maintenance checklist to keep things running smoothly. Start with the easy stuff: bleed your radiators to get rid of trapped air and check your boiler pressure. If you notice certain rooms staying colder than others despite the heat being on, it’s often just an air pocket, not a broken system. I always tell my clients that catching these small issues early is the difference between a quick fix and an expensive emergency repair.

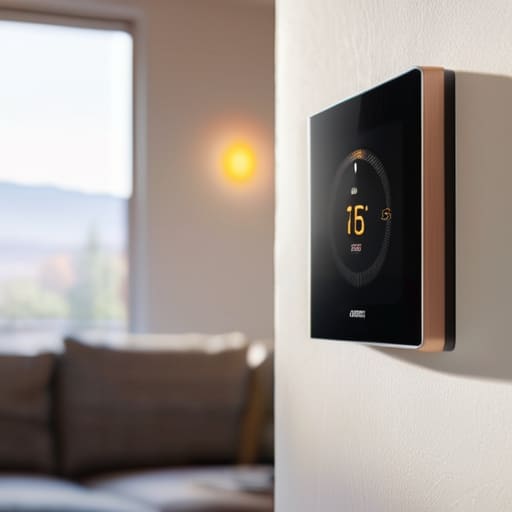
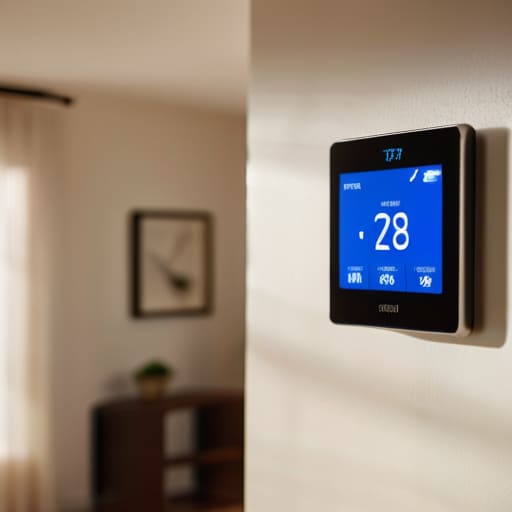
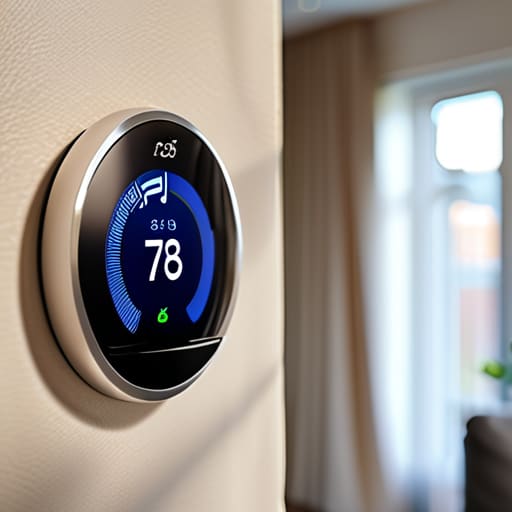
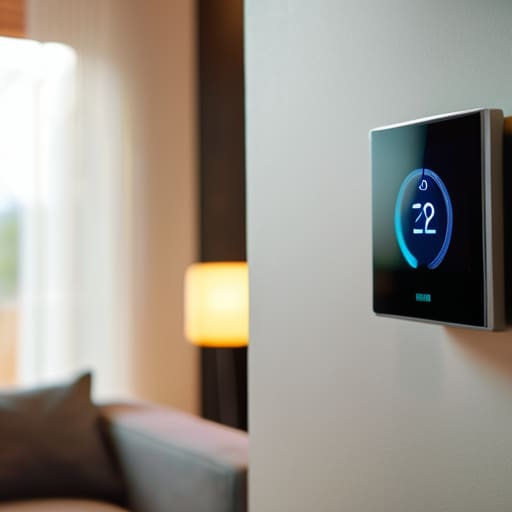
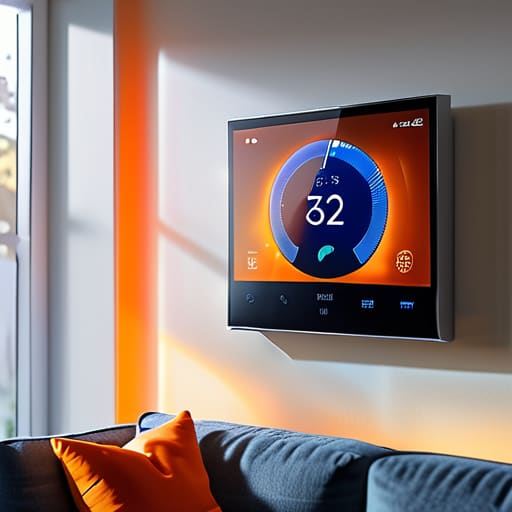
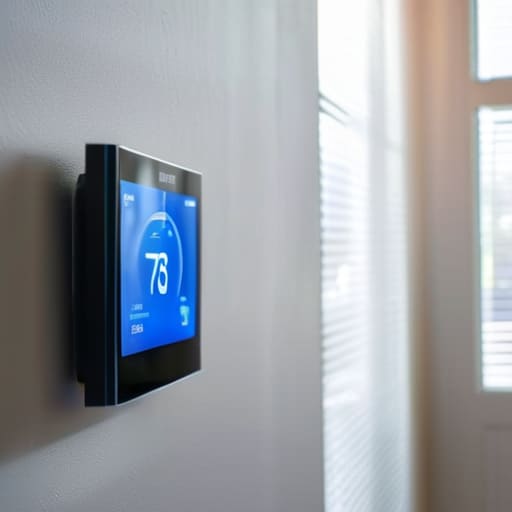
    Next, take a look at your thermostat. It’s the brain of your entire setup, and if it’s miscalibrated, you’re essentially fighting a losing battle with your utility provider. Improving thermostat accuracy is one of the fastest ways to stop overpaying for heat you aren’t actually using. While you’re at it, do a quick visual sweep for any unusual noises or leaks around your pipes. If you spot these signs of a faulty boiler, don’t ignore them—that’s usually the moment your efficiency starts to tank and your bills start to climb.

    Spotting the Subtle Signs of a Faulty Boiler

    Spotting the Subtle Signs of a Faulty Boiler.

    Most people don’t notice a boiler failing until they’re shivering in a cold living room, but by then, the repair bill is usually massive. I’ve learned through audits that the warning signs are often subtle. Keep an eye out for strange noises—clanking, banging, or whistling—coming from your unit. These aren’t just “character” sounds; they’re often indicators of air trapped in the system or a pump struggling to do its job. If you notice your radiators are hot at the bottom but cold at the top, you’re likely dealing with sludge buildup, which is a major obstacle when it comes to lowering energy bills with heating care.

    Another red flag is a sudden, unexplained spike in your monthly utility costs. If your usage jumps but your habits haven’t changed, your system is likely working overtime to compensate for a mechanical inefficiency. I always tell my clients to watch for uneven heating across different rooms, too. If one room stays icy while another is stifling, it’s time for some central heating troubleshooting. Catching these signs of a faulty boiler early can save you from a total system breakdown mid-winter.

    5 Quick Wins to Keep Your Heating Running Lean

    • Bleed your radiators to get rid of trapped air. If the top of your radiator is cold but the bottom is warm, you’re paying to heat air instead of water, which is a massive waste of energy.
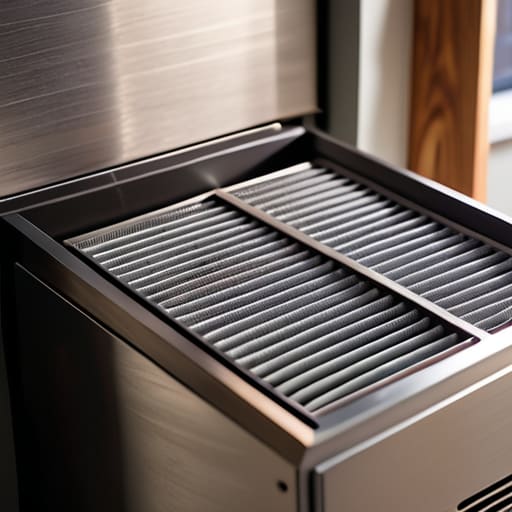
    • Clean your filters and vents regularly. Dust buildup acts like an insulator in the wrong places, forcing your system to work twice as hard to push heat through, driving your utility bills straight up.
    • Check your thermostat settings and placement. If it’s sitting near a drafty window or a heat source, it’s giving you junk data, causing your heater to cycle on and off inefficiently.
    • Insulate your exposed pipework. It’s a cheap, minimalist fix, but wrapping those pipes in foam prevents heat from bleeding out into the cupboard or crawlspace before it ever reaches your living room.
    • Monitor your pressure gauges. A drop in pressure often signals a small leak somewhere in the system; catching it early prevents a minor fix from turning into a costly, high-impact emergency repair.

    The Bottom Line on Keeping Your Heat (and Cash) in the House

    Don’t wait for a total breakdown to act; catching small issues through regular checks is way cheaper than an emergency boiler repair.

    Keep an eye (and an ear) on your system—weird noises or sudden temperature drops are your first warning signs that energy is leaking out.

    Small, proactive maintenance isn’t just about comfort; it’s a data-driven way to slash your monthly utility bills and lower your footprint.

    The Real Cost of Neglect

    “A heating system isn’t just a convenience; it’s a major line item in your monthly budget. If you aren’t spending a little time on maintenance now, you’re essentially signing a blank check for a massive repair bill—or a much higher utility statement—later this winter.”

    Tobias Nkemdirim

    The Bottom Line on Heating Maintenance

    The Bottom Line on Heating Maintenance.

    At the end of the day, keeping your heating system in check isn’t about buying expensive gadgets or hiring a fleet of technicians; it’s about staying observant. By running through a simple checklist, keeping your vents clear, and knowing exactly what a failing boiler sounds like, you’re essentially plugging the leaks in your bank account. I’ve seen too many people ignore those small, subtle warning signs only to end up facing a massive repair bill or a freezing living room in the middle of January. Remember, preventative maintenance is always cheaper than emergency repairs, both for your wallet and for the environment.

    Living sustainably shouldn’t feel like a luxury reserved for the wealthy. It’s about making these small, smart adjustments that ensure your home works for you, not against you. Every time you tune up your heater or catch a leak early, you are actively choosing to reduce your carbon footprint while keeping your living costs manageable. We don’t need to overhaul our entire lives to make a difference; we just need to stop letting energy slip through the cracks of convenience. Take care of your gear, and it will take care of you.

    Frequently Asked Questions

    How often should I actually call in a professional versus just doing the DIY checks myself?

    Look, I’m all for DIY—it’s better for your wallet and the planet—but you need to know where the line is. Stick to the DIY checks for things like bleeding radiators, cleaning filters, or checking thermostat settings. However, if you smell gas, hear banging inside the unit, or see water pooling, stop immediately. Leave the internal mechanics and gas connections to a pro. It’s not worth risking your safety or breaking your system just to save a few bucks.

    Is it worth spending money on a high-end smart thermostat, or are there cheaper ways to manage my heating schedule?

    Look, I get the temptation to go all-in on a high-end smart thermostat, but you don’t need to drop hundreds to see results. If your current setup is just a manual dial, a mid-range programmable one is a massive win. Honestly, before you buy anything, just check your radiator valves. Replacing old TRVs with basic programmable ones is way cheaper and often more effective at stopping heat from bleeding into empty rooms.

    I noticed my radiators are cold at the top but warm at the bottom; is that a sign of a major leak or just something I can fix easily?

    Don’t panic—it’s likely not a major leak. What you’re describing sounds like trapped air, a classic case of “air locking.” When air gets stuck at the top of the radiator, it prevents hot water from circulating through the whole unit. It’s an easy fix: grab a radiator key and bleed the valve to let the air out. Once you see water instead of air, you’re back in business without spending a dime.

  • Using Solar Panel Monitoring Tools

    Using Solar Panel Monitoring Tools

    I remember sitting in my old rental apartment, staring at a utility bill that looked more like a mortgage payment, feeling completely powerless against the rising costs. It’s that same frustration I see now when people invest thousands into a solar setup, only to walk away and hope it’s actually working. There is this massive, annoying misconception that once the panels are on the roof, the job is done. But without active solar panel monitoring, you’re basically flying blind. You could have a single faulty inverter or a layer of grime choking your efficiency, and you wouldn’t know until you saw the hit to your bank account at the end of the month.

    I’m not here to sell you on some overpriced, high-tech gadgetry that complicates your life for no reason. My goal is to show you how to use data to stop wasting energy and ensure your investment actually pays for itself. I’ll walk you through the practical ways to track your production, what specific numbers you should actually care about, and how to spot a problem before it becomes an expensive headache. Let’s get your system working for you, not against your wallet.

    Table of Contents

    Mastering Real Time Solar Energy Tracking to Slash Your Bills

    Mastering Real Time Solar Energy Tracking to Slash Your Bills

    Most people install solar panels and then just… forget about them. They assume that because the hardware is on the roof, the work is done. But if you aren’t checking your data, you’re essentially flying blind. I’ve seen too many setups where a single faulty string or a layer of debris is quietly tanking the output, and the homeowner doesn’t realize it until their utility bill arrives. By using real-time solar energy tracking, you stop guessing and start seeing exactly how much power you’re pulling from the sun at any given moment.

    It’s about moving from passive ownership to active management. When you dive into your solar inverter monitoring software, you aren’t just looking at pretty graphs; you’re performing a continuous health check on your investment. I always tell my clients that optimizing solar energy yield isn’t a one-time setup—it’s a habit. If you notice a sudden dip in production during peak sunlight hours, you can catch a technical glitch before it drains your savings for months. It turns your roof from a static piece of equipment into a high-performing asset.

    Using Solar Inverter Monitoring Software to Stop Wasting Power

    Using Solar Inverter Monitoring Software to Stop Wasting Power

    Most people treat their solar setup like a “set it and forget it” appliance, but that’s exactly how you end up losing money. I’ve seen too many setups where a single faulty string or a dusty panel goes unnoticed for months because the owner isn’t looking at the data. This is where solar inverter monitoring software becomes your best friend. Instead of waiting for your utility bill to tell you something is wrong, the software gives you a direct line into your system’s health. It’s about moving from guesswork to actual photovoltaic system diagnostics that tell you exactly where your energy is—or isn’t—going.

    When I’m auditing a home, I always tell clients to check their inverter’s app at least once a week. You’re looking for those small, unexplained dips in production that signal a hardware hiccup or a cleaning requirement. By leveraging remote solar system management, you can spot a malfunction before it turns into a massive spike in your electricity costs. It’s not about being obsessed with gadgets; it’s about optimizing solar energy yield so that every ray of sunlight hitting your roof actually works to lower your overhead.

    5 Ways to Use Your Data to Stop Wasting Solar Power

    • Watch your production curves, not just the totals. If you see a sudden dip during peak sunlight hours on a clear day, you likely have a dirty panel or a shading issue that’s eating your ROI.
    • Set up push notifications for inverter faults. You shouldn’t have to manually log in every day to see if something is broken; let the system tell you the second an error code pops up so you can fix it before the bill arrives.
    • Compare your generation data against your real-time consumption. If your panels are cranking out power but your app shows you’re still pulling heavily from the grid, you need to shift your heavy appliance use—like the dishwasher or dryer—to those peak production windows.
    • Track your battery state-of-charge (SoC) religiously. If you have storage, monitoring how quickly you’re draining it helps you figure out if you’re over-relying on the grid at night or if your battery isn’t holding the charge it should.
    • Keep an eye on the weather-to-output ratio. If the forecast says sunny but your monitoring app shows low yields, it’s time to grab my infrared thermometer (or just a good pair of gloves) and check for physical obstructions or hardware malfunctions.

    The Bottom Line on Solar Monitoring

    Stop guessing and start seeing; real-time data turns your solar setup from a “set and forget” expense into a tool you actually control.

    Catching a malfunction early through your software isn’t just about tech—it’s about preventing weeks of wasted sunlight and unnecessary utility bills.

    Use the numbers to prove your ROI, ensuring every kilowatt your system produces is actually working to lower your monthly overhead.

    ## Stop Guessing, Start Measuring

    “You wouldn’t drive a car without a fuel gauge and expect to reach your destination, so why are you running a solar system without knowing exactly where your power is going? Monitoring isn’t about chasing tech trends; it’s about seeing the invisible leaks in your energy production so you can stop paying for power you aren’t actually catching.”

    Tobias Nkemdirim

    Making Data Work for Your Wallet

    Making Data Work for Your Wallet.

    At the end of the day, solar panels are only as good as the data you use to manage them. We’ve looked at how real-time tracking keeps you from flying blind and how inverter software acts as your first line of defense against technical glitches that quietly bleed your savings dry. It isn’t about obsessing over every single watt, but about eliminating the guesswork. When you stop treating your solar setup like a “set it and forget it” appliance and start treating it like a dynamic tool, you stop wasting energy and start reclaiming your hard-earned money.

    I know that transitioning to a sustainable lifestyle can feel expensive and overwhelming, especially when you’re just trying to make ends meet. But remember, efficiency isn’t a luxury reserved for the wealthy; it’s a practical way to take control of your own environment. Every time you check your monitoring app and catch a drop in performance, you are making a choice to live smarter. You don’t need a massive budget to make an impact—you just need to stop letting energy leak away through neglect. Let’s make sure every bit of sunlight you capture actually goes toward powering your life, not just disappearing into a faulty connection.

    Frequently Asked Questions

    Do I actually need a dedicated monitoring system, or can I just check my inverter's screen manually?

    Look, I get the temptation to keep it simple. Checking the inverter screen works if you just want a quick glance, but it’s reactive. You’re only seeing a snapshot in time. A dedicated monitoring system is proactive. It tracks trends and catches those tiny, silent energy leaks that a manual check will always miss. If you’re serious about squeezing every cent of value out of your setup, the data from a real system is worth it.

    How much of an impact will seeing my real-time data actually have on my monthly savings?

    It’s not just about the numbers on a screen; it’s about changing your behavior. When I use my infrared thermometer, I see exactly where heat escapes. Real-time data does the same for your electricity. Seeing a spike when the dryer kicks in or a drop when a cloud passes makes the invisible, visible. That awareness stops you from running appliances at peak rates and helps you catch system glitches before they become expensive repairs.

    What are the red flags I should look for in my monitoring app that indicate a panel might be failing?

    Keep a close eye on your daily yield patterns. If you see a sudden, unexplained dip in production on a clear, sunny day, that’s a massive red flag. I also look for “stair-stepping” in the data—where energy output drops sharply and stays low instead of following a smooth curve. If one specific string or panel shows significantly lower voltage than the others, you likely have a hardware issue or heavy shading that needs immediate attention.

  • Strategies to Reduce Energy Consumption

    Strategies to Reduce Energy Consumption

    I still remember sitting in my old rental apartment three years ago, shivering under three layers of blankets while staring at a heating bill that made absolutely no sense. I’d check the thermostat, turn it up, and yet the air stayed biting and cold. It’s incredibly frustrating how most “green living” advice tells you that to reduce energy consumption, you need to drop thousands on solar panels or high-end smart home ecosystems. Honestly? That’s a load of rubbish. For most of us, sustainability isn’t about a massive capital investment; it’s about identifying the invisible leaks in your daily routine that are bleeding your bank account dry.

    I’m not here to sell you on expensive gadgets or lifestyle overhauls that feel impossible to maintain. My goal is to give you the practical, data-driven tweaks I use in my professional audits to stop wasting power without breaking the bank. We’re going to look at the small, high-impact shifts—the kind of stuff you can actually do this weekend—to help you lower your bills and your carbon footprint simultaneously. Let’s get into the real ways to keep your home comfortable and your costs low.

    Table of Contents

    Smart Home Energy Management on a Budget

    Smart Home Energy Management on a Budget.

    When people hear “smart home,” they usually think of expensive, flashy gadgets that don’t actually do much. But for me, it’s about utility, not vanity. You don’t need to drop thousands on a fully automated ecosystem to see a difference in your monthly costs. Real smart home energy management starts with the basics: smart plugs and programmable thermostats. I’ve seen so many people leave devices on standby or keep the heat running in empty rooms simply because it’s easier than manually adjusting them. A $20 smart plug can ensure your coffee maker or old gaming setup isn’t drawing phantom power while you sleep, which is a massive win for lowering utility bills without any lifestyle sacrifice.

    I also tend to focus on the “brain” of the house. If you can control when your heavy hitters—like your water heater or washing machine—are pulling power, you’re winning. It isn’t about buying the latest high-end tech; it’s about using affordable sensors to stop the bleeding. By automating the small stuff, you’re making a consistent dent in your carbon footprint reduction efforts while keeping your wallet intact.

    Home Insulation Tips That Save Your Wallet

    Home Insulation Tips That Save Your Wallet

    I’ve spent more hours than I’d like to admit pointing my infrared thermometer at window frames, watching the temperature drop as the heat leaks out into the street. Most people think effective home insulation tips require a massive renovation budget, but that’s a misconception. If you’re renting or on a tight budget, start with the low-hanging fruit. Draft excluders for the bottom of doors and heavy, thermal curtains can act as a secondary barrier, keeping the warmth you’ve already paid for inside the room.

    It’s about creating a seal. I always tell my clients to check the attic or crawl spaces if they own their place; even a small gap in the insulation can lead to massive heat loss. By focusing on these thermal leaks, you aren’t just helping with carbon footprint reduction, you’re directly lowering utility bills every single month. You don’t need to rip out your walls to see a difference; you just need to stop the air from moving where it shouldn’t. It’s simple physics, and it’s the most cost-effective way to stay comfortable.

    Low-Cost Fixes to Stop Your Money from Leaking Out

    • Audit your phantom loads. I see this all the time with my infrared thermometer—devices that are “off” but still pulling juice. Plug your entertainment center or coffee station into a cheap power strip and flip the switch when you’re done; it’s an easy way to kill that silent energy drain.
    • Master your thermostat’s rhythm. You don’t need a $300 smart hub to be efficient. Just get into the habit of dropping the temp by a few degrees when you’re sleeping or out for the day. It’s about discipline, not expensive hardware.
    • Switch to LED, but do it strategically. Don’t feel like you have to replace every bulb in the house overnight. Start with the high-use areas like the kitchen or living room. The upfront cost is tiny compared to what you’ll save on your monthly bill.
    • Check your water heater settings. Most people have their temp set way higher than necessary. Dialing it back to about 120°F (49°C) is usually plenty for a hot shower and prevents your heater from working overtime just to maintain excess heat.
    • Use your curtains as thermal barriers. In the winter, keep them open during the day to let the sun heat your rooms for free, then shut them tight the second the light fades to trap that warmth inside. It’s a zero-dollar hack that actually works.

    The Bottom Line on Cutting Costs

    Focus on the “leaks” first—whether it’s air escaping through a poorly sealed window or electricity bleeding from standby devices, stopping the immediate waste is your fastest way to see a lower bill.

    You don’t need a high-tech overhaul to see results; small, data-backed shifts like adjusting your thermostat by just a couple of degrees or switching to smart power strips offer the best ROI for your wallet.

    Sustainability shouldn’t be a luxury, so prioritize low-cost, high-impact upgrades that tackle energy loss before you ever consider spending big money on expensive new appliances.

    The Reality of Wasted Energy

    “Most people think sustainability requires a massive solar array or a complete home overhaul, but it’s usually much simpler than that. It’s about finding the leaks—both in your walls and in your habits—and stopping that money from literally evaporating into thin air.”

    Tobias Nkemdirim

    The Bottom Line on Saving Energy

    The Bottom Line on Saving Energy.

    At the end of the day, reducing your energy consumption isn’t about some massive, expensive overhaul of your entire living space. It’s about the cumulative effect of those small, intentional choices we’ve talked about—from managing your smart devices more effectively to plugging those sneaky heat leaks that drive up your monthly costs. I know it can feel overwhelming when you look at a utility bill, but remember that every watt saved is money back in your pocket. By focusing on smart management and better insulation, you’re essentially stopping the bleeding of your finances while making your home a much more comfortable place to live.

    I truly believe that sustainability shouldn’t be a luxury reserved for people with massive bank accounts. We don’t need to wait for perfect, high-tech solutions to start making a difference; we just need to stop being passive about how we use the resources we already have. If you start with just one or two of these tweaks, you’re already ahead of the curve. Let’s stop letting energy leak out of our windows and our wallets just because it’s convenient. It’s time to take control of your home’s efficiency and start living a little smarter, one small adjustment at a time.

    Frequently Asked Questions

    Are there specific smart plugs or devices that are actually worth the investment, or is it just marketing fluff?

    Look, I’ve tested enough of these to know the difference between a gimmick and a tool. Most basic smart plugs are fine for scheduling lamps, but if you want real ROI, look for ones with energy monitoring. I use them to track my “vampire loads”—devices that pull power even when they’re off. If a plug doesn’t show you the actual wattage in an app, it’s probably just marketing fluff. Get the ones that give you data.

    How much of a difference will DIY weatherstripping actually make compared to professional insulation?

    Look, if you’re asking if weatherstripping can replace a full attic insulation upgrade, the answer is no. Professional insulation handles the heavy lifting of thermal resistance. But don’t discount DIY weatherstripping; it’s the “low-hanging fruit.” I’ve used my infrared thermometer on countless doors and windows where air was just pouring in. Sealing those gaps stops the drafts immediately. It won’t transform your home’s R-value, but it’s a cheap, high-impact way to stop wasting heat.

    Is it more cost-effective to focus on heating/cooling efficiency or reducing my appliance usage?

    If you’re looking for the biggest bang for your buck, focus on heating and cooling. I’ve run the numbers on countless audits, and thermal leaks are almost always the biggest culprits for high bills. While swapping out a toaster or a lamp helps, it’s a drop in the bucket compared to the energy lost through poor insulation or inefficient HVAC systems. Fix the envelope of your home first; that’s where the real savings live.

  • The Impact of Unplugging Unused Devices

    The Impact of Unplugging Unused Devices

    I remember sitting in my old rental apartment, shivering through a February freeze, staring at a utility bill that made absolutely no sense. I had the heat cranked, yet the numbers kept climbing. It wasn’t just the radiator; it was the invisible drain of everything plugged into the walls. I grabbed my infrared thermometer and started scanning, realizing just how much energy was being bled away by things I wasn’t even using. We’ve been sold this lie that saving energy requires massive solar arrays or expensive smart home systems, but most of the waste is much more low-tech and annoying. Honestly, unplugging devices that sit in standby mode is one of the easiest ways to stop your money from literally evaporating through your outlets.

    I’m not here to sell you on some futuristic, overpriced gadget that promises to automate your life. I want to show you the practical, data-backed reality of how much you can actually save by changing a few simple habits. I’ll be sharing the exact steps I use during my audits to identify the biggest culprits in a home, focusing on real-world results rather than theoretical savings. This is about making smart, minimalist choices that keep your bills low and your footprint even lower.

    Table of Contents

    Identifying the Hidden Energy Drains in Your Living Room

    Identifying the Hidden Energy Drains in Your Living Room.

    I usually start my audits by walking into a living room and just… looking. It’s easy to focus on the big stuff like the HVAC, but the real culprits are often hiding in plain sight. I grab my infrared thermometer and scan the entertainment center; you’ll often see those little glowing standby lights or the warmth coming off a game console that hasn’t been touched in hours. These are your hidden energy drains. Even when you aren’t actively watching a movie, your soundbar, streaming sticks, and smart speakers are still sipping power. It’s a constant, silent leak that adds up over a billing cycle.

    If you’re like me and want to stop the bleeding without turning your living room into a dark cave, you have to look at how your gear is actually connected. Most people have a tangled mess of cords behind the TV that are constantly drawing standby power consumption. Instead of manually pulling every single plug every night, I’m a big advocate for using smart power strips. They can automatically cut juice to your peripherals when your main device is off, which is one of the most effective ways of reducing electricity bills without any daily hassle.

    Stop Letting Phantom Energy Savings Slip Through Your Fingers

    Stop Letting Phantom Energy Savings Slip Through Your Fingers.

    It’s easy to ignore those little red or blue standby lights glowing in the dark, but those tiny LEDs are actually symptoms of a larger problem. Most of us think that if a device is turned off, it’s not costing us anything. That’s a myth. Between your coffee maker’s digital clock and your gaming console’s “instant-on” mode, you are constantly dealing with standby power consumption. I’ve used my infrared thermometer on various outlet covers during audits, and it’s surprising how much residual heat—and therefore wasted electricity—is bleeding out of devices that aren’t even in active use.

    If you aren’t in the habit of manually pulling every plug, you don’t have to start overnight. One of my favorite energy efficient home tips is to invest in a few high-quality power strips. By using smart power strips benefits, you can effectively cut the cord on an entire entertainment center or home office setup with a single switch. It’s about creating a barrier between your appliances and the grid so you aren’t paying for power that serves no purpose.

    My Quick-Fire Audit: 5 Ways to Stop the Bleeding

    • Grab a power strip for your entertainment center. Instead of chasing every single cord behind the TV, just flip one switch at night to kill the power to the console, the soundbar, and the streaming box all at once.
    • Be ruthless with your kitchen small appliances. That coffee maker or toaster isn’t doing you any favors by sitting on standby 24/7; if you aren’t using it, pull the plug or use a smart plug to automate the cutoff.
    • Watch your workspace. Laptops and monitors are notorious for sipping power even when they’re “off.” If you’re heading out for the day, shut them down completely and unplug the chargers—leaving a charger plugged in without a device is just burning money for no reason.
    • Tackle the “always-on” culprits like microwave clocks and phone chargers. It feels minor, but if you do a quick sweep of every room with my infrared thermometer, you’ll see how much heat (and energy) is being wasted by devices that never actually sleep.
    • Use smart plugs for the stuff you forget. If you’re too lazy to walk around the house every night—and honestly, I get it—set up a few cheap smart plugs to kill the power to your lamps and non-essential tech on a schedule.

    The Bottom Line: Small Habits, Real Savings

    Stop treating “off” as enough; if it’s still plugged in, it’s likely still pulling a charge and draining your wallet.

    Focus on the big offenders like gaming consoles and old tech setups first—they’re the biggest culprits for phantom power drain.

    Make it a mindless habit, like turning off the lights, so you’re saving money and reducing your footprint without even thinking about it.

    The Cost of Convenience

    Every time you leave a charger plugged into a dead outlet or leave a TV on standby, you’re essentially paying a small, invisible tax for the sake of laziness. It’s not about being perfect; it’s about realizing that those tiny leaks eventually drain your bank account just as surely as they drain the grid.

    Tobias Nkemdirim

    Cutting the Cord for Good

    Cutting the Cord for Good to save.

    At the end of the day, stopping phantom power drain isn’t about some massive, expensive home renovation; it’s about the small, intentional habits we build into our daily routines. We’ve looked at how your living room setup is likely bleeding money through idle electronics and how those tiny “vampire” loads add up to a significant chunk of your monthly bill. Whether it’s pulling the plug on your coffee maker before you head to work or using smart power strips to kill the connection to your gaming console, these actions actually matter. When you start tracking where that energy is going, you realize that stopping the waste is often easier than trying to generate more power.

    I know it feels like a minor inconvenience to walk around and unplug things, but I promise you, the payoff is worth the extra ten seconds of effort. Every watt you save is money that stays in your pocket and a little less pressure on our aging power grid. Living sustainably shouldn’t be a luxury reserved for people with massive budgets and solar arrays; it’s about being smart with what we already have. Let’s stop letting convenience dictate our carbon footprint. Start small, stay consistent, and take back control of your home’s energy profile one outlet at a time.

    Frequently Asked Questions

    Is it actually worth the effort to unplug everything, or am I just wasting time for pennies?

    Look, I get the skepticism. If you’re just unplugging a single phone charger, you’re fighting for pennies. But if you’re looking at the whole picture—gaming consoles, coffee makers, old TVs—it adds up. I’ve run the numbers on my own audits, and “vampire load” can account for up to 10% of a monthly bill. It’s not about being perfect; it’s about being smart. Focus on the big offenders, and you’ll actually see the difference.

    Which devices are the biggest culprits for phantom power, and which ones are safe to leave plugged in?

    Look, not everything needs to be yanked from the wall. If it’s a lamp or a toaster, just unplug it. The real culprits are the “always-on” electronics: game consoles in standby mode, old desktop computers, and those massive TV setups with smart features. They’re constantly sipping power. If it has a little glowing LED or a digital clock, it’s costing you money. Keep your fridge and router plugged in, obviously, but everything else? Unplug it.

    Won't constantly plugging and unplugging things actually damage my electronics or my outlets?

    I get it—you don’t want to fry your gear or wear out your wall sockets. Honestly, the risk is minimal. Modern outlets are designed for thousands of cycles, and most of the devices we’re talking about aren’t sensitive enough to care. If you’re worried about a specific piece of vintage tech or a high-end setup, just grab a power strip with a physical switch. One click, and the whole circuit is dead. No wear and tear required.

  • The Importance of Insulating Hot Water Pipes

    The Importance of Insulating Hot Water Pipes

    I remember sitting in my old rental apartment three years ago, shivering in a room that felt like a walk-in freezer, while my heating bill climbed higher than my actual rent. I’d spent a fortune on the thermostat, thinking that was the fix, only to realize later that I was basically paying to heat the air inside my walls. I pulled out my infrared thermometer and saw the truth: heat was bleeding out of every exposed joint. Most people think you need a massive, expensive HVAC overhaul to see real savings, but they’re ignoring the low-hanging fruit. Insulating hot water pipes isn’t some high-tech engineering feat reserved for luxury eco-homes; it’s a basic, common-sense move that most people completely overlook.

    I’m not here to sell you on some complicated, overpriced “green” gadget that promises the moon but delivers nothing. My goal is to give you the straightforward reality of how to stop that thermal leakage without breaking your bank account. I’ll show you exactly which sections matter most, how to do it yourself in twenty minutes, and why this tiny adjustment is one of the smartest investments you can make for your monthly budget.

    Table of Contents

    Fighting Convection Heat Loss Without Breaking the Bank

    Fighting Convection Heat Loss Without Breaking the Bank

    When I’m running an audit, I often see people focusing entirely on their windows while ignoring the literal veins of their home. Convection heat loss happens when the air around your exposed plumbing circulates, picking up heat from the pipes and carrying it away into the rest of the house. It sounds subtle, but it’s a constant, invisible drain on your comfort. If your pipes are bare, you’re essentially paying to heat the air in your utility closet rather than the water in your shower.

    The good news is that tackling this doesn’t require a massive renovation budget. I always recommend picking up some foam pipe sleeves from a local hardware store; they are incredibly cheap and take minutes to install. These are some of the most effective energy saving home improvements because they create a physical barrier that traps the heat exactly where it belongs. By using these basic thermal insulation materials, you aren’t just stopping heat from escaping—you’re also adding a vital layer of protection for preventing frozen pipes during those sudden winter cold snaps. It’s a small, pragmatic win for your wallet and your home’s efficiency.

    Smart Energy Saving Home Improvements for Every Budget

    Smart Energy Saving Home Improvements for Every Budget

    When I’m out on an audit, I don’t just look for the big, expensive fixes like solar panels or new windows. Most people think energy saving home improvements have to cost thousands, but that’s a myth. I always tell my clients to start with the “low-hanging fruit”—the small, tactical upgrades that yield immediate results. If you’re working with a tight budget, focus on sealing the gaps. It’s about plugging the leaks in your thermal envelope before you even think about upgrading your furnace.

    If you have a bit more to spend, you can look into better thermal insulation materials for your attic or crawl spaces. However, if you’re just trying to see a difference in your monthly statement right now, grab some foam pipe sleeves. They are incredibly cheap and easy to install yourself. It’s one of those rare wins where a ten-dollar trip to the hardware store actually translates into reducing heating bills over the long term. You aren’t just saving energy; you’re basically stopping a slow leak in your bank account.

    My Quick-Fire Checklist for Pipe Insulation

    • Grab a roll of foam pipe sleeves (lagging) from a hardware store; they’re dirt cheap and much more effective than trying to wrap pipes in old towels or blankets.
    • Don’t skip the joints; make sure you use foam tape or even just some heavy-duty foil tape to seal the gaps where two sleeves meet, otherwise, you’re just creating tiny heat leaks.
    • Focus on the “hot zones” first, specifically the stretches of pipe running from your water heater to the nearest taps, as that’s where your money is literally evaporating into the air.
    • Use my infrared thermometer trick—scan your pipes while the hot water is running to find the exact spots where the temperature drops sharply; that’s where your insulation is failing or missing.
    • Keep it tight and snug; if the insulation is loose or sagging, it won’t do its job properly, so make sure it’s pressed firmly against the pipe surface to minimize air gaps.

    The Bottom Line on Pipe Insulation

    Think of pipe insulation as a cheap shield; wrapping your hot water lines prevents heat from escaping before it even reaches your tap, saving you money on every single shower.

    You don’t need a massive renovation budget to see results—grab some foam sleeves from a hardware store and tackle the exposed pipes in your basement or utility closet this weekend.

    Prioritize the “low-hanging fruit” by insulating pipes that run through unheated areas, as these are the primary spots where your energy is literally evaporating into thin air.

    The Invisible Leak

    “I’ve spent way too many audits pointing my infrared thermometer at bare pipes and watching the heat bleed out into thin air; insulating those lines isn’t just a DIY project, it’s about stopping your monthly budget from evaporating before it even reaches your tap.”

    Tobias Nkemdirim

    The Bottom Line

    The Bottom Line: insulating pipes saves money.

    At the end of the day, insulating your hot water pipes isn’t some complex engineering project; it’s just common sense. We’ve looked at how tackling convection loss and choosing the right materials can stop your expensive heated water from losing its temperature before it even reaches your tap. Whether you’re spending a few dollars on foam sleeves or investing in more robust lagging, the math is simple: less heat lost means less energy wasted and a direct reduction in your monthly utility bill. It’s one of those rare home wins where the upfront cost is minimal compared to the long-term savings you’ll see on your statement.

    I know it’s easy to feel like individual actions don’t matter when we’re facing massive global energy crises, but I disagree. Every time you stop a heat leak or optimize a small corner of your home, you’re proving that sustainability doesn’t require a massive bank account or a solar farm in your backyard. It’s about reclaiming control over your space and your finances. Start small, grab some insulation, and stop letting your hard-earned money evaporate into thin air. Making your home efficient is a practical act of rebellion against waste, and it starts with the very pipes running through your walls.

    Frequently Asked Questions

    Do I need to insulate the pipes under the sink, or just the ones running through the walls and basement?

    Honestly, if those pipes under the sink are in an unheated cabinet or near an exterior wall, insulate them. I’ve seen too many people ignore the “easy” spots, only to find their water temperature dropping before it even hits the tap. While the basement pipes are the big offenders, those under-sink lines are prime territory for heat loss. It’s a tiny, cheap fix that keeps your water hotter for longer.

    How do I know if I've missed a spot, or if the insulation I just bought is actually thick enough to make a difference?

    Grab your infrared thermometer—it’s the best way to see what your eyes can’t. Run it along the pipes; if you see a sudden temperature spike, you’ve found a gap or a thin spot. As for thickness, don’t go overboard with expensive heavy-duty stuff for standard domestic lines. Most foam sleeves are fine, but if the pipe feels hot to the touch through the insulation, it’s too thin. Aim for a consistent, snug fit.

    Is it safe to wrap pipes that are already carrying very hot water, or is there a risk of overheating something?

    It’s completely safe. In fact, that’s exactly what the insulation is designed for. You aren’t adding heat to the water; you’re just creating a thermal barrier that keeps the heat inside the pipe where it belongs. Just make sure you aren’t wrapping anything that needs to breathe, like a gas line or a vent. As long as you’re sticking to standard copper or PEX water pipes, you’re good to go. No overheating risk here.

  • How to Manage Energy During Peak Times

    How to Manage Energy During Peak Times

    I still remember sitting in my old rental apartment, staring at a utility bill that felt like a personal attack. It was mid-January, the place was freezing, and I was terrified to turn on the heater because I knew exactly when those expensive peak rates kicked in. Most “experts” will tell you that managing energy peaks requires a massive investment in smart home ecosystems or high-end solar arrays that most of us simply can’t afford. They make it sound like a luxury problem for people with huge budgets, but that’s total nonsense.

    I’m not here to sell you on expensive gadgets or complicated tech that requires a PhD to operate. Instead, I’m going to show you how to actually take control of your consumption without breaking the bank. I’ll be sharing the same practical, data-driven tactics I use during my home audits to shave costs off those heavy-hitting hours. My goal is to give you a realistic roadmap for lowering your bills through small, smart shifts in your daily routine, proving that you don’t need to be rich to live a more sustainable, efficient life.

    Table of Contents

    Decoding Your Energy Consumption Patterns to Save Money

    Decoding Your Energy Consumption Patterns to Save Money

    Most people treat their electricity bill like a mystery novel—they see the final number at the end of the month and just shrug, wondering where the money went. But if you want to actually stop the bleeding, you have to stop guessing and start looking at your energy consumption patterns. I always tell my clients that you can’t fix what you haven’t measured. I usually pull up my utility’s usage dashboard to see exactly when those spikes happen. Is it that 6:00 PM rush when everyone turns on the oven and the AC simultaneously? Or is it a slow, steady creep throughout the evening? Identifying these specific windows is the first step toward taking control of your wallet.

    Once you spot those spikes, you’ll start to see how your habits interact with the broader grid. When everyone hits the power at once, it puts massive pressure on grid stability and peak demand, which is exactly why utility companies jack up the rates during those hours. Instead of just reacting to high bills, you can start implementing simple demand side management strategies. This might mean running your dishwasher at midnight or shifting your laundry to the morning. It’s about being intentional with your timing so you aren’t paying a premium for convenience.

    Reducing Peak Load Impact With Simple Daily Habits

    Reducing Peak Load Impact With Simple Daily Habits

    You don’t need a massive solar array or a high-tech home automation system to start reducing peak load impact. Most of the time, it’s about timing. I see it all the time during my audits: people running their dishwashers, dryers, and ovens all between 5:00 PM and 9:00 PM. That’s exactly when the grid is under the most stress. Instead of fighting the system, just shift your heavy lifting. Try running that laundry cycle in the morning or late at night when demand drops. It’s a small mental shift, but it makes a massive difference in how much you’re actually being charged.

    If you want to get a bit more intentional, look into simple demand side management strategies that don’t break the bank. For instance, pre-cooling your home an hour before the evening rush starts can take the edge off your AC usage later. It’s not about living in the dark; it’s about being smart with when you pull power. By smoothing out your usage, you aren’t just saving a few bucks—you’re actually helping maintain grid stability and peak demand balance.

    Five Low-Effort Moves to Cut Your Peak-Hour Costs

    • Stop running the heavy hitters during the rush. Things like dishwashers, washing machines, and dryers are absolute energy hogs; if you can, set them to run late at night or early in the morning when the grid isn’t screaming for power.
    • Master the “thermal buffer” trick. Instead of blasting the AC or heater right when the sun goes down and rates spike, try pre-cooling or pre-heating your space an hour before the peak period hits. You’re essentially using your home’s temperature as a battery.
    • Audit your “vampire” loads with a bit of scrutiny. I always carry my infrared thermometer to find heat leaks, but I also look for those little glowing standby lights on electronics. If it’s plugged in and not being used, unplug it—don’t let it bleed money while you sleep.
    • Swap out your old-school bulbs for LEDs immediately. It sounds basic, but if you’re still running old incandescent bulbs, you’re basically paying for a tiny space heater that happens to give off light. It’s a waste of wattage that adds up fast.
    • Be smarter about your water heater. It’s one of the biggest energy consumers in most homes. If you can turn the temperature down a few degrees or use a timer to ensure it isn’t working overtime when you’re at work, you’ll see that impact on your bill almost instantly.

    The Bottom Line: How to Stop Paying the "Convenience Tax"

    Stop treating your energy use like a constant stream; learn to shift heavy tasks—like laundry or dishwashing—away from those expensive peak windows to keep your bills from spiking.

    Use data, not guesswork, by checking your utility’s peak hours and your own usage patterns to identify exactly when you’re leaking money.

    Small, intentional shifts in your daily routine are more effective than expensive tech upgrades when it comes to flattening your load and lowering your monthly costs.

    The Hidden Cost of Convenience

    “Most people don’t realize they’re essentially paying a ‘laziness tax’ every time they run heavy appliances during peak hours; managing your energy peaks isn’t about living in the dark, it’s about being smart enough to stop throwing money at the grid when it’s at its most expensive.”

    Tobias Nkemdirim

    Cutting Through the Noise

    Cutting Through the Noise of utility bills.

    At the end of the day, managing energy peaks isn’t about living in the dark or making massive, expensive renovations. It’s about being intentional. We’ve looked at how tracking your consumption patterns can reveal exactly where your money is bleeding out, and how shifting simple habits—like delaying a heavy laundry load or adjusting your thermostat by just a couple of degrees—can make a massive difference. It’s really just a game of strategic timing. When you stop fighting the grid and start working with it, you stop being a victim of those high-cost peak windows and start taking control of your utility bills.

    I know it can feel overwhelming, especially when you’re just trying to get through a busy week. But I promise you, sustainability shouldn’t be a luxury reserved for people with massive solar arrays and smart-home budgets. It’s found in the small, pragmatic shifts we make every single day. Every time you choose to run your dishwasher during an off-peak hour, you’re doing two things: you’re keeping more cash in your pocket and you’re reducing the strain on our aging infrastructure. Let’s stop letting convenience dictate our costs. Small changes actually add up.

    Frequently Asked Questions

    Does shifting my heavy appliance use to off-peak hours actually make a noticeable difference on my monthly bill, or is the saving too small to bother with?

    It’s definitely not too small to bother with. I’ve audited enough homes to know that if you’re running a dishwasher, dryer, or even an electric oven during peak hours, you’re essentially paying a premium for the privilege of wasting money. Shifting those heavy hitters to off-peak times can shave a significant chunk off your monthly bill. It’s one of those low-effort, high-reward moves that actually moves the needle on your expenses.

    Are there specific smart home gadgets you'd recommend that can automate this process so I don't have to manually track peak hours every day?

    Honestly, you shouldn’t have to live your life by a utility schedule. I’m all about using tech to do the heavy lifting. I’d start with smart plugs for your high-draw appliances—things like coffee makers or space heaters—so you can schedule them outside peak windows via an app. A smart thermostat is also a non-negotiable; it’ll automatically nudge your heating or cooling down when rates spike, saving you money without you even thinking about it.

    If I live in a rental and can't change my major appliances, what are the most effective "low-effort" ways to dodge those high-cost windows?

    Since you can’t swap out the fridge or the HVAC, you have to play the timing game. It’s all about shifting your “heavy hitters.” Run your dishwasher or laundry during off-peak hours—usually late at night or mid-morning—so you aren’t pulling power when rates spike. Also, grab a few heavy blackout curtains; they’re a renter’s best friend for keeping heat in or out without touching the thermostat. Small shifts, big savings.

  • Reducing Water Waste With Smart Irrigation

    Reducing Water Waste With Smart Irrigation

    I was walking through a client’s backyard last Tuesday when I saw it: a high-end, automated sprinkler system running at full blast in the middle of a heavy downpour. It was a perfect, expensive example of how we often mistake “automated” for “intelligent.” Most people think you need to drop thousands on a complex ecosystem to achieve smart irrigation, but that’s just marketing fluff designed to drain your bank account. Real efficiency isn’t about having the most expensive gadgets; it’s about making sure not a single drop of water is wasted just because a timer says it’s time to turn on.

    I’m not here to sell you on a futuristic lifestyle or a tech-heavy overhaul that requires a degree in engineering to manage. Instead, I want to show you how to implement practical, data-driven solutions that actually respect your budget and the environment. I’ll break down how to use real-world metrics to guide your setup, ensuring you get a lush garden without the unnecessary utility spikes. Let’s stop guessing and start measuring, so you can keep your costs low and your impact even lower.

    Table of Contents

    Reducing Landscape Water Waste Without Breaking the Bank

    Reducing Landscape Water Waste Without Breaking the Bank

    Most people think upgrading your yard requires a massive landscaping budget, but that’s a misconception. You don’t need a high-end professional crew to start reducing landscape water waste. I often tell my clients to start small by looking at how they actually deliver water to their plants. Swapping out old, clunky spray heads for drip irrigation efficiency can make a massive difference. Drip systems deliver water directly to the roots where it’s actually needed, rather than letting it evaporate off your driveway or sidewalk. It’s a low-cost tweak that pays for itself in a single season of lower utility bills.

    If you have a bit more room in the budget, I recommend looking into soil moisture sensor technology. I carry an infrared thermometer to find heat leaks in houses, and I use similar logic for gardens: stop guessing and start measuring. Instead of running a timer blindly, these sensors tell the system when the ground is actually thirsty. It prevents that common mistake of watering right before a rainstorm, which is essentially just throwing money into the clouds.

    How Precision Watering Systems Protect Your Wallet

    How Precision Watering Systems Protect Your Wallet

    When I’m auditing a property, I often see people running sprinklers on a fixed timer, even when it’s pouring rain outside. It’s basically like leaving the tap running while you sleep—it’s pure, unadulterated waste. This is where precision watering systems actually pay for themselves. Instead of guessing when your plants need a drink, these setups use data to make decisions. By integrating soil moisture sensor technology, the system knows exactly how much water is actually sitting in the dirt. If the ground is already saturated, the system stays off. You aren’t just saving water; you’re stopping the cycle of overwatering that kills plants and inflates your monthly utility bill.

    It’s not just about the sensors, though. Upgrading to weather-based irrigation controllers is one of the smartest moves for a budget-conscious homeowner. These devices pull real-time local weather data to adjust your schedule automatically. If a heatwave is coming, they prep the soil; if a storm rolls in, they skip the cycle. It takes the guesswork out of yard maintenance and ensures you aren’t paying for water that just ends up in the storm drain.

    Five Ways to Stop Guessing and Start Saving

    • Check your sensor placement. If your smart controller thinks it’s pouring rain because it’s sitting under a leaky gutter, your garden is going to drown and your bill will spike. Keep sensors in a clear, open spot.
    • Group your plants by thirst. I see people all the time watering a drought-tolerant succulent with the same heavy cycle as a thirsty fern. Use your smart system to create “zones” so you aren’t overwatering the easy stuff.
    • Audit your sprinkler heads. A smart controller can only do so much if your hardware is broken. If you see a head spraying directly onto the sidewalk, that’s just money being shot into the street. Fix the leak, then automate the rest.
    • Use weather data, not just timers. A basic timer is a blunt instrument. A real smart system pulls local weather data so it skips a cycle when a storm is rolling in. That’s the difference between a smart home and a predictable waste of water.
    • Monitor your usage through the app. Don’t just set it and forget it. Check the data once a week to see if your water consumption is spiking unexpectedly. It’s the easiest way to catch a broken pipe or a malfunctioning valve before it ruins your month’s budget.

    The Bottom Line on Smart Irrigation

    Efficiency isn’t a luxury; by switching to precision watering, you stop paying for water that just evaporates or runs off into the street.

    Small, data-driven adjustments to your watering schedule can significantly lower your monthly utility bills without sacrificing a healthy yard.

    Moving away from “set it and forget it” timers is the easiest way to reduce your environmental footprint while keeping your household budget in check.

    Efficiency Isn't an Extra Cost

    “Most people think sustainability is a luxury, but smart irrigation proves it’s actually a survival strategy for your bank account; it’s about stopping the mindless waste of a timer-based system and finally making your garden work for your budget, not against it.”

    Tobias Nkemdirim

    Making the Switch is Easier Than You Think

    Making the Switch is Easier Than You Think

    At the end of the day, moving toward smart irrigation isn’t about buying every expensive gadget on the market; it’s about shifting your mindset from “set it and forget it” to precision management. We’ve looked at how choosing the right hardware and optimizing your watering schedule can stop the constant cycle of wasting water and money. By implementing these small, data-driven changes, you aren’t just keeping your plants alive—you are actively plugging the leaks in your monthly budget and ensuring that every drop serves a purpose rather than just running off into the gutter.

    I know it can feel overwhelming to try and “go green” when everything seems designed to be expensive and complicated. But my experience with energy audits has taught me that the most impactful changes usually start with the simplest adjustments. You don’t need a massive budget to be a steward of your local environment; you just need to be observant. Start small, track your usage, and watch how those incremental wins add up over time. Let’s stop treating water like an infinite resource and start treating it like the valuable asset it actually is.

    Frequently Asked Questions

    Is it actually worth the upfront cost to switch from a basic timer to a smart controller, or is it just a fancy gadget?

    Look, I get it. When you’re looking at the price tag of a smart controller, it feels like paying for a luxury gadget. But as someone who audits homes for waste, I see it differently. A basic timer is “set it and forget it,” which usually means it’s watering your lawn during a rainstorm. A smart controller pays for itself by cutting that wasted runoff. It’s not a toy; it’s an investment in stopping the leak.

    Can these systems work with my existing sprinkler heads, or am I going to have to rip everything up and start over?

    The short answer is: most likely, no, you don’t need to rip everything up. If you’re looking at a smart controller, you just swap the “brain” in your garage, and your existing heads keep working fine. However, if you’re upgrading to a high-end drip system to stop evaporation, you’ll need to swap some hardware. I always tell clients: check your current setup first. Don’t scrap a working system if a simple controller upgrade does the job.

    How much maintenance do these smart systems actually need to keep them from malfunctioning and wasting water?

    Honestly, the maintenance isn’t a full-time job, but you can’t just “set it and forget it.” I usually tell clients to do a quick monthly walkthrough. Check your sensors for dirt buildup and make sure your nozzles aren’t clogged with grit. If a sensor is buried under mulch or a valve is stuck, you’re essentially paying to water your sidewalk. A little bit of seasonal cleaning keeps the tech working for you, not against your budget.

  • Reducing Water Energy Use With Smart Irrigation

    Reducing Water Energy Use With Smart Irrigation

    I was standing in a client’s backyard last Tuesday, watching a standard timer-based sprinkler head blast a perfectly clear, sunny afternoon with water. It was a total waste—not just of the water itself, but of the money leaking out of the homeowner’s wallet with every single cycle. Most people think you need a massive, high-tech overhaul to fix this, but the truth is that most “advanced” setups are just overpriced gadgets designed to make you feel tech-savvy. Real efficiency isn’t about complexity; it’s about making sure smart irrigation systems actually do the heavy lifting of reacting to the weather, rather than just running on a mindless, expensive loop.

    I’m not here to sell you on a lifestyle upgrade or some shiny, complicated ecosystem you’ll struggle to program. My goal is to show you how to pick a system that actually works for your specific space and budget. I’ll be breaking down the data on what makes a system worth your time and how to avoid the common pitfalls that turn a “smart” investment into a total energy drain. Let’s get your garden watered without breaking the bank or the planet.

    Table of Contents

    Reducing Residential Water Waste Without Breaking the Bank

    Reducing Residential Water Waste Without Breaking the Bank

    Most people think that going green requires a massive upfront investment, but that’s a misconception I see all the time in my audits. When it comes to reducing residential water waste, you don’t need to rip out your entire landscaping project. Often, the biggest leaks aren’t even physical pipes; they are the inefficient habits of watering on a fixed timer, regardless of whether it rained two hours ago or if the ground is already soaked.

    Instead of overhauling your garden, focus on smarter, smaller upgrades. One of the most effective ways to stop throwing money down the drain is through soil moisture sensor integration. By adding these to your existing setup, you ensure the water only runs when the plants actually need it. It’s a data-driven approach that removes the guesswork. If you want to level up without a total rebuild, look into weather-based irrigation controllers. These devices adjust your schedule based on real-time local data, meaning you aren’t watering through a rainstorm. It’s about working with the environment, not fighting it.

    The Real Smart Garden Automation Benefits for Your Wallet

    The Real Smart Garden Automation Benefits for Your Wallet

    When I’m out on an audit, I usually see people watering their lawns in the middle of a downpour or right before a heatwave hits. It’s pure waste. The real financial win with smart garden automation benefits isn’t just about the “cool factor”; it’s about precision. By using weather-based irrigation controllers, you’re essentially letting the local forecast do the heavy lifting for you. If the clouds are heavy and the rain is coming, the system stays off. You aren’t just saving water; you’re stopping the cycle of paying for resources that nature is providing for free.

    I’m also a huge advocate for soil moisture sensor integration. Instead of relying on a timer that runs blindly, sensors tell the system exactly how thirsty the dirt actually is. This prevents overwatering, which is a silent killer for both your plants and your bank account. When you move toward these kinds of precision irrigation techniques, you stop treating your garden like a guessing game and start treating it like a managed system. It’s the difference between throwing money at a sprinkler and actually investing in a sustainable landscape.

    5 Ways to Stop Watering Your Driveway (and Wasting Cash)

    • Go for weather-syncing controllers. There’s no point in the sprinklers running at 6 AM if my hygrometer is telling me it rained an hour ago. These systems check local forecasts and automatically skip a cycle if rain is on the way, which is a massive win for both your plants and your water bill.
    • Zone your garden like a pro. I’ve seen too many setups where a thirsty rose bush and a drought-tolerant succulent are on the same timer. By splitting your garden into zones, you can give each plant exactly what it needs without over-saturating the entire yard.
    • Invest in soil moisture sensors. This is my favorite low-cost hack. Instead of relying on a timer, these sensors tell the system when the soil is actually dry. It prevents that “hidden” waste where you’re watering ground that’s already soaked.
    • Ditch the sprayers for drip irrigation. If you’re using high-pressure sprayers, you’re basically just misting the air and losing half that water to evaporation. Drip lines deliver water directly to the roots where it actually matters, making every drop count.
    • Audit your hardware for leaks. It sounds basic, but I’ve caught plenty of “smart” systems running while a cracked pipe was dumping water into the dirt. Check your connections once a month; a smart controller can’t fix a physical leak, but it can help you spot the sudden spike in usage.

    The Bottom Line on Smart Watering

    The Bottom Line on Smart Watering.

    You don’t need a high-tech, expensive overhaul to see results; even basic smart timers can stop the cycle of overwatering and wasted utility dollars.

    Real efficiency comes from data, not just automation—using sensors to match your garden’s actual needs prevents you from literally pouring money down the drain.

    Think of smart irrigation as a long-term investment in your home’s ecosystem that pays for itself by slashing monthly water bills and keeping your plants healthier.

    The Real Cost of "Set and Forget" Watering

    “Most people think they’re saving time with automated timers, but if those timers aren’t reacting to actual soil moisture or weather data, you’re essentially just paying a premium to water your driveway and waste money on your utility bill.”

    Tobias Nkemdirim

    The Bottom Line on Smart Watering

    At the end of the day, transitioning to a smart irrigation system isn’t about buying every shiny new gadget on the market; it’s about intentionality. We’ve looked at how these systems stop the mindless cycle of overwatering, how they slash your monthly utility bills, and how automation can actually do the heavy lifting for your wallet. You don’t need a massive, high-tech overhaul to see results. By moving away from old-school timers and toward data-driven watering, you’re essentially plugging the leaks in your household budget and ensuring that not a single drop of water is wasted just because it was “convenient” to leave the tap running.

    I know that making changes to your home can feel like an uphill battle, especially when you’re trying to balance a budget. But I promise you, small, smart swaps are where the real impact happens. Whether you start with a simple soil moisture sensor or a fully integrated smart controller, you are making a choice to live more efficiently. Sustainability shouldn’t be a luxury reserved for the wealthy; it should be a standard for anyone willing to look a little closer at how they use their resources. Let’s stop letting our money—and our water—just wash away.
    Frequently Asked Questions

    How much extra will my monthly water bill actually go up once I factor in the electricity for the smart controller and sensors?

    Honestly, it’s negligible. I’ve run the numbers on a few setups, and we’re talking about pennies, not dollars. Most smart controllers and sensors pull so little power they’re practically invisible on your utility bill. You might see a few extra cents a month—maybe enough to buy a single piece of gum—but the water you save by not over-watering will dwarf that cost every single time. It’s a tiny trade-off for massive efficiency.

    Can I set up a basic smart irrigation system myself, or am I going to need to hire a professional to avoid leaking pipes and wasted water?

    You don’t need to be a plumber to do this. If you’re just swapping a standard tap timer for a smart one, it’s a simple DIY job—literally plug and play. However, if you’re digging up the yard to lay new drip lines, that’s where it gets tricky. If you aren’t confident with pipe fittings, hire a pro for the installation. A single leaky joint can waste more water than the smart system ever saves.

    Are these systems actually reliable if my Wi-Fi signal is weak in the backyard, or will they just stop working when I need them most?

    That’s a fair concern. I’ve seen plenty of “smart” tech turn into expensive paperweights because the signal couldn’t reach the garden. If your Wi-Fi is spotty, don’t just buy the first thing you see. Look for systems that use LoRaWAN or dedicated radio frequencies instead of just standard Wi-Fi; they handle distance much better. Alternatively, a simple Wi-Fi extender or a mesh node near the window can bridge that gap and keep your setup reliable.

  • Installing Solar Panels on Roofs

    Installing Solar Panels on Roofs

    I spent most of my twenties shivering in a rental apartment that felt more like a walk-in freezer than a home, watching my utility bills climb every single winter. It’s why I hate the way people talk about renewable energy; it’s often framed as this elite, high-tech luxury that only wealthy homeowners can afford. There is this massive, annoying myth that installing solar panels on roofs is a “all or nothing” financial gamble that requires a massive upfront investment or a specialized degree to understand. Honestly, that’s just nonsense designed to keep people from taking control of their own power.

    I’m not here to sell you on some shiny, futuristic dream or push expensive, unnecessary hardware. My goal is to strip away the marketing fluff and give you the actual, data-driven reality of how to make this work for your specific budget. I’ll show you how to evaluate your setup, avoid the common installation traps, and ensure you aren’t just throwing money at the sun. Let’s get into the practical steps to making your home efficient without breaking the bank.

    Table of Contents

    Cutting Rooftop Solar Installation Costs Without Sacrificing Quality

    Cutting Rooftop Solar Installation Costs Without Sacrificing Quality

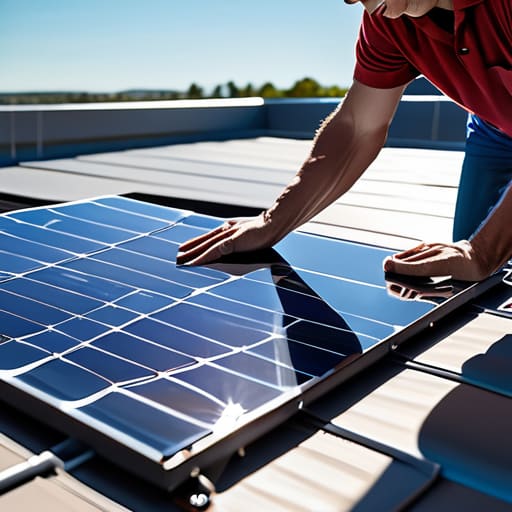
    When I’m auditing a home, I often see people getting overwhelmed by the upfront quote. They think they have to choose between the cheapest gear that breaks in three years or a premium system that costs a small fortune. That’s a false choice. To keep your rooftop solar installation costs manageable, you need to focus on the math, not just the brand name. Instead of buying the most expensive panels on the market, look for a balance between price and photovoltaic cell efficiency. You don’t need a space-grade setup; you just need components that provide a solid return on investment within a reasonable timeframe.

    Another way to save without cutting corners is to be smart about the hardware. I always tell my clients to look closely at the solar panel mounting systems being proposed. Sometimes, a slightly more complex installation adds unnecessary labor costs. By optimizing your residential solar panel orientation during the planning phase, you can often use fewer panels to achieve the same energy output. It’s about working with the layout of your roof rather than fighting against it. Small, calculated decisions here prevent you from overspending on hardware you don’t actually need.

    Maximizing Solar Energy Yield on a Tight Budget

    Maximizing solar energy yield on a tight budget.

    Once you’ve managed the initial rooftop solar installation costs, the next step is making sure every single photon actually does some work. I’ve seen too many people install a system only to realize they’ve placed it in a spot that gets shaded by a neighbor’s chimney or a single overgrown tree. To truly focus on maximizing solar energy yield, you need to get obsessed with your residential solar panel orientation. It’s not just about pointing them toward the sun; it’s about calculating the specific angle where they’ll catch the most consistent light throughout the changing seasons.

    I also tell my clients to look closely at their hardware. You don’t always need the most expensive, top-tier tech, but you do need to understand photovoltaic cell efficiency relative to your local climate. If you live in a place with frequent overcast skies, investing a bit more in cells that perform better in low light is a smarter move than buying cheap panels that only work in direct, blazing heat. It’s about being strategic with your setup so you aren’t just sitting there watching the meter spin.

    Small Moves That Actually Move the Needle on Your Solar ROI

    • Don’t just buy the biggest panels you can find; match your array size to your actual consumption habits so you aren’t paying for excess capacity that just sits idle on your roof.
    • Prioritize your roof’s orientation before you even look at a quote—getting that tilt and direction right is the difference between a system that barely breaks even and one that actually pays for itself.
    • Keep your panels clean, and I don’t mean a professional deep clean every month, but a simple rinse once in a while to prevent dust and grime from choking your energy yield.
    • Check your mounting hardware twice; I’ve seen too many people skimp on the mounting system to save a few bucks, only to end up with leaks that cost ten times more to fix later.
    • Use a smart monitor to track your production in real-time, because you can’t fix a drop in efficiency if you don’t actually know when it’s happening.

    The Bottom Line: Making Solar Work for You

    Don’t chase the most expensive setup; focus on high-quality, mid-range components and smart installation to get the best bang for your buck.

    Efficiency isn’t just about the panels; keep them clean and positioned correctly so you aren’t losing free energy to dust or bad angles.

    Treat solar as a long-term hedge against rising utility bills, not just a trendy gadget—the goal is to stop the bleeding on your monthly expenses.

    ## The Real Value of Rooftop Solar

    “Most people look at solar panels as a luxury expense for tech enthusiasts, but I see them as a tool for energy independence; it’s not about having the most expensive setup on the block, it’s about making sure every square inch of your roof is actually working to keep your monthly bills from climbing.”

    Tobias Nkemdirim

    The Bottom Line on Going Solar

    The Bottom Line on Going Solar.

    Look, we’ve covered a lot of ground, from trimming those initial installation costs to making sure every bit of sunlight hitting your roof actually turns into savings. The takeaway is pretty simple: you don’t need to go into massive debt or buy the most expensive, high-end setup on the market to make a dent in your utility bills. It’s about being strategic—choosing quality components that won’t fail in three years, optimizing your panel placement, and not letting unnecessary markups eat your budget alive. When you focus on efficiency rather than just flashiness, you turn your roof into a genuine asset instead of just another home improvement expense.

    At the end of the day, I really believe that sustainability shouldn’t be a luxury reserved for people with massive disposable income. We have to stop viewing green energy as this “all or nothing” lifestyle and start seeing it as a series of smart, incremental wins. Every kilowatt you generate yourself is money that stays in your pocket and carbon that stays out of the atmosphere. It might feel like a big jump to start, but once you see that first lower energy bill, you’ll realize that making the switch was one of the best investments you ever made for your wallet and the planet.

    Frequently Asked Questions

    How do I know if my roof is actually structurally sound enough to hold panels without a massive renovation?

    Look, I’ve seen too many people jump into solar only to realize their rafters can’t handle the load. You don’t necessarily need a massive renovation, but you can’t just wing it. First, check for sagging or visible cracks in your attic. If you can, grab a flashlight and look for water stains—moisture is a silent killer for structural integrity. Honestly, the smartest move is paying a pro for a quick structural assessment before you buy a single panel.

    Is it worth it to go solar if I'm renting, or am I just paying for someone else's property value?

    Honestly, if you’re renting, traditional rooftop solar usually isn’t worth the headache—you’re essentially paying to upgrade a landlord’s asset. But don’t write off solar entirely. Look into “community solar” programs or even portable, plug-in solar kits if your balcony allows it. You can still slash your personal energy footprint and offset costs without needing to own the shingles. It’s about finding the workaround that actually hits your wallet, not theirs.

    What’s the real-world math on how long it takes for the energy savings to actually pay off the initial setup cost?

    Look, I get it—the upfront cost is the biggest hurdle. I usually see a “break-even” point between five and nine years for most residential setups. It depends on your local sun exposure and how much electricity you’re currently buying from the grid. I always tell my clients: don’t just look at the sticker price; look at the monthly savings. If you’re cutting a $150 utility bill down to $20, that math adds up fast.

  • Ways to Lower Water Heating Costs

    Ways to Lower Water Heating Costs

    I still remember standing in my old rental apartment, shivering in a drafty kitchen while staring at a utility bill that made absolutely no sense. I was heating water to a temperature that felt like it could scald skin, all because I thought “hotter is better.” It’s a massive, expensive myth that we need high-tech, smart-home gadgets to fix our efficiency issues. The truth is, most people are just throwing money down the drain through sheer negligence and outdated settings. Lowering water heating costs isn’t about buying a solar-powered boiler or a fancy new system; it’s about identifying the silent energy leaks in your current setup that you’re likely ignoring right now.

    I’m not here to sell you on expensive renovations or complicated tech that requires a PhD to operate. My goal is to give you the straight talk based on the data I see during my audits and the practical fixes I use in my own life. I’m going to show you how to audit your own water usage and make a few low-effort, high-impact adjustments that actually move the needle on your monthly bill. Let’s stop paying for heat we don’t even need.

    Table of Contents

    The Hidden Savings of Setting Optimal Water Temperature

    The Hidden Savings of Setting Optimal Water Temperature

    Most people leave their water heater set to a default temperature that is way higher than necessary. I often see tanks cranked up to 140°F (60°C), which is basically just a recipe for scalding skin and massive energy waste. By setting optimal water temperature to around 120°F (49°C), you’re not just making your showers safer; you’re preventing the heating element from working overtime just to maintain a level of heat you don’t even need.

    It’s a small adjustment, but the data doesn’t lie. When you lower that setting, you reduce the frequency of the heating cycles, which directly impacts your monthly utility bill. Think of it like leaving your car engine idling at a red light—it’s just burning fuel for no reason. If you want to dive deeper into energy efficient water heating solutions, this is the absolute easiest starting point. It requires zero upfront investment and takes about thirty seconds to do, yet it’s one of the most effective ways to stop bleeding money through your pipes.

    Insulating Water Heater Tank to Stop Wasting Heat

    Insulating Water Heater Tank to Stop Wasting Heat

    If you haven’t touched your water heater in years, it’s likely sitting there losing heat to the surrounding air every single second. I see this constantly during my audits: a perfectly functional unit that’s essentially acting like a giant, expensive radiator for no reason. Insulating your water heater tank is one of those low-effort, high-reward moves that actually makes sense for your wallet. If you have an older model that feels warm to the touch, you’re literally watching money evaporate into the room.

    Grab a pre-cut insulation blanket—they’re cheap and easy to wrap around the unit—and you’ll create a thermal barrier that keeps that hard-earned heat where it belongs. It’s not just about the tank, though; I always tell my clients to check the pipes leading out of it, too. While some people jump straight to expensive upgrades like looking into tankless water heater benefits, a simple insulation kit is a much more accessible way to start reducing household hot water consumption and energy waste. It’s practical, it’s fast, and it stops the constant cycle of your heater working overtime just to fight ambient temperature loss.

    5 Quick Wins to Stop Bleeding Money on Hot Water

    • Check your faucets for leaks. I’ve seen way too many people paying to heat water that’s literally just trickling down the drain because of a worn-out washer. It’s a small fix, but those drips add up to a lot of wasted thermal energy.
    • Switch to low-flow showerheads. You don’t need to sacrifice your comfort; modern low-flow heads feel great, but they use significantly less water. Less water means your heater doesn’t have to work nearly as hard to keep up.
    • Only run the dishwasher and washing machine when they’re actually full. It sounds obvious, but I see people running half-empty loads all the time. If you’re using the “eco” setting and cold water for laundry, you’re saving a massive amount of energy on the heating side.
    • Install aerators on your kitchen and bathroom taps. These little gadgets mix air into the water stream, giving you the same pressure while using much less volume. It’s a cheap, five-minute DIY job that makes a measurable difference in your daily usage.
    • Time your heavy water usage. If you have a tank-style heater, try to avoid running multiple high-draw appliances (like the dishwasher and the shower) at the exact same time. Spreading out your usage helps prevent the heater from constantly cycling on and off to keep up with demand.

    Quick Wins for Your Water Bill

    Dial back your water heater temperature to around 120°F (49°C); it’s plenty hot for most tasks and stops you from paying to heat water you don’t even need.

    Wrap your tank in an insulation blanket to keep the heat where it belongs—inside the tank—instead of letting it bleed into your utility room.

    Focus on small, low-cost adjustments rather than expensive overhauls to see a real difference in your monthly energy spend.

    ## The Cost of Convenience

    “We’ve been conditioned to think that scalding hot water is the standard, but most of us are just paying a premium to heat water we never actually use. Efficiency isn’t about sacrifice; it’s about stopping the bleed of money through pipes we haven’t even bothered to check.”

    Tobias Nkemdirim

    Making It Count

    Making It Count with water heating efficiency.

    At the end of the day, slashing your water heating costs isn’t about a single, massive renovation; it’s about the cumulative effect of these small, logical adjustments. By dialing back your water heater temperature to a sensible level and wrapping your tank in a bit of insulation, you’re effectively plugging the leaks in your wallet. I’ve seen it firsthand during my audits—people are often surprised by how much energy they were bleeding out simply because they were following outdated habits or ignoring a poorly insulated tank. These steps are low-effort but high-reward, ensuring that you aren’t paying for heat that just disappears into the air before it ever reaches your shower.

    I know that living sustainably can sometimes feel like an expensive luxury reserved for people with huge budgets and solar arrays, but that’s just not true. Real efficiency starts with the decisions you make in your own utility closet. Every degree you shave off and every inch of insulation you add is a win for your bank account and a step toward a smaller footprint. You don’t need to be a professional auditor to take control of your home’s energy use; you just need to be observant. Let’s stop letting our hard-earned money evaporate through inefficient systems and start making our homes work for us.

    Frequently Asked Questions

    Is it actually safe to turn my water heater down to 120°F, or am I risking bacteria like Legionella?

    Look, I get the anxiety. I’ve stood in front of plenty of tanks with my thermometer, wondering the same thing. Here’s the data: 120°F (49°C) is the sweet spot for most homes. It’s hot enough to kill bacteria if your tank is well-maintained, but low enough to stop wasting energy. If you’re worried about Legionella, just make sure your system is clean and avoid letting water sit stagnant in unused pipes. Safety and efficiency can coexist.

    How much can I really expect to save on my monthly bill just by adding an insulation blanket to an older tank?

    Honestly, it depends on how old your tank is, but if you’re dealing with an uninsulated model, you’re basically paying to heat the air around the tank. I’ve seen people shave about 7% to 15% off their water heating costs just by slapping on a thermal blanket. It’s not going to make you rich, but for a few bucks upfront, it’s one of those low-effort wins that actually shows up on your utility statement.

    If I have a tankless water heater, do these same insulation and temperature tricks still apply?

    Short answer: mostly no. Since there’s no massive tank sitting there losing heat to the room, insulating a “tank” isn’t an option. However, the temperature logic still holds—don’t set it higher than you actually need. For tankless units, focus your energy on the pipes instead. If those hot water lines aren’t insulated, you’re basically paying to heat your walls before the water even reaches your tap. Check those connections.