Category: Home

  • Understanding Energy Star Ratings on Appliances

    Understanding Energy Star Ratings on Appliances

    I still remember sitting in my old rental apartment, shivering under three blankets because the heater was running constantly but the room stayed ice-cold. I’d stare at my utility bill, feeling like I was being robbed, while trying to figure out if my aging fridge was actually the culprit. Most people think you need a massive renovation budget to fix these issues, but that’s a lie. The truth is, a lot of the money you’re bleeding every month could be saved just by paying closer attention to the energy star rating on the appliances you’re already buying. It isn’t some elite, luxury concept; it’s a basic tool for anyone tired of throwing money down the drain.

    I’m not here to sell you on expensive, high-tech gadgets or lifestyle trends that don’t actually move the needle. My goal is to strip away the marketing fluff and show you exactly how to use these ratings to make smart, budget-friendly decisions. I’ll walk you through what these numbers actually mean for your wallet and how to spot the real value so you can stop overpaying for power. This is about practical efficiency, not perfection.

    Table of Contents

    Energy Star vs Standard Appliances the Real Cost Difference

    Energy Star vs Standard Appliances the Real Cost Difference

    When I’m auditing a home, I often see people staring at a price tag for a new fridge and thinking, “I’ll just go with the cheaper model; it does the same thing.” That’s a trap. While a standard appliance might save you a hundred bucks upfront, the math changes the moment you plug it in. I’ve seen too many households stuck in a cycle of high utility costs simply because they ignored the long-term math. Comparing energy star vs standard appliances isn’t just about being “green”—it’s about calculating the total cost of ownership over five or ten years.

    The real magic happens when you look at the cumulative impact. By choosing certified models, you aren’t just buying a machine; you’re investing in reducing household electricity bills every single month. I always tell my clients to look past the sticker price and focus on the operational drain. A standard dishwasher might be easy on your wallet today, but a certified one pays for itself through consistent energy efficient appliances cost savings. It’s about making sure your money stays in your pocket rather than being bled out through an inefficient compressor.

    Understanding Yellow Energy Guides to Save Money Instantly

    Understanding Yellow Energy Guides to Save Money Instantly

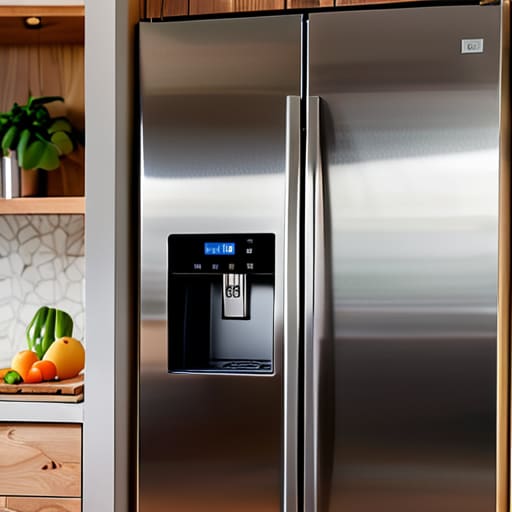
    When you’re standing in the appliance aisle, staring at a wall of shiny refrigerators, don’t just look at the price tag. That’s where most people trip up. You need to look for those bright yellow stickers. Understanding yellow energy guides is probably the fastest way to see the long-term reality of what you’re buying. These labels aren’t just random decorations; they provide a direct comparison of how much electricity a unit will pull over an entire year.

    I always tell my clients to ignore the upfront sticker shock for a second and look at the estimated annual operating cost. It’s easy to get seduced by a cheaper, non-rated model, but that “saving” is an illusion. By comparing the yearly cost listed on the guide, you can actually calculate your potential reducing household electricity bills impact before you even swipe your card. It’s about seeing the math clearly: a slightly more expensive machine today often pays for itself in less than two years through lower monthly utility costs. Don’t let a low purchase price trick you into a high-cost lifestyle.

    5 Ways to Use Energy Star Ratings Without Getting Scammed

    • Don’t just look for the logo; check the specific estimated annual operating cost on the tag. A high Energy Star rating is great, but if the machine uses a massive amount of power to begin with, you’re still going to see a spike in your monthly bills.
    • Prioritize your “heavy lifters” first. If you’re on a budget, don’t stress about an Energy Star toaster; put your money toward an Energy Star-rated refrigerator or washing machine, as these are the appliances that run constantly and eat up the most kilowatt-hours.
    • Watch out for “efficiency creep” in newer models. Sometimes a brand-new appliance has a high rating but uses more water or specialized detergents to achieve it. Always cross-reference the energy rating with the actual resource consumption to make sure the math actually works in your favor.
    • Use the rating to negotiate your lifestyle, not just your purchases. If you can’t afford to replace your old fridge with an Energy Star model right now, use the data from the ratings to see exactly how much energy your current “energy hog” is wasting so you can prioritize your next upgrade.
    • Look beyond the sticker and check the “Smart” features. Many Energy Star appliances now come with connectivity options that allow you to monitor usage via an app. For me, being able to see real-time data on my phone is the best way to ensure that “efficient” machine is actually behaving efficiently.

    The Bottom Line: Making the Smart Choice

    Don’t just look at the sticker price; an Energy Star appliance might cost more upfront, but it pays for itself by slashing your monthly utility bills.

    Use the yellow EnergyGuide labels to compare the actual running costs of different models so you aren’t blindsided by high electricity usage later.

    Prioritize efficiency over convenience—investing in better-rated tech is one of the simplest ways to live sustainably without needing a massive budget.

    ## The Real Math Behind the Sticker

    “An Energy Star rating isn’t just a marketing badge; it’s a roadmap for your wallet. When I’m auditing a home, I don’t care how shiny the new fridge looks—I care about how much of your hard-earned money is leaking out of it every single month through inefficient power draw.”

    Tobias Nkemdirim

    The Bottom Line on Efficiency

    The Bottom Line on Efficiency savings guide.

    At the end of the day, navigating Energy Star ratings and those yellow window guides isn’t about memorizing technical jargon; it’s about making informed decisions for your bank account. We’ve looked at how the upfront cost of a certified appliance pays for itself through lower monthly bills and how those little yellow labels provide a direct roadmap to your long-term savings. I’ve seen too many people overlook these details only to realize months later that they’ve been essentially subsidizing energy waste. Don’t fall into that trap. Whether you are replacing an old fridge or shopping for a new washing machine, look for the data before you reach for your wallet.

    I know that living sustainably can feel like a luxury reserved for people with massive budgets, but that couldn’t be further from the truth. Efficiency is actually the ultimate equalizer. By choosing smarter, more efficient tech, you aren’t just lowering your carbon footprint; you are reclaiming control over your monthly expenses. Every time you opt for an Energy Star-rated device, you are making a small, pragmatic choice that adds up to a massive impact over time. Let’s stop letting energy leaks and inefficient machines dictate our finances. Start small, shop smart, and keep your money where it belongs.

    Frequently Asked Questions

    Does an Energy Star rating actually mean the appliance will last longer, or is it just about the electricity it uses?

    That’s a common misconception, but here’s the reality: an Energy Star rating is strictly about efficiency, not durability. It tells you how little electricity or water the machine uses, but it doesn’t guarantee the motor won’t die in five years. However, in my experience auditing homes, Energy Star appliances are often built to slightly higher engineering standards to meet those efficiency benchmarks. They might last longer, but don’t buy them expecting a lifetime of service.

    Is it worth paying the extra upfront cost for an Energy Star model if I'm only planning to live in this apartment for a year or two?

    Honestly? If you’re truly only staying for a year or two, the math gets tricky. You have to calculate if the monthly savings actually offset that higher sticker price before you move. However, I usually suggest looking at the used market first. You can often snag a high-rated model for cheap from someone moving. If you’re buying new, don’t overspend on premium tech just for the label if the ROI won’t hit before you leave.

    Can I use Energy Star products to significantly lower my carbon footprint, or is the impact too small to matter?

    Look, I get the skepticism. It feels like a drop in the ocean when you consider global emissions. But here’s the reality: your home is a collection of constant, small drains. When you swap out an old, inefficient fridge or HVAC for an Energy Star model, you aren’t just making a symbolic gesture; you’re cutting a continuous stream of waste. Those cumulative savings—both in carbon and your actual bank account—add up to a massive, tangible impact.

  • Using Radiator Reflectors to Improve Heat Distribution

    Using Radiator Reflectors to Improve Heat Distribution

    I still remember the winter I spent in my first rental; I’d sit there, shivering in three layers of wool, watching the radiator hiss away while the wall behind it soaked up every bit of heat like a sponge. It felt like I was literally burning money just to keep the masonry warm. People will try to tell you that you need a full-scale retrofit or a massive solar investment to fix a drafty room, but that’s just expensive nonsense. Most of the time, you’re just losing heat to the wrong places, and a simple set of radiator reflectors can stop that thermal leak before it even starts.

    I’m not here to sell you on some high-tech, overpriced gadget that promises the moon. My goal is to give you the straight-up truth based on what actually works when you’re looking at a real utility bill. I’ll show you exactly how to use these foils to redirect heat back into your living space, which ones are worth the buy, and how to install them without making a mess. Let’s get your home warm without draining your bank account.

    Table of Contents

    The Magic of Radiator Heat Reflection Technology

    The Magic of Radiator Heat Reflection Technology.

    Think about how a radiator actually works. Most people assume the heat is just flowing freely into the room, but if your radiator is sitting against an external wall, a massive chunk of that thermal energy is actually being sucked straight into the masonry. It’s basically heating the outdoors instead of your living room. This is where radiator heat reflection technology steps in to change the math. Instead of letting that warmth vanish into the bricks, a specialized layer of foil acts like a mirror for heat, bouncing the infrared radiation back into your living space.

    When I’m out on an audit, this is one of the first things I look for. By installing energy saving radiator foil, you aren’t just adding a layer of material; you’re creating a thermal barrier that forces the heat to stay where you actually need it. It’s a simple physics hack that helps maximize heat distribution throughout the room. You aren’t changing the radiator itself, just ensuring that every bit of energy you’ve paid for actually contributes to your comfort rather than just warming up the neighbor’s garden.

    Maximize Heat Distribution Without Spending a Fortune

    Maximize Heat Distribution Without Spending a Fortune

    The real trick isn’t just about blocking the cold; it’s about redirection. When I’m auditing a room, I often see radiators positioned against external walls. Without a barrier, that heat is essentially a gift to the outdoors, soaking straight into the masonry. By installing energy saving radiator foil, you’re essentially creating a thermal mirror. Instead of the warmth bleeding into the brickwork, it bounces back into the living space. This is one of those low-effort, high-reward home energy efficiency tips that actually moves the needle on your comfort levels.

    You don’t need a massive renovation budget to see the difference. If you want to maximize heat distribution, focus on the areas where your radiators sit furthest from the center of the room. It’s about making sure every BTU you pay for is actually working to warm your skin, not your foundation. I always tell my clients: stop treating your heating system like a blunt instrument and start treating it like a precision tool. A bit of thermal insulation behind radiators ensures the warmth stays where you can actually feel it.

    5 Pro Moves to Get the Most Out of Your Reflectors

    • Stop the thermal leak: Always place your reflectors on the wall directly behind the radiator. If there’s even a small gap between the panel and the wall, you’re letting heat escape into the masonry instead of pushing it back into the room.
    • Check your spacing: Don’t let furniture crowd your radiators. If you’ve installed reflectors but then shove a heavy sofa right against the unit, you’re just creating a pocket of trapped, wasted heat. Keep the airflow clear.
    • Match the material to the room: For a quick DIY fix, even a heavy-duty foil can work, but if you want something that actually lasts, invest in purpose-built reflective boards. They’re sturdier and won’t peel or look like a science experiment after six months.
    • Use my infrared trick: Grab a handheld thermal scanner—or just use your hand if you’re feeling old school—to check the wall temperature behind the radiator. If the wall feels warm, your reflector isn’t doing its job or isn’t positioned correctly.
    • Don’t forget the corners: If you have radiators tucked into alcoves or corners, reflectors are even more critical there. These are prime spots for heat to get “lost” in the architecture, so make sure those surfaces are shielded.

    The Bottom Line: Small Fix, Big Impact

    Stop letting your heat escape into the masonry; a simple reflector acts as a thermal barrier that directs warmth back into your living space where it actually matters.

    You don’t need a massive renovation to see results—installing these is a low-cost, DIY win that pays for itself through lower monthly utility bills.

    Think of it as a strategic upgrade for your home’s efficiency: it’s one of the easiest ways to stop wasting energy just because it’s convenient to leave the heating cranked up.

    The Real Cost of a Cold Wall

    “I’ve spent too many audits watching heat literally soak into brickwork instead of warming a room. Using a reflector isn’t just a ‘home hack’; it’s about refusing to let your utility budget disappear into a wall that doesn’t even care if you’re cold.”

    Tobias Nkemdirim

    Stop Leaking Heat and Start Saving

    Stop Leaking Heat and Start Saving.

    At the end of the day, radiator reflectors are one of those rare, low-effort wins in the world of home efficiency. We’ve looked at how they work by bouncing thermal radiation back into your living space rather than letting it soak into a cold, exterior wall. By strategically placing these foils behind your heaters and ensuring your radiators aren’t blocked by heavy furniture, you’re essentially plugging a hole in your wallet. It isn’t about complex engineering or expensive smart-home ecosystems; it’s about the simple, data-backed reality that redirecting heat is much smarter than just generating more of it.

    I know it can feel overwhelming to try and “go green” or lower your bills when the cost of living is constantly climbing. But sustainability shouldn’t be a luxury reserved for people with massive renovation budgets. My goal is to show you that you can take control of your environment through small, intentional shifts. Installing a few reflectors might seem minor, but it’s a step toward a home that works for you, not against you. Let’s stop accepting high bills as an inevitability and start making small, smart changes that actually make a difference for our pockets and the planet.

    Frequently Asked Questions

    Will these reflectors actually work if my radiators are electric rather than water-based?

    Short answer: Yes, they still work. The physics doesn’t change just because you’re using a heating element instead of hot water. Whether it’s a water-based radiator or an electric panel, the goal is the same: stop that heat from being absorbed by a cold, exterior wall. If you’re using electric heaters, you’re likely paying a premium for that power, so catching those escaping rays and bouncing them back into the room is even more critical.

    Are there any safety risks, like fire hazards, if I place these too close to the heating elements?

    It’s a fair question, and honestly, it’s the one I get most when I’m doing site audits. Generally, no—they aren’t a fire hazard if you use the right kind. Most reflectors are made of foil-faced foam or specialized heat-resistant materials designed specifically for this. Just avoid anything DIY with flammable materials like cardboard. Stick to purpose-built products, keep them a tiny bit of breathing room from the actual metal, and you’re golden.

    Do I need to replace my current radiator covers, or can I just stick these directly onto the wall behind the unit?

    You definitely don’t need to replace your covers. In fact, most of the radiator covers out there are actually working against you by trapping heat. I usually recommend sticking the reflective panels directly to the wall behind the unit. It’s much more efficient because there’s nothing blocking the heat from bouncing back into the room. It’s a quick, low-cost fix that actually does the job without the unnecessary expense of new furniture.

  • Improving the Efficiency of Your Water Heater

    Improving the Efficiency of Your Water Heater

    I still remember the winter I spent in that drafty rental apartment, shivering through morning showers because the water temperature was a constant, expensive gamble. I’d stand there, staring at the tap, wondering why I was paying a premium for lukewarm water that felt more like a compromise than a comfort. Most people think upgrading your water heaters requires a massive, soul-crushing investment or a complete home overhaul, but that’s just marketing noise designed to keep you spending. The truth is, most of us are just leaking money through outdated tech and poor settings without even realizing it.

    I’m not here to sell you on some futuristic, high-tech gadget that costs more than your monthly rent. Instead, I want to show you how to audit your setup and make the smart, tactical shifts that actually move the needle on your utility bills. My goal is to give you a practical roadmap for choosing and maintaining equipment that works for your budget and the planet. We’re going to cut through the jargon and focus on what actually matters: keeping your hot water reliable while slashing your energy waste.

    Table of Contents

    Tankless vs Traditional Water Heaters Which Saves More

    Tankless vs Traditional Water Heaters Which Saves More

    When I’m auditing a home, the debate between tankless vs traditional water heaters is usually where the biggest energy leaks hide. Traditional tanks are essentially giant, insulated thermoses that spend 24/7 fighting to keep a massive volume of water hot, even when you’re sleeping or at work. It’s a constant cycle of heating and cooling that feels incredibly wasteful to me. If you’re looking at reducing hot water energy consumption, that standby heat loss is your biggest enemy.

    On the flip side, tankless units only fire up when you actually turn on the tap. They’re much more compact and definitely more efficient for the long haul, but they aren’t a magic bullet. The upfront cost is higher, and you have to be diligent about water heater maintenance tips—like descaling the unit—to ensure it doesn’t lose its edge. Whether you go with electric vs gas water heaters, the real winner is whichever one fits your actual usage patterns without leaving energy on the table. It’s not about having the most expensive tech; it’s about making sure you aren’t paying to heat water you aren’t even using.

    Electric vs Gas Water Heaters Finding Your Best Fit

    Electric vs Gas Water Heaters Finding Your Best Fit

    When I’m auditing a home, the debate between electric vs gas water heaters usually comes down to two things: your local utility rates and your existing infrastructure. Gas is often the go-to for people looking for lower upfront costs and faster recovery times, especially in colder climates. However, if you’re looking at long-term sustainability, electric options—specifically those paired with solar or renewable grids—are much cleaner. It’s not just about the fuel source, though; it’s about how much you’re paying to move that heat from the source to your shower.

    If you’re leaning toward gas, you have to be mindful of ventilation and the potential for carbon monoxide leaks. On the flip side, electric units are generally easier to install in tight spaces, but they can put a heavy strain on your electrical panel if you aren’t careful. Ultimately, finding the right balance involves looking at your monthly usage patterns. If you’re a high-volume user, the efficiency gains from a high-end electric model might actually outweigh the initial savings of a cheap gas unit by significantly reducing hot water energy consumption over the next decade.

    5 Low-Cost Moves to Stop Your Water Heater From Bleeding Cash

    • Dial it back. Most manufacturers set your temperature at 140°F (60°C), but honestly, that’s overkill for most households. I always recommend dropping it to 120°F (49°C). You’ll still get plenty of hot water, but you’ll stop paying to heat water you don’t actually need.
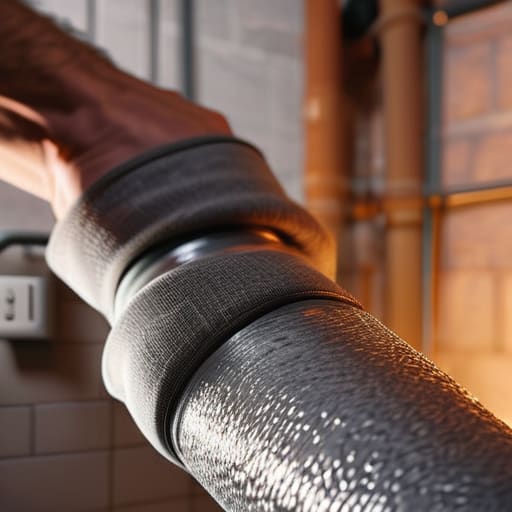
    • Insulate the “hot spots.” If you have an older tank in a basement or garage, it’s likely losing heat through the sides. Grab a cheap insulating blanket for the tank and some foam sleeves for the first few feet of hot water pipes. It’s a tiny investment that pays for itself in a few months.
    • Stop the “phantom” heat loss. If you aren’t using hot water for several hours—like overnight—your heater is still working hard just to keep that tank scalding. If you’re on a budget, look into a timer or just get used to the idea of a slightly shorter shower to minimize the load.
    • Check your pressure. If your shower feels like a power washer but you’re using half the water, your pressure might be too high. High pressure forces your heater to work harder and wastes water. Installing a low-flow showerhead is a two-minute fix that actually makes a measurable difference in your monthly bill.
    • Flush the sediment. Over time, minerals build up at the bottom of your tank, creating a layer of “gunk” that acts as an insulator between the heating element and the water. This makes your heater work twice as hard to do half the job. A quick annual flush keeps the system efficient and prevents expensive repairs down the road.

    The Bottom Line: Making the Right Call

    Don’t just look at the sticker price; a cheaper unit that leaks heat or uses inefficient heating elements will cost you way more in utility bills over the next five years.

    Match your tech to your lifestyle—if you’re a one-person household or rarely use hot water, a tankless system is a massive win for both your wallet and the planet.

    Maintenance is the most underrated efficiency hack; even the best water heater becomes a money pit if you ignore sediment buildup or failing components.

    ## The Real Cost of Hot Water

    “Most people look at the sticker price of a new water heater and think they’re done, but if you aren’t looking at the efficiency rating, you’re basically signing a blank check to your utility company every single month.”

    Tobias Nkemdirim

    Making the Right Call

    Making the Right Call for water heaters.

    At the end of the day, choosing a water heater isn’t about picking the flashiest model on the market; it’s about matching the tech to your specific lifestyle and budget. We’ve looked at how tankless systems can slash your footprint through on-demand heating, and how the choice between gas and electric often comes down to your local utility rates and existing infrastructure. Whether you go for the high upfront investment of a high-efficiency unit or stick with a more traditional setup, the goal remains the same: minimizing heat loss and maximizing every cent you spend on utilities. Don’t feel pressured to overhaul everything overnight, but do keep a close eye on your energy consumption patterns to see where your real opportunities for savings lie.

    I know that thinking about appliances can feel overwhelming and, frankly, a bit dry, but these small shifts in how we heat our water are where real change happens. You don’t need a massive renovation or a huge bank account to start living more sustainably. It’s about making intentional, data-backed decisions that serve both your wallet and the planet. Every time you choose efficiency over convenience, you’re proving that a low-impact lifestyle is actually achievable for the rest of us. Let’s stop letting our money—and our energy—just vanish into thin air.

    Frequently Asked Questions

    How often do I actually need to flush my tank to keep it running efficiently?

    I’d say once a year is the sweet spot. I usually check my clients’ tanks during audits, and sediment buildup is almost always the culprit behind rising energy bills. If you live in an area with hard water, you might need to do it every six months. Think of it like clearing a clogged filter; if you let that sludge settle at the bottom, your heater has to work twice as hard just to reach the right temperature.

    Is it worth the upfront cost to switch to a heat pump water heater if I'm on a tight budget?

    If you’re on a tight budget, the short answer is: yes, but don’t do it today. Heat pump water heaters are incredible—they can slash your energy use by up to 70%—but that high upfront cost is a real barrier. Instead of draining your savings, look for local rebates or federal tax credits first. If you can bridge that price gap with incentives, the monthly savings will pay you back long before a traditional unit does.

    How can I tell if my current water heater is leaking heat or just getting old and inefficient?

    I usually pull out my infrared thermometer for this. If you see a massive temperature drop right at the tank’s surface compared to the pipes, you’re likely losing heat through poor insulation. But if the unit is just taking longer to recover after a shower, or if you’re seeing sediment buildup in the tank, it’s probably just old and struggling. Check for any dampness around the base first—a slow leak is a silent budget killer.

  • The Benefits of Upgrading Your Window Glazing

    The Benefits of Upgrading Your Window Glazing

    I still remember sitting in my old rental apartment three years ago, wrapped in two blankets and shivering, while my heating bill climbed higher than my actual rent. I pulled out my infrared thermometer—the one thing that actually told me the truth—and pointed it at the glass. The reading was brutal; the heat was just bleeding straight through the panes. Most people will tell you that fixing this requires a massive, soul-crushing renovation or a complete window replacement that costs more than a used car. They’re wrong. You don’t need to tear down your walls to fix poor window glazing; you just need to stop letting your hard-earned money escape into the atmosphere.

    I’m not here to sell you on expensive, high-tech gimmicks that promise the world but deliver nothing. My goal is to give you the straightforward, data-backed truth about how different glazing methods actually perform in a real home. We’re going to look at the practical ways to seal those thermal leaks and optimize your windows without draining your savings. I’ll show you how to make your space actually comfortable, because living sustainably shouldn’t be a luxury reserved only for the wealthy.

    Table of Contents

    Spotting Glazing Seal Failure Signs Before They Drain Your Wallet

    Spotting Glazing Seal Failure Signs Before They Drain Your Wallet

    I usually pull out my infrared thermometer when I walk into a room that feels inexplicably drafty. If I see a massive temperature drop right at the glass, it’s a dead giveaway. One of the most obvious glazing seal failure signs is seeing condensation or fogging trapped between the panes. This isn’t just a smudge on the surface; it means the airtight seal has broken, and the insulating gas—usually argon—has leaked out. Once that happens, your windows are basically just single-pane glass, and you’re paying to heat the street outside.

    Keep an eye out for “rainbow” patterns or cloudy patches that won’t wipe away. This is a sign that the moisture is interacting with the coatings inside the unit. When the seal fails, you lose the specific low-e coating benefits designed to reflect heat back into your home. If you notice your living room getting uncomfortably hot in the afternoon or freezing by 8 PM, your windows aren’t doing their job anymore. Catching these leaks early can save you from a massive spike in your monthly utility bill.

    Why Argon Gas Filled Windows Are a Smart Budget Move

    Why Argon Gas Filled Windows Are a Smart Budget Move

    When I’m doing an audit, I usually see people focusing on the wrong things—like expensive smart thermostats—while ignoring the actual thermal envelope. If you’re looking at replacement glass units, you need to talk about what’s happening inside the panes. Argon gas filled windows are a game changer because argon is denser than air. It acts as a much better insulator, significantly slowing down the transfer of heat through the window. Instead of air circulating and carrying warmth from your living room straight to the sidewalk, that heavy gas stays put, keeping the thermal barrier intact.

    It’s not just about the gas, though; it’s about the math behind the glass. When you combine argon with a high-quality low-e coating, you’re essentially creating a two-pronged defense against your utility bills. The coating reflects infrared energy, meaning you can manage both u-value and solar heat gain much more effectively. You get the benefit of letting natural light in during the day without turning your apartment into a greenhouse, and you keep the heat trapped inside during a freeze. It’s a practical, high-impact upgrade that actually pays for itself.

    5 Low-Cost Glazing Hacks to Lock in the Warmth

    • Grab your infrared thermometer and check the edges of your panes; if you see a sudden temperature drop at the frame, your seals are likely shot and need immediate attention.

    • Don’t overlook secondary glazing; if you can’t afford full window replacements, adding a clear acrylic sheet over your existing panes creates a cheap, effective thermal barrier.
    • Check your weatherstripping every season, because even the best glazing won’t help if cold air is whistling through gaps in the window sash.
    • Opt for Low-E coatings if you’re upgrading; it’s a small upfront cost that pays for itself by reflecting heat back into the room during winter and keeping it out during summer.
    • Use heavy, thermal-lined curtains to supplement your glazing, especially at night, to create an extra layer of insulation that stops heat from radiating out through the glass.

    The Bottom Line on Better Glazing

    Don’t wait for a massive bill to act; if you see fogging or condensation between your panes, your seal is gone and you’re literally paying to heat the street.

    Upgrading to argon-filled glass isn’t a luxury—it’s one of the most cost-effective ways to trap heat inside your home without a full-scale renovation.

    Think of glazing as a long-term investment in your monthly cash flow; the upfront cost pays for itself by cutting the constant drain of energy waste.

    The Cost of Doing Nothing

    “I’ve spent too many audits pointing my infrared thermometer at single-pane glass and watching the temperature drop like a stone. Every degree of heat you lose through a bad seal is basically just handing your hard-earned cash to the utility company.”

    Tobias Nkemdirim

    Making the Upgrade Count

    Making the Upgrade Count with window repairs.

    At the end of the day, fixing your windows isn’t about chasing some high-tech architectural trend; it’s about practicality. We’ve looked at how to spot those telltale signs of seal failure before they turn into massive utility bills, and why opting for argon gas is one of the most cost-effective ways to boost your thermal performance. Whether you’re looking at simple films or a more permanent glazing upgrade, the goal is the same: stop letting your hard-earned money leak out through the glass. If you take the time to audit your windows now, you’re essentially locking in lower energy costs for years to come.

    I know that home improvements can feel overwhelming, especially when you’re trying to balance a budget. But I’ve seen firsthand how these small, strategic shifts transform a house from a drafty, expensive shell into a truly efficient home. You don’t need a massive renovation budget to make a meaningful difference for your wallet and the planet. Start with what you can afford, focus on the high-impact areas, and remember that every degree of heat you keep inside is a win. Let’s stop settling for wasted energy and start building homes that actually work for us.

    Frequently Asked Questions

    Is it actually worth the cost to reglaze my existing windows, or should I just save up for full replacements?

    Look, I’ve run my infrared thermometer over enough drafty frames to know there’s no one-size-fits-all answer. If your window frames are structurally sound and it’s just the seal that’s failed, reglazing is a massive win for your wallet. It’s a fraction of the cost of full replacements and stops that immediate heat bleed. But if the frames are rotting or warped, you’re just throwing good money after bad. Save for the replacement if the bones are gone.

    Can I DIY some of these glazing fixes myself, or am I going to end up making the drafts worse?

    Look, I’ll be real with you: some things are definitely DIY-friendly, while others are a recipe for disaster. If you’re just applying new weatherstripping or replacing worn-out caulk around the frame, go for it. That’s easy money saved. But if the seal inside the glass unit has failed—that foggy, condensation look—don’t try to fix that yourself. You can’t “patch” gas. In that case, you’re better off replacing the pane rather than making a mess.

    How much of a difference will new glazing actually make on my monthly heating bill during the peak of winter?

    Look, I can’t give you a single magic number because every house is different, but I’ve seen the data. If you’re moving from single-pane or cracked double-glazing to high-quality, gas-filled units, you’re looking at a significant dent in your heating costs. In the dead of winter, it’s common to see a 15% to 30% drop in thermal loss through windows. It’s basically the difference between fighting your heater all night and actually feeling cozy.

  • Transitioning to Led Lighting in Every Room

    Transitioning to Led Lighting in Every Room

    I still remember sitting in my old rental apartment, shivering through a February freeze because the heating bill was becoming a second mortgage. I spent half my time staring at the ceiling, wondering why my tiny living room felt like a cave, only to realize my old incandescent bulbs were basically miniature space heaters working in reverse—bleeding energy into heat instead of light. People love to make a massive deal out of “smart home integration” or high-end designer fixtures, but they ignore the absolute basics. If you aren’t looking at your led lighting setup, you are essentially leaving money on the table every single month for no reason at all.

    I’m not here to sell you on some overpriced, “connected” gadget that needs a Wi-Fi signal just to turn on. My goal is to give you the straightforward truth about which bulbs actually last and how to pick the right color temperature without breaking the bank. I’ll show you how to audit your own space and make the switch in a way that actually lowers your utility bills and cuts your carbon footprint. No hype, no fluff—just practical ways to make your home more efficient.

    Table of Contents

    The Real Cost a Brutal Led vs Incandescent Comparison

    The Real Cost a Brutal Led vs Incandescent Comparison

    I recently ran a quick audit on an old apartment that was still running original incandescent bulbs. When you look at a direct led vs incandescent comparison, the math is actually pretty staggering. An old-school bulb is essentially a heater that happens to give off a little light; about 90% of the energy it pulls from your outlet is wasted as heat. I caught this last week using my infrared thermometer—the bulb housing was scorching, while the actual light output was minimal.

    If you switch to modern energy efficient lighting solutions, you aren’t just helping the planet; you’re stopping a literal leak in your bank account. For example, a standard 60-watt incandescent bulb can be replaced by an LED that pulls only about 8 or 9 watts to produce the same amount of light. When you factor in the massive difference in the lifespan of led bulbs—which can last decades compared to a few months for old filaments—the upfront cost pays for itself almost immediately. It’s not just about being “green”; it’s about refusing to pay for wasted energy.

    Dont Get Fooled Lumens vs Watts Explained for Real Savings

    Dont Get Fooled Lumens vs Watts Explained for Real Savings

    When I’m out on an audit, I often see people staring at a box of bulbs like they’re trying to solve a math equation. The confusion usually stems from one thing: we’ve been conditioned to shop by wattage. For decades, a “60-watt bulb” was the standard for brightness. But wattage is actually just a measure of how much electricity a bulb gulps down, not how much light it actually puts out. If you want to stop overpaying, you need to master lumens vs watts explained in a way that actually makes sense for your wallet.

    Lumens are what you actually care about; they represent the volume of light hitting your eyes. A modern LED might only pull 9 watts of power, but if it pumps out 800 lumens, it’ll brighten your kitchen just as well as an old 60-watt incandescent ever could. When you’re browsing the aisles, ignore the wattage and look directly at the lumen count to ensure you’re getting the brightness you need. It’s the simplest way to ensure you aren’t buying underpowered bulbs that leave you fumbling in the dark.

    5 Low-Cost Moves to Optimize Your Lighting Setup

    • Stop buying based on wattage. I see people all the time looking for “60W bulbs” when they should be looking for the lumen count. If you want the same brightness as an old 60W incandescent, look for roughly 800 lumens. Buying by wattage is a legacy habit that’ll cost you extra money for no reason.
    • Check your color temperature before you buy. There’s nothing worse than installing “daylight” LEDs in a cozy living room and making it feel like a sterile hospital ward. For relaxing spaces, stick to “Warm White” (around 2700K); save the “Cool White” for your workspace or kitchen where you actually need to see clearly.
    • Use dimmers to squeeze out even more savings. If your fixtures are compatible, installing a dimmer switch allows you to dial back the intensity when you don’t need full brightness. It’s a tiny adjustment that prevents unnecessary energy draw and extends the lifespan of the bulbs.
    • Group your lighting by usage. Don’t just leave a high-output LED array running in a room you only use for ten minutes. If you’re auditing a home, I always suggest putting high-traffic areas on motion sensors or smart plugs so the lights aren’t burning energy just because someone forgot to flip a switch.
    • Look for the “Energy Star” rating on the box. It’s easy to get distracted by the cheapest bulb on the shelf, but the ultra-cheap, off-brand LEDs often have terrible efficiency and burn out way too fast. Spending an extra couple of bucks on a certified bulb means better light quality and a much longer replacement cycle.

    The Bottom Line on Making the Switch

    Stop looking at wattage as a measure of brightness; focus on lumens to ensure you’re actually getting the light you need without the wasted energy.

    The upfront cost of an LED bulb is a one-time investment that pays for itself almost immediately through lower monthly utility bills.

    You don’t need a complete home overhaul to see results—start by swapping the bulbs in the rooms you use most to see the biggest impact on your wallet.

    The Hidden Tax of Old Bulbs

    “Every time you leave an old incandescent bulb burning, you aren’t just lighting a room; you’re essentially paying a premium tax for heat you never even asked for. Swapping to LEDs isn’t just an ‘eco-friendly’ move—it’s a common-sense way to stop bleeding money through your light sockets.”

    Tobias Nkemdirim

    Cutting the Cord on Wasted Energy

    Cutting the Cord on Wasted Energy.

    At the end of the day, switching to LEDs isn’t just about some abstract environmental goal; it’s about practical, common-sense math. We’ve looked at how much money you’re essentially throwing out the window by clinging to old incandescent bulbs, and we’ve cleared up the confusion between wattage and actual brightness. Remember, you aren’t paying for the “power” a bulb draws, you are paying for the light it actually produces. When you stop obsessing over watts and start looking at lumens, you realize that upgrading your lighting is one of the highest-return investments you can make in your home. It’s a low-effort, high-impact move that pays for itself almost immediately.

    I know that sometimes, making sustainable choices feels like it’s reserved for people with massive bank accounts or solar-paneled mansions. But my experience auditing homes has taught me that real change happens in the small, overlooked corners—like the light fixture in your hallway or the lamp on your desk. You don’t need to overhaul your entire life to make a dent in your utility bill or your carbon footprint. Small, smart changes are how we build a more efficient future. So, grab a pack of LEDs next time you’re at the store; it’s a simple way to stop wasting energy just because it’s convenient.

    Frequently Asked Questions

    Are LEDs actually better for the environment if they're harder to recycle than old bulbs?

    It’s a fair question, and honestly, it’s one I’ve debated while looking at my own tech scraps. Yes, the circuitry in an LED is more complex than a simple filament, which makes recycling a bit trickier. But when you look at the math, the win is still for the LED. The massive reduction in energy production—and the carbon footprint that comes with it—far outweighs the recycling hurdle. It’s about the bigger picture.

    Will switching to LEDs make my home feel "cold" or clinical compared to the warm glow of old incandescent lights?

    That’s a fair concern, and honestly, it’s one of the biggest misconceptions I hear during audits. If you grab a cheap, “daylight” bulb, your living room will definitely feel like a hospital ward. But it’s not the tech; it’s the color temperature. Look for “Warm White” (around 2700K) on the box. It mimics that old-school amber glow perfectly. You get the efficiency without losing the cozy vibe of your home.

    Do I need to replace every single bulb in my house at once to see a real difference in my utility bill?

    Absolutely not. You don’t need to drop a massive chunk of cash on a single shopping trip to see results. I always tell my clients to start with the “high-traffic” areas—the lights you leave on for hours, like the kitchen or living room. Even swapping out five or six bulbs in those spots will show up on your next bill. Think of it as a rolling upgrade; tackle one room at a time.

  • Using Smart Plugs to Manage Standby Power

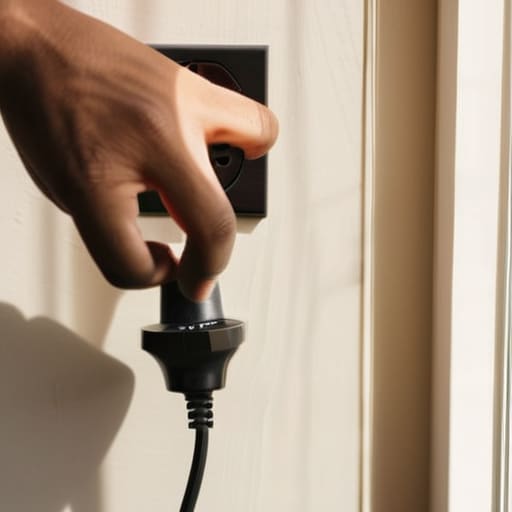
    Using Smart Plugs to Manage Standby Power

    I still remember sitting in my old rental apartment, staring at a utility bill that felt like a personal insult. It was freezing, I was running the heater constantly, and I had this nagging feeling that I was paying for power that wasn’t even doing any work. I used to think that “going green” required a massive solar array or a complete home overhaul, but honestly, most of that high-tech hype is just a way to drain your wallet. The truth is, you don’t need a smart home revolution to see a difference; you just need to stop the vampire draw from devices that stay plugged in but do nothing. That’s where smart plugs actually become useful tools rather than just expensive gadgets.

    I’m not here to sell you on a futuristic lifestyle or some overcomplicated automation setup that requires a degree to program. My goal is to give you the no-nonsense reality of using these devices to actually shave money off your monthly costs. I’ll show you which ones are worth your time, how to use them to kill phantom energy loads, and how to make them work for your budget, not against it.

    Table of Contents

    Eliminating Vampire Power Usage Once and for All

    Eliminating Vampire Power Usage Once and For All

    We’ve all been there: you walk into a room and see that little red standby light glowing on the TV or the microwave clock staring you down. It feels harmless, but those idle devices are essentially silent thieves. I call it “vampire power,” and it’s one of the easiest ways to bleed money without even realizing it. When you’re constantly plugged in, your electronics are still drawing a trickle of current, even when they’re technically “off.” By eliminating vampire power usage through scheduled cut-offs, you stop paying for energy that serves absolutely no purpose.

    This is where I lean heavily on home automation energy efficiency to do the heavy lifting. Instead of manually unplugging your coffee maker or gaming console every night, you can set a routine that kills the power entirely during your sleeping hours. I’ve seen firsthand how much of a difference this makes when auditing small apartments; it’s those tiny, invisible drains that add up to a massive chunk of your monthly statement. It’s not about being obsessive; it’s about making sure every cent you spend on utilities is actually going toward something you’re using.

    Reducing Electricity Bills With Smart Plugs Without High Costs

    Reducing Electricity Bills With Smart Plugs Without High Costs

    Most people think home automation is a luxury for people with huge bank accounts and custom-built mansions, but that’s a total misconception. For me, it’s about the math. If you aren’t using an app to monitor your daily usage, you’re essentially flying blind. By using smart plug energy consumption tracking, you can actually see exactly which appliances are the biggest culprits during peak hours. I usually start with the coffee maker or the old printer in the corner; seeing those real-time numbers on my phone is a massive wake-up call.

    You don’t need to overhaul your entire house to see a difference in your monthly statement. I always tell my clients that reducing electricity bills with smart plugs is most effective when you target high-draw items that don’t need to be active 24/7. Set a schedule so your entertainment center or desk setup completely cuts power at midnight. It’s a small, low-cost tweak that prevents your money from literally evaporating into the air, and it’s one of the easiest ways to start your journey toward a more efficient home.

    5 Practical Ways to Put Your Smart Plugs to Work

    • Set automated schedules for your coffee maker or toaster so they aren’t drawing idle power in the early hours when you’re still asleep.
    • Use “Away Mode” on your smart plug apps to ensure your entertainment center and gaming consoles are completely cut off the moment you leave for work.
    • Group your devices into “scenes” so you can kill the power to your entire home office with a single tap on your phone instead of hunting for five different switches.
    • Connect your seasonal decor or holiday lights to a timer; there’s no reason to let them run until 3 AM when nobody is watching.
    • Monitor your real-time energy usage through the plug’s app to identify which specific appliances are your biggest energy hogs before you decide to replace them.

    The Bottom Line on Smart Plugs

    The Bottom Line on Smart Plugs.

    You don’t need a high-tech smart home setup to see results; just targeting your biggest “vampire” offenders—like your coffee maker or old gaming console—is enough to start seeing lower bills.

    Think of smart plugs as a way to automate your discipline; they’re perfect for those times you forget to unplug things before heading out or going to bed.

    Treat this as a long-term investment in your wallet rather than a gadget purchase; the money you save on monthly utility costs will eventually pay for the plugs themselves.

    The Real Cost of Idle Tech

    “I’ve spent too many hours pointing my infrared thermometer at walls and outlets, seeing exactly where energy is bleeding away. Most people think they’re saving money by turning things ‘off,’ but if they’re still plugged in, they’re still paying. A smart plug isn’t just a gadget; it’s a way to finally take back control from the devices that are quietly draining your bank account while you sleep.”

    Tobias Nkemdirim

    The Bottom Line on Smart Plugs

    At the end of the day, smart plugs aren’t just some fancy gadget for tech enthusiasts; they are practical tools for anyone tired of seeing their money vanish into thin air. We’ve looked at how they can kill off those silent vampire loads that drain your meter overnight and how you can automate your heavy hitters to ensure you’re only paying for the power you actually use. By taking control of your outlets, you’re effectively plugging the leaks in your monthly budget. It’s about being intentional with your hardware rather than just letting it run on autopilot.

    I know that making changes to your home can feel overwhelming, especially when you’re working with a tight budget. But remember, sustainability isn’t an all-or-nothing game. You don’t need to rewire your entire house or install a high-end smart home ecosystem to make a difference. Start with one or two plugs on your most wasteful devices and watch the data. Small, calculated shifts in habit lead to massive changes in both your bank account and your carbon footprint. Let’s stop letting convenience dictate our costs and start making our homes work for us.

    Frequently Asked Questions

    Are smart plugs actually worth the initial cost if I'm only using them for a few devices?

    Honestly, it depends on what you’re plugging in. If you’re just using one for a lamp, don’t bother—the math won’t add up. But if you target high-draw “vampire” culprits like your coffee maker, gaming setup, or old TV, they pay for themselves surprisingly fast. I always look at the wattage. If a device pulls power even when “off,” a smart plug is a tiny investment that stops your money from leaking out of the wall.

    Will using these plugs interfere with my existing home Wi-Fi or smart home setup?

    Honestly, I get the hesitation. I’ve seen people try to build a smart home only to have their Netflix buffering every time they plug something in. The short answer is: no, they shouldn’t interfere, provided you aren’t overloading a single cheap router. Most smart plugs use 2.4GHz Wi-Fi, which is standard. Just don’t buy a dozen ultra-cheap, off-brand ones all at once; that’s how you clutter your network and cause lag.

    Can I use smart plugs for high-wattage appliances like space heaters or coffee makers without risking a fire?

    Short answer: Be extremely careful. Most standard smart plugs are rated for about 10 to 15 amps, which isn’t enough for a space heater or a heavy-duty coffee maker. If you plug a high-wattage device into a cheap plug, it can overheat and become a serious fire hazard. Always check the wattage rating on the plug itself. If it’s not specifically rated for high-draw appliances, don’t risk it. Stick to lights and electronics.

  • An Introduction to Residential Heat Pumps

    An Introduction to Residential Heat Pumps

    I still remember sitting in my old rental apartment, wrapped in three layers of blankets, watching the radiator hiss while the thermostat climbed and my bank account plummeted. It felt like a losing battle against physics. Most people will tell you that switching to heat pumps is some futuristic, luxury-only upgrade that requires a massive renovation and a mountain of cash, but that’s just nonsense. The industry loves to make sustainability feel like an elite club, making it seem like you need to be a millionaire to stop burning money just to stay warm.

    I’m not here to sell you on a lifestyle trend or some glossy brochure version of “going green.” My goal is to give you the raw, data-driven reality of how heat pumps actually perform in a real home. I’ll break down the efficiency numbers, the actual upfront costs, and the small, smart adjustments you can make to ensure you aren’t just throwing money at a broken system. We’re going to focus on practical efficiency that keeps your bills low and your home comfortable, without the unnecessary hype.

    Table of Contents

    Decarbonizing Home Heating Without Breaking Your Bank Account

    Decarbonizing Home Heating Without Breaking Your Bank Account

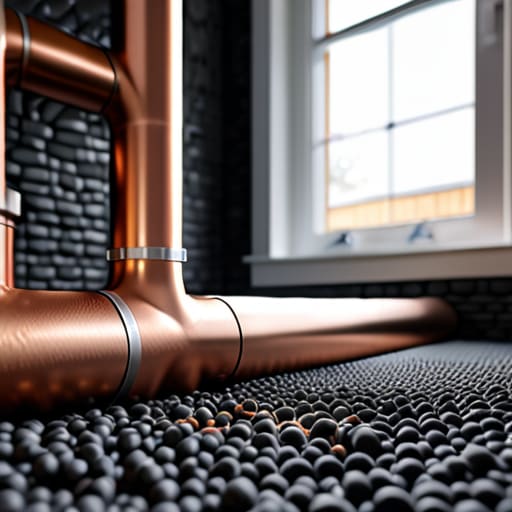
    Decarbonizing home heating often feels like a luxury reserved for people with massive savings, but that’s a misconception I see all the time. When I’m auditing a space, I don’t just look at the hardware; I look at the long-term math. While the upfront heat pump installation costs can definitely cause some sticker shock, you have to weigh that against the years of lower utility bills and reduced carbon output. It isn’t just about buying a new machine; it’s about shifting away from fossil fuels toward low carbon heating solutions that actually make sense for your monthly budget.

    The real trick is knowing where to start so you aren’t throwing money at a problem you haven’t fully diagnosed. Before you commit to a major system, check your home’s insulation and draftiness—I usually grab my infrared thermometer for this part. If your house is leaking heat like a sieve, even the most advanced tech won’t save you much money. By focusing on energy efficiency ratings and sealing those gaps first, you ensure that whatever renewable system you eventually install is actually working for you, not just fighting against a drafty window.

    Navigating Heat Pump Installation Costs for Real Savings

    When I’m out on an audit, the first question I usually get isn’t about the tech itself, but the sticker shock. Let’s be real: heat pump installation costs can feel intimidating when you’re looking at the upfront numbers. It’s easy to get overwhelmed by the gap between what you pay today and what you’ll save over the next decade. The trick is to stop looking at it as a single expense and start viewing it as a long-term hedge against rising fossil fuel prices.

    You also need to decide between air source vs ground source systems, which is a huge factor in your initial budget. Air source is generally the more accessible route for most renters or homeowners looking for a practical upgrade, while ground source is a heavy-duty investment for those with the space and capital to go all-in. I always tell my clients to check for local government rebates and tax credits before signing anything. These incentives are designed specifically to make low carbon heating solutions more attainable for the average person, effectively bridging that gap between “expensive luxury” and “smart home essential.”

    5 Practical Ways to Get the Most Out of Your Heat Pump

    • Don’t treat it like an old furnace; heat pumps work best with steady, consistent temperatures rather than blasting high heat on and off, which actually wastes energy.
    • Size matters more than you think—get a professional to calculate your home’s actual heat load so you don’t end up with an oversized unit that cycles too frequently.
    • Keep your filters clean like your life depends on it; a clogged filter forces the system to work harder, driving up your electricity bill and shortening the unit’s lifespan.
    • Use your thermostat’s smart features to your advantage, but don’t get too aggressive with “away” modes—extreme temperature swings can actually make it harder for the pump to recover.
    • Seal those sneaky air leaks first; I always grab my infrared thermometer to check windows and doors before a client installs a pump, because there’s no point heating air that’s just leaking outside.

    The Bottom Line on Going Heat Pump

    Don’t let the upfront price tag scare you off; when you factor in the long-term drop in your monthly utility bills and available tax credits, the math actually starts to make sense.

    Efficiency isn’t just about the hardware you buy, it’s about how you use it—pairing a heat pump with basic insulation and weather stripping is what actually locks those savings in.

    Stop viewing sustainability as a luxury for the wealthy; switching to electric heating is one of the most practical ways to take control of your home’s running costs and your carbon footprint at the same time.

    The Reality of the Switch

    “A heat pump isn’t just a luxury gadget for eco-conscious homeowners; it’s a practical tool for anyone tired of watching their money vanish into thin air every time the temperature drops.”

    Tobias Nkemdirim

    The Bottom Line on Heat Pumps

    The Bottom Line on Heat Pumps.

    At the end of the day, making the switch to a heat pump isn’t just about chasing some futuristic green trend; it’s about practical, long-term financial sense. We’ve looked at how you can decarbonize your space without needing a massive inheritance, and how to navigate those initial installation costs by looking at the total lifecycle savings rather than just the sticker price. By auditing your home for leaks first and then choosing the right system, you’re essentially plugging the holes in your wallet. It’s a process of smart, incremental upgrades that eventually turn a drafty, expensive house into a streamlined, efficient home.

    I know it can feel overwhelming to rethink how your entire house breathes and stays warm, but remember that sustainability shouldn’t be a luxury reserved for the wealthy. You don’t have to overhaul everything overnight to make a difference. Every bit of efficiency you claw back from the grid is a win for your bank account and a win for the planet. Let’s stop accepting high bills and wasted energy as just “the cost of living.” It is time to take control of your energy footprint and build a home that works for you, not against you.

    Frequently Asked Questions

    Will a heat pump actually keep my house warm during those brutal sub-zero winter nights?

    I get this question all the time, usually while I’m pointing my infrared thermometer at a drafty window. The short answer? Yes, but with a caveat. Modern cold-climate heat pumps are beasts; they’re designed to pull heat from freezing air even when it’s well below zero. However, if your home is a sieve for heat, you’re fighting a losing battle. Fix your insulation first, then the heat pump will actually do its job.

    How much of a dent will this actually make in my monthly utility bills compared to my old gas furnace?

    Honestly, it depends on your local gas prices, but for most people I audit, the drop is significant. If you’re switching from an old, inefficient gas furnace, you’re looking at potentially cutting your heating costs by 30% to 50%. I always tell my clients: don’t just look at the sticker price of the unit; look at the monthly delta. That’s where the real win is. It’s about stopping the bleed in your monthly budget.

    Do I need to redo my entire electrical panel or upgrade my ductwork to make a heat pump work?

    Not necessarily, but you should definitely check both. I usually grab my infrared thermometer during audits to see if old ductwork is leaking air like a sieve; if it is, your new heat pump will struggle. As for the electrical panel, it depends on your current setup and the unit’s requirements. You might need a simple breaker upgrade rather than a full panel overhaul, but a quick pro inspection is non-negotiable.

  • Simple Methods for Draft Proofing Your Home

    Simple Methods for Draft Proofing Your Home

    I still remember sitting in my old rental apartment three years ago, wrapped in two blankets and shivering, watching my heating bill climb higher every single month. I’d crank the thermostat up, only to feel that sharp, biting chill cutting right through the floorboards. It wasn’t a broken heater; it was a house that was essentially a sieve. I spent hours tracking those invisible currents with my infrared thermometer, realizing that most people think you need a massive renovation budget to fix a cold home. That’s a lie. The truth is, most of your warmth is simply escaping through tiny gaps, and neglecting basic draft proofing is basically like trying to fill a bucket with a hole in the bottom.

    I’m not here to sell you on expensive, high-tech window replacements or complicated architectural overhauls that most of us can’t afford. Instead, I’m going to show you how to tackle this with practical, low-cost solutions that actually work. We’re going to look at the specific spots where your money is leaking out and how to seal them up for good. My goal is to give you a straightforward roadmap for effective draft proofing so you can finally stop overpaying for heat and start feeling comfortable in your own space.

    Table of Contents

    Preventing Cold Air Infiltration Without a Massive Budget

    Preventing Cold Air Infiltration Without a Massive Budget

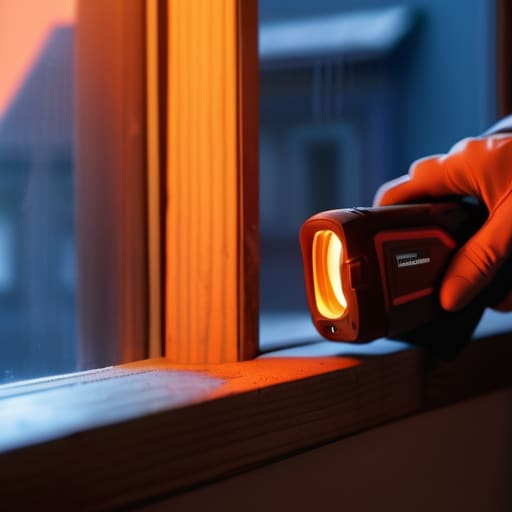
    You don’t need a contractor or a massive renovation budget to start preventing cold air infiltration. Most of the heat loss I see during my audits isn’t coming from missing wall insulation; it’s coming from the gaps you can actually feel. I usually start by grabbing my infrared thermometer and scanning the perimeter of your doors and windows. If you see those sudden temperature drops, you’ve found your problem. A simple roll of adhesive foam or a basic set of weatherstripping techniques can seal those gaps for a few dollars, stopping the breeze before it even enters the room.

    For those on a tight budget, even “low-tech” fixes are incredibly effective for reducing heating bills. If you have old, single-pane windows, try using thermal film kits—they’re cheap, easy to apply, and create an extra layer of air that acts as a buffer. It’s not a permanent architectural fix, but it’s a smart way to achieve home comfort optimization without needing to replace your entire window unit. Small, incremental changes are always better than doing nothing at all.

    Simple Weatherstripping Techniques to Keep the Warmth in

    Simple Weatherstripping Techniques to Keep the Warmth in.

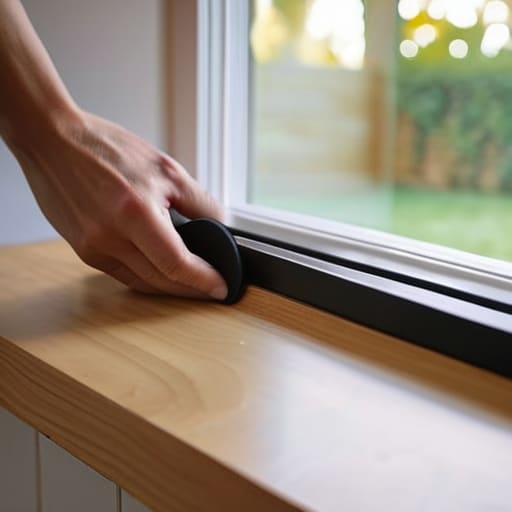
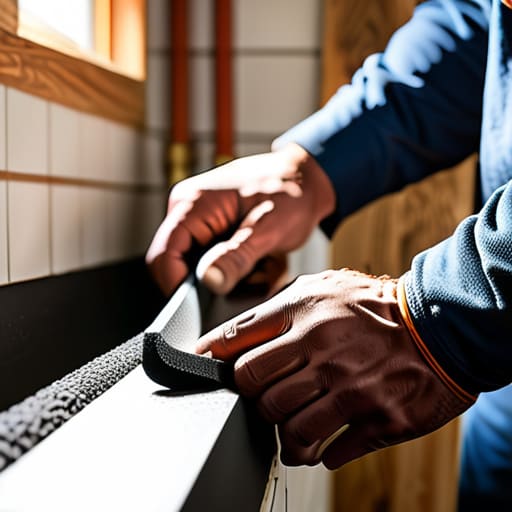
    If you aren’t ready to replace your entire window frame, don’t sweat it. Most of the heat loss I see during my audits happens in those tiny, invisible gaps around door frames and sashes. One of my favorite low-cost weatherstripping techniques involves using adhesive foam tape. It’s cheap, easy to apply, and you can pick it up at any hardware store. Just make sure you clean the surface thoroughly first; if there’s dust on the frame, that tape isn’t going to stick, and you’ll be right back to shivering in a few weeks.

    For the bottom of your doors, skip the expensive custom sweeps and grab a weighted fabric draft stopper. I call them “door snakes.” They’re incredibly effective at preventing cold air infiltration from the hallway or the porch. If you’re feeling crafty, you can even sew one yourself using scrap fabric. It’s a small, practical tweak, but when you combine it with some basic insulation for windows and doors, you’ll notice a massive difference in how your space actually holds onto the warmth you’re paying for.

    My Go-To Checklist for Finding and Fixing the Invisible Leaks

    • Grab your infrared thermometer and scan your baseboards and window frames; if you see a sudden temperature drop on the screen, you’ve found a direct path for cold air to enter.
    • Don’t ignore the door sweep—if you can feel a breeze hitting your ankles when you walk through the front door, a simple adhesive foam strip or a weighted draft stopper will pay for itself in a single winter.
    • Check your electrical outlets on exterior walls, as these are notorious for letting air seep through the wall cavity; installing inexpensive foam gaskets behind the faceplates is a quick, low-effort win.
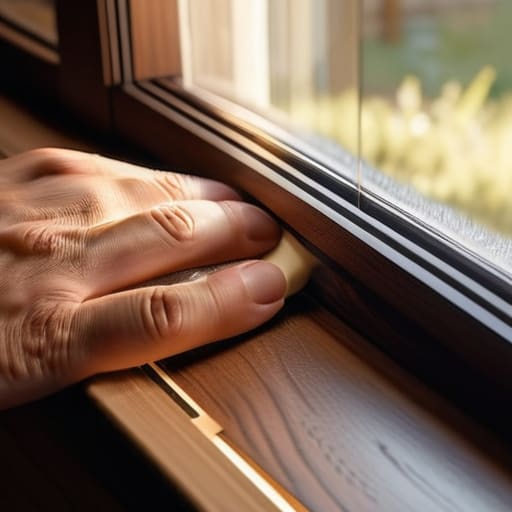
    • Inspect the gaps where your window sashes meet; if they feel loose, a bit of clear weatherstripping can seal the deal without ruining the look of your frames.
    • Take a look at your ceiling—if you have recessed lighting, make sure they are airtight, otherwise, you’re basically paying to heat the space inside your attic instead of your living room.

    The Bottom Line on Sealing Your Space

    You don’t need a massive renovation budget to see results; start with cheap, tactile fixes like weatherstripping and door snakes to stop the immediate energy bleed.

    Use a handheld thermometer or even just your hands to find the specific “hot spots” where air is moving, so you aren’t wasting money on fixes that don’t actually matter.

    Think of draft proofing as a long-term investment in your bank account—every crack you seal is money you stop handing over to your utility provider every single month.

    The Real Cost of a Draft

    I’ve spent enough time pointing my infrared thermometer at window frames to know that a draft isn’t just a bit of cold air—it’s a literal hole in your bank account. You aren’t just losing heat; you’re paying to heat the entire neighborhood through those tiny cracks.

    Tobias Nkemdirim

    Stop the Leak, Save Your Cash

    Stop the Leak, Save Your Cash.

    At the end of the day, draft proofing isn’t about a massive, expensive renovation; it’s about being smart with what you already have. We’ve covered how a few rolls of weatherstripping, some basic sealant, and a bit of strategic heavy curtain usage can transform a drafty room into a cozy sanctuary. I’ve seen firsthand with my infrared thermometer how a single unsealed window frame can act like a constant drain on your bank account. By tackling these small, manageable leaks, you aren’t just fixing a house—you are systematically reclaiming your monthly budget from the cold air that’s trying to steal it.

    I know it can feel overwhelming when you look at the rising cost of everything, but don’t let that stop you from making a move. You don’t need a massive solar array or a smart home system to make a difference. Every crack you seal and every window you weatherstrip is a win for your wallet and a win for the planet. Sustainability shouldn’t be a luxury reserved for the wealthy; it’s about making intentional, practical choices in the spaces we live. Start small, stay consistent, and watch how much more control you have over your home and your footprint.

    Frequently Asked Questions

    How do I know if a draft is coming from a window seal or just poor insulation in the wall?

    The easiest way to tell is to grab your infrared thermometer. I always do this during audits. Point it at the window frame; if you see a sharp temperature drop right along the seal, it’s a draft issue you can fix with weatherstripping. But if the entire wall feels cold and uniform, that’s a lack of insulation. One is a leak you can plug; the other is a structural gap that needs more serious attention.

    Are there any draft-proofing methods that won't permanently damage older, vintage window frames?

    I get this question a lot, especially from people restoring old houses. You don’t want to ruin beautiful, vintage woodwork with aggressive adhesives. Skip the heavy-duty tapes. Instead, use removable silicone weatherstripping or even temporary “draft snakes” for the sills. If you need something more secure, look into V-seal strips; they’re low-profile and much gentler on old wood. It’s all about finding that balance between keeping the heat in and respecting the original architecture.

    Is it actually worth the cost of materials to seal up a door that I only use once or twice a day?

    Honestly? Yes. I’ve seen too many people overlook those “low-traffic” doors, but that’s exactly where the heat escapes. If that door leads to a hallway or an unheated porch, you’re basically leaving a window open 24/7. A simple door sweep or some adhesive foam costs maybe ten bucks and takes five minutes to install. It pays for itself in energy savings within a single season. Don’t let a tiny gap drain your wallet.

  • Choosing the Right Insulation for Your Home

    Choosing the Right Insulation for Your Home

    I still remember sitting in my old rental apartment, shivering under three layers of blankets while the radiator hissed uselessly against the draft. I’d stare at my utility bill, wondering why I was paying a premium just to heat the neighborhood through my poorly sealed walls. Most people think you need a massive, expensive renovation to fix this, but that’s a lie. The truth is that navigating the endless sea of insulation types shouldn’t feel like a high-stakes gamble with your savings. You don’t need a contractor’s degree to understand which materials actually stop the heat from escaping and which ones are just expensive marketing fluff.

    I’m not here to sell you on some “miracle” product that costs a fortune. Instead, I’m going to break down the most common insulation types based on what I’ve actually seen work during my audits. My goal is to give you a practical, data-driven roadmap so you can choose the right solution for your specific space without breaking the bank. We’re going to focus on what’s efficient, what’s affordable, and what actually makes a difference in your monthly budget.

    Table of Contents

    Understanding R Value Explained for Your Wallet

    Understanding R Value Explained for Your Wallet

    When I’m auditing a house, the first thing I do isn’t looking at the brand of the insulation; it’s looking at the R-value. If you aren’t familiar with the term, think of it as a measurement of how well a material resists heat flow. The higher the number, the better it is at keeping the warmth inside during winter and the heat outside during summer. For me, R-value explained simply means your ability to stop paying for air that’s just leaking through your walls.

    But here is where people usually trip up: a higher R-value doesn’t always mean a better deal for your specific setup. You have to consider how the material is applied. For example, when comparing fiberglass vs spray foam, you aren’t just looking at the numbers on the bag; you’re looking at how well that material fills the gaps. If you have gaps, you’re losing money regardless of the rating. Understanding these insulation material properties is the difference between a one-time upgrade that actually works and just throwing cash at a problem that isn’t being solved.

    Fiberglass vs Spray Foam Smart Energy Efficient Home Upgrades

    Fiberglass vs Spray Foam Smart Energy Efficient Home Upgrades

    When you’re looking at fiberglass vs spray foam, it usually comes down to a trade-off between your initial budget and long-term performance. Fiberglass is the classic choice—it’s affordable, easy to find, and great for DIYers looking at quick energy efficient home upgrades. I often see it used in attic spaces, but it has a weakness: it doesn’t stop air leakage. If you just stuff batts into a wall, air can still whistle right through the gaps, which means you aren’t actually reducing heating costs as much as you think you are.

    Spray foam is a different beast entirely. It acts as both an insulator and an air barrier, which is a massive advantage for thermal bridging prevention. Because it expands to fill every tiny nook and cranny, it creates a much tighter seal than fiberglass ever could. It’s definitely more expensive upfront, but if you’re trying to stop wasting money on a house that feels drafty, the airtightness of spray foam is hard to beat. I usually tell my clients that if they can swing the cost, the superior seal is worth the investment for permanent efficiency.

    5 Practical Ways to Pick the Right Insulation Without Breaking the Bank

    • Don’t get distracted by fancy marketing; focus on the R-value that actually makes sense for your specific climate and the area of the house you’re insulating.
    • Use a cheap handheld infrared thermometer to find exactly where the cold is creeping in before you start buying materials—don’t waste money insulating walls that aren’t actually leaking heat.
    • Consider the “retrofit factor”—if you’re working with tight spaces or old wiring, blown-in cellulose is often way more practical and less invasive than trying to jam rigid foam boards into existing cavities.
    • Prioritize your “thermal envelope” by tackling the attic first; it’s usually the biggest source of heat loss and offers the fastest return on your investment.
    • Always account for air sealing alongside your insulation choice; even the best insulation in the world won’t do much if drafts are just blowing right past it through small gaps.

    The Bottom Line on Your Insulation Strategy

    Don’t get blinded by high R-values alone; you need to match the insulation type to your specific home’s layout and your actual budget to see a real return on investment.

    Stop treating insulation as a “one size fits all” fix—while spray foam is great for sealing air leaks, fiberglass is often the more practical, low-cost choice for many standard renovations.

    Think of insulation as a long-term financial tool, not just an environmental one; every cent you spend now on the right materials is a direct reduction in your monthly utility bills.

    ## The Real Cost of Choosing Wrong

    “Don’t let the technical jargon intimidate you; picking the wrong insulation isn’t just a DIY mistake, it’s a long-term tax on your bank account every time the seasons change.”

    Tobias Nkemdirim

    Making the Right Call for Your Home

    Making the Right Call for Your Home

    At the end of the day, choosing between fiberglass, cellulose, or spray foam isn’t about finding the “perfect” material—it’s about finding the right fit for your specific budget and the gaps in your walls. We’ve looked at how R-values translate directly to your monthly utility costs and how different materials tackle heat transfer in unique ways. Whether you decide to go with a DIY-friendly fiberglass batt or invest more upfront in a high-performance spray foam, the goal remains the same: stopping the energy leaks that are currently draining your bank account. Don’t let the technical jargon paralyze you; just focus on where your heat is escaping and pick the most cost-effective way to plug those holes.

    I know that tackling home efficiency can feel overwhelming, especially when you’re staring at a list of technical specs and price tags. But I promise you, every bit of insulation you add is a win for both your wallet and the planet. You don’t need to turn your house into a high-tech laboratory to make a difference; you just need to stop wasting energy simply because it’s the path of least resistance. Start small, be intentional, and watch how those tiny, smart changes turn your living space into something truly sustainable.

    Frequently Asked Questions

    How do I know which insulation type is actually worth the upfront cost for my specific house?

    To figure this out, you have to look past the price tag and look at your home’s “leaks.” I always grab my infrared thermometer for this. If you have a drafty, older house with gaps in the walls, spray foam might be worth the premium because it seals everything at once. But if you’re just topping up an attic, fiberglass is your best bet. Focus on where the heat is actually escaping first.

    Can I add more insulation to my existing walls without tearing everything down?

    The short answer is yes, you don’t have to gut your house to fix a thermal leak. If you have access to an attic or crawlspace, blowing in loose-fill cellulose is a massive win for your wallet. For actual walls, you can look into “drill and fill” methods where small holes are made to inject foam or insulation. It’s less invasive than a full renovation and way more effective than just living with the draft.

    Are there any eco-friendly or natural insulation options that don't break the bank?

    You definitely don’t have to rely on heavy synthetics to go green. I’ve been looking into sheep’s wool and hempcrete lately; they’re incredible for moisture regulation and have a much lower embodied carbon footprint. If you’re on a tighter budget, even recycled cellulose—basically shredded old newspapers treated for fire resistance—is a massive win. It’s affordable, keeps waste out of landfills, and does a killer job of plugging those heat leaks I’m always hunting for.

  • How Solar Panels Work for Homes

    How Solar Panels Work for Homes

    I spent most of my early twenties shivering in a drafty rental, staring at a utility bill that felt more like a ransom note than a monthly expense. Whenever I brought up the idea of switching to solar panels, people would immediately pivot to these massive, expensive, “luxury” setups that seemed designed only for people with huge backyards and even bigger bank accounts. It’s a total myth that you need to be wealthy to harness the sun; honestly, most of the hype out there is just noise designed to sell you hardware you don’t actually need.

    I’m not here to sell you a dream or a high-interest loan for a system that won’t even pay for itself in a decade. Instead, I’m going to give you the actual, unvarnished truth about how to approach this transition without breaking your budget. We’re going to look at the real math, the small-scale options, and the smart moves that actually lower your footprint and your bills simultaneously. My goal is to help you stop throwing money at the grid and start making your home work for you.

    Table of Contents

    Maximizing Solar Energy Savings Without Breaking the Bank

    Maximizing Solar Energy Savings Without Breaking the Bank

    Look, I get it. When you see the upfront cost of a full installation, it’s easy to walk away. But maximizing your solar energy savings isn’t always about buying the most expensive setup on the market; it’s about being strategic with what you actually need. If you’re looking at residential solar systems, don’t just buy based on the biggest number. Check the solar panel efficiency ratings for the specific models you’re eyeing. A slightly higher-efficiency panel might cost more initially, but if it generates more power in a smaller footprint, it pays for itself much faster through reduced monthly bills.

    Another thing I always tell my clients: pay attention to how you use your power. If your utility provider offers net metering benefits, you can actually get credit for the excess electricity you send back to the grid during the day. This turns your roof into a little revenue stream. If you can’t afford a massive array right away, start with a smaller, scalable system. It’s better to start small and smart than to go into massive debt for hardware you won’t fully utilize.

    Understanding Residential Solar Systems on a Real World Scale

    Understanding Residential Solar Systems on a Real World Scale

    When I talk to clients about residential solar systems, I usually see a lot of confusion about what’s actually happening on their roof. It isn’t just about slapping some glass plates on a shingles and hoping for the best. At its core, we’re looking at photovoltaic technology explained through the lens of your specific roof orientation and local weather patterns. It’s a math problem, really. You have to look at your consumption peaks versus when those cells are actually pumping out juice. If you don’t align the two, you’re just generating power that you’ll end up selling back for pennies.

    I also see a lot of people getting hung up on the hardware without looking at the bigger picture. It’s easy to get distracted by flashy marketing, but you need to focus on solar panel efficiency ratings and how they actually perform in real-world, cloudy conditions—not just in a perfect lab setting. I always tell people: don’t just buy the most expensive setup; buy the one that matches your actual energy footprint. Understanding that balance is the difference between a system that pays for itself in five years and one that just sits there looking pretty while you keep paying the utility company.

    5 Ways to Get More Bang for Your Buck from Your Solar Setup

    • Don’t just install and forget; keep your panels clean. A thick layer of dust or bird droppings can actually drop your efficiency significantly, and I’ve seen it happen too often during my audits.
    • Time your heavy lifting for the sunniest hours. If you’re running the dishwasher or the dryer, try to do it mid-day when your panels are peaking so you’re pulling directly from the sun rather than the grid.
    • Look into battery storage if your budget allows. It’s the best way to stop letting your excess energy go to waste at night and helps you avoid those expensive peak-hour utility rates.
    • Check your inverter regularly. It’s the unsung hero of the system that converts the power, and if it’s underperforming, your entire investment feels like it’s dragging.
    • Pair your solar move with an energy audit. There’s no point in generating massive amounts of clean power if your home is leaking heat through old windows and wasting it all immediately.

    The Bottom Line on Going Solar

    Don’t view solar as a luxury purchase; treat it as a long-term hedge against rising utility rates that eventually pays for itself.

    Efficiency first—there is no point in generating more power if your home is still leaking heat or wasting electricity through old appliances.

    Start small and scale up; you don’t need a massive, expensive array on day one to start seeing a real dent in your monthly bills.

    The Reality of Solar Investment

    Solar panels shouldn’t be treated like a luxury status symbol for the wealthy; they’re a practical tool for anyone tired of watching their hard-earned money vanish into an aging, inefficient power grid.

    Tobias Nkemdirim

    Making the Switch Count

    Making the Switch Count with solar energy.

    At the end of the day, transitioning to solar isn’t about buying into a luxury lifestyle; it’s about reclaiming control over your monthly overhead. We’ve looked at how you can scale these systems to fit a real-world budget and how to maximize every kilowatt without needing a massive upfront investment. Whether you’re looking at small-scale setups or more comprehensive residential arrays, the goal remains the same: stop letting your hard-earned money leak out through your roof in the form of wasted electricity. It comes down to smart auditing and strategic planning rather than just throwing money at the most expensive option available.

    I know that looking at solar can feel overwhelming, especially when you’re already juggling rising living costs. But I promise you, the shift toward energy independence is worth the initial learning curve. We don’t need perfect, massive solar farms to make a difference; we just need enough people to start making small, intentional changes to how they power their lives. Every panel installed and every watt saved is a step toward a home that is both sustainable and affordable. Let’s stop treating energy waste as an inevitability and start treating it like the financial drain it actually is.

    Frequently Asked Questions

    Is it actually worth the upfront cost if I'm renting or don't own my roof?

    If you don’t own the roof, traditional panels are a non-starter, but don’t let that stop you. I’ve seen too many renters just accept high bills because they feel stuck. Look into community solar programs—you basically subscribe to a local solar farm and get credits on your utility bill. It’s a way to reap the savings without a single drill bit touching your walls. It’s about being smart with the options available to you.

    How much do I really need to save on my monthly bills to make the investment pay for itself?

    Look, there isn’t one magic number, but here’s how I run the math: you’re looking for the “payback period.” If your solar setup costs $15,000 and it knocks $150 off your monthly utility bill, you’re looking at a ten-year break-even point. I always tell my clients to aim for a reduction that covers the monthly financing cost of the panels themselves. If the savings don’t outpace the loan, you aren’t investing; you’re just shifting bills.

    Can these systems actually handle my power usage during cloudy weeks or in the middle of winter?

    Look, I get the skepticism. I’ve stood in drafty apartments where the heating just couldn’t keep up, so I know the fear of being left in the dark. The short answer is: yes, but it depends on your setup. If you’re paired with a battery system or a grid-tie agreement, you’re covered. During those gloomy winter stretches, you’ll pull from the grid or stored power. It’s about managing your load, not just chasing perfect sunshine.