Category: Home

  • Simple Methods for Draft Proofing Your Home

    Simple Methods for Draft Proofing Your Home

    I still remember sitting in my old rental apartment three years ago, wrapped in two blankets and shivering, watching my heating bill climb higher every single month. I’d crank the thermostat up, only to feel that sharp, biting chill cutting right through the floorboards. It wasn’t a broken heater; it was a house that was essentially a sieve. I spent hours tracking those invisible currents with my infrared thermometer, realizing that most people think you need a massive renovation budget to fix a cold home. That’s a lie. The truth is, most of your warmth is simply escaping through tiny gaps, and neglecting basic draft proofing is basically like trying to fill a bucket with a hole in the bottom.

    I’m not here to sell you on expensive, high-tech window replacements or complicated architectural overhauls that most of us can’t afford. Instead, I’m going to show you how to tackle this with practical, low-cost solutions that actually work. We’re going to look at the specific spots where your money is leaking out and how to seal them up for good. My goal is to give you a straightforward roadmap for effective draft proofing so you can finally stop overpaying for heat and start feeling comfortable in your own space.

    Table of Contents

    Preventing Cold Air Infiltration Without a Massive Budget

    Preventing Cold Air Infiltration Without a Massive Budget

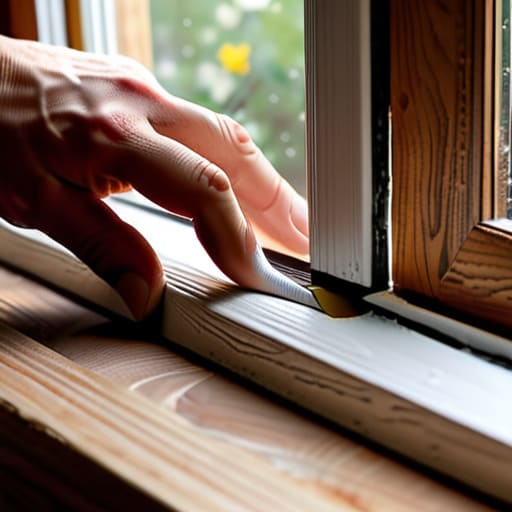
    You don’t need a contractor or a massive renovation budget to start preventing cold air infiltration. Most of the heat loss I see during my audits isn’t coming from missing wall insulation; it’s coming from the gaps you can actually feel. I usually start by grabbing my infrared thermometer and scanning the perimeter of your doors and windows. If you see those sudden temperature drops, you’ve found your problem. A simple roll of adhesive foam or a basic set of weatherstripping techniques can seal those gaps for a few dollars, stopping the breeze before it even enters the room.

    For those on a tight budget, even “low-tech” fixes are incredibly effective for reducing heating bills. If you have old, single-pane windows, try using thermal film kits—they’re cheap, easy to apply, and create an extra layer of air that acts as a buffer. It’s not a permanent architectural fix, but it’s a smart way to achieve home comfort optimization without needing to replace your entire window unit. Small, incremental changes are always better than doing nothing at all.

    Simple Weatherstripping Techniques to Keep the Warmth in

    Simple Weatherstripping Techniques to Keep the Warmth in.

    If you aren’t ready to replace your entire window frame, don’t sweat it. Most of the heat loss I see during my audits happens in those tiny, invisible gaps around door frames and sashes. One of my favorite low-cost weatherstripping techniques involves using adhesive foam tape. It’s cheap, easy to apply, and you can pick it up at any hardware store. Just make sure you clean the surface thoroughly first; if there’s dust on the frame, that tape isn’t going to stick, and you’ll be right back to shivering in a few weeks.
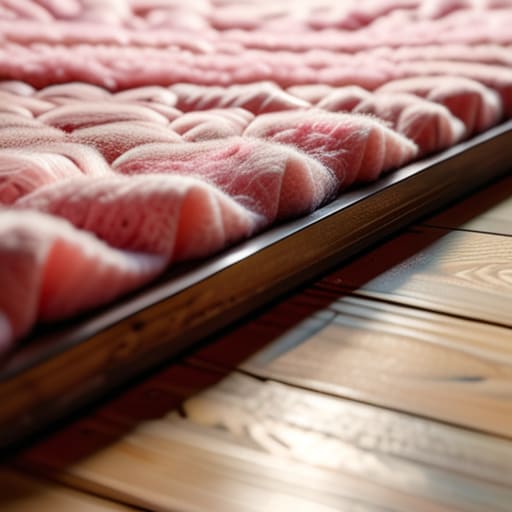
    For the bottom of your doors, skip the expensive custom sweeps and grab a weighted fabric draft stopper. I call them “door snakes.” They’re incredibly effective at preventing cold air infiltration from the hallway or the porch. If you’re feeling crafty, you can even sew one yourself using scrap fabric. It’s a small, practical tweak, but when you combine it with some basic insulation for windows and doors, you’ll notice a massive difference in how your space actually holds onto the warmth you’re paying for.

    My Go-To Checklist for Finding and Fixing the Invisible Leaks

    • Grab your infrared thermometer and scan your baseboards and window frames; if you see a sudden temperature drop on the screen, you’ve found a direct path for cold air to enter.
    • Don’t ignore the door sweep—if you can feel a breeze hitting your ankles when you walk through the front door, a simple adhesive foam strip or a weighted draft stopper will pay for itself in a single winter.
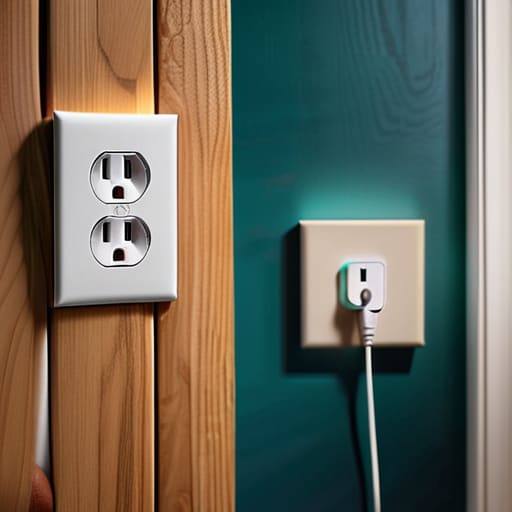
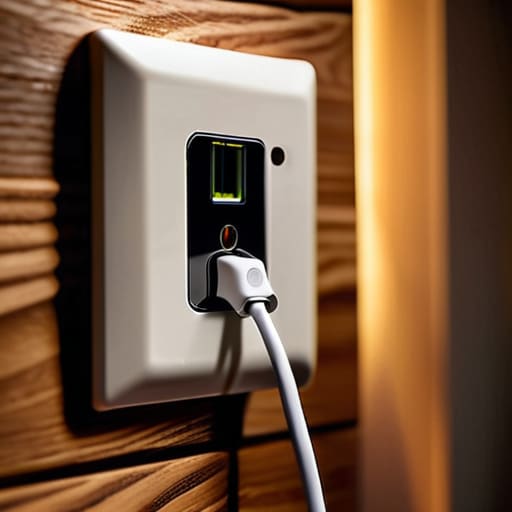
    • Check your electrical outlets on exterior walls, as these are notorious for letting air seep through the wall cavity; installing inexpensive foam gaskets behind the faceplates is a quick, low-effort win.
    • Inspect the gaps where your window sashes meet; if they feel loose, a bit of clear weatherstripping can seal the deal without ruining the look of your frames.
    • Take a look at your ceiling—if you have recessed lighting, make sure they are airtight, otherwise, you’re basically paying to heat the space inside your attic instead of your living room.

    The Bottom Line on Sealing Your Space

    You don’t need a massive renovation budget to see results; start with cheap, tactile fixes like weatherstripping and door snakes to stop the immediate energy bleed.

    Use a handheld thermometer or even just your hands to find the specific “hot spots” where air is moving, so you aren’t wasting money on fixes that don’t actually matter.

    Think of draft proofing as a long-term investment in your bank account—every crack you seal is money you stop handing over to your utility provider every single month.

    The Real Cost of a Draft

    I’ve spent enough time pointing my infrared thermometer at window frames to know that a draft isn’t just a bit of cold air—it’s a literal hole in your bank account. You aren’t just losing heat; you’re paying to heat the entire neighborhood through those tiny cracks.

    Tobias Nkemdirim

    Stop the Leak, Save Your Cash

    Stop the Leak, Save Your Cash.

    At the end of the day, draft proofing isn’t about a massive, expensive renovation; it’s about being smart with what you already have. We’ve covered how a few rolls of weatherstripping, some basic sealant, and a bit of strategic heavy curtain usage can transform a drafty room into a cozy sanctuary. I’ve seen firsthand with my infrared thermometer how a single unsealed window frame can act like a constant drain on your bank account. By tackling these small, manageable leaks, you aren’t just fixing a house—you are systematically reclaiming your monthly budget from the cold air that’s trying to steal it.

    I know it can feel overwhelming when you look at the rising cost of everything, but don’t let that stop you from making a move. You don’t need a massive solar array or a smart home system to make a difference. Every crack you seal and every window you weatherstrip is a win for your wallet and a win for the planet. Sustainability shouldn’t be a luxury reserved for the wealthy; it’s about making intentional, practical choices in the spaces we live. Start small, stay consistent, and watch how much more control you have over your home and your footprint.

    Frequently Asked Questions

    How do I know if a draft is coming from a window seal or just poor insulation in the wall?

    The easiest way to tell is to grab your infrared thermometer. I always do this during audits. Point it at the window frame; if you see a sharp temperature drop right along the seal, it’s a draft issue you can fix with weatherstripping. But if the entire wall feels cold and uniform, that’s a lack of insulation. One is a leak you can plug; the other is a structural gap that needs more serious attention.

    Are there any draft-proofing methods that won't permanently damage older, vintage window frames?

    I get this question a lot, especially from people restoring old houses. You don’t want to ruin beautiful, vintage woodwork with aggressive adhesives. Skip the heavy-duty tapes. Instead, use removable silicone weatherstripping or even temporary “draft snakes” for the sills. If you need something more secure, look into V-seal strips; they’re low-profile and much gentler on old wood. It’s all about finding that balance between keeping the heat in and respecting the original architecture.

    Is it actually worth the cost of materials to seal up a door that I only use once or twice a day?

    Honestly? Yes. I’ve seen too many people overlook those “low-traffic” doors, but that’s exactly where the heat escapes. If that door leads to a hallway or an unheated porch, you’re basically leaving a window open 24/7. A simple door sweep or some adhesive foam costs maybe ten bucks and takes five minutes to install. It pays for itself in energy savings within a single season. Don’t let a tiny gap drain your wallet.

  • Choosing the Right Insulation for Your Home

    Choosing the Right Insulation for Your Home

    I still remember sitting in my old rental apartment, shivering under three layers of blankets while the radiator hissed uselessly against the draft. I’d stare at my utility bill, wondering why I was paying a premium just to heat the neighborhood through my poorly sealed walls. Most people think you need a massive, expensive renovation to fix this, but that’s a lie. The truth is that navigating the endless sea of insulation types shouldn’t feel like a high-stakes gamble with your savings. You don’t need a contractor’s degree to understand which materials actually stop the heat from escaping and which ones are just expensive marketing fluff.

    I’m not here to sell you on some “miracle” product that costs a fortune. Instead, I’m going to break down the most common insulation types based on what I’ve actually seen work during my audits. My goal is to give you a practical, data-driven roadmap so you can choose the right solution for your specific space without breaking the bank. We’re going to focus on what’s efficient, what’s affordable, and what actually makes a difference in your monthly budget.

    Table of Contents

    Understanding R Value Explained for Your Wallet

    Understanding R Value Explained for Your Wallet

    When I’m auditing a house, the first thing I do isn’t looking at the brand of the insulation; it’s looking at the R-value. If you aren’t familiar with the term, think of it as a measurement of how well a material resists heat flow. The higher the number, the better it is at keeping the warmth inside during winter and the heat outside during summer. For me, R-value explained simply means your ability to stop paying for air that’s just leaking through your walls.

    But here is where people usually trip up: a higher R-value doesn’t always mean a better deal for your specific setup. You have to consider how the material is applied. For example, when comparing fiberglass vs spray foam, you aren’t just looking at the numbers on the bag; you’re looking at how well that material fills the gaps. If you have gaps, you’re losing money regardless of the rating. Understanding these insulation material properties is the difference between a one-time upgrade that actually works and just throwing cash at a problem that isn’t being solved.

    Fiberglass vs Spray Foam Smart Energy Efficient Home Upgrades

    Fiberglass vs Spray Foam Smart Energy Efficient Home Upgrades

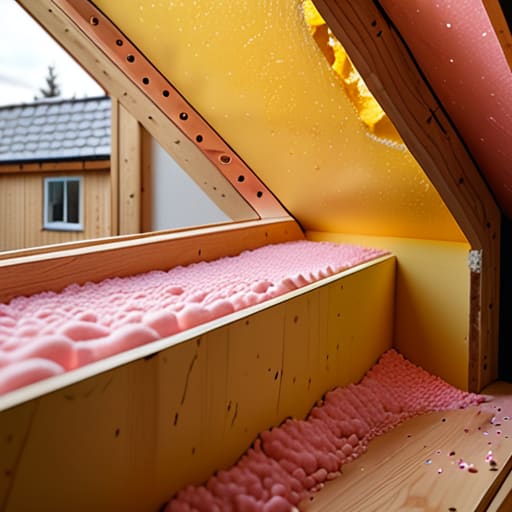
    When you’re looking at fiberglass vs spray foam, it usually comes down to a trade-off between your initial budget and long-term performance. Fiberglass is the classic choice—it’s affordable, easy to find, and great for DIYers looking at quick energy efficient home upgrades. I often see it used in attic spaces, but it has a weakness: it doesn’t stop air leakage. If you just stuff batts into a wall, air can still whistle right through the gaps, which means you aren’t actually reducing heating costs as much as you think you are.

    Spray foam is a different beast entirely. It acts as both an insulator and an air barrier, which is a massive advantage for thermal bridging prevention. Because it expands to fill every tiny nook and cranny, it creates a much tighter seal than fiberglass ever could. It’s definitely more expensive upfront, but if you’re trying to stop wasting money on a house that feels drafty, the airtightness of spray foam is hard to beat. I usually tell my clients that if they can swing the cost, the superior seal is worth the investment for permanent efficiency.

    5 Practical Ways to Pick the Right Insulation Without Breaking the Bank

    • Don’t get distracted by fancy marketing; focus on the R-value that actually makes sense for your specific climate and the area of the house you’re insulating.
    • Use a cheap handheld infrared thermometer to find exactly where the cold is creeping in before you start buying materials—don’t waste money insulating walls that aren’t actually leaking heat.
    • Consider the “retrofit factor”—if you’re working with tight spaces or old wiring, blown-in cellulose is often way more practical and less invasive than trying to jam rigid foam boards into existing cavities.
    • Prioritize your “thermal envelope” by tackling the attic first; it’s usually the biggest source of heat loss and offers the fastest return on your investment.
    • Always account for air sealing alongside your insulation choice; even the best insulation in the world won’t do much if drafts are just blowing right past it through small gaps.

    The Bottom Line on Your Insulation Strategy

    Don’t get blinded by high R-values alone; you need to match the insulation type to your specific home’s layout and your actual budget to see a real return on investment.

    Stop treating insulation as a “one size fits all” fix—while spray foam is great for sealing air leaks, fiberglass is often the more practical, low-cost choice for many standard renovations.

    Think of insulation as a long-term financial tool, not just an environmental one; every cent you spend now on the right materials is a direct reduction in your monthly utility bills.

    ## The Real Cost of Choosing Wrong

    “Don’t let the technical jargon intimidate you; picking the wrong insulation isn’t just a DIY mistake, it’s a long-term tax on your bank account every time the seasons change.”

    Tobias Nkemdirim

    Making the Right Call for Your Home

    Making the Right Call for Your Home

    At the end of the day, choosing between fiberglass, cellulose, or spray foam isn’t about finding the “perfect” material—it’s about finding the right fit for your specific budget and the gaps in your walls. We’ve looked at how R-values translate directly to your monthly utility costs and how different materials tackle heat transfer in unique ways. Whether you decide to go with a DIY-friendly fiberglass batt or invest more upfront in a high-performance spray foam, the goal remains the same: stopping the energy leaks that are currently draining your bank account. Don’t let the technical jargon paralyze you; just focus on where your heat is escaping and pick the most cost-effective way to plug those holes.

    I know that tackling home efficiency can feel overwhelming, especially when you’re staring at a list of technical specs and price tags. But I promise you, every bit of insulation you add is a win for both your wallet and the planet. You don’t need to turn your house into a high-tech laboratory to make a difference; you just need to stop wasting energy simply because it’s the path of least resistance. Start small, be intentional, and watch how those tiny, smart changes turn your living space into something truly sustainable.

    Frequently Asked Questions

    How do I know which insulation type is actually worth the upfront cost for my specific house?

    To figure this out, you have to look past the price tag and look at your home’s “leaks.” I always grab my infrared thermometer for this. If you have a drafty, older house with gaps in the walls, spray foam might be worth the premium because it seals everything at once. But if you’re just topping up an attic, fiberglass is your best bet. Focus on where the heat is actually escaping first.

    Can I add more insulation to my existing walls without tearing everything down?

    The short answer is yes, you don’t have to gut your house to fix a thermal leak. If you have access to an attic or crawlspace, blowing in loose-fill cellulose is a massive win for your wallet. For actual walls, you can look into “drill and fill” methods where small holes are made to inject foam or insulation. It’s less invasive than a full renovation and way more effective than just living with the draft.

    Are there any eco-friendly or natural insulation options that don't break the bank?

    You definitely don’t have to rely on heavy synthetics to go green. I’ve been looking into sheep’s wool and hempcrete lately; they’re incredible for moisture regulation and have a much lower embodied carbon footprint. If you’re on a tighter budget, even recycled cellulose—basically shredded old newspapers treated for fire resistance—is a massive win. It’s affordable, keeps waste out of landfills, and does a killer job of plugging those heat leaks I’m always hunting for.

  • How Solar Panels Work for Homes

    How Solar Panels Work for Homes

    I spent most of my early twenties shivering in a drafty rental, staring at a utility bill that felt more like a ransom note than a monthly expense. Whenever I brought up the idea of switching to solar panels, people would immediately pivot to these massive, expensive, “luxury” setups that seemed designed only for people with huge backyards and even bigger bank accounts. It’s a total myth that you need to be wealthy to harness the sun; honestly, most of the hype out there is just noise designed to sell you hardware you don’t actually need.

    I’m not here to sell you a dream or a high-interest loan for a system that won’t even pay for itself in a decade. Instead, I’m going to give you the actual, unvarnished truth about how to approach this transition without breaking your budget. We’re going to look at the real math, the small-scale options, and the smart moves that actually lower your footprint and your bills simultaneously. My goal is to help you stop throwing money at the grid and start making your home work for you.

    Table of Contents

    Maximizing Solar Energy Savings Without Breaking the Bank

    Maximizing Solar Energy Savings Without Breaking the Bank

    Look, I get it. When you see the upfront cost of a full installation, it’s easy to walk away. But maximizing your solar energy savings isn’t always about buying the most expensive setup on the market; it’s about being strategic with what you actually need. If you’re looking at residential solar systems, don’t just buy based on the biggest number. Check the solar panel efficiency ratings for the specific models you’re eyeing. A slightly higher-efficiency panel might cost more initially, but if it generates more power in a smaller footprint, it pays for itself much faster through reduced monthly bills.

    Another thing I always tell my clients: pay attention to how you use your power. If your utility provider offers net metering benefits, you can actually get credit for the excess electricity you send back to the grid during the day. This turns your roof into a little revenue stream. If you can’t afford a massive array right away, start with a smaller, scalable system. It’s better to start small and smart than to go into massive debt for hardware you won’t fully utilize.

    Understanding Residential Solar Systems on a Real World Scale

    Understanding Residential Solar Systems on a Real World Scale

    When I talk to clients about residential solar systems, I usually see a lot of confusion about what’s actually happening on their roof. It isn’t just about slapping some glass plates on a shingles and hoping for the best. At its core, we’re looking at photovoltaic technology explained through the lens of your specific roof orientation and local weather patterns. It’s a math problem, really. You have to look at your consumption peaks versus when those cells are actually pumping out juice. If you don’t align the two, you’re just generating power that you’ll end up selling back for pennies.

    I also see a lot of people getting hung up on the hardware without looking at the bigger picture. It’s easy to get distracted by flashy marketing, but you need to focus on solar panel efficiency ratings and how they actually perform in real-world, cloudy conditions—not just in a perfect lab setting. I always tell people: don’t just buy the most expensive setup; buy the one that matches your actual energy footprint. Understanding that balance is the difference between a system that pays for itself in five years and one that just sits there looking pretty while you keep paying the utility company.

    5 Ways to Get More Bang for Your Buck from Your Solar Setup

    • Don’t just install and forget; keep your panels clean. A thick layer of dust or bird droppings can actually drop your efficiency significantly, and I’ve seen it happen too often during my audits.
    • Time your heavy lifting for the sunniest hours. If you’re running the dishwasher or the dryer, try to do it mid-day when your panels are peaking so you’re pulling directly from the sun rather than the grid.
    • Look into battery storage if your budget allows. It’s the best way to stop letting your excess energy go to waste at night and helps you avoid those expensive peak-hour utility rates.
    • Check your inverter regularly. It’s the unsung hero of the system that converts the power, and if it’s underperforming, your entire investment feels like it’s dragging.
    • Pair your solar move with an energy audit. There’s no point in generating massive amounts of clean power if your home is leaking heat through old windows and wasting it all immediately.

    The Bottom Line on Going Solar

    Don’t view solar as a luxury purchase; treat it as a long-term hedge against rising utility rates that eventually pays for itself.

    Efficiency first—there is no point in generating more power if your home is still leaking heat or wasting electricity through old appliances.

    Start small and scale up; you don’t need a massive, expensive array on day one to start seeing a real dent in your monthly bills.

    The Reality of Solar Investment

    Solar panels shouldn’t be treated like a luxury status symbol for the wealthy; they’re a practical tool for anyone tired of watching their hard-earned money vanish into an aging, inefficient power grid.

    Tobias Nkemdirim

    Making the Switch Count

    Making the Switch Count with solar energy.

    At the end of the day, transitioning to solar isn’t about buying into a luxury lifestyle; it’s about reclaiming control over your monthly overhead. We’ve looked at how you can scale these systems to fit a real-world budget and how to maximize every kilowatt without needing a massive upfront investment. Whether you’re looking at small-scale setups or more comprehensive residential arrays, the goal remains the same: stop letting your hard-earned money leak out through your roof in the form of wasted electricity. It comes down to smart auditing and strategic planning rather than just throwing money at the most expensive option available.

    I know that looking at solar can feel overwhelming, especially when you’re already juggling rising living costs. But I promise you, the shift toward energy independence is worth the initial learning curve. We don’t need perfect, massive solar farms to make a difference; we just need enough people to start making small, intentional changes to how they power their lives. Every panel installed and every watt saved is a step toward a home that is both sustainable and affordable. Let’s stop treating energy waste as an inevitability and start treating it like the financial drain it actually is.

    Frequently Asked Questions

    Is it actually worth the upfront cost if I'm renting or don't own my roof?

    If you don’t own the roof, traditional panels are a non-starter, but don’t let that stop you. I’ve seen too many renters just accept high bills because they feel stuck. Look into community solar programs—you basically subscribe to a local solar farm and get credits on your utility bill. It’s a way to reap the savings without a single drill bit touching your walls. It’s about being smart with the options available to you.

    How much do I really need to save on my monthly bills to make the investment pay for itself?

    Look, there isn’t one magic number, but here’s how I run the math: you’re looking for the “payback period.” If your solar setup costs $15,000 and it knocks $150 off your monthly utility bill, you’re looking at a ten-year break-even point. I always tell my clients to aim for a reduction that covers the monthly financing cost of the panels themselves. If the savings don’t outpace the loan, you aren’t investing; you’re just shifting bills.

    Can these systems actually handle my power usage during cloudy weeks or in the middle of winter?

    Look, I get the skepticism. I’ve stood in drafty apartments where the heating just couldn’t keep up, so I know the fear of being left in the dark. The short answer is: yes, but it depends on your setup. If you’re paired with a battery system or a grid-tie agreement, you’re covered. During those gloomy winter stretches, you’ll pull from the grid or stored power. It’s about managing your load, not just chasing perfect sunshine.