Category: Guides

  • How to Insulate Your Loft Effectively

    How to Insulate Your Loft Effectively

    I still remember sitting in my childhood bedroom, wrapped in three layers of wool, watching my breath mist in the air while the radiator hissed uselessly against the draft. I used to think I just needed a bigger heater, but the truth was much simpler: we were literally bleeding money through the ceiling. Most people looking for a loft insulation guide end up buried under a mountain of technical jargon or, worse, sales pitches for expensive, high-tech systems that your bank account definitely doesn’t need. You don’t need a massive renovation budget to fix a drafty house; you just need to understand where the heat is actually escaping.

    I’m not here to sell you on some “revolutionary” new material that costs a fortune. Instead, I’m going to give you a straightforward, data-driven breakdown of what actually works for real homes. This guide is about finding the most efficient ways to seal your space without breaking the bank. I’ll show you how to identify the gaps, choose the right materials for your budget, and ensure you’re getting the maximum thermal return for every pound you spend.

    Table of Contents

    Choosing the Right Types of Loft Insulation Materials

    Choosing the Right Types of Loft Insulation Materials

    When you start looking into the different types of loft insulation materials, it’s easy to get overwhelmed by the sheer variety of options. Most people I audit end up choosing between traditional mineral wool rolls or more modern sheep’s wool. Mineral wool is the industry standard for a reason—it’s affordable and does a solid job of reducing heating bills with insulation without breaking the bank. However, if you’re dealing with an older property, you might want to look into sheep’s wool; it has a natural ability to help with preventing condensation in the attic by managing moisture levels more effectively than synthetics.

    If you’re looking for something more high-tech, there are rigid foam boards that offer a much higher R-value for loft insulation in a thinner profile. This is a game-changer if you have limited space or need to insulate around awkward rafters. While the initial loft insulation installation costs might be slightly higher for these premium materials, the long-term energy savings usually justify the upfront hit. I always tell my clients: don’t just buy the cheapest stuff you find; buy what actually fits your home’s specific thermal needs.

    Understanding R Value for Loft Insulation Without the Confusion

    Understanding R Value for Loft Insulation Without the Confusion

    When you start looking into different types of loft insulation materials, you’re going to see the term “R-value” thrown around constantly. It sounds like some complex engineering metric, but it’s actually pretty straightforward. Think of the R-value as a measure of how well a material resists heat flow. The higher the number, the better the material is at stopping heat from escaping your living space. If you’re serious about reducing heating bills with insulation, you need to stop looking at just the thickness of the material and start looking at that number.

    I usually tell my clients not to get bogged down in the math, but there is a practical way to use this data. A higher R-value means you can achieve better thermal performance without necessarily needing a massive amount of space in your attic. However, keep in mind that loft insulation installation costs can fluctuate depending on how much material you need to hit your target R-value. It’s a balancing act: you want enough resistance to keep the heat in, but you also need to ensure you aren’t creating issues like preventing condensation in the attic by trapping too much moisture.

    5 Pro Tips to Avoid Wasting Money (and Heat) During Installation

    • Don’t forget your eaves. When you lay down new insulation, make sure you don’t block the airflow from your soffit vents. I’ve seen too many people accidentally suffocate their attic, which leads to dampness and rot—the last thing you want in a “sustainable” home.
    • Check your recessed lighting. If you have old-school downlights, you can’t just bury them under mineral wool. You’ll need to install protective covers or loft caps to prevent a fire hazard. It’s a small detail that’s non-negotiable for safety.
    • Seal the gaps before you layer. Before you start spreading insulation, grab some expanding foam or caulk and seal the tiny cracks around pipes and cables passing through the ceiling. If you don’t stop the drafts first, you’re just putting a bandage on a leaky wound.
    • Mind the depth. If you’re adding new insulation on top of the old stuff, don’t just guess the thickness. Aim for a total depth that hits your target R-value. More isn’t always better if it’s uneven, so try to keep it consistent across the whole floor.
    • Protect your gear and yourself. This isn’t just about the house; it’s about you. Wear a decent mask and gloves. Fiberglass or sheep’s wool might look harmless, but breathing in those particles is a nightmare, and I’ve learned that the hard way during my first few audits.

    The Bottom Line on Your Loft Insulation

    Don’t get bogged down in the technical jargon; just focus on finding a material that offers a high R-value for your specific budget and space.

    Choosing the right insulation is a one-time investment that pays for itself by stopping the constant drain on your monthly utility bills.

    Whether you go with mineral wool or sheep’s wool, the goal is simple: create a solid thermal barrier that keeps the heat where it belongs—inside your home.

    ## The Real Cost of Doing Nothing

    “I’ve spent too many afternoons pointing my infrared thermometer at ceilings and watching the heat bleed straight into the night sky; it’s frustrating because it’s preventable, and every cent you spend on insulation is a cent you aren’t handing over to your utility company.”

    Tobias Nkemdirim

    Stop Letting Your Money Leak Out the Roof

    Stop Letting Your Money Leak Out the Roof.

    At the end of the day, insulating your loft isn’t about chasing some perfect, high-tech engineering standard; it’s about making a practical decision that works for your specific space and budget. We’ve looked at how to pick the right materials, whether you’re going with mineral wool or sheep’s wool, and we’ve demystified those R-values so you can actually understand what you’re paying for. Remember, the goal is to create a thermal barrier that keeps the heat where it belongs—inside your living space—rather than letting it vanish into the rafters. Don’t get paralyzed by choice; just pick a reliable, high-performing option and get it installed correctly.

    I know that starting a home improvement project can feel overwhelming, especially when you’re trying to balance costs with sustainability. But I promise you, the moment you feel that first draft-free evening in a room that actually stays warm, you’ll realize it was worth it. You don’t need to overhaul your entire life to make a difference; you just need to stop wasting energy simply because it’s the easier path. Every bit of insulation you lay down is a win for your bank account and a small, necessary step toward a more efficient future. Let’s get to work.

    Frequently Asked Questions

    How do I know if my current insulation is actually working or if it's just old and settled?

    I usually grab my infrared thermometer for this. If I scan your ceiling and see massive temperature drops near the eaves or patches where the heat is escaping rapidly, your insulation has likely failed. Also, go up there and physically check it. If the material looks compressed, thin, or lumpy, it’s “settled.” Once it loses that loft, it loses its ability to trap air, which means it’s basically just expensive, useless fluff.

    Is it safe for me to install this myself, or am I going to mess up my ventilation and cause dampness?

    Look, I get the hesitation. I’ve seen too many DIY jobs turn into a nightmare of mold and damp because someone blocked the airflow. You can definitely do this yourself, but you can’t just stuff everything in like a pillow. You have to respect your eaves and maintain that ventilation gap. If you block the airflow, you’re essentially trapping moisture, which is a recipe for rot. Keep it breathable, and you’ll be fine.

    How much is this actually going to save me on my monthly bills in the long run?

    Look, I’m not going to give you a vague “it depends” answer. If you’ve got a poorly insulated loft, you’re basically heating the sky. Depending on your home’s setup, upgrading can shave 15% to 25% off your heating bills. It’s not just a one-time fix; it’s a long-term hedge against rising energy prices. You’ll see the difference in your meter readings almost immediately once the temperature stabilizes. It’s one of the highest-return moves you can make.

  • Using Smart Technology to Manage Home Energy

    Using Smart Technology to Manage Home Energy

    I remember standing in my old rental apartment three years ago, shivering in a room that felt more like a walk-in freezer than a living space. I was staring at a utility bill that looked more like a mortgage payment, wondering why my heater was working overtime just to keep the air lukewarm. Most people will tell you that smart home energy management requires a massive investment in high-end, interconnected gadgets that cost more than the energy they actually save. They sell you this dream of a futuristic, automated mansion, but for most of us, that’s just expensive noise. You don’t need a thousand-dollar ecosystem to stop bleeding money through your walls and outlets.

    I’m not here to sell you on shiny new tech that complicates your life. Instead, I’m going to show you how to use data and a few strategic, low-cost tools to actually take control of your consumption. My goal is to give you a practical roadmap for managing your home’s energy without breaking the bank. We’re going to skip the hype and focus on the real-world tweaks that actually move the needle on your monthly bills.

    Table of Contents

    Smart Thermostat Integration Small Changes for Big Savings

    Smart Thermostat Integration Small Changes for Big Savings

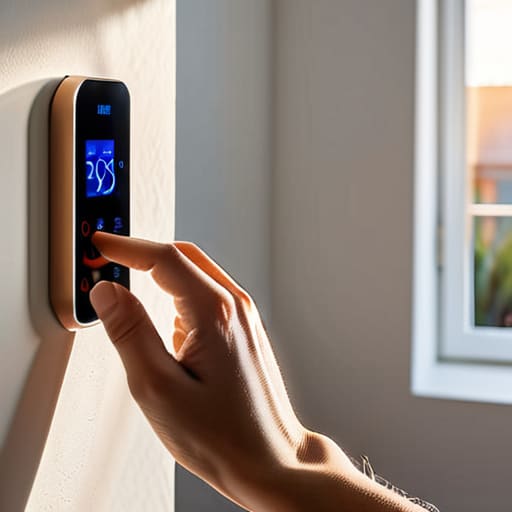
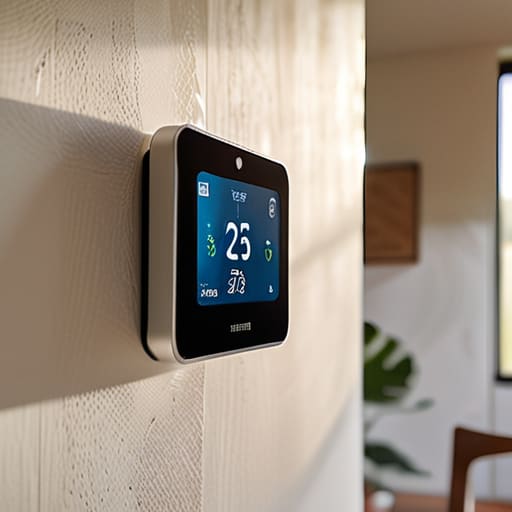
    I remember sitting in my old apartment, staring at a thermostat that felt more like a suggestion than a tool. I’d crank the heat up to fight the chill, only to realize I was basically heating the entire neighborhood because I wasn’t home. This is exactly why I’m such a huge advocate for smart thermostat integration. It isn’t just about being able to change the temperature from your phone while you’re at work; it’s about removing the human error that leads to massive waste.

    When you set up a system that actually learns your routine, you start seeing real-time energy usage tracking that makes sense. Instead of guessing why your bill spiked last month, you can see exactly when your HVAC system is working overtime. These devices act as a central brain, ensuring you aren’t heating an empty house or cooling a room no one is using. For me, it’s the most effective way of reducing electricity consumption without having to constantly micromanage your life. It turns a passive appliance into an active participant in your savings.

    Real Time Energy Usage Tracking to Stop the Waste

    Real Time Energy Usage Tracking to Stop the Waste

    If you’re like me, you probably look at your monthly utility bill and feel like you’re being robbed by a ghost. You see a massive number at the bottom, but you have no idea which specific appliance or habit caused the spike. This is where real-time energy usage tracking becomes a game changer. Instead of waiting thirty days to find out you overspent, you can see exactly when your energy consumption peaks. I recently used my infrared thermometer to find a drafty window, but even that didn’t show the full picture until I plugged in some IoT energy monitoring solutions to see the actual draw from my old space heater.

    Once you have that data, the “invisible” waste becomes impossible to ignore. You might realize your old fridge is cycling constantly or that your home office setup is pulling way more power than it should during standby mode. It’s not about living in the dark; it’s about reducing electricity consumption by cutting out the stuff you aren’t even using. When you can actually see the numbers moving on your phone, you stop guessing and start making decisions based on facts.

    5 Low-Cost Ways to Take Control of Your Power Usage

    • Plug your “vampire” electronics into smart power strips. I’ve seen too many people leave gaming consoles and coffee makers on all night; these devices pull power even when they’re “off,” and a smart strip cuts that leak instantly.
    • Automate your lighting with smart bulbs or motion sensors. There is zero reason to light an empty hallway or a room you haven’t stepped into for an hour, so let the tech handle the shut-off for you.
    • Use smart plugs to schedule your heavy hitters. If your water heater or certain appliances don’t need to be running at 3 AM, set a schedule to keep them offline during peak tariff hours.
    • Connect your smart blinds to your heating system. If I’m auditing a house and see the sun beating down on large windows, I always suggest automated shades to block heat in the summer and trap it in the winter.
    • Set up automated “Away” modes. Instead of manually checking every switch when you leave, one tap on your phone should trigger a house-wide energy-saving profile that kills unnecessary loads.

    The Bottom Line: Making Energy Efficiency Work for You

    You don’t need a massive, expensive overhaul to see results; start by using smart tech to automate the small, repetitive habits that bleed money.

    Data is your best friend—if you aren’t tracking your real-time usage, you’re essentially flying blind and paying for energy you aren’t even using.

    Sustainability shouldn’t be a luxury; focus on high-impact, low-cost tweaks that lower your bills and your carbon footprint at the same time.

    The Real Cost of Convenience

    “We’ve been conditioned to think that ‘set it and forget it’ is the peak of modern living, but when your thermostat is fighting a losing battle against a drafty window, you aren’t being efficient—you’re just subsidizing waste. True smart management isn’t about fancy gadgets; it’s about using data to stop paying for energy you never actually used.”

    Tobias Nkemdirim

    Cutting the Cord on Energy Waste

    Cutting the Cord on Energy Waste.

    At the end of the day, managing your home’s energy isn’t about buying every shiny new gadget on the market. It’s about being intentional. We’ve looked at how smart thermostats can take the guesswork out of your heating, and how tracking your real-time usage can expose those hidden “vampire” loads that are quietly draining your bank account. By integrating these tools, you aren’t just playing with tech; you are reclaiming control over your monthly expenses and ensuring that every kilowatt you pay for is actually doing something useful. It’s about moving from passive consumption to active, data-driven management.

    I know it can feel overwhelming, especially when you’re staring down a rising utility bill or feeling like sustainability is a luxury reserved for the wealthy. But I’ve seen firsthand how a few small, smart tweaks can completely transform a space. You don’t need a massive renovation to make a difference; you just need to stop letting energy slip through the cracks. Every bit of waste you eliminate is a win for your wallet and a win for the planet. Let’s stop settling for inefficiency just because it’s the status quo and start building homes that are actually built to last.

    Frequently Asked Questions

    Is it actually worth the upfront cost of smart devices if I'm on a tight budget?

    Look, I get it. When you’re watching every cent, dropping a hundred bucks on a gadget feels wrong. But I look at it like an investment, not a luxury. If a smart plug or a basic thermostat pays for itself in energy savings within six months, that’s a win. If you can’t swing the upfront cost, don’t sweat it—start with manual habits first. The goal is efficiency, not just having shiny tech.

    How much of a difference will these gadgets make if my house is old and has poor insulation?

    Look, I’ll be straight with you: gadgets won’t fix a drafty house. If your insulation is shot, you’re essentially trying to heat the neighborhood. I’ve seen it myself—running a smart thermostat in a poorly insulated room is just a more efficient way to watch your money leak through the walls. Use the tech to manage when you heat, but prioritize sealing those gaps first. Tech manages the flow; insulation holds the value.

    Are these smart systems actually easy to set up, or am I going to spend more time troubleshooting them than actually saving money?

    Look, I get the skepticism. I’ve spent way too many hours troubleshooting old tech in my workshop. Most modern smart plugs and thermostats are pretty much “plug and play” now—you follow the app, and you’re done. But if you’re trying to bridge legacy systems with new tech, yeah, it can get messy. My advice? Start small. Don’t overhaul the whole house at once. Pick one device, nail the setup, and let the data prove itself.

  • Tips for a Low Energy Lifestyle

    Tips for a Low Energy Lifestyle

    I still remember sitting in my old rental apartment three years ago, wrapped in two blankets and shivering, staring at a heating bill that felt like a personal insult. I’d spent half my paycheck just trying to keep the air in the room from feeling like a freezer, and it felt like I was fighting a losing battle against my own walls. People love to sell you this idea that a low energy lifestyle requires a massive solar array or a total home renovation that costs more than a car, but that’s just marketing fluff. Most of the time, you aren’t failing because you’re “un-green”; you’re just losing money through cracks you don’t even know exist.

    I’m not here to pitch you expensive gadgets or complicated lifestyle overhauls that take more effort than they save. My goal is to show you how to audit your own space with a practical, data-driven eye to see where you’re actually wasting power. I’ll be sharing the small, no-nonsense adjustments I use in my consulting work to stop the leaks and keep your bills manageable. We’re going to focus on high-impact, low-cost changes that actually work in the real world.

    Table of Contents

    Reducing Household Electricity Consumption Without a Massive Budget

    Reducing Household Electricity Consumption Without a Massive Budget

    Most people think they need to install a full solar array or replace every appliance with a high-end smart model to see a difference. That’s just not true. In my audits, I usually find that the biggest wins come from addressing “phantom loads”—the energy your devices suck up even when they’re turned off. I’ve started using simple power strips for my workstation and vintage tech setups; flicking one switch to kill the standby power is one of the easiest energy efficient home practices you can adopt. It costs zero dollars and stops the slow bleed of electricity.

    Beyond the hardware, it’s about tweaking your eco-conscious daily routines. I always tell my clients to look at their laundry and dishwashing habits. Running a full load on a cold cycle instead of hot can shave a noticeable amount off your monthly bill. It’s not about living in the dark; it’s about intentionality. When you stop running machines half-empty or heating water unnecessarily, you aren’t just saving money—you’re effectively auditing your own life for waste.

    Energy Efficient Home Practices for the Everyday Person

    Energy Efficient Home Practices for the Everyday Person

    Most people think living sustainably requires a complete lifestyle overhaul or a massive solar array, but it’s actually about the small, intentional habits you build into your day. I’ve found that energy efficient home practices are most effective when they aren’t a chore. For me, it’s about being mindful of phantom loads—those little vampire lights on chargers and appliances that sip power while you sleep. I usually do a quick sweep of my outlets before bed; it’s a simple way to practice low impact living tips without needing a specialized toolkit.

    Another thing I’ve noticed during my audits is how much heat we lose just by being passive. You don’t need smart home tech to manage your environment; you just need to be observant. Closing your curtains as soon as the sun goes down or adjusting your thermostat by just one degree can make a massive difference in your monthly bill. Integrating these eco-conscious daily routines into your life isn’t about deprivation; it’s about stopping the bleed of wasted resources. It’s practical, it’s data-backed, and most importantly, it’s affordable.

    My Top 5 "Quick Wins" for Finding Hidden Energy Leaks

    • Stop treating your thermostat like a suggestion. I’ve seen so many people crank the heat to 75°F only to have it all escape through a drafty window; instead, try dropping it just two degrees and using a heavy rug to insulate your floor.
    • Get yourself a cheap power strip for your entertainment setup. Most people don’t realize their TV, gaming console, and soundbar are still sipping electricity even when they’re “off”—it’s called vampire power, and it’s literally just money leaking out of your wall.
    • Check your fridge seals with a simple piece of paper. If you can slide a note easily between the door and the seal, your fridge is working twice as hard as it needs to, which is a massive, unnecessary drain on your monthly bill.
    • Switch to LED bulbs, but don’t just do it for the “green” factor. From a data perspective, the ROI (return on investment) is insane; they last longer and pull a fraction of the wattage, meaning you stop paying for light you aren’t even using.
    • Master the art of the “cold wash.” Most of the energy your washing machine uses goes toward heating the water; switching to cold cycles for your everyday loads saves a ton of power and actually helps your clothes last longer.

    The Bottom Line on Cutting Costs

    Efficiency isn’t about expensive solar panels or smart home gadgets; it’s about identifying where your money is literally leaking out of your walls and windows.

    Small, consistent behavioral shifts—like managing your thermostat or unplugging phantom loads—are more effective for your wallet than waiting for a massive renovation you can’t afford.

    Sustainability shouldn’t be a luxury; by auditing your own habits and fixing the low-hanging fruit, you can lower your carbon footprint and your utility bills at the same time.

    The Real Cost of Convenience

    A low energy lifestyle isn’t about living in the dark or sacrificing comfort; it’s about realizing that every bit of energy we let leak through a drafty window or waste on an idle appliance is just money we’re throwing away.

    Tobias Nkemdirim

    The Bottom Line on Living Low-Energy

    The Bottom Line on Living Low-Energy.

    At the end of the day, building a low-energy lifestyle isn’t about some grand, expensive overhaul of your entire house. It’s about the cumulative effect of the small things we discussed: tightening up those drafts, being smarter about how we use our appliances, and actually paying attention to where our money—and our heat—is leaking out. I’ve spent enough time with my infrared thermometer to know that energy waste is often invisible until you start looking for it. By making these adjustments, you aren’t just lowering your utility bills; you are actively reclaiming control over your household budget and stopping the cycle of unnecessary consumption.

    I know it can feel overwhelming when you look at the scale of the climate crisis, but please don’t let that paralyze you. You don’t need to be a millionaire to live sustainably or to make a dent in your carbon footprint. Real change happens when we stop choosing convenience over efficiency and start making intentional, data-driven choices in our own living rooms. Start with one room, one appliance, or one habit. If we all stop letting energy leak out of our lives just because it’s easy, we actually stand a chance at building a future that is both affordable and breathable.

    Frequently Asked Questions

    I've tried switching to LEDs, but my bill is still high—what are the hidden energy drains I might be missing?

    If your LEDs aren’t moving the needle, you’re likely losing energy to “phantom loads” or poor insulation. I’ve audited plenty of homes where devices like game consoles or old coffee makers pull power even when they’re “off.” Grab my infrared thermometer; I’d bet you’ll find heat escaping through window seals or poorly insulated outlets. Stop treating your house like a sieve. Check your standby power and seal those drafts before you spend another cent on lighting.

    Are there specific smart home gadgets that actually pay for themselves, or is it just marketing hype?

    Look, most “smart” tech is just expensive junk designed to look cool on a shelf. If a gadget doesn’t actively stop energy from leaking, it’s just hype. However, smart thermostats and smart plugs are the real deal. I’ve audited enough homes to know that automating your heating schedule or killing phantom power to your entertainment center actually moves the needle. If it doesn’t pay for itself in utility savings within a year, skip it.

    How can I make my rental apartment more energy-efficient if I'm not allowed to make permanent changes like adding insulation?

    I get it—renting feels like you’re stuck with whatever thermal leaks the landlord left behind. Since you can’t tear down walls for insulation, focus on “non-invasive” fixes. Grab some heavy thermal curtains to block window drafts and use adhesive weatherstripping on door frames; it’s cheap and peels right off when you move. I also swear by draft stoppers for the bottom of doors. It’s all about creating temporary barriers to keep the heat where it belongs.

  • Ways to Improve Water Heating Efficiency

    Ways to Improve Water Heating Efficiency

    I remember standing in my old rental apartment, shivering while waiting for a shower that never seemed to get warm enough, only to realize my water heater was working overtime just to keep up with the heat loss. It wasn’t a lack of willpower; it was a massive leak in my budget. Most people think improving water heating efficiency requires a total system overhaul or a massive investment in solar arrays, but that’s just expensive noise. You don’t need to replace your entire setup to see a difference; you just need to stop letting energy escape through cracks you can’t even see.

    I’m not here to sell you on high-tech gadgets that won’t actually pay for themselves. Instead, I’m going to walk you through the practical, data-driven tweaks that I use during my own audits to slash utility bills without breaking the bank. We’re going to look at the small, smart changes—from insulation hacks to temperature calibration—that actually move the needle. My goal is simple: to show you how to reclaim your comfort and stop wasting money on heat that never even reaches your shower.

    Table of Contents

    Smart Water Heating Technology That Actually Fits Your Budget

    Smart Water Heating Technology That Actually Fits Your Budget

    When people talk about upgrading their tech, they usually think of the latest smartphone, but the real game-changer for your wallet is actually sitting in your utility closet. If you’re looking at smart water heating technology, don’t feel like you need to drop five figures on a futuristic setup. For most of my clients, the smartest move is simply switching to Energy Star rated water heaters. These units are engineered to minimize the energy wasted during the heating cycle, meaning you get the same hot shower for a fraction of the cost.

    If a full replacement isn’t in the cards right now, you can still use data to your advantage. I always tell people to check their water heater temperature settings first. Most manufacturers set them unnecessarily high, which forces the unit to work overtime just to maintain a temperature you don’t even need. I also recommend looking into high-quality insulation blankets for your tank. It’s a low-cost way of reducing standby heat loss, ensuring that the energy you’ve already paid for actually stays in the water rather than bleeding through the tank walls.

    Perfecting Your Water Heater Temperature Settings to Save Daily

    Perfecting Your Water Heater Temperature Settings to Save Daily

    Most people treat their water heater like a “set it and forget it” appliance, but that’s exactly where you start losing money. I’ve seen so many homes where the thermostat is cranked up to 140°F (60°C) unnecessarily. Unless you have a specific medical need or a high risk of bacteria, you really don’t need it that hot. By adjusting your water heater temperature settings to a more reasonable 120°F (49°C), you aren’t just saving a bit of power; you’re significantly reducing standby heat loss. When the tank isn’t fighting to maintain an extreme temperature, it isn’t cycling on and off constantly, which preserves the life of the unit and keeps your costs down.

    It’s one of those small, data-backed tweaks that makes a massive difference over a month of utility statements. Think of it as tuning an engine; you’re looking for that sweet spot where you have enough heat for a hot shower without the excess waste. If you find yourself constantly adjusting the dial, you might need to look into better insulation for your pipes, but for most, lowering utility bills starts with this one simple, manual adjustment.

    Low-Cost Fixes to Stop Your Water Heater From Bleeding Cash

    • Insulate your pipes. If you’ve got bare copper or plastic pipes running from the heater, you’re losing heat before the water even reaches your tap. Grab some foam pipe sleeves—they’re cheap, easy to snap on, and keep that thermal energy where it belongs.
    • Check your tank for “sweating.” If I see condensation pooling around the base of a tank during an audit, it usually means the insulation is failing or the tank is losing heat too fast. A dedicated water heater blanket can act like a thermal jacket for your unit.
    • Install low-flow showerheads. This isn’t just about saving water; it’s about saving the energy required to heat that water. When you use less volume, your heater doesn’t have to work nearly as hard to recover.
    • Fix those leaky faucets immediately. A steady drip might seem minor, but it’s a constant drain on your hot water reservoir. Every drop that leaks out is a drop that you’ve already paid to heat, only to watch it go straight down the drain.
    • Time your heavy usage. If you’re running a dishwasher or a laundry load, try to do it during off-peak hours if your utility provider uses time-of-use pricing. It’s a simple way to align your energy consumption with a smarter, cheaper grid.

    The Bottom Line on Water Heating Efficiency

    You don’t need a high-tech overhaul to see results; starting with simple temperature adjustments can provide immediate relief to your monthly utility bills.

    Prioritize smart, budget-friendly upgrades like insulation or better tech over expensive, unnecessary renovations to get the best ROI on your energy savings.

    Small, consistent habits—like being mindful of how much hot water you actually use—are just as vital as the hardware sitting in your utility closet.

    The Hidden Cost of Comfort

    Most people think a high utility bill is just the price of a warm shower, but it’s actually the cost of inefficiency. We’re essentially paying a premium to heat water that leaks out of poorly insulated tanks or stays scalding hot long after we’ve turned the tap off. Efficiency isn’t about sacrifice; it’s about making sure every cent you spend actually goes toward the comfort you’re paying for.

    Tobias Nkemdirim

    Cutting the Cord on Wasted Energy

    Cutting the Cord on Wasted Energy.

    At the end of the day, optimizing your water heating doesn’t require a massive overhaul or a sudden windfall of cash. We’ve looked at how upgrading to smarter, more efficient tech can pay for itself, and how simply dialing back your temperature settings can stop that constant, invisible drain on your bank account. Whether you are insulating your pipes to keep the heat where it belongs or choosing a model that actually matches your household’s real-world usage, these aren’t just technical tweaks—they are direct ways to reclaim control over your monthly expenses.

    I know it can feel overwhelming to tackle sustainability when you’re just trying to make ends meet, but please don’t let perfection be the enemy of progress. You don’t need a solar-powered mansion to make a difference; you just need to stop letting energy leak out of your life through sheer convenience. Start with one small change this week, grab your tools, and look at your setup with a critical eye. If we all focus on these small, intentional adjustments, we can build a future where living sustainably is a standard, affordable reality for everyone, not just a luxury for the few.

    Frequently Asked Questions

    Is it actually worth the upfront cost to switch to a heat pump water heater, or should I just stick with my current tank?

    Look, I get the hesitation. The upfront cost of a heat pump water heater is a gut punch compared to a standard tank. But if you’re looking at the long game, the math almost always wins. I’ve run the numbers on several audits, and the energy savings are massive because you’re moving heat instead of creating it. If you plan on staying in your home for more than a few years, the ROI is real.

    How much energy am I really losing through the insulation on my pipes, and can I fix that myself?

    Honestly, it’s a massive, invisible leak. If your pipes are bare, you’re basically paying to heat your utility closet or crawlspace instead of your shower. I’ve used my thermal scanner on several jobs and seen temperature drops that are honestly staggering. The good news? It’s one of the easiest DIY fixes out there. Grab some foam pipe sleeves from the hardware store, wrap them tight, and you’ll stop bleeding heat immediately.
    Will lowering my water temperature to 120°F (49°C) actually make a noticeable dent in my monthly bill?

    Short answer: Yes, it will. Most manufacturers set heaters to 140°F by default, which is overkill for basic tasks like washing hands or dishes. By dropping it to 120°F, you’re reducing “standby heat loss”—that constant energy drain where your heater works just to keep water hot while you aren’t even using it. It’s one of those low-effort, high-reward tweaks that actually shows up on your utility statement.

  • A Guide to Seasonal Home Weatherization

    A Guide to Seasonal Home Weatherization

    I still remember sitting in my old rental apartment three years ago, wrapped in two blankets and staring at a space heater that was doing nothing but eating my paycheck. I’d point my infrared thermometer at the window frames, watching the numbers drop into the freezing zone, realizing that my money was literally leaking through the cracks in the walls. Most people think home weatherization requires a massive renovation budget or a team of contractors to be effective, but that’s a total myth designed to keep you spending.

    I’m not here to sell you on expensive, high-tech gadgets that won’t actually move the needle on your utility bills. Instead, I’m going to show you how to approach home weatherization using a data-driven, low-cost strategy that actually works for real people. We’re going to focus on the small, high-impact tweaks—the kind I use in my own audits—to stop the energy waste without draining your bank account. You don’t need to be rich to live sustainably; you just need to stop throwing your hard-earned money out the window.

    Table of Contents

    Mastering Air Leakage Prevention Without Breaking the Bank

    Mastering Air Leakage Prevention Without Breaking the Bank

    Most people think stopping drafts requires ripping out drywall or hiring a massive crew, but that’s just not true. I usually start my audits by looking at the low-hanging fruit: windows, doors, and baseboards. If you can feel a chill near your floorboards, you’ve found a prime spot for air leakage prevention. Grab some weatherstripping or even a simple door snake to block those gaps. It’s a tiny investment that makes a massive difference in how much your HVAC system has to work.

    I’m a big believer in using simple draft detection methods before you spend a dime. I always pull out my infrared thermometer to scan around window frames and electrical outlets. If you see a sudden temperature drop on the screen, you’ve found a leak. Once you pinpoint those spots, a bit of caulk or expanding foam can seal them up tight. These small fixes are the most effective way to reduce heating and cooling costs without needing a massive renovation budget. It’s about being smart with what you have.

    A Simple Energy Audit Checklist for Every Room

    A Simple Energy Audit Checklist for Every Room

    When I walk into a room for a client, I don’t just look around; I hunt for the places where money is escaping. You don’t need a professional sensor suite to start, but you do need a systematic approach. Grab a flashlight and a piece of incense or a damp hand to help with draft detection methods. Start with the “low-hanging fruit” like windows and doors. Feel for air movement around the frames and check the seals. If you feel a chill, you’ve found a leak that’s actively working against your thermostat.

    Next, move your focus to the “invisible” areas: the ceiling and floor. In my experience, the biggest culprit for high bills is often a lack of attention to the attic hatch or the gaps around recessed lighting. Check your outlets on exterior walls, too—they are notorious for letting cold air seep in. Use this energy audit checklist to document every single spot where you feel a temperature shift. Identifying these specific failure points is the first step toward a meaningful thermal envelope improvement without spending a fortune on unnecessary renovations.

    Small Wins: 5 Low-Cost Upgrades That Actually Move the Needle

    • Stop the draft with heavy curtains. I’ve seen too many people crank the heat while cold air pours in through single-pane windows; thick, thermal-lined curtains act as a cheap barrier that keeps the warmth where it belongs—inside your living space.
    • Switch to LED bulbs, but do it strategically. It’s not just about the wattage; it’s about replacing the high-draw incandescent bulbs in the rooms you actually use most, like the kitchen or living room, to cut down on constant phantom energy drain.
    • Seal your outlets and switches. Most people forget that air leaks through the electrical boxes in your walls, so popping on some inexpensive foam gaskets behind the faceplates can stop that subtle, constant draft from chilling your rooms.
    • Use rugs as thermal insulation. If you’re dealing with cold hardwood or tile floors, a thick rug isn’t just a decor choice—it’s a layer of insulation that helps stabilize the temperature of the room and keeps your feet from freezing.
    • Optimize your thermostat settings for when you’re actually home. You don’t need a smart system to be efficient; just a simple habit of dropping the temp by a few degrees while you’re sleeping or out for the day can shave a noticeable chunk off your monthly bill.

    The Bottom Line: Small Wins, Big Savings

    Stop treating energy leaks like an invisible problem; use tools like an infrared thermometer or even a simple candle to find exactly where your money is escaping.

    You don’t need a massive renovation to see results—focus on low-cost, high-impact fixes like weatherstripping and caulking before you even think about expensive upgrades.

    Efficiency isn’t just about the environment; it’s about reclaiming your budget by stopping the habit of heating or cooling the outdoors.

    ## The Real Cost of Convenience

    “Weatherization isn’t about buying the most expensive smart gadgets; it’s about closing the gaps we’ve been taught to ignore. Every drafty window is just a leak in your bank account, and fixing them is the smartest investment you’ll ever make.”

    Tobias Nkemdirim

    Making it Stick

    Making it Stick: efficient home weatherization.

    At the end of the day, weatherization isn’t about buying the most expensive smart thermostat or hiring a contractor for a full-scale renovation. It’s about the small, tactical wins we talked about: sealing those sneaky drafts around window frames, tackling the air leaks in your attic, and actually taking the time to run a proper audit in every room. When you stop the energy from leaking out of your house, you aren’t just saving a few bucks on your monthly utility bill; you are reclaiming control over your living space. By focusing on these high-impact, low-cost fixes, you turn a drafty, expensive house into a tight, efficient home that works for you, not against you.

    I know it can feel overwhelming to look at a list of home improvements and wonder where to even start. But remember, you don’t have to fix everything by next weekend to make a difference. Sustainability shouldn’t be a luxury reserved for people with massive bank accounts; it should be accessible to anyone willing to put in a little bit of effort. Every single draft you seal and every watt you save is a step toward a more intentional way of living. Let’s stop treating energy waste as an inevitability and start treating it as a fixable problem. You’ve got the tools and the plan—now go out there and stop throwing your money out the window.

    Frequently Asked Questions

    If I'm renting, what are some low-cost weatherization hacks that won't get me in trouble with my landlord?

    Being a renter is tricky because you can’t exactly go tearing out old windows. I used to deal with this in my old apartment, and it was frustrating. Focus on “non-permanent” fixes. Grab some heavy thermal curtains to block drafts, or use adhesive weatherstripping on door frames—it peels right off when you move. Even a simple draft stopper at the base of your door makes a massive difference. These are cheap, reversible, and won’t trigger a landlord headache.

    How do I know if my insulation is actually the problem versus just having an old, inefficient heating system?

    Think of it like this: your heater is the engine, but your insulation is the car’s body. If the body is full of holes, it doesn’t matter how powerful the engine is; the heat is just escaping.

    Is it worth investing in heavy thermal curtains, or am I better off spending that money on sealing the window frames instead?

    If you have to pick one, seal the frames first. I’ve used my infrared thermometer on dozens of homes, and air leaks around window edges are almost always the bigger culprit for heat loss. Curtains are great for adding a layer of insulation, but they won’t stop the actual draft from blowing right through them. Seal those gaps to stop the energy waste at the source, then grab some curtains once you’ve stabilized the room.

  • Exploring Renewable Energy Sources for Homes

    Exploring Renewable Energy Sources for Homes

    I remember sitting in my old rental apartment, shivering under three blankets while staring at a utility bill that felt like a personal insult. I used to think that transitioning to renewable energy sources was some luxury reserved for people with massive solar arrays and deep pockets. The industry loves to sell this idea that going green requires a complete, expensive overhaul of your entire life, but that’s mostly just marketing noise. Most of the hype focuses on high-end tech that the average person can’t actually afford, leaving us stuck with fossil fuels simply because they’re the “convenient” default.

    I’m not here to sell you on a lifestyle you can’t afford or push some overpriced, shiny gadget. My goal is to cut through the jargon and show you how to actually leverage different renewable energy sources to lower your monthly overhead. I’ll be sharing practical, data-backed ways to integrate cleaner power into your home without needing a massive bank account. We’re going to focus on small, smart shifts that make sense for your wallet and your footprint, because sustainability shouldn’t be a status symbol—it should be a standard.

    Table of Contents

    Harnessing Photovoltaic Technology Advancements Without the Premium Price T

    Harnessing Photovoltaic Technology Advancements Without the Premium Price T

    Most people think solar is a luxury reserved for homeowners with massive savings, but recent photovoltaic technology advancements have actually made it much more accessible. I used to see people getting quoted astronomical figures for full rooftop setups, but the market is shifting. You don’t necessarily need to overhaul your entire roof on day one. I often tell my clients to look into modular kits or even plug-in solar setups for balconies if they’re in apartments. It’s about finding that entry point that fits your actual budget rather than trying to do everything at once.

    The real trick to making solar work for a tight budget is pairing it with smart management. If you can’t afford high-end renewable energy storage solutions like a Tesla Powerwall right away, don’t sweat it. Instead, focus on shifting your heavy energy usage—like running the dishwasher or laundry—to the middle of the day when your panels are peaking. It’s a simple way to maximize your self-consumption without needing a massive battery bank. It’s not about having the most expensive gear; it’s about using what you have more intelligently.

    Simple Fossil Fuel Alternatives That Protect Your Monthly Budget

    Simple Fossil Fuel Alternatives That Protect Your Monthly Budget

    If you aren’t ready to drop thousands on a full solar setup, don’t sweat it. You don’t have to jump straight into a total home overhaul to start looking for fossil fuel alternatives. One of the easiest moves is switching your electricity provider to a “green power” plan. Many utility companies now allow you to opt into a program where your energy is sourced from wind or solar farms rather than coal or gas. It’s a low-effort way to participate in the clean energy transition without touching a single wire in your house.

    Another practical move is looking at how you heat your water. If you’re still running an old, inefficient electric tank, you’re basically burning money. Switching to a heat pump water heater is a massive win; they pull heat from the air around them, making them incredibly efficient. While I’m usually focused on the bigger picture of the decarbonization of energy grids, I know that small, localized changes are what actually keep your monthly bank statement from looking like a horror movie.

    Low-Cost Ways to Bring More Clean Power Into Your Space

    • Look into community solar programs if you rent or can’t install panels. It lets you buy into a local solar farm, giving you the benefits of renewable energy without touching your roof.
    • Audit your energy supplier’s current green tariffs. Sometimes, switching to a 100% renewable provider is just a phone call away and doesn’t require any hardware upgrades at all.
    • Start small with micro-generation like portable solar chargers for your devices. It’s a tiny way to offset your daily electricity use and get used to the tech.
    • Check for local government rebates or tax credits specifically for renewable transitions. Most people leave this money on the table, but it can significantly lower your upfront costs.
    • Prioritize energy-efficient appliances before adding more power sources. There’s no point in generating clean energy if your old fridge is just bleeding it back out through inefficiency.

    The Bottom Line on Going Green

    You don’t need a massive solar array to make a difference; even small-scale tech upgrades can start slashing your monthly utility bills.

    Switching to cleaner energy isn’t just an environmental choice—it’s a practical way to protect your budget from rising fossil fuel costs.

    Sustainability shouldn’t be a luxury; focus on incremental, smart changes that offer the highest efficiency for every dollar you spend.

    The Real Cost of Waiting

    “We need to stop treating renewable energy like a luxury item reserved for the wealthy. Transitioning to clean power shouldn’t be about buying into a status symbol; it’s about making smart, tactical moves to stop bleeding money through inefficient, outdated systems.”

    Tobias Nkemdirim

    Making the Shift

    Making the Shift to renewable energy.

    At the end of the day, transitioning to renewable energy doesn’t have to be an “all or nothing” event that drains your savings. We’ve looked at how you can leverage smarter solar tech without the massive upfront costs and how certain fossil fuel alternatives can act as a bridge to keep your monthly budget stable. Whether it’s a small-scale solar setup or just being more intentional about how you source your power, the goal is the same: stop the bleed. Every kilowatt you save and every clean source you switch to is a direct win for your wallet and a step away from the wasteful habits that keep us trapped in high-cost, high-carbon cycles.

    I know it can feel overwhelming when you look at the scale of the climate crisis, but I want you to remember that sustainability isn’t a luxury reserved for the wealthy. It’s a series of practical, data-backed choices made by people who are tired of overpaying for inefficiency. You don’t need a massive overhaul of your entire life to make a dent; you just need to start where you are. Let’s stop letting convenience dictate our energy consumption and start building homes that are actually built to last. It’s time to take control of your power—literally.

    Frequently Asked Questions

    Is it actually worth the upfront cost to switch to solar if I'm renting instead of owning?

    Honestly? If you’re renting, a full solar installation is usually a bad investment. You’re paying for hardware you don’t own, and you can’t take those savings with you when you move. Instead of chasing panels, focus on “portable” efficiency. Grab a few high-quality power banks charged via solar chargers, or look into plug-in solar kits if your lease allows it. Don’t sink your savings into a landlord’s asset; invest in things you can actually carry to your next place.

    How much of a difference will these changes actually make on my monthly utility bill?

    Look, I get the skepticism. You’re wondering if these tweaks are just “feel-good” gestures or actual money in your pocket. I’ve run the numbers on several audits, and it’s not just pennies. Depending on your setup, switching to smarter alternatives or optimizing your current tech can slash your monthly bill by 15% to 30%. It’s about stopping the bleed. Small, consistent shifts turn into significant savings over a single heating season.

    Can I mix these renewable options with my current setup, or do I need to redo my whole electrical system?

    You definitely don’t need a total overhaul. In most cases, you can layer these upgrades onto your existing setup. If you’re adding solar, we can usually integrate it via a smart inverter to work with your current panel. Even something as simple as swapping to a more efficient heat pump or adding small-scale wind can plug into your existing grid. I always check for compatibility first, but the goal is integration, not reconstruction.

  • What to Expect During a Home Energy Audit

    What to Expect During a Home Energy Audit

    I still remember standing in my childhood living room, shivering under three layers of wool blankets while the heater rattled uselessly in the corner. I’d watch my parents stress over the monthly utility bill, wondering why we were paying so much just to stay barely warm. Most people think you need a massive renovation budget or a team of engineers to fix this, but that’s a total myth. The truth is, understanding the energy audit process isn’t about high-tech gadgets or expensive contractors; it’s about identifying the invisible ways your home is literally bleeding cash through drafts and poor insulation.

    I’m not here to sell you on overpriced, “smart” home gadgets that won’t actually move the needle on your bills. Instead, I’m going to walk you through the actual energy audit process from a practical, boots-on-the-ground perspective. I’ll show you exactly what to look for—and what to ignore—so you can stop guessing and start making smart, low-cost changes that actually work. My goal is simple: to help you take control of your energy spend without breaking the bank.

    Table of Contents

    The Blower Door Test Explained Finding Your Hidden Leaks

    The Blower Door Test Explained Finding Your Hidden Leaks

    If you’ve ever felt a random draft cutting through your living room even with the windows shut, you’ve felt the symptoms of a leaky building envelope. This is where the blower door test comes in. Think of it as a high-pressure stress test for your house. An auditor installs a powerful fan into your front door frame, effectively turning your home into a giant wind tunnel. By depressurizing the house, we force all that “hidden” air to rush in through the cracks you can’t see—like gaps behind baseboards, electrical outlets, or even where the attic meets the walls.

    It’s a bit intense to watch, but seeing the raw data is a massive reality check. Once the fan is running, I usually pull out my infrared thermometer to see exactly where the temperature drops. This often leads directly into a thermal imaging inspection, which lets us visualize the cold air plumes moving through your walls. It’s not just about being “green”; it’s about pinpointing exactly where you need to invest in home energy efficiency improvements so you aren’t just guessing.

    Using Thermal Imaging Inspection to See Where Money Escapes

    Using Thermal Imaging Inspection to See Where Money Escapes

    If the blower door test is about feeling the air pressure, then a thermal imaging inspection is about actually seeing the invisible. This is my favorite part of a site visit. I pull out my infrared camera, and suddenly, the walls aren’t just drywall anymore—they’re a map of heat movement. You might see a bright purple streak running down a corner, which is just a fancy way of saying your expensive heated air is escaping through a gap in the insulation.

    It’s one thing to tell a client they have poor insulation, but it’s another thing entirely to show them a high-contrast image of their money literally bleeding through the ceiling. This visual proof is essential for a proper building envelope assessment. It removes the guesswork. Instead of just guessing where to add more fiberglass or spray foam, we can target the exact spots where the temperature drops. It turns a vague idea of “fixing the house” into a precise, data-driven plan for reducing utility bills without wasting a cent on unnecessary upgrades.

    5 Ways to Prep for an Audit (And Not Waste Your Time)

    • Clear the perimeter. If you’ve got stuff piled up against exterior walls or tucked into corners, move it. I can’t check for drafts or thermal bridges if I’m fighting through a mountain of cardboard boxes and old furniture.
    • Keep the house “normal.” Don’t try to cheat the system by turning off every light or closing every door before I arrive. To get an accurate reading, I need to see how your home actually behaves during a standard, lived-in day.
    • Check your thermostat settings. Make sure your heating or cooling is running at a consistent, typical temperature. If the house is an icebox or a sauna when I walk in, the data I get from the blower door test won’t reflect your actual energy reality.
    • Locate your utility bills. Having your recent usage data handy is huge. It helps me connect the physical leaks I find with the actual spikes in your spending, making the results way more practical for your budget.
    • Walk your own perimeter first. Grab your own thermometer if you have one, or just feel around your windows and outlets. If you point out a specific spot that feels suspiciously drafty, it helps me focus my inspection on the areas that are actually bothering you.

    The Bottom Line: Why This Audit Matters

    An energy audit isn’t just about being “green”—it’s a practical way to stop the constant drain on your bank account caused by invisible drafts and inefficient systems.

    You don’t need a massive renovation budget to see results; the data from these tests usually points toward small, high-impact fixes that pay for themselves quickly.

    Think of the audit as a roadmap rather than a chore; once you know exactly where the heat is escaping, you can stop guessing and start fixing with confidence.

    ## The Reality Check

    An energy audit isn’t just a technical checklist; it’s a reality check for your wallet. It’s about peeling back the layers of your home to see exactly where you’re paying for warmth that’s actually just drifting out into the street.

    Tobias Nkemdirim

    The Bottom Line on Your Energy Audit

    The Bottom Line on Your Energy Audit

    At the end of the day, an energy audit isn’t just a checklist of technical jargon; it’s your roadmap to a more efficient life. We’ve looked at how the blower door test pinpoints those invisible drafts and how thermal imaging acts like a pair of X-ray specs for your walls, revealing exactly where your hard-earned money is escaping. Whether it’s sealing a gap in the window frame or upgrading your insulation, these aren’t just “green” projects—they are strategic investments in your monthly budget. Once you know where the leaks are, you stop guessing and start fixing.

    I know it can feel overwhelming, especially when you’re looking at a long list of potential upgrades. But remember, you don’t have to overhaul your entire house overnight to make a difference. Sustainability shouldn’t be a luxury reserved for people with massive bank accounts; it’s about making smart, incremental shifts that work for your specific space. Start with the data, tackle the biggest leaks first, and watch how your comfort levels rise while your bills drop. You have the power to take control of your home’s footprint, one small fix at a time.

    Frequently Asked Questions

    How much is an actual energy audit going to cost me upfront versus how much I'll save on my bills?

    Here’s the reality: an upfront audit might cost you anywhere from $300 to $600 depending on your home’s size and how deep you want to go. It feels like a hit to the wallet initially, but I look at it as an investment. Most homeowners see those costs recouped within a year through lower utility bills. If you fix the leaks we find, the savings aren’t just theoretical—they’re actual cash staying in your pocket.

    Do I need to be home during the entire inspection, or can I just leave the keys and let the auditor work?

    You don’t have to be there, but I’d highly recommend it. While an auditor can definitely work with just a key, you’ll miss the most valuable part: the walkthrough. It’s much better to be present when they point out a drafty window or a poorly insulated attic. Being there allows you to ask questions in real-time and see exactly where your money is leaking, rather than just reading about it in a report later.

    Once the audit is done, how do I know which repairs are actually worth the money and which ones are just fluff?

    Don’t let a long list of recommendations overwhelm you. I always tell my clients to look at the “Payback Period.” If a $50 roll of weatherstripping saves you $100 a year, that’s a no-brainer. If a high-end HVAC upgrade takes fifteen years to pay for itself, it might be fluff for now. Focus on the low-cost, high-impact fixes first—sealing air leaks and insulating attic hatches—before you start chasing the expensive, shiny upgrades.

  • The Advantages of Using a Smart Meter

    The Advantages of Using a Smart Meter

    I still remember sitting in my old rental apartment, staring at a utility bill that felt like a personal attack. I was shivering in a room that cost a fortune to heat, yet I had absolutely no idea where the money was actually going. Most people think you need a massive renovation or a huge budget to fix your energy leaks, but that’s just a myth. The truth is, understanding the real smart meter advantages isn’t about buying fancy new gadgets; it’s about finally getting the data you need to stop the bleeding.

    I’m not here to sell you on some high-tech lifestyle hype or corporate jargon. I’m here to give you the straight talk on how to use this tech to actually shrink your bills and your carbon footprint at the same time. I’ll walk you through the practical ways a smart meter can help you spot energy vampires in your home, ensuring you only pay for what you actually use. My goal is to show you how to make small, smart changes that keep your wallet full and your impact minimal.

    Table of Contents

    Seeing the Truth Through Real Time Energy Consumption Data

    Seeing the Truth Through Real Time Energy Consumption Data.

    The biggest difference between a smart meter vs traditional meter isn’t just how the numbers get to the utility company; it’s about what you actually see. With an old-school meter, you’re essentially flying blind. You get a bill at the end of the month, and it feels like a surprise attack on your bank account. You know you spent money, but you have no idea if it was because of that old space heater in the guest room or the fridge running constantly.

    When you start looking at real-time energy consumption data, the mystery disappears. I usually pull up the data on my phone or the in-home display and watch the numbers jump every time a heavy appliance kicks in. It’s a massive eye-opener. You might realize that your “efficient” dehumidifier is actually a massive energy hog, or that your standby power usage is higher than you thought. Seeing that live spike makes you actually want to flip the switch. It turns energy saving from a vague concept into a tangible, daily habit.

    Smart Meter vs Traditional Meter Why One Saves You More

    Smart Meter vs Traditional Meter Why One Saves You More

    The biggest difference between a smart meter vs traditional meter comes down to how much guesswork you’re forced to do. With the old-school analog meters, you’re basically flying blind. You wait for a monthly bill to arrive, see a number that looks way too high, and then spend the next thirty days wondering if it was the heater, the old fridge, or just a bad estimate from the utility company. It’s reactive, frustrating, and—most importantly—expensive.

    Smart meters flip that script by giving you a constant feedback loop. Instead of a monthly “surprise,” you get a clear picture of your habits as they happen. This is where reducing utility bills with smart meters actually becomes practical rather than just theoretical. When you can see that your energy spikes every time the dishwasher runs at 7 PM, you can start making adjustments. You aren’t just guessing anymore; you’re making decisions based on what’s actually happening in your walls, which is the only way to stop the leak in your wallet.

    5 Ways a Smart Meter Actually Changes Your Daily Routine

    • Stop guessing and start tracking. Most people treat their energy bill like a mystery box that arrives once a month, but a smart meter lets you see exactly when your heavy hitters—like the dryer or the space heater—are actually spiking your costs.
    • Take the guesswork out of budgeting. Since you aren’t waiting for a manual reading to get an estimate, you can see your usage patterns in real-time, which means no more “bill shock” at the end of a cold winter month.
    • Spot the phantom loads. I often use my infrared thermometer to find physical heat leaks, but a smart meter helps you find “electrical leaks”—those appliances that sit on standby and quietly bleed money even when you aren’t using them.
    • Optimize your “off-peak” usage. If your utility provider offers cheaper rates during certain hours, a smart meter makes it easy to shift energy-heavy tasks, like running the dishwasher, to those lower-cost windows.
    • Simplify your life with automated billing. You don’t have to play phone tag with your provider or worry about an estimator getting your usage wrong; the data flows automatically, so you only ever pay for what you actually consumed.

    The Bottom Line: Why Making the Switch Matters

    You can’t fix what you can’t see; smart meters turn invisible energy leaks into clear, actionable data so you actually know where your money is going.

    It’s about moving away from the “bill shock” of traditional meters and taking control of your consumption patterns in real-time.

    Upgrading to a smart meter isn’t just a tech play—it’s a practical, low-effort way to shrink your utility bills and your carbon footprint at the same time.

    ## The End of the Guessing Game

    “I’ve spent way too many hours auditing homes only to find people are essentially throwing money out of the window because they have no idea when their appliances are spiking. A smart meter ends that guesswork; it turns your energy usage from a mystery on a monthly bill into a real-time map you can actually use to take control.”

    Tobias Nkemdirim

    Making the Switch

    Making the Switch to smart energy meters.

    At the end of the day, switching to a smart meter isn’t just about getting a shiny new piece of hardware installed on your wall. It’s about reclaiming control over your household budget. We’ve looked at how real-time data removes the guesswork from your monthly bills and how much more efficient these systems are compared to the old-school, manual meters that leave you guessing until the end of the month. By seeing exactly when your energy spikes occur—whether it’s that old space heater or a faulty appliance—you can finally stop paying for energy you aren’t actually using. It’s about turning invisible waste into visible, actionable data.

    I know that sometimes the idea of “sustainability” feels like a luxury reserved for people with massive bank accounts and solar-paneled mansions. But my experience auditing homes has taught me that true change starts with these small, practical shifts. You don’t need to overhaul your entire life to make an impact; you just need to stop being blind to your own consumption. Getting a smart meter is a simple, smart way to ensure you aren’t wasting money just because it’s convenient. Let’s stop letting our hard-earned cash leak out of our homes and start living smarter, not harder.

    Frequently Asked Questions

    How much money can I actually expect to save on my monthly bills after installing one?

    Look, I can’t give you a magic number because every home is different, but I’ve seen the data. If you’re just passive, you might only see a 5% dip. But if you use that real-time data to actually change your habits—like shifting laundry to off-peak hours—you can realistically shave 10% to 15% off your monthly bill. It’s not about a windfall; it’s about cutting out the invisible waste.

    Are there any privacy risks with the energy company seeing my real-time usage data?

    Look, I get the hesitation. When you’re looking at data, you want to know who else is looking at it. While your energy provider sees the patterns, they aren’t watching you through a camera; they’re just seeing spikes in kilowatt-hours. It tells them when you’re home or using the oven, but it’s all encrypted. For me, the trade-off is worth it: the privacy risk is minimal compared to the massive amount of money you waste by flying blind.

    Do I need to upgrade my old appliances to get the most out of a smart meter?

    Not necessarily, but there’s a catch. A smart meter tracks your usage, but it can’t fix a massive energy drain. If you’re running a twenty-year-old fridge that’s basically a space heater, the smart meter will just show you exactly how much money you’re bleeding in real-time. Start by using your meter data to identify the biggest culprits. Upgrade the “energy hogs” first; that’s where you’ll see the biggest dent in your bills.

  • Comparing Led and Incandescent Lighting

    Comparing Led and Incandescent Lighting

    I still remember sitting in my old rental apartment, shivering in the dark because I was too terrified to flip the light switch and watch my utility bill spike. It’s a frustrating cycle: you want a bright, warm home, but every time you turn on an old bulb, you feel like you’re literally burning cash. Most people I talk to are stuck in this loop, caught in the middle of the led lighting vs incandescent debate, unsure if the upfront cost of new tech is actually worth the headache. They see the different price tags and the confusing lumens, and they just end up sticking with what they know—even if it’s costing them a fortune.

    I’m not here to sell you on some expensive, high-tech lifestyle you can’t afford. My goal is to give you the straight facts based on actual energy audits and my own experience. I’ll break down the real-world math so you can see exactly how much these bulbs impact your monthly budget and your carbon footprint. By the end of this, you’ll know how to make the switch without breaking the bank, ensuring your home stays bright without draining your wallet.

    Table of Contents

    Incandescent Lighting

    Warm amber glow from incandescent lighting.

    Incandescent bulbs are the traditional light sources we’ve all grown up with, functioning by passing an electric current through a thin tungsten filament until it gets hot enough to glow. Their primary selling point has always been the warm, familiar amber light they produce, which many people find cozy and natural for living spaces.

    But honestly, from an energy auditing perspective, these bulbs are a massive leak in your budget. I remember sitting in my old rental apartment, shivering because the heater couldn’t keep up, only to realize my old lighting setup was basically acting like a collection of tiny, inefficient space heaters. When you compare led lighting vs incandescent options, the incandescent bulb is the clear loser because it converts about 90% of its energy into heat rather than actual light. You aren’t just paying for illumination; you’re paying to waste electricity as thermal energy that you probably don’t even want in your room.

    LED Lighting

    Energy efficient LED Lighting technology.

    LED, or Light Emitting Diode, lighting is a semiconductor-based technology that produces light by moving electrons through a specialized material, offering extreme energy efficiency. The core advantage is its ability to provide high-quality brightness while consuming a fraction of the power required by older technologies.

    In my line of work, switching to LEDs is the “low-hanging fruit” I recommend to almost every client I audit. It’s not just about the technical specs; it’s about the immediate relief in your monthly utility bill. When I’m looking at the data for led lighting vs incandescent usage, the numbers are staggering. Using LEDs means you can light up your entire home without the guilt of a spiking electric bill or a massive carbon footprint. It’s one of those rare upgrades where the technology actually pays for itself remarkably fast, making sustainability feel less like a luxury and more like a practical financial win.

    Comparison of LED Lighting vs. Incandescent Bulbs

    Feature LED Lighting Incandescent Bulbs
    Lifespan 25,000+ hours 1,000 hours
    Energy Efficiency Very High Low
    Initial Cost Higher Lower
    Heat Emission Minimal Significant
    Best For Long-term savings and sustainability Low-budget temporary use
    Durability High (Solid-state) Low (Glass filament)

    Comparing Energy Consumption to Shrink Your Monthly Bills

    Comparing Energy Consumption to Shrink Your Monthly Bills

    Look, I’ve spent way too many hours in drafty apartments watching utility meters spin like they’re possessed. When you’re looking at lighting, the energy consumption isn’t just a technical spec on a box; it’s the difference between a manageable monthly bill and a constant financial leak. If you’re still using old-school bulbs, you’re essentially paying a premium just to heat your air instead of lighting your room.

    The math here is honestly pretty brutal for incandescents. Those old bulbs are incredibly inefficient because they convert about 90% of their energy into heat rather than actual light. On the flip side, LEDs are built for precision; they use a fraction of the wattage to produce the same—if not better—lumens. I’ve seen it firsthand with my infrared thermometer: an incandescent bulb is a tiny, glowing heater that wastes electricity by design.

    When it comes strictly to shrinking your monthly overhead, there is no contest. LEDs are the undisputed winner here. They allow you to keep your home bright without bleeding money through your light sockets every single month.

    Why Lifespan of Led vs Incandescent Changes Everything

    When I’m auditing a home, I don’t just look at the immediate power draw; I look at the replacement cycle. Most people forget that every time a bulb burns out, you aren’t just losing light—you’re losing the money you spent on the bulb, the time it took to climb a ladder, and the waste sent to a landfill. Lifespan is the hidden metric that determines whether your lighting setup is a long-term asset or a constant drain on your wallet.

    Incandescent bulbs are notoriously fragile, usually fizzling out after about 1,000 hours of use. If you’re using them in a high-traffic area like a hallway, you’ll find yourself replacing them constantly. On the flip side, a decent LED can easily clock 25,000 to 50,000 hours. That means while you’re busy replacing an incandescent bulb every few months, your LED is still going strong years later.

    The practical reality is that LEDs turn lighting from a recurring chore into a “set it and forget it” solution. You’re trading a slightly higher upfront cost for massive long-term savings in both hardware and effort.

    The Verdict: LED wins by a landslide.

    The Bottom Line: Which One Actually Wins?

    Stop looking at the sticker price; LEDs cost more upfront, but they pay for themselves through massive energy savings and by not needing to be replaced every few months.

    If you want to slash your monthly utility bills immediately, the math is clear: ditch the old incandescent bulbs and switch to LEDs to stop wasting power on heat.

    Think long-term—switching to LEDs isn’t just a “green” move, it’s a practical way to reduce your household maintenance and stop throwing money away on constant bulb replacements.

    ## The Real Cost of Convenience

    “I’ve spent too many hours auditing homes only to find people still burning money on old incandescent bulbs just because they’re ‘familiar.’ It’s not just about the light; it’s about the fact that you’re paying for heat you didn’t even ask for. Switching to LEDs isn’t some luxury lifestyle choice—it’s just common sense for your wallet.”

    Tobias Nkemdirim

    The Bottom Line

    Look, the data doesn’t lie. When you stack up the numbers, the choice is pretty clear. Incandescent bulbs are essentially little heaters that happen to produce light, wasting the vast majority of their energy as heat. LEDs, on the other hand, are built for efficiency, using a fraction of the wattage to deliver the same brightness. Between the massive drop in your monthly power consumption and the fact that you won’t be climbing ladders to replace dead bulbs every few months, the math favors the LED every single time. It’s not just about being “green”; it’s about stopping the unnecessary drain on your bank account.

    At the end of the day, I don’t expect you to overhaul your entire house overnight. Sustainability isn’t about perfection; it’s about making better choices where it actually counts. Swapping out those old, hot bulbs for LEDs is a small, low-effort win that yields immediate results. We often think that saving the planet requires massive, expensive investments, but real change often starts with the small stuff—the stuff you do right in your own living room. Go ahead, make the switch, and start keeping more of your hard-earned money where it belongs.

    Frequently Asked Questions

    If I switch all my bulbs to LEDs, will my house feel too "cold" or clinical compared to the warm glow of my old incandescent bulbs?

    That’s a common fear, and honestly, it’s a valid one. If you just grab the first pack of “Daylight” LEDs you see, your living room will definitely feel like a hospital ward. But that’s not on the bulbs; it’s on the Kelvin rating. Look for “Warm White” (around 2700K) on the packaging. It mimics that cozy, amber glow of old filaments perfectly. You get the efficiency without losing the vibe.

    Are there specific types of LED bulbs that work better for task lighting, like reading or cooking, versus just general room light?

    For task lighting, don’t just grab any random LED. You need to look at the color temperature and CRI (Color Rendering Index). For reading or prepping food, I always recommend “Cool White” (around 4000K) with a high CRI—at least 90. It mimics daylight, which keeps you sharp and makes colors look real. Avoid “Warm White” for tasks; it’s too dim and cozy. Use those for your bedside lamp instead.

    Is it actually worth buying more expensive, high-quality LEDs, or should I just go with the cheapest ones I find at the hardware store?

    Don’t fall for the “cheapest is best” trap. I’ve seen too many people buy those bottom-of-the-barrel LEDs that flicker or die after three months. It’s a waste of money and a headache. If you can swing it, grab the mid-range, name-brand ones. They have better color rendering—so your living room doesn’t look like a sterile hospital—and they actually last as long as the box claims. Invest a little more now to save later.

  • How to Stop Vampire Power Consumption

    How to Stop Vampire Power Consumption

    I was sitting in my old rental apartment last February, shivering under three blankets while staring at a utility bill that made absolutely no sense. I had the heat cranked, yet the math just didn’t add up. That’s when I pulled out my infrared thermometer and realized it wasn’t just the drafty windows; it was the silent, constant drain from every single plugged-in gadget in the room. We’ve been told that saving energy requires massive solar arrays or expensive smart-home ecosystems, but that’s a lie designed to sell hardware. The truth is much simpler and much more annoying: you are losing money to vampire power every single night while you sleep.

    I’m not here to sell you a high-tech gadget or some complicated lifestyle overhaul that costs more than it saves. My goal is to give you the straightforward, data-driven reality of how much these idle electronics are actually bleeding your bank account dry. I’m going to show you exactly which culprits to hunt down and the low-cost, practical ways to kill that phantom drain for good. Let’s stop letting your electricity go to waste just because it’s convenient.

    Table of Contents

    Identifying the Hidden Energy Consumers in Your Living Room

    Identifying the Hidden Energy Consumers in Your Living Room.

    I usually start my audits by scanning the living room, because that’s where the most hidden energy consumers tend to hide in plain sight. Take your entertainment center, for example. Even when the TV is off, that little glowing red LED or the digital clock on your soundbar tells me everything I need to know: they are still pulling juice. It’s not just the big screens, either; it’s the gaming consoles sitting in “rest mode” and the streaming sticks plugged into the back. They might seem harmless, but that constant standby power consumption adds up to a significant chunk of your monthly bill.

    To really get a handle on this, I recommend doing a quick sweep of your media console. If a device has a remote control or a standby light, it’s likely bleeding energy. While it’s a hassle to pull every plug manually, investing in some quality gear can change the game. I’m a huge advocate for smart power strip benefits here; they allow you to cut the flow to multiple devices with a single switch. It’s a practical way to stop the leak without turning your living room into a maze of wires.

    Why Standby Power Consumption Is Bleeding Your Wallet Dry

    Why Standby Power Consumption Is Bleeding Your Wallet Dry

    Think about it this way: you’re essentially paying a “laziness tax” every single month. When you leave your coffee maker plugged in or keep your gaming console in standby mode, you aren’t just keeping them ready for use; you’re keeping a tiny, invisible circuit running 24/7. This standby power consumption might seem negligible in the moment—just a few cents here and there—but when you multiply that across every gadget in your house over a full year, it turns into a significant chunk of change that could have stayed in your savings.

    I’ve seen this play out during my audits more times than I can count. People are often shocked to realize that their “off” devices are actually contributing to a constant, steady drain on their meter. It’s a slow leak, like a dripping faucet that eventually floods the kitchen. By focusing on reducing household electricity costs through simple habits—like actually pulling the plug or utilizing smart power strip benefits—you stop that leak. It’s not about making massive lifestyle sacrifices; it’s about realizing that convenience shouldn’t come at the expense of your budget.

    5 Low-Effort Ways to Cut the Cord on Phantom Loads

    • Grab some smart power strips for your entertainment setup. Instead of hunting for five different plugs behind your TV stand, one strip can kill the power to your consoles, soundbars, and streaming sticks all at once when you’re done for the night.
    • Get into the habit of unplugging your chargers. I see it all the time during audits—phone bricks left in the wall doing absolutely nothing but sipping electricity. If it’s not connected to a device, it shouldn’t be drawing current.
    • Switch to manual power buttons where you can. Some of the newer, “smart” appliances are designed to stay in a constant state of readiness, which is great for convenience but terrible for your meter. If it has a physical kill switch, use it.
    • Use timers for your seasonal gear. If you have things like holiday lights or even certain desk lamps that stay plugged in, a cheap mechanical timer ensures they aren’t drawing power while you’re asleep or at work.
    • Audit your kitchen appliances with a simple plug-in energy monitor. If you want to stop guessing and start knowing, these little devices show you exactly how much a coffee maker or microwave is pulling while in standby mode, so you can decide if it’s worth the cost of unplugging it.

    The Bottom Line: Stop the Leak

    Treat standby mode as a silent drain; if it has a little red light or a digital clock, it’s pulling power even when you aren’t using it.

    Invest in a few smart power strips to kill the connection to your entire entertainment center or home office with one single switch.

    Audit your setup regularly—it’s not just about the big appliances, but the cumulative cost of those tiny, idle gadgets that add up to real money every month.

    ## The Invisible Leak

    “Most people think their energy bill is driven by the big stuff—the fridge or the AC—but I’ve seen enough homes to know that it’s often the silent, idle gadgets bleeding your budget dry while you sleep.”

    Tobias Nkemdirim

    Cutting the Cord for Good

    Cutting the Cord for Good to save.

    At the end of the day, tackling vampire power isn’t about some massive, expensive home renovation or installing high-tech solar arrays. It’s about the small, intentional shifts we make in our daily habits—like actually unplugging that gaming console when you’re done or using smart power strips to kill the flow to your media center. We’ve seen how those idle chargers and standby lights act like a slow, invisible leak in your bank account. By identifying these hidden consumers and making the switch to more mindful habits, you aren’t just saving a few extra dollars on your monthly utility bill; you are actively stopping the waste that happens simply because we’ve grown too comfortable with convenience.

    I know it can feel like a chore to walk around the house checking plugs, but I promise you, the math adds up. Every watt you reclaim is a win for your budget and a win for the planet. We don’t need to be perfect, and we certainly don’t need to be wealthy to live more sustainably. We just need to be observant. If we all stop letting our electronics bleed us dry, we can collectively make a massive dent in unnecessary energy demand. So, grab a power strip, start with one room, and take control of your consumption starting today.

    Frequently Asked Questions

    Are there specific types of appliances that are worse "vampires" than others?

    Not all vampires are created equal. If you’re looking for the biggest culprits, start with anything that has a digital clock or a remote sensor. Your microwave, coffee maker, and that big-screen TV are notorious for sipping power 24/7. I’ve also noticed gaming consoles and desktop computers pull a surprising amount of juice even when they’re “off.” They might seem idle, but they’re actually just waiting in a high-energy standby mode.

    Is it actually worth the effort to unplug everything, or should I just invest in smart power strips?

    Look, if you’re a perfectionist, unplugging everything works, but let’s be real: most people won’t actually do it. For a busy household, smart power strips are the better play. They automate the process by cutting power to peripherals when your main device is off. It’s a small upfront cost that pays for itself in saved kWh. Use the manual unplugging method for things you rarely use, but automate the rest. Efficiency shouldn’t be a chore.

    Will turning my devices off at the wall actually shorten their lifespan or damage the electronics?

    I get this question a lot during my audits. The short answer? No, you aren’t going to fry your tech. Modern electronics are designed to handle power cycles. In fact, cutting the power at the wall can actually protect your gear from unexpected voltage surges during storms. If you’re worried about a specific high-end component, just use a smart power strip. For everything else, stop worrying about the “damage” and start saving that extra cash.